Table of Contents
Advertisement
Quick Links
FMA5L, FMA5X
Multifamily Wall-Hung Fan Coil, for R-454B Refrigerant
NOTE: Read the entire instruction manual before starting the
installation.
Table of Contents
Safety Considerations . . . . . . . . . . . . . . . . . . . . . . . . . . . . . . . . . . . . . . 1
Introduction. . . . . . . . . . . . . . . . . . . . . . . . . . . . . . . . . . . . . . . . . . . . . . 1
Installation . . . . . . . . . . . . . . . . . . . . . . . . . . . . . . . . . . . . . . . . . . . . . . 5
Check Equipment. . . . . . . . . . . . . . . . . . . . . . . . . . . . . . . . . . . . . . . 5
Mount Fan Coil . . . . . . . . . . . . . . . . . . . . . . . . . . . . . . . . . . . . . . . . 6
Table 1 - Dimensional Data. . . . . . . . . . . . . . . . . . . . . . . . . . . . . . . 7
Ductwork Specifications . . . . . . . . . . . . . . . . . . . . . . . . . . . . . . . . . 8
Conversion to Bottom Return . . . . . . . . . . . . . . . . . . . . . . . . . . . . . . . . 9
Condensate Drain. . . . . . . . . . . . . . . . . . . . . . . . . . . . . . . . . . . . . . . 9
Electrical Connections . . . . . . . . . . . . . . . . . . . . . . . . . . . . . . . . . . . 9
Select Proper Blower Speed. . . . . . . . . . . . . . . . . . . . . . . . . . . . . . 10
TXV . . . . . . . . . . . . . . . . . . . . . . . . . . . . . . . . . . . . . . . . . . . . . . . . 10
Leak Dissipation System . . . . . . . . . . . . . . . . . . . . . . . . . . . . . . . . . . 10
Leak Dissipation System Self-Test . . . . . . . . . . . . . . . . . . . . . . . . 10
Table 2 - Control Board Test Functions . . . . . . . . . . . . . . . . . . . . 11
Table 3 - Required Minimum Dissipation Mode Airflows,
based on Total System Refrigerant Charge Quantity. . . . . . . . . . . 11
Start-Up. . . . . . . . . . . . . . . . . . . . . . . . . . . . . . . . . . . . . . . . . . . . . . . . 11
Sequence of Operation . . . . . . . . . . . . . . . . . . . . . . . . . . . . . . . . . . . . 11
Table 4 - FMA5X ECM Motor Speed Taps Delay Off Time
Setting . . . . . . . . . . . . . . . . . . . . . . . . . . . . . . . . . . . . . . . . . . . . . . 11
Continuous Fan . . . . . . . . . . . . . . . . . . . . . . . . . . . . . . . . . . . . . . . 11
Cooling Mode . . . . . . . . . . . . . . . . . . . . . . . . . . . . . . . . . . . . . . . . 11
Heat Pump Heating Mode . . . . . . . . . . . . . . . . . . . . . . . . . . . . . . . 11
Heat Pump Heating with Auxiliary Electric Heat . . . . . . . . . . . . . 11
Electric Heat or Emergency Heat Mode . . . . . . . . . . . . . . . . . . . . 12
Care and Maintenance . . . . . . . . . . . . . . . . . . . . . . . . . . . . . . . . . . . . 12
Table 5 - Filter Sizes . . . . . . . . . . . . . . . . . . . . . . . . . . . . . . . . . . . 12
Refrigerant Charge and Room Area Limitations . . . . . . . . . . . . . . 12
Table 6 - Minimum Opening Area for Connected Rooms. . . . . . 13
Table 7 - Maximum Refrigerant Charge . . . . . . . . . . . . . . . . . . . 13
Table 8 - Required Minimum Room Area . . . . . . . . . . . . . . . . . . 13
Table 9 - Minimum Circulation Airflow . . . . . . . . . . . . . . . . . . . 13
Electrical Wiring . . . . . . . . . . . . . . . . . . . . . . . . . . . . . . . . . . . . . . 13
Ductwork . . . . . . . . . . . . . . . . . . . . . . . . . . . . . . . . . . . . . . . . . . . . 14
Table 10 - PSC -Airflow Performance (Standard CFM). . . . . . . . 22
Table 11 - ECM - Airflow Performance (Standard CFM) . . . . . . 22
Safety Considerations
Improper installation, adjustment, alteration, service, maintenance, or
use can cause explosion, fire, electrical shock, or other conditions which
may cause death, personal injury or property damage. Consult a
qualified installer, service agency, or your distributor or branch for
information or assistance. The qualified installer or agency must use
factory-authorized kits or accessories when modifying this product.
Refer to individual instructions packaged with kits or accessories when
installing.
Installation Instructions
Follow all safety codes. Wear safety glasses, protective clothing, and
work gloves. Use quenching cloth for brazing operations. Have a fire
extinguisher available. Read these instructions thoroughly and follow all
warning or cautions included in literature and attached to the unit.
Consult local building codes and the current editions of the National
Electrical Code (NEC) NFPA 70.
In Canada, refer to the current editions of Canadian Electrical Code CSA
C22.1.
Recognize safety information. This is the safety alert symbol
you see this symbol on the unit and in instructions or manuals, be alert to
the potential for personal injury. Understand the signal words
DANGER, WARNING, and CAUTION. These words are used with the
safety alert symbol. DANGER identifies the most serious hazards which
will result in severe personal injury or death. WARNING signifies
hazards which could result in personal injury or death. CAUTION is
used to identify unsafe practices, which may result in minor personal
injury or product and property damage. NOTE is used to highlight
suggestions which will result in enhanced installation, reliability, or
operation.
Introduction
FMA5L, FMA5X Fan Coils are designed with application flexibility in
mind and are suitable for closet and flush mount installations. These
units can be equipped with either factory-installed or field-installed
electric heat options, with the latter including a circuit breaker. Units are
used indoors as the fan coil for split-system heat pumps or air
conditioners.
The FMA5L uses a TXV and a 3 Speed PSC Motor. FMA5X uses a
TXV and a 5 speed multi-tap ECM motor for efficiency. Units are
available in 18,000 through 36,000 Btuh nominal cooling capacities.
Field-installed heaters are available in 5, 7.5, and 10 kW sizes. The coil
is equipped with sweat-type connections and is vapor-charged with dry
nitrogen. The casing is fully insulated to meet applications in
conditioned space. Additional insulation is required if the unit is
installed in unconditioned space.
NOTE: Nuisance sweating may occur if the unit is installed in a humid
location with low airflow.
Units are designed for upflow applications only. Local codes may limit
this free-air-return type unit to installation in single-level applications.
IMPORTANT: These units are designed specifically for R-454B
refrigerant and must be used only with compatible R-454B refrigerant
air conditioners and heat pumps as shipped.
. When
Advertisement
Table of Contents

Subscribe to Our Youtube Channel
Related Manuals for Carrier FMA5L


Summary of Contents for Carrier FMA5L
-
Page 1: Table Of Contents
Heat Pump Heating Mode ....... 11 The FMA5L uses a TXV and a 3 Speed PSC Motor. FMA5X uses a Heat Pump Heating with Auxiliary Electric Heat . - Page 2 FMA5L, FMA5X: Installation Instructions WARNING WARNING PROPERTY OR PERSONAL PERSONAL INJURY / PROPERTY DAMAGE HAZARD INJURY HAZARD Exposing combustible (non-metal) material to the supply opening of a downflow unit can cause a fire resulting in property damage, personal Risk of fire. Flammable refrigerant injury or death.
- Page 3 FMA5L, FMA5X: Installation Instructions Where electrical components are being changed, they shall be fit WARNING according to their purpose and to the correct specification. At all times the manufacturer’s maintenance and service guidelines shall be PERSONAL INJURY / PROPERTY DAMAGE HAZARD followed.
- Page 4 FMA5L, FMA5X: Installation Instructions When breaking into the refrigerant circuit to make repairs or for any j. When the cylinders have been filled correctly and the process has other purpose conventional procedures shall be used. However, for been completed, make sure that the cylinders and the equipment...
-
Page 5: Cut Hazard
FMA5L, FMA5X: Installation Instructions When the system is installed and operates in a small room, it is required WARNING to maintain the concentration of the refrigerant below the limit, in case a leak occurs. Otherwise, oxygen in the room may be affected, resulting in ELECTRICAL OPERATION HAZARD a serious accident. -
Page 6: Mount Fan Coil
FMA5L, FMA5X: Installation Instructions Mount Fan Coil Fan Coil Mounting Options The fan coil comes standard with two different options for mounting: wall mount or frame mount. Both mounting options require the unit to be level from side to side and from front to back in order to allow condensate to properly drain from the unit. - Page 7 FMA5L, FMA5X: Installation Instructions A150161A Fig. 3 – Dimensional Drawing with Circuit Breaker This appliance uses R-454B refrigerant. Table 1 – Dimensional Data Dimensions- In. (mm) Model Size Unit Weight Unit Height H Unit Width W Unit Width W1 Unit Depth D Unit Depth D1 Lb.
-
Page 8: Ductwork Specifications
FMA5L, FMA5X: Installation Instructions Ductwork Specifications Connect supply-air duct over 3/4" (19 mm) flange provided on supply-air opening. Secure duct to flange using applicable fasteners for type of duct used, and seal duct-to-unit joint. NOTE: Short duct runs tend to increase noise level. -
Page 9: Conversion To Bottom Return
FMA5L, FMA5X: Installation Instructions Conversion to Bottom Return NOTE: Before proceeding with electrical connections, make certain that voltage, frequency, and phase correspond to that specified on rating This product is shipped configured for front return and can be converted plate. Also, check to be sure that the service provided by utility is for bottom return. -
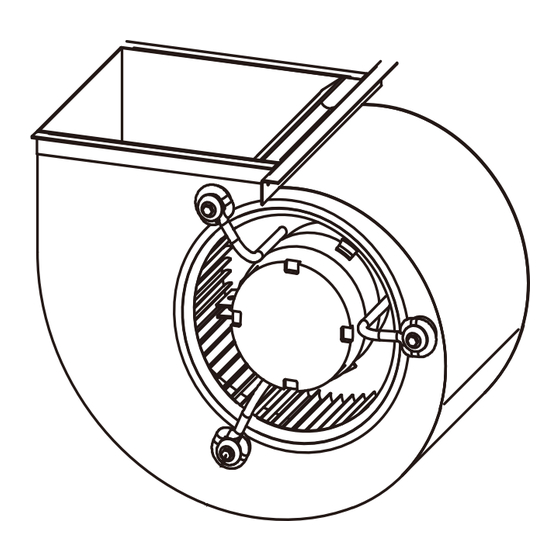
Page 10: Select Proper Blower Speed
If any fault codes are listed, please troubleshoot to prevent system selected. Fan speeds are selected manually using DIP switches on the malfunction. control board. For both the FMA5L and FMA5X, only the first 2 dip switches are used. The units come equipped with a factory wired R-454B leak detection The dip switches on the FMA5L units are located in the lower left and dissipation system to ensure safe operation during a leak. -
Page 11: Based On Total System Refrigerant Charge Quantity
FMA5L, FMA5X: Installation Instructions Table 3 – Required Minimum Dissipation Mode Airflows, CAUTION based on Total System Refrigerant Charge Quantity Total Minimum Required Total Minimum Required The refrigerant leakage sensor can only use the factory model or the System Dissipation Airflow... -
Page 12: Electric Heat Or Emergency Heat Mode
FMA5L, FMA5X: Installation Instructions Electric Heat or Emergency Heat Mode 3. It is intended for people to walk through. Thermostat energizes R to W1. W1 energizes electric heat relay(s) which The area of the connected rooms, on the same floor, connected by completes circuit to heater element(s). -
Page 13: Electrical Wiring
FMA5L, FMA5X: Installation Instructions Table 8 – (Continued)Required Minimum Room Area Table 6 – Minimum Opening Area for Connected Rooms Amin/Tamin Amin/Tamin Mmax Anvmin 8-13 132.2 12.3 15-6 231.4 21.5 lb-oz lb-oz 138.8 12.9 15-14 238.0 22.1 17-3 6-10 0.14 9-11 145.5... -
Page 14: Shock Hazard
FMA5L, FMA5X: Installation Instructions Ductwork Control Wiring Field ductwork must comply with the National Fire Protection IMPORTANT: Class 2 low voltage control wiring should not be run in Association NFPA 90A, NFPA 90B and any applicable local ordinance. conduit with main power wiring and must be separated from power wiring, unless class 1 wire of proper voltage rating is used. - Page 15 FMA5L, FMA5X: Installation Instructions FAN COIL THERMOSTAT (CONTROL) WHITE YELLOW YELLOW BLACK BLACK AIR COND. GREEN A150158A Fig. 11 – Wiring Layout Air Conditioning Unit (Cooling and 1-Stage Heat) FAN COIL HEAT PUMP THERMOSTAT (CONTROL) (CONTROL) ORANGE WHITE YELLOW BLACK...
-
Page 16: Wiring Diagram
FMA5L, FMA5X: Installation Instructions CAUTION: WIRING DIAGRAM NOT SUITABLE FOR USE ON SYSTEMS EXCEEDING 150V TO GROUND ATTENTION: SEE NAME PLATE FOR VOLT&HERTZ NE CONVIENT PAS AUXINSTALLATIONS DE PLUS DE 150V ALA TERRE FIELD POWER WIRING CLASS 2 YELLO W... - Page 17 250 VAC/1A. Please refer to the manual for wiring methods. A230608 Fig. 15 – FMA5L (PSC motor) Factory Installed Electric Heat - Schematic Manufacturer reserves the right to change, at any time, specifications and designs without notice and without obligations.
- Page 18 250 VAC/1A. Please refer to the manual for wiring methods. A240387 Fig. 16 – FMA5L, Wiring Diagram - (PSC Motor) Field Installed Electric Heat Manufacturer reserves the right to change, at any time, specifications and designs without notice and without obligations.
- Page 19 FMA5L, FMA5X: Installation Instructions CAUTION: WIRING DIAGRAM NOT SUITABLE FOR USE ON SYSTEMS EXCEEDING 150V TO GROUND ATTENTION: SEE NAME PLATE FOR VOLT&HERTZ NE CONVIENT PAS AUXINSTALLATIONS DE PLUS DE 150V ALA TERRE FIELD POWER WIRING DE TAILE D REFERENC E...
- Page 20 FMA5L, FMA5X: Installation Instructions A240389 FMA5L, FMA5X, Wiring Diagram - Field Installed Electric Heat Manufacturer reserves the right to change, at any time, specifications and designs without notice and without obligations.
- Page 21 FMA5L, FMA5X: Installation Instructions A240393 FMA5L, FMA5X, Wiring Diagram - Factory Installed Electric Heat Manufacturer reserves the right to change, at any time, specifications and designs without notice and without obligations.
- Page 22 Airflow based upon wet coil at 230V with no electric heat and factory-approved filter..For FMA5X airflow at 208V is approximately the same as 230V because the multi-tap ECM motor is a constant torque motor. The torque doesn’t drop off at the speeds in which the motor operates. Airflow is equivalent for front or bottom return configurations. © 2024 Carrier. All rights reserved. Edition Date: 09/24 Catalog No: IM-FMA5L-X-03 Replaces: IM-FMA5L-X-02 Manufacturer reserves the right to change, at any time, specifications and designs without notice and without obligations.
Need help?
Do you have a question about the FMA5L and is the answer not in the manual?
Questions and answers