Advertisement
Quick Links
Advertisement

Related Manuals for Vari 402252


Summary of Contents for Vari 402252
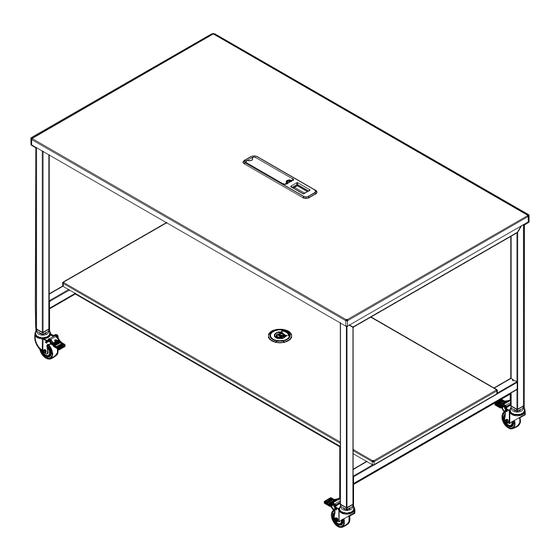
- Page 1 Standing Conference Table 3 person 300 lbs assembly (136 kg)
- Page 2 Inventory Parts ANGLE BRACKET M4 X 6MM SCREW M8 X 20MM SCREW UPPER TABLE TOP M8 X 55MM SCREW LOWER TABLE TOP M8 LOCK WASHER UPPER CROSSBAR M8 FLAT WASHER GROMMET 5MM ALLEN KEY TABLE LEG...
- Page 3 To prevent any surface scratching we recommend assembling the table in its box ( or on another smooth, debris-free flat surface.) With the tabletop face-down and frame-up, align the two CROSSBARS with the insert holes on the table top. Place an M8 LOCK WASHER and a M8 FLAT WASHER onto each of the M8 x 20 SCREWS, forming four sets.
- Page 4 Place an M8 LOCK WASHER and then an M8 FLAT WASHER onto each of the M8 x 55MM SCREWS, forming (4) sets. Insert each set into an opening in a corner of each leg frame, and use the provided 5MM ALLEN KEY to partially secure them to the table top.
- Page 5 Place a LOCK WASHER and then a FLAT WASHER onto (8) of the M8 x 20MM SCREWS, forming eight sets. Insert each set into a flat opening where the leg frame inserts meet the table top frame. Use the provided 5MM ALLEN KEY to secure the leg frame inserts to the top CROSSBARS.
- Page 6 Place a LOCK WASHER and then a FLAT WASHER onto (4) of the M8 x 20MM SCREWS, forming four sets. Insert each set into a slanted opening where the leg frame inserts meet the table top frame. Use the provided 5MM ALLEN KEY to secure the leg frame inserts to the top CROSSBARS.
- Page 7 With assistance, insert the LOWER TABLE TOP through the legs and align the CROSSBAR cutouts with the leg frame inserts.
- Page 8 Place an M8 LOCK WASHER and then an M8 FLAT WASHER onto each of the M8x20 screws, forming (4) sets. Insert each set into an opening in a corner of each leg frame, and use the provided 5MM ALLEN KEY to partially secure them to the LOWER TABLE TOP. Place a LOCK WASHER and then a FLAT WASHER onto (4) of the M8 x 20MM SCREWS, forming four sets.
- Page 9 Flatten the box by folding down the outer edges, then tilt the table out of the box. With two people on each end, flip the table. *Note: Ensure the casters are locked before flipping the table over.
- Page 10 Insert the GROMMET into the center opening on the table top. Insert (3) M4 x 6MM SCREWS to attach the angle brackets onto the GROMMET underneath the table top. The flat surface of the angle brackets should be flush against the bottom of the table top to lock the GROMMET in place.
- Page 11 Power Hub Insertion The Vari Power Hub can be inserted into the GROMMET. Simply slot the cord through the GROMMET and secure the Power Hub in place. Additional cables can also be routed through the upper and lower GROMMETS.
- Page 12 WARNING: To prevent injuries and product failure, do not use this table for standing, (800) 207-2587 climbing, or leaning. Do not use if the table is damaged or incorrectly assembled. Patent and trademark information: vari.com/patents ©2024 Varidesk, LLC All rights reserved.
Need help?
Do you have a question about the 402252 and is the answer not in the manual?
Questions and answers