Table of Contents
Advertisement
Quick Links
Advertisement
Table of Contents

Related Manuals for rotork SM-5300 Series


Summary of Contents for rotork SM-5300 Series
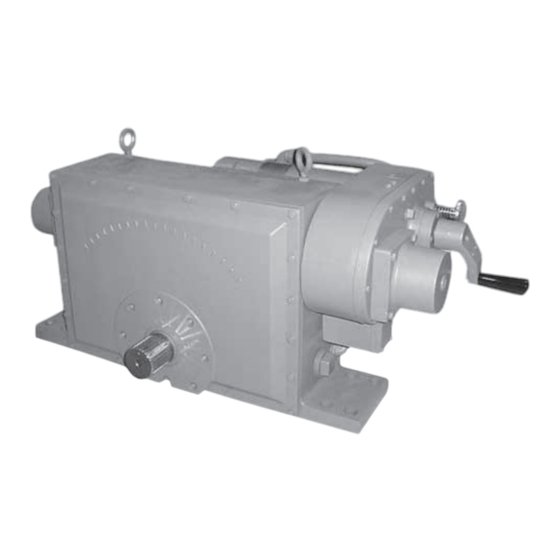
- Page 1 SM-5300 Series Installation Manual Rotary Actuators Redefining Flow Control...
-
Page 2: Table Of Contents
Instruction Manual IM-0462 SM-5300 Series Rotary Actuator Table of Contents General Information ..........2-3 Introduction ............2 Cautions ............2 Receiving/Inspection .......... 2 Storage .............. 2 Equipment Return..........2 Identification Label ..........3 Abbreviations Used in This Manual ....3 General Actuator Description ...... -
Page 3: General Information
Report all damage immedi- If any of the instructions are not understood, contact ately to the freight carrier and Rotork Process your Rotork representative for clarification. Controls. -
Page 4: Identification Label
66% more torque at the ends of travel Both of these models are also available with internal (0° and 90° positions). The SM-5300 Series is ideally or remote mounted servo amplifiers that features suited for dampers, vanes and valve control requiring loss of signal detection for current command signal high torque and exact position control. -
Page 5: Specifications
SM-5300 Series Specifications Rotation: Up to 90° Hold on Loss of Power: Self-locking. Optional brake allows improved positioning response. Modulation Rate: AC: 2,000 starts/hour. Minimum position change of 1% Mounting: Any position. DC: 4,000 starts/hour. Torque Limiting: Bi-Directional, disables motor in Minimum position change of 1% one direction when torque rating is exceeded. -
Page 6: Options
Linkage Kit: Includes two clevises, two adjustment OPTION SPECIFICATIONS rods with lock nuts, two pipe adapters, two pins for Servo Amplifiers: All servo amplifiers include a field- clevises. adjustable command signal monitor that can be set for lock-in-place, or drive to a pre-set position if the Auxiliary Position Limit Switches: (two or four): 20 current command signal is lost. -
Page 7: Installation & Wiring
Installation INSTALLATION WIRING ROTORK PROCESS CONTROLS SUPPLIED (OPTIONAL) COUPLING (Field Installed) Typical wiring diagrams are shown on pages 7-8. Actual wiring should follow the print supplied with Jordan Controls has designed a three piece “wedge- the actuator. lock” coupling which can be adjusted to align the... -
Page 8: Typical Wiring Diagrams
Typical Wiring Diagrams ACTUATOR WITHOUT AN INTERNAL AMPLIFIER SM-5320 (120/240 Vac) SM-5360 (90 Vdc) AC Power Applied to Terminals DC Power Applied to Terminals Actuator Action 1 & 2 1 & 3 1(+ ) & 2(-) 1(-) & 2(+ ) Viewing Output S haft Notes: 1. -
Page 9: Start Up
Start Up ACTUATORS WITHOUT SERVO AMPLIFIERS 5. Apply motor power to drive the actuator to the desired CCW position or until PL2 trips and stops the motor. If A. POSITION LIMIT SWITCH ADJUSTMENT the driven device is not at the desired position: (Ref. - Page 10 For the unit to function optimally, the 4mA end of the F. ACTUATOR WITH INTERNAL AD-7830 feedback potentiometer must be preset to 50 ohms. SERVO AMPLIFIER Switch and feedback potentiometer alignment is accom- plished in the same manner as actuator without amplifiers, except motor power is supplied from the amplifier.
- Page 11 The fourth cam is used for any value of x between 0.5 and 2 2. If either upper or lower shaft position is not at 0 or 100% and must be cut by the user. For details on cutting this cam, (0°...
- Page 12 Figure 2 Figure 3...
-
Page 13: Troubleshooting
Troubleshooting Guide TROUBLE POSSIBLE CAUSE REMEDY a. No power to actuator a. Check source, fuses, wiring b. Let motor cool and determine why b. Motor overheated and internal overheating occurred (such as, thermal switch tripped (single phase AC excessive duty cycle or ambient motors only) temperature) c. - Page 14 Troubleshooting Guide a. Power not applied for other a. Correct power problem direction b. Power always applied to one direction and electrically stalls when b. Correct power problem applied for opposite direction c. Open limit switch for other c. Adjust or replace limit switch as Motor runs, but only one way direction required...
-
Page 15: Parts Identification
Parts Identification... -
Page 17: Clutch Assembly
Handcrank Assembly Hand Crank ........... 60B-014514-001 Hand Crank (Painted) ......60B-014514-002 Handle ..........74A-014614-001 Screw, Hex. Hd. 3/8-16 x 1.50 Lg..54A-015081-150 Manual Override Shaft ......61A-013950-001 Ret. Ring - #5160-150 ......58B-014186-150 Thrust Race ........... 17A-013949-001 Needle Thrust Bearing ......17A-013948-001 “O”... -
Page 18: Drive Shaft Assembly
Clutch Yoke Assembly Clutch Yoke ........... 60C-013958-001 Dowel Pin, .250 x 1.00 Lg....57A-015226-100 Spring ............ 20A-012337-001 Latch Pin ..........61A-011664-001 Clevis Pin ..........75A-014771-001 Cotter Pin, 3/32 Dia. X 1/2 Lg....Manual Crank Latch ......61A-013960-001 Yoke Shaft ..........62A-013961-001 Roll Pin 1/4 Dia x 1”... -
Page 19: Limit Switch Assembly
Standard Feedback - Potentiometers Precision One Turn, 1K ......34B-003956-043 Disc, Adapter (Precision) ...... 61A-SM3304-003 Screw, Truss Hd., 8-32 x 0.25 Lg..54A-015032-025 Limit Switch Assembly... -
Page 20: Maintenance
Maintenance LUBRICATION Under normal service conditions the motor, gearing, TORQUE LIMIT SWITCH ALIGNMENT bearings, and parts are all pre-lubricated and should The torque limit switches are factory set and field not require periodic maintenance. If for any reason the adjustment is not advised unless proper test equip- unit is disassembled in the field, all oilite bushings ment is available. - Page 21 Maintenance MOTOR REPLACEMENT FEEDBACK POTENTIOMETER REPLACEMENT 1. Disconnect all power to the actuator. A. One Turn Linear Potentiometer 2. Remove screws, washers and rear cover. 1. Disconnect all power to the actuator. 3. Disconnect actuator output shaft from driven 2. Remove screws, washers, and rear cover. device and remove actuator from mount.
-
Page 22: Major Dimensions
Major Dimensions These dimensions are subject to change without notice and should not be used for preparation of drawings or fabrication of installation mounting. Current installation dimension drawings are available on request. -
Page 23: Linkage Options
10 (254) 12.25 (311) 17 (432) 1 - 1/4 (NPT) (19 - 38.1) Rotork Process Controls 5607 West Douglas Avenue Milwaukee, Wisconsin 53218 The dimensions in this manual are subject to change without notice Phone: (414) 461-9200 and should not be used for preparation of drawings or fabrication FAX: (414) 461-1024 of installation mounting. - Page 24 A full listing of our worldwide sales and service network is available on our website. www.rotork.com Formerly P573E. As part of a process of on-going product development, Rotork reserves the right to amend and change specifications without prior notice. Published data may be subject to change.
Need help?
Do you have a question about the SM-5300 Series and is the answer not in the manual?
Questions and answers