Advertisement
Technical Support and E-Warranty Certificate
www.vevor.com/support
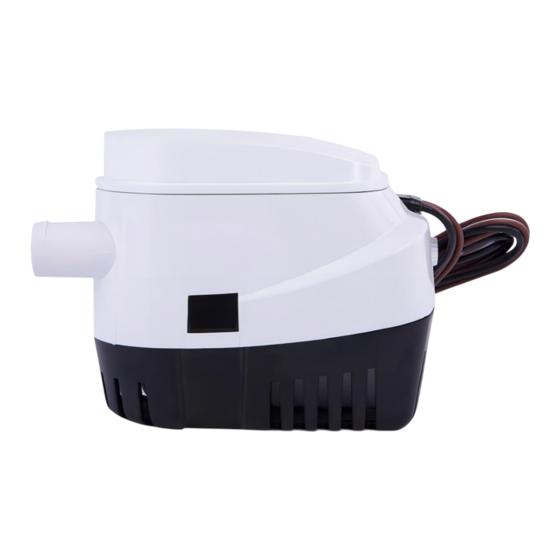
BOAT BILGE PUMP
INSTRUCTIONS
MODEL:NMBP11-G1100-40-12
We continue to be committed to provide you tools with competitive price.
"Save Half", "Half Price" or any other similar expressions used by us only represents an
estimate of savings you might benefit from buying certain tools with us compared to the major
top brands and does not necessarily mean to cover all categories of tools offered by us. You
are kindly reminded to verify carefully when you are placing an order with us if you are
actually saving half in comparison with the top major brands.
Advertisement
Table of Contents

Related Manuals for VEVOR NMBP11-G1100-40-12


Summary of Contents for VEVOR NMBP11-G1100-40-12
- Page 1 BOAT BILGE PUMP INSTRUCTIONS MODEL:NMBP11-G1100-40-12 We continue to be committed to provide you tools with competitive price. "Save Half", "Half Price" or any other similar expressions used by us only represents an estimate of savings you might benefit from buying certain tools with us compared to the major top brands and does not necessarily mean to cover all categories of tools offered by us.
- Page 2 This is the original instruction, please read all manual instructions carefully before operating. VEVOR reserves a clear interpretation of our user manual. The appearance of the product shall be subject to the product you received. Please forgive us that we won't inform you again if there are any technology or software updates on our product.
- Page 3 PROPERTIES OF PRODUCTS Outer diameter Model Input Max flow Max lift of outlet pipe power NMBP11-G1100-40-12 DC12V 1100GPH Փ29mm NMBP11-G750-30-12 DC12V 750GPH Փ19mm WARING CAUTION: Read all instructions carefully before installing and using this product.This pump is sealed and, therefore, submersible, However,...
-
Page 4: Optional Materials
Use the suitable fuse. The wire connections must be sealed by marine sealant. All wires and connections must be above the bilge water level. Unless necessary, please do not arbitrarily remove the insulator. Marine sealant oxidant should be used for all wires.Not dry running WARNING: To prevent injury, always disconnect the power source when installing ... - Page 5 Step 3:Install the strainer A: When fixing the strainer on wood block, use Փ4.0mm stainless steel self-tapping screws. B: If you fix the strainer to a metal or glass fiber, firstly install a piece of wood on it, then fix the strainer to the piece of wood, then install the pump in the filter, and ensure that the two hasps fastened.
-
Page 6: Operation
2. Position the pump in the lowest part of the bilge on a flat, level surface (on the plywood block if it has been installed)with the outlet pointing toward the transom. Be sure outlet nozzle is level. If pointed upward or downward, an airlock may form in the pump. -
Page 7: Warning Instructions
surface of the strainer, the float switch's contact point is disconnected, the float switch stops working, and then the pump ceases to work meanwhile when the brown wire of the auto bilge pump is connected to the battery's positive (+) terminal, the black wire is connected to the battery's negative (-) terminal, this pump is same as the ordinary bilge pump and has no automatic function. -
Page 8: Care And Maintenance
2. Route wires out of the way and secure them to the bulkhead to avoid pulling. 3. Using butt connectors sized for 18-gauge wire, splice fuse holder into positive lead (brown) between the battery and switch. Position fuse holder in a location that is easily accessible for changing fuses. - Page 9 Replace impeller guard, screw, and pump housing on base. Be certain that all tabs are fully engaged. Periodically check the electrical connections to ensure they are water-resistant and mounted high and dry.Do not use household cleaners on the pump because many of them may damage the pump materials.
-
Page 10: Failure Recovery
FAILURE RECOVERY Symptom possible cause cure Plugged Clean outside of strainer and clean debris strainer from around impeller. Discharge line Clean out hose by back flushing plugged Reduced Low battery Check battery condition and charge if Flow voltage necessary. If hose is kinked because of sharp Kinked bend,convert to hose which will not kink at discharge hose... - Page 11 Something Clean under the float to make sure debris is under float not holding the float up Check to see that the float is loose and free of gummy bilge oil. If float action appears sluggish and/or the float does not move freely intermittent or sporadic operation of the pump may occur.This condition is usually the result of oil and/or Dirt accumulating in and...
- Page 12 Unit 5 Albert Edward House, The Pavilions Preston, United Kingdom Tel: 01772418127 pooledas123@gmail.com Imported to AUS: SIHAO PTY LTD. 1 ROKEVA STREETEASTWOOD NSW 2122 Australia Imported to USA: Sanven Technology Ltd. Suite 250, 9166 Anaheim Place, Rancho Cucamonga, CA 91730 Made In China Technical Support and E-Warranty Certificate www.vevor.com/support...
Need help?
Do you have a question about the NMBP11-G1100-40-12 and is the answer not in the manual?
Questions and answers