Table of Contents
Advertisement
Quick Links
Contents
1. About This Manual
2. Important Safety Information
2.1 Disclaimer
FAQ
EcoFlow App
1. About This Manual
This manual contains an introduction to this product, and details on its
operation, management, and maintenance. Please note that this manual may
be updated without prior notice.
The availability of certain accessories and features described in this manual
may vary depending on your country or region.
All images displayed in this manual are for demonstrative purposes only.
Please refer to the actual product received. The following examples are
based on the
US_EPA
If you are reading this manual in PDF format, please note that you can
access it online at
EcoFlow Support
updates.
2. Important Safety Information
SAVE THESE INSTRUCTIONS.
WARNING: IMPORTANT SAFETY INSTRUCTIONS.
2.1 Disclaimer
Please read the product document and ensure that you understand it fully
before using the product. After reading this document, keep it for future
reference. Improper use of this product may cause serious injury to yourself or
others, or cause product damage and property loss. Once you use this
product, it is deemed that you understand, approve and accept all the terms
After-sales
Policy
version.
for a better experience and the latest
Community
Advertisement
Table of Contents

Related Manuals for EcoFlow Smart Generator 3000 Dual Fuel


Summary of Contents for EcoFlow Smart Generator 3000 Dual Fuel
-
Page 1: Table Of Contents
5. Get Started updates. 5.1 Prerequisite 5.2 Checklist Before Each Use 5.3 Power Appliances and Devices 2. Important Safety Information 5.4 Charge EcoFlow Power Station SAVE THESE INSTRUCTIONS. 6. Maintenance and Servicing WARNING: IMPORTANT SAFETY INSTRUCTIONS. 6.1 Maintenance Precautions 6.2 Maintenance Schedule 6.3 Maintenance Instructions... -
Page 2: Safety Instructions
7.5 Transportation and content in this document. EcoFlow is not liable for any loss caused by the user’s failure to use the product in compliance with the product document. In 8. Regulatory and Compliances compliance with laws and regulations, EcoFlow reserves the right to the final 9. - Page 3 2.2.3 Safety Guidelines Carbon Monoxide Hazards DANGER 1. Exhaust gas from the generator contains toxic carbon monoxide (CO) fumes. Inhaling these fumes may lead to shock, loss of consciousness, or even death. 2. Do not use the generator indoors, including in homes, garages, basements, and other enclosed or partially enclosed areas.
- Page 4 DANGER 6. Do not use the generator in damp environments. 7. Do not operate the generator with a damaged cord or plug. 8. Do not overload the generator. Ensure the connected loads do not exceed the generator's wattage capacity to prevent damage. Earthing the Generator: The generator is equipped with a grounding system that connects its frame components to the ground terminal in...
- Page 5 CAUTION 16. Use the generator only on a dry, flat, and stable surface. 17. Keep the generator upright to prevent engine oil leaks. Do not lay it down in any direction or tilt it. 18. Keep the generator out of reach of children and pets. 19.
- Page 6 2.2.7 Powercord: Using Extension Cords EcoFlow assumes no responsibility for the contents of this table. The use of this table is solely the responsibility of the user only. This table is intended for reference only.
-
Page 7: Overview
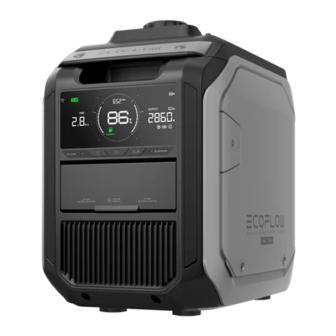
3. Overview The EcoFlow Smart Generator 3000 (hereinafter referred to as "the generator" or "the product") is a portable power generator designed for convenience and versatility. It offers dual fuel capability, allowing you to power your devices using gasoline or liquefied petroleum gas (LPG). - Page 8 Gasoline Inlet Engine Switch Starter Grip LPG Inlet Maintenance Cover Muffler...
-
Page 9: Control Buttons
Internal Battery Air Filter Spark Plug Oil Drain Bolt Engine Oil Dipstick 3.2 Control Buttons The button servers the following functions: Electric • Power On / Off: Press and hold the button for 2 seconds to start Start or shut down the generator. Button •... -
Page 10: Led Indicators
(if applicable). Note: This function is currently supported when working with an Button EcoFlow DELTA 3 Power Station or an EcoFlow DELTA 3 Plus Power Station. For the most up-to-date compatibility info, check the official website: www.ecoflow.com. -
Page 11: Display Screen
Green: The generator is paired with an EcoFlow power station and properly connected through an AC socket. Solid Red: The generator is paired with an EcoFlow power station, but there is no physical connection. Connect the power station to the generator’s AC outlet and try again. - Page 12 The alert will automatically disappear once the temperature Alert returns to normal operating levels. On: The generator requires maintenance or servicing. Visit Maintenance the EcoFlow app for detailed instructions to inspect or Reminder maintain the generator components. Total Running Time / Total On: Displays total running time or total power generation.
-
Page 13: Management
3. Select your EcoFlow device and follow the pop-up instructions to complete device binding and Wi-Fi setup. 4.3 Control via Phone With the EcoFlow app, you can manage all your EcoFlow binding devices on your phone. The generator supports Wi-Fi and Bluetooth connections, adapting to varying network conditions to ensure convenient access to device settings. -
Page 14: Get Started
Without Internet If the Wi-Fi connection is limited, you can access the device settings locally via Bluetooth. 5. Get Started 5.1 Prerequisite 5.1.1 Engine Oil Engine oil ensures the engine works normally by providing essential lubrication, cooling, cleaning, and protection. Before each use, check the engine oil level, and if it is low, fill it properly. - Page 15 Checking Engine Oil Place the generator on a level surface and do not tilt it. 1. Use the screwdriver (Slotted-head) provided in the package to unscrew the maintenance cover, and then remove the cover. 2. Remove the dipstick and wipe it clean. 3.
- Page 16 the upper fuel level limit. Note: Never handle fuel near smoke and flames. 3. Close the fuel cap tightly after fueling. Tip: Fuel type: unleaded gasoline Fuel tank capacity: 4 L / 1.06 gal. Checking Gasoline Level Ensure the gasoline is not overfilled, and wipe off any spilled fuel with a clean and soft cloth.
- Page 17 If you see bubbles, this indicates a leak. Immediately turn off the valve and contact EcoFlow support for assistance.
- Page 18 5.1.3 Internal Rechargeable Battery The internal battery powers the display screen and allows you to start the generator using the Electric Start Button. Connecting Internal Battery 1. Use the screwdriver (Slotted-head) provided in the package to unscrew the maintenance cover, and then remove the cover. 2.
-
Page 19: Checklist Before Each Use
5.1.5 Grounding Terminal Connect the grounding terminal to a copper rod. Grounding codes can vary by location. If you are not familiar with them, check with a local electrician or other qualified professional for specific requirements. 5.2 Checklist Before Each Use Carefully check the following items each time before starting the generator. -
Page 20: Power Appliances And Devices
2 LPG (when using LPG) ☐ Cylinder positioned safely away from exhaust path and other heat sources ☐ Valid cylinder inspection date ☐ No LPG leaks ☐ No bending or twisting of the LPG hose 3 Gasoline (when using gasoline) ☐... - Page 21 Step 2: Start the generator Start the generator using one of the following methods: Method 1: Electric Start Button Press and hold the Electric Start Button for 2 seconds to start the generator. Note: To save battery power, the generator will automatically shut down after 3 minutes if it fails to start.
- Page 22 Gently return the handle to its original position to avoid damaging the starter. Method 3: EcoFlow App Open the EcoFlow app and access the device settings page to turn on the generator. Step 3: Connect to a device After the generator is turned on, connect your device to the generator's AC...
- Page 23 5.3.2 Shutting Down the Generator Emergency Shutdown In an emergency, turn the Engine Switch to “OFF” to shut down the generator immediately. Regular Shutdown Step 1: Disconnect Devices and Fuel Turn off and disconnect all electrical devices connected to the generator. If you are using LPG as fuel, turn off the LPG cylinder valve to stop the fuel supply.
- Page 24 Electric Start Button again to activate the display screen, then, hold the button for 2 seconds to execute the start-up program. Method 2: EcoFlow App Open the EcoFlow app and access the device settings page to turn off the generator.
-
Page 25: Charge Ecoflow Power Station
The generator supports automatic start and stop when charging an EcoFlow power station through an AC outlet. In this scenario, you need to pair the generator with an EcoFlow power station using Bluetooth for the first-time setup. Once paired, the generator will automatically start or stop operation based on the power station's battery level. - Page 26 Turn the Engine Switch to the "AUTO" position. Step 2: Connect to an EcoFlow Power Station Connect an EcoFlow power station to the generator’s AC outlet, then turn on the power station. Step 3: Pair the generator with the EcoFlow Power Station Press the IoT button once to start pairing.
- Page 27 5.4.3 Shutting Down Your Generator The generator will automatically stop if the power station's battery level reaches the threshold set in the EcoFlow app. However, if you need to shut down the generator and stop using it, follow these steps: Emergency Shutdown In an emergency, turn the Engine Switch to “OFF”...
- Page 28 Method 2: EcoFlow App Open the EcoFlow app and access the device settings page to turn off the generator. Step 4: Completely Shut Down the Generator Turn the engine switch to "OFF" to fully shut down the generator.
-
Page 29: Maintenance And Servicing
6. Maintenance and Servicing 6.1 Maintenance Precautions Proper maintenance and servicing are essential to ensure safe, economical, and reliable usage. This also helps minimize your environmental impact. Before undertaking any maintenance, carefully review the following safety precautions: Disconnect from power: Shut down the generator before beginning any maintenance or servicing. -
Page 30: Maintenance Instructions
Before Each Use • Check/add engine oil • Check/add air filter element Within the First month, or After 20 Hours of Operation • Replace engine oil • Clean air filter element Every 3 Months, or Every 50 Hours of Operation •... - Page 31 maintenance cover, and then remove the cover. 2. Take off the spark plug cap. 3. Use the spark plug socket and breaker bar to remove the spark plug. 4. Check for any color fading and remove any carbon deposits. The porcelain around the spark plug center electrode should be light brown if it is in good condition.
- Page 32 6. Reinstall the spark plug with a torque of 13.5±1.5(N ×m). Note: If you don't have a torque wrench, tighten the spark plug until snug, then continue turning an additional 1/4 to 1/2 rotation. 7. Reinstall the spark plug cap. 8.
- Page 33 3. Clean the foam filter element with soapy water or a nonflammable solvent, then dry it. Add engine oil to the foam filter element and squeeze out the excess oil. The foam filter element should be wet but not dripping oil. Note: Do not twist the filter element to avoid damaging it.
- Page 34 5. Reinstall the maintenance cover. 6.3.5 Cleaning the Fuel Filter 1. Take off the fuel cap and remove the fuel filter screen. 2. Clean the fuel filter screen with fuel. Note: Never handle fuel near smoke and flames. 3. Wipe the filter screen and place it back into the fuel tank. 4.
-
Page 35: Storage And Transportation
4. Inspect the muffler block and spark plug arrestor for any damage, and replace them if necessary. 5. Reinstall the parts in turn. 6.3.7 Replacing the Internal Battery If you find that the internal battery is no longer functioning, please contact our Customer Service to obtain a new one. -
Page 36: Storing The Generator
covered with the dust cover. 2. Open the fuel tank cap, remove the fuel filter screen, drain the fuel into a temporary tank, and reinstall the cap. 3. Start the generator without connecting any electrical equipment. It will run on the remaining fuel and shut off when no fuel is left. Note: The run time of the generator depends on the amount of remaining fuel in the tank. -
Page 37: Use After Storage
7.4 Use after Storage If the generator is stored with fuel in the fuel tank and carburetor, conduct servicing as required in the table below before using it again. Storage Recommended Servicing Procedure to Prevent Difficult Startups Duration Within 1 No preparation needed month 1 to 2... - Page 38 systems can cause burns and ignite certain materials. To prevent fuel spills during transport, securely position the generator upright and turn the engine switch to "OFF." During transportation, do not drop the generator or subject it to impacts 8. Regulatory and Compliances FCC Statement Any Changes or modifications not expressly approved by the party responsible for compliance could void the user’s authority to operate the equipment.
- Page 39 The United States Environmental Protection Agency and RATO Technology, Inc. (RATO), are pleased to explain the exhaust and evaporative emissions (“emissions”) control system warranty on your 2024/2025 small off-road engine/equipment. In the United States, new equipment that use small off- road engines must be designed, built, and equipped to meet the State’s stringent anti-smog standards.
- Page 40 DEFECTS WARRANTY REQUIREMENTS: The warranty period begins on the date the small off-road engine/equipment is delivered to an ultimate purchaser. General Emissions Warranty Coverage. RATO warrants to the ultimate purchaser and each subsequent owner that the engine or equipment is: (1) Designed, built, and equipped so as to conform with all applicable regulations adopted by the Air Resources Board;...
- Page 41 add-on or modified part. (11) RATO issuing the warranty shall provide any documents that describe that warranty procedures or policies within five working days of request by the Executive Officer. Emission Warranty Parts List for Exhaust (1) Fuel Metering System (i) Carburetor and internal parts (and/or pressure regulator or fuel injection system).
-
Page 42: Appendix A: What's In The Box
9. Appendix Appendix A: What's in the Box EcoFlow Smart Generator 3000 (Dual Fuel) ×1 Quick Start Guide and Warranty Card ×1 LPG Hose ×1 Oil Funnel ×1 2-in-1 Screwdriver (PH/SL) ×1... -
Page 43: Appendix C: Circuit Diagram
Temperature 40°C Max. Operating Altitude 3000 feet Manufacture Year For details, refer to the product label Generator Type Inverter AC Rated Voltage 120V 16.7A (Gasoline) AC Rated Current 15A (LPG) Operating Frequency 60Hz Gasoline: 2000W (Max. 2200W) Rated Power LPG: 1800W (Max. 2000W) Engine Single cylinder, four-stroke, forced-air cooling, Engine Type... - Page 44 Copyright © 2024 EcoFlow. All Rights Reserved.
Need help?
Do you have a question about the Smart Generator 3000 Dual Fuel and is the answer not in the manual?
Questions and answers