Advertisement
TECHNICAL INFORMATION
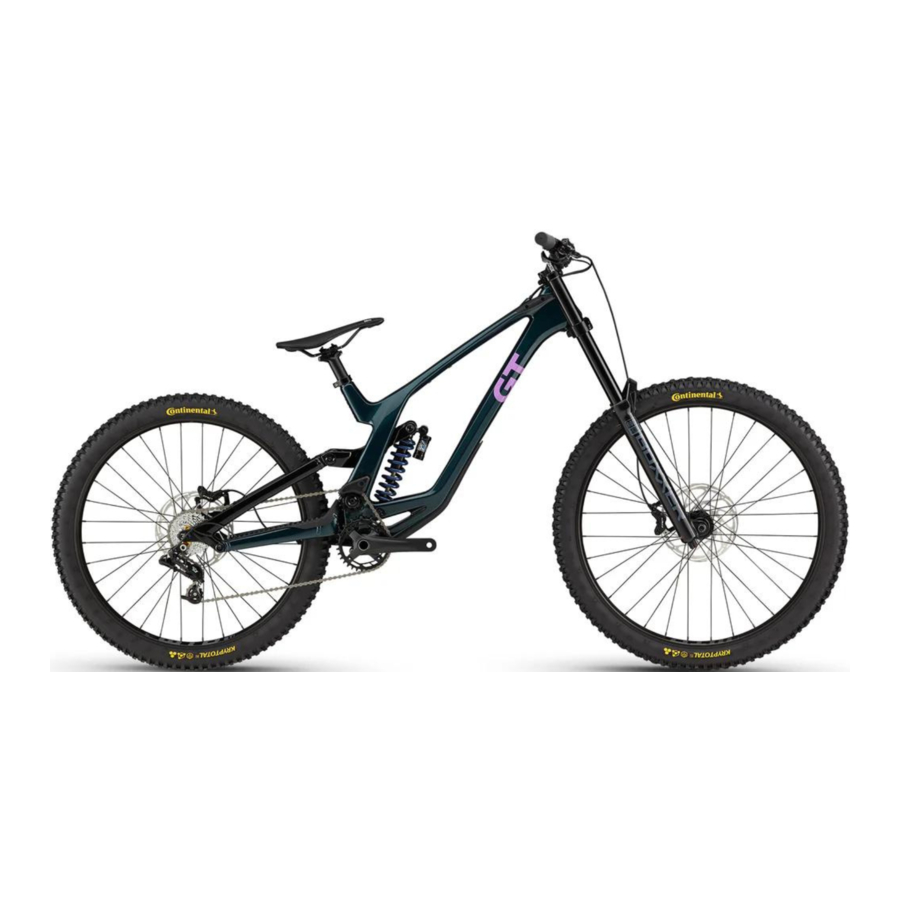
Specifications
| Item | Specification | |
| Wheel Size | REAR: 27.5 or 29 | FRONT: 29 in only |
| Rear Travel | 29: 205mm 27.5: 213mm | |
| Head Tube | UPR: ZS49, LWR ZS49 | |
| Headset | FSA Orbit Z 1.5r Semi-Integrated ZS49/28.6 top, ZS49/30 Lower | |
| Bottom Bracket: Type/Width | BSA Threaded/83mm | |
| Front Derailleur | N/A | |
| Seat Post: Dia./Binder | 31.6mm/34.9mm | |
 Min. Seat Post Insert Min. Seat Post Insert | MD: 100mm LG: 110mm XL: 120mm | |
| Tire Size x Max. Tire Width | REAR:27.5" x 2.5" / 29"X2.25" (measured) FRONT: 29" x 2.5" (measured) | |
| Max. Fork Length | 615.5mm | |
| Rear Shock: Eye-to-Eye / Stroke / Bushing Width | 225mm x 75mm Metric Trunnion/30mm x M10 | |
| Sag | 25%-30%, 17.1mm-20.6mm | |
| Chain Guide | ISCG05 | |
| Rear Brake: Mount Type / Min./Max. Rotor Dia. | Post Mount/200mm/223mm | |
| Rear Axle: Type/Length | 148x12 Maxle TA M12x1.75p 188mm Overall Length | |
| Chain Line | 56.5mm-57.9mm | |
| Intended Use | ASTM CONDITION 5: Downhill | |
| Max. Weight Limit: Total (Rider+All Equipment) | 305lbs/138kg | |
| Additional Technical Features | Tube in Tube Cable Routing | |
Geometry

Dimensions = millimeter
| Sizes (mm) | MD | LG | XL | |
| STL_A | Seat tube length | 410 | 420 | 430 |
| STA_E | Seat tube angle effective | 75.0 ° | 75.0 ° | 75.0 ° |
| TTL_H | Top tube horizontal | 621 | 653 | 686 |
| TTL_A | Top tube actual | 546 | 577 | 609 |
| HTA | Head tube angle | 63.5 ° | 63.5 ° | 63.5 ° |
| STA_A | Seat tube angle | 75.0 ° | 75.0 ° | 75.0 ° |
| SO | Standover | 720 | 730 | 730 |
| HTL | Head tube length | 110 | 120 | 130 |
| WB | Wheelbase | 1260 | 1295 | 1329 |
| FC | Front center | 821 | 856 | 890 |
| RAKE | Fork rake | 52 | 52 | 52 |
| TRAIL | Trail | 133 | 133 | 133 |
| STACK | Stack | 638 | 647 | 656 |
| REACH | Reach | 450 | 480 | 510 |
| Travel front | 200 | 200 | 200 |
Notes:
Rear axle Flip Chip adjusts the Chainstay Length between 440mm and 450mm with a 29er rear wheel and 435mm and 445mm with a 27.5 rear wheel. No other frame geomtery changes when switching between 29 and 27.5 rear wheels when using the Flip Chip. The Shock Flip Chip changes shock progression and has no effect on frame geometry.
Pivot Axles
To remove pivot axles:
- Unthread and remove idler, idler bolt, and spacer if present (only on main pivot).
- Using an M6 bolt of threaded length > 30mm, thread the bolt through the exposed wedge thread. Continue until the wedge is loosened.
- Remove M6 bolt from main axle and remove wedge from M6 bolt.
- Using 6mm Hex, unthread and remove main axle.
To install the pivot axles:
- Disassemble and clean all parts of the pivot axle. Inspect the parts for damage (e.g., burrs, scratches, deformity, wear). Replace the entire pivot axle with a new one if necessary.
- Apply a light coating of a high-quality bicycle bearing grease to the pivot axle surfaces, axle and screw threads, and the wedge.
- Align the linkage system and insert the threaded end of the pivot axle from the non-drive side.
- From the non-drive side, tighten the inserted pivot axle to 5 Nm using a 6mm hex key fitted to a torque wrench.
- Insert the small end of the wedge into the non-drive side pivot axle head.
- Thread the screw through the wedge and tighten to 5.0 Nm.
Please Note: The idler gear assembly is fixed to the drive-side end of the main pivot axle. The idler assembly must be removed first when installing the main pivot axle and last after install the main pivot axle.

Rear Shock
Setting Sag
- Follow the shock manufacturer's instructions for setting the shock according to rider weight.
- Sit on the bike in a normal riding position with your hands on the handlebar and feet on the pedals so that your weight compresses the rear shock.
- Measure the Sag.
- Dismount and adjust the air pressure or coil spring preload of the shock. Repeat steps 2 through 4 to achieve the correct Sag measurement.
Removal/Installation Points:
- Always clean the mounting hardware and frame interfaces with a clean dry lint-free shop towel prior to assembly.
- Clean and re-grease the frame pockets where the leverage chips are inserted.
- Lightly grease the spacers.
- Always re-apply threadlocker as indicated, and lightly grease under the bolt heads
- Lightly grease the trunnion spacers.
- Always re-apply threadlocker as indicated, and lightly grease under the bolt heads.
NOTICE
Install shock with adjusters/reservoirs positioned to the front of the bike. - Install the lower shock bolt into the non-drive side, as shown.
- Tighten bolts to the specified torque.
Changing Leverage Chips
Select between a Progressive or Linear rear shock response by changing the installed position of the lower shock leverage chips. See next figure, lower.
PROGRESSIVE - better big hit performance
LINEAR - more support in cornering The leverage chip positioning is a matter of rider preference and can be selected independently of the current seatstay or dropout chips set-up.

Identification

- Shock
- Link
- Shock bolt, upper (2X)
- Bearing, spacer (2X)
- Left leverage chip
- Right leverage chip
- Shock bolt, lower
- socket
Shock Link

Identification
- Link
- Seatstay
- Seatstay/Link chip (2X)
- Bearing spacer (2X)
- Link bearing, rear (2X)
- Link pivot axle
- Link, pivot bearings (4X)
- Link, pivot axle bearing spacer
- Shock bolts, upper (2X)
- Link bearing, front (2X)
- Bearing, spacer (2X)
- Rear shock
- Pivot axle (2X)
- small end
- large end
Bottom Bracket BSA Threaded (Euro)
")
- Thoroughly grease the threads and cup faces
- Apply BB spacers to the BB cups depending on the specification found in the BB manufacturers manual.
- Thread drive side cup in reserve lefthand thread per manufacturer torque spec
- Thread non drive side cup in regular right-hand thread per manufacturer torque spec
- Wipe off excess grease
- The chainring should be in-line with the idler sprocket OR slighter outboard of the idler sprocket -this depends on the crank and both are as designed.
Changing Rear Wheel Size
The seatstay/link chips can be installed for either a 27.5" or 29" rear wheel. See next figure, lower. The selected position of the chip in either the 27.5" or 29" wheel position can be made independently of the positions of either the rear shock leverage or rear dropout chips.

Secure the bike in a work stand first. Before working on the suspension linkage, remove the wheel. Take addtional steps to support the swingarm from dropping or moving unexpectedly.
Removal/Installation Points:
- Always clean the mounting hardware and frame interfaces with a clean, dry, lint-free shop towel prior to assembly.
- Clean and re-grease the pockets where the chips are inserted. See next figure inset.
- Lightly grease the spacers.
- Always re-apply threadlocker indicated, and lightly grease under the bolt heads
- Install the corresponding rear wheel size.
Match the installed seatstay/link chips position with the wheel size to be installed in the rear dropouts.
After making a change to the chip position and installed wheel, make sure the rear brakes are set-up correctly for the different wheel and that the brake operates normally before riding.
Identification

- Link
- Seatstay
- Chip (2X)
- Axle bolt (2X)
- Seatstay socket
Changing Wheelbase Length
The dropout chips can be installed for either a shorter or longer bicycle wheelbase. See next figure, lower. The selected position of the chip in either the longer or shorter position can be made independently of the positions of either the rear shock leverage or seatstay/ link chips.
Removal/Installation Points:
- Always clean the mounting hardware and frame interfaces with a clean dry lint-free shop towel prior to assembly.
- Clean and re-grease the pockets where the chips are inserted. Also, lightly grease the dropout and rear derailleur mating surfaces.
- Always re-apply threadlocker as indicated, and lightly grease under the bolt heads.
- Note that the rear derailleur hanger has alternative mounting bolt hole depending on the flip chip position in use. See figure next, lower.
Identification

- Left dropout chip
- Right dropout chip
- Rear derailleur hanger
- Screw
- Dropout socket
Dropouts

Identification
- Seatstay
- Chainstay
- Axle Bolt (2X)
- Bearing spacer (4X)
- Bearing (4X)
- Ring clip (2X)
- Groove
- Small side
Guards/Protectors

Identification
- Left, seatstay, outer
- Right, seatstay, inner
- Horst link, lower
- Right, seatstay, outer
- Right, chainstay, outer
- Right, chainstay, upper
- Chain guide
- Left chainstay, outer
- Fender/cable guide
- Downtube protector––
- Right, fork bumper
- Left, fork bumper
NOTICE
Damaged, loose, missing, or incorrectly-positioned protectors can lead to frame damage. Damage of this type is not covered by the GT Limited Warranty. Make sure all frame protectors and guards are present, are installed correctly, and are in good condition.
Tightening Torques

Cable Routing

- Please note that at the fender cable guide the two housing cross.
- Please note that the housing in the area of the fender cable guide are to be secured to the frame on the frame guides (3) using zip ties.
Identification
- Rear brake
- Rear Derailleur
- Cable tie, location
- Tubing end grommet
- Internal cable tubing
- Fender cable guide
REPLACEMENT PARTS
The following service and replacement parts are available through an Authorized GT Dealer:
| ID | Part Number | Description | VIEW |
| A | K34033 | Fury Fork Bumpers L+R | 2 |
| B | K22011 | FS Idler Pulley w/ Bearing | 2 |
| C | K22091 | Force/Fury Idler Bolt and Spacer | 2 |
| D | K91003 | Fury Shock Link (incl. bearings, assembled) | 2 |
| E | K36003 | Fury Link/CS/SS/Pivot Bearings | 1,2 |
| F | K36013 | Fury Link/CS/SS/Pivot Hardware | 1,2 |
| G | K36023 | Fury Shock Bolts w/Flip Chips | 2 |
| H | K24003 | Fury Post Mount Brake Adapter 203mm | 1 |
| I | K31011 | FS Crb 29 Post Mount Brake Adapter | 1 |
| J | K33013 | Derailleur Hanger TA ST SS 092 | 1 |
| K | K36161 | LTS Thru Axle Dropout Flip Chips | 1 |
| L | K11023 | Fury Chain Guide | 2 |
| M | K34043 | Fury DT Protector | 2 |
| N | K34053 | Fury CS Protector | 1 |
| O | K34063 | Fury SS Protector | 1 |
| P | K11033 | Fury Rear Fender | 1 |
| Q | KP312/ | Open Oval Grommet x10 | 1 |
| R | K36033 | Fury Wheel Size Flip Chips | 1 |
| S | K34551 | LTS Heel Rub Guards | 1 |
| T | K32143 | HT Cable Plug Qty4 | 2 |
| U | K34273 | Horst Link Protection Pad | 1 |
| V | K36093 | 17x28mm MP Bearing Spacer | 1 |
| W | K36103 | 17x12mm Link Bearing Spacer | 2 |
| X | K36123 | 4mm Trunnion Spacers Qty2 | 2 |


MAINTENANCE
Scheduling
The following table lists only supplemental maintenance items. Please consult your GT Bicycle Owner's Manual for more information on basic bike maintenance.
| Item | Frequency |
| Cable Routing - Make sure control cables are in place, undamaged and attached securely. Frame Protection - Check the various frame protectors on your bike. Make sure they are in place and in good condition. | Before first ride |
| Damage Inspection - Clean and visually inspect entire bike frame/swing arm/linkage assembly for cracks or damage. | Before and after each ride |
| Check Tightening Torques - In addition to other componentspecific tightening torques for your bike. tighten according to the "Tightening Torques" information listed in this supplement. | Every few rides |
Disassemble, clean, inspect, re-grease, replace worn or damaged parts in the following assemblies:
| In wet, muddy, sandy conditions every 25 hrs. In dry conditions every 50 hrs. |
| Fork and Shock- Consult the manufacturer's owner's manual for maintenance requirements. | |
Any part of a poorly maintained bike can break or malfunction leading to an accident where you can be killed, severely injured, or paralyzed.
Frequent checks are necessary to identify the problems that can lead to an accident. See "Inspect For Safety" in your GT Bicycle Owners Manual.
Safety Messages
READ THIS SUPPLEMENT AND YOUR GT BICYCLE OWNER'S MANUAL.
Both contain important safety information.
Keep both for future reference.
In this supplement, particularly important information is presented in the following ways:
Indicates a hazardous situation which, if not avoided, may result in death or serious injury.
NOTICE
Indicates special precautions that must be taken to avoid damage.
Symbols:
| Symbol | Name | Description |
 | Carbon gel | Apply carbon gel (friction paste) KF115/ |
 | NGLI-2 synthetic grease | Apply NGLI-2 synthetic grease. |
 | Medium-strength removable thread lock | Apply Loctite® 242 (blue) or equivalent. |
GT Support
Our online SUPPORT contains helpful resources to consult about our bikes.
https://support.gtbicycles.com/hc/en-us

Illustrations:
Throughout this manual, all product images, graphics, and figures shown are for illustration purposes only and may not be an exact representation of the product.
GT Supplements
This manual is a "supplement" to your GT Bicycle Owner's Manual.
This supplement provides additional and important model-specific safety, maintenance, and technical information. It may be one of several important manuals/ Contents supplements for your bike; obtain and read all of them.
Please contact your Authorized GT Dealer immediately if you need a manual or supplement or have a question about your bike. You may also contact us using the appropriate country/region/location information.
Contacting GT
GT Bicycles
11 Columbia
Aliso Viejo, CA 92656 1-800-843- 2453
International Distributors
Consult our website to identify the appropriate GT Dealer for your region.
Your GT Dealer
To make sure your bike is serviced and maintained correctly and that you protect applicable warranties, please coordinate all service and maintenance through your Authorized GT Dealer.
NOTICE
Unauthorized service, maintenance, or repair parts can result in serious damage and void your warranty.
SAFETY INFORMATION
Important Composites Message
Your bike (frame and components) is made from composite materials also known as "carbon fiber."
All riders must understand a fundamental reality of composites. Composite materials constructed of carbon fibers are strong and light; but when crashed or overloaded, carbon fibers do not bend - they break.
For your safety, as you own and use the bike, you must follow proper service, maintenance, and inspection of all the composites (e.g., frame, stem, fork, handlebar, seat post, etc.). Ask your GT Dealer for help.
We urge you to read Section "Inspect For Safety" in your GT Bicycle Owner's Manual BEFORE you ride.
You can be severely injured, paralyzed, or killed in an accident if you ignore this warning.
Inspection & Crash Damage Of Carbon Frames/Forks
After A Crash Or Impact:
Inspect frame carefully for damage (See Section Inspect For Safety in your GT Bicycle Owner's Manual. )
Do not ride your bike if you see any signs of damage such as broken, splintered, or delaminated carbon fiber.
Any of the following may indicate a delamination or damage:
- An unusual or strange feel to the frame
- Carbon which has a soft feel or altered shape
- Creaking or other unexplained noises
- Visible cracks, or a white / milky color present in carbon fiber section
Continuing to ride a damaged frame increases the chances of frame failure with the possibility of injury or death of the rider.
Intended Use

The intended use of all models is ASTM CONDITION 5, Downhill.
Understand your bike and its intended use. Using your bike the wrong way is dangerous.
Please read your GT Bicycle Owner's Manual for more information about Intended Use and Conditions 1-5.
Servicing
This supplement may include procedures beyond the scope of general mechanical aptitude.
Special tools, skills, and knowledge may be required. Improper mechanical work increases the risk of an accident. Any bicycle accident has risk of serious injury, paralysis, or death. To minimize risk, we strongly recommend that owners always have mechanical work done by an Authorized GT Dealer.
Tightening Torques
Correct tightening torque for the fasteners (e.g., bolts, screws, nuts, etc.) on your bicycle is very important to your safety. Correct tightening torque for the fasteners is also important for the durability and performance of your bicycle. We urge you to have your dealer correctly torque all fasteners using a torque wrench. If you decide to torque fasteners yourself, always use a torque wrench.
Find Tightening Torque Information:
The wide range of bicycle models and components used means that a listing of tightening torques would be out of date by the time it was published. Many fasteners should be installed with a thread locking adhesive such as Loctite®.
To determine correct tightening torque and any adhesive application for a fastener, we ask you to check for the following:
- On-product markings Many components are marked. .
- Torque specs in the component manufacturers instructions shipped with your bicycle.
- Torque specs listed on the websites of component manufacturers.
- With your dealer. Dealers have access to current data and have experience with correct torques for most fasteners.
Freeriding & Downhill
FREERIDING AND OTHER FORMS OF "EXTREME RIDING" ARE EXTREMELY DANGEROUS. YOU CAN BE SEVERELY INJURED OR KILLED IN A SERIOUS ACCIDENT.
Freeriding, jumping, hucking, dirt jumping, mountaincross, downhill, slalom, slopestyle, urban or street riding or other evolving forms of extreme or hard core mountain biking are inherently dangerous and can lead to serious accidents. Wear all safety gear and be sure your bike is in excellent condition. Follow all the instructions and warnings below. These steps will reduce, but not eliminate, the inherent risks. Even with state of the art protective safety gear you could be seriously injured, paralyzed or killed. If you do not want to take these risks, do not engage in this type of riding.
Fundamental Risk
Freeriding, jumping, hucking, dirt jumping, mountaincross, downhill, slalom, slopestyle, urban or street riding. It seems that everywhere you look, from Mountain Dew® commercials to the X-Games® to the Red Bull®Rampage, riders are grabbing big air and sticking sick drops. And it sure looks fun.
But what the videos and bike magazines and ads don't always tell you is that extreme riding takes an amazing amount of skill. Some of the riders you see are well-paid pros who have gradually built up their skills through endless hours of practice, and who have also had their share of stitches, concussions and busted bones (and bikes). Others are daredevils who have chosen to accept or ignore the risks. Would you allow anyone to say that you are so weak in the head, and have such poor judgment that you copy those you see in the media without thought of the serious risks?
The stakes are high if you screw up. Realize too late that you aren't up to the challenge, and you run the risk of major injury or even – say it aloud – death, paralysis. In short, extreme riding carries a high degree of fundamental risk, and you bear the ultimate responsibility for how you ride and what you attempt to pull off. Do you want to avoid these significant risks? Then do not ride this way.
Product Limitations
Problems of pilot error aside, hard-core riding also beats the heck out of your equipment. Although we build and test our bikes to make them tough, there's no way that we can guarantee they'll survive your umpteenth six-foot drop. For starters, there is no industry "jumping" standard. The many circumstances of takeoff, landing, speed, rider technique, etc. are unique. The judgment, lack of judgment or insanity of a rider who may ride a GT Bicycle cannot be completely predicted, so it's flat-out impossible to predict how anyone's equipment is going to hold up. (continued on next page...)
Let's get another thing straight. Buying a Freeride bike does not make you any better. Do not confuse the built-in capabilities of equipment with your own capabilities, which must be learned.
Keeping your bike and all its components in good working order is critical, and it's up to you to maintain and inspect it. Even so, your sweet rig isn't going to last forever. Nothing does, particularly bikes and parts that are built to minimize weight and then are subjected to abuse. GT frames carry a warranty, but that's to cover issues with workmanship and/or materials. (See the GT Limited Warranty in this manual). The warranty doesn't mean that they're going to last forever. They're not. The warranty certainly doesn't mean that the bicycle can in any way protect you from injury.
Use of Specialized Protective Gear
GT has long urged the use of helmets. As riskier, extreme downhill and freeriding became part of the sport we communicated frankly about the risks in this freeride warning. Give very strong consideration to neck braces, designed for mountain biking and motocross riding, fitted between the rider and helmet, that can decrease the risk of paralysis, spinal cord and neck injuries. As the manufacturer clearly states, these braces cannot prevent all injuries. We urge riders, particularly riders into challenging and risky riding, to investigate and consider prophylactic neck braces. A prophylactic neck brace might save your life or keep you out of a wheelchair.
In Conclusion
If you're going hard-core, be smart about it. Always wear a full face helmet, state-of-the-art neck brace, body armor, full-finger gloves, and protective clothing. Choose a bike that's right for you, your riding and terrain, and check it often for signs of fatigue or other trouble. (Your dealer can help you on both fronts.) Read PART II, SECTION B. MOUNTAIN BIKE RIDING. And most importantly, know your limitations. Practice. Stay in control, and carefully, gradually expand your limits – but ride within them.
YOU CAN BE SEVERELY INJURED, PARALYZED, OR KILLED IF YOU IGNORE THIS WARNING.
Maximum Fork Length
Maximum Fork Length is an important frame safety testing specification for front suspension mountain bikes. You must observe the measurement when installing headset parts and headset adapters, when installing and adjusting a fork, and selecting replacement forks.

You must select a replacement fork based not only on headtube diameter but also on the frame's maximum fork length.
Do not exceed the frame's maximum fork length. Doing so can overload the frame, causing it to break while riding.
Your retailer MUST follow and observe this specification for your bike. For Maximum Fork Length specifications for GT bicycles, see www.gtbicycles.com.
You can be severely injured, paralyzed, or killed in an accident if you ignore this warning.
Tire Size x Maximum Width
Observe the Tire Size x Maximum Width for your bike found in the "Specifications" page of this manual.
Mounting the wrong size tires can result in the tires hitting the fork or frame when riding. If this happens, you can lose control of your bike and you can be thrown off. A moving tire can be stopped because it touches the fork or frame.
Do not mount oversized tires, ones that rub or hit the fork or frame, ones that result in too little clearance, or ones that can hit the fork or frame, saddles, seat post, or seat post clamps seat post when the suspension is fully compressed or when riding.
Take care that the tires you select are compatible with your bike's fork or frame design. Also, be sure to follow the manufacturer's recommendations of your front fork and rear shocks.
When you are considering tires for your bike, consider the following:
The actual measured size of a tire may be different than its sidewall marking. Each time you mount a new tire, take the time to inspect the actual clearance between the rotating tire and all parts of the frame. The U.S. Consumer Product Safety
Commission (CPSC) requires at least 1/16" (1.6 mm) tire clearance from any part of the bike. Allowing for lateral rim flex and a wheel or rim that is out-of-true will likely mean choosing a rear tire that provides even more clearance than the CPSC recommends.
Ask your authorized brand retailer for the right tires for your bike and its particular components! You can be severely injured, paralyzed, or killed in an accident if you ignore this warning.
Rear Tire Clearance: Full Suspension

Applies to:
- saddles
- seat posts
- rear racks
- dropper posts
- any accessory with possible collision with the moving tire.
- Release all the air from the rear shock. Remove the coil spring from coil shocks (spring coil removal should only be done by a professional bike mechanic). Do not disconnect or remove the shock.
- Compress the suspension fully with the tire inflated to its maximum inflation pressure.
- At various points across the tire, measure the distance between the tire and the component or accessory.
- If there is less than 10 mm of clearance available, the component or accessory must be adjusted or changed until there is at least 10 mm of clearance.
Maintain 10 mm of clearance between rear tire, any rear rack, saddle, seat post, frame seat tube, or any mounted accessory.
Check following saddle or seat post adjustments.
If you have questions maintaining tire clearances for parts of your bike, consult with an Authorized Dealer or with a professional cycling mechanic.
You can be severely injured, paralyzed, or killed in an accident if you ignore this warning.
Rear Shock
Select only compatible shocks and forks for your bike. Do not modify your bike in any way to mount one.
Have your shock or fork installed by a professional bike mechanic.
Riding with the wrong rear shock can damage the frame. You could have a serious accident. Make sure the eye-to-eye length, and stroke length of the rear shock you select meet the "Specifications" listed in this manual.
When selecting different shocks or forks for your bike, make sure that the shock or fork you select is compatible with your bike's design and how you will use your bike.
You can be severely injured, paralyzed, or killed in an accident if you ignore this warning.
Making Adjustments
To prevent personal injury: Before making flip chip adjustments, place the bike in a work stand and remove the rear wheel. Keep your hands and finger out of pinch points of moving suspension parts. Take additional steps to prevent the swingarm from dropping or moving unexpectedly.
Minimum Seat Post Insert
Tinimum seat post insert length for your frame is found in the Frame SPecifications table in this manual.
Make sure the specified length is = inserted into the frame at all times.
Failure to insert the specified seat post length can place a very high stress on the seat tube / top tube junction, causing the frame to fail while riding.
The specified length is measured from the bottom of a removed seat post. You can use a permanent marker tto make the specified length on the seat post.
When adjusting the seat post height in the seat tube, never adjust the seat post so that the line you mark is above the top edge of the seat tube.
You must also be aware that bicycle seat posts are permanently marked by the manufacturer with a "minimum insert" line on the seat post itself. You must not rely on this marking as an indication of the proper minimum seat post insertion depth.
You can be severely injured, paralyzed, or killed in an accident if you ignore this warning.
Documents / Resources
References
Download manual
Here you can download full pdf version of manual, it may contain additional safety instructions, warranty information, FCC rules, etc.
Advertisement


Need help?
Do you have a question about the Fury and is the answer not in the manual?
Questions and answers