Vela Tango, Salsa, Latin, Samba Manual
- Service manual (8 pages) ,
- User manual (4 pages) ,
- Mounting instructions (2 pages)
Advertisement
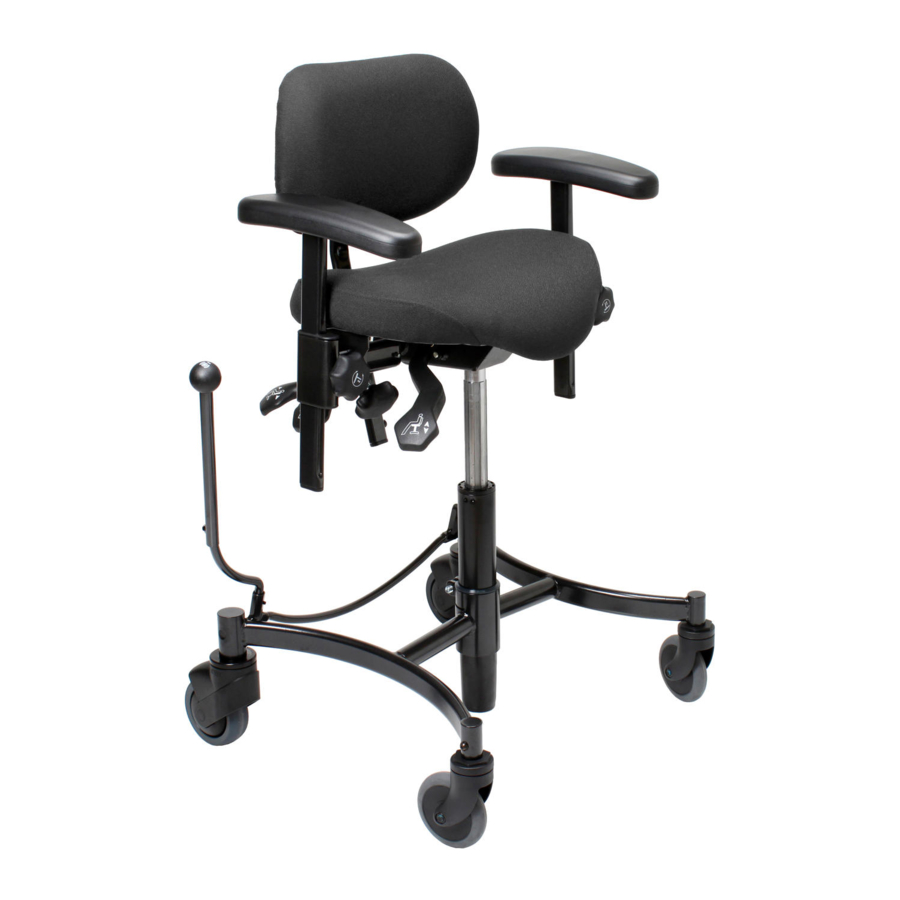
PRODUCT MODELS

TECHNICAL SERVICE
VELA/VELA Medical offers to perform on-site service at selected destinations. In addition, we offer technical support during business hours via our dealers and partners throughout the world. Our partners' technical staff can assist you with troubleshooting, technical documentation and repair questions. There is also a lot of helpful information on our websites: www.vela.eu/www.velamedical.com
VELA's customer service can also be contacted: phone +45 96 34 76 00 or email mail@vela.eu/mail@velamedical.com for further help
In case of complaints or other enquiries about the product, please provide the chair identification number. This six-digit number can be found on a 6 x 2 cm silvercoloured label under the chair:

CLEANING
VELA/VELA Medical chairs withstand thorough cleaning and can be reused. We recommend that professionals examine the chair following the checklist in "Checklist for Testing and Checking" section. Several of the items on the list are described in further detail in "Maintenance" section.
CHAIRS WITH GAS SPRING HEIGHT ADJUSTMENT
Chairs with gas spring can be cleaned either with a hard-wrung cloth or through chemical disinfection with approved disinfectants.
We also recommend regular maintenance after cleaning. This includes lubrication of inner and outer tubes described in "Lubrication of Inner and Outer Tubes" section.
CHAIRS WITH ELECTRIC HEIGHT ADJUSTMENT
Chairs with electric height adjustment can be cleaned either with a hard-wrung cloth or with chemical disinfection using approved disinfectants.
MAINTENANCE
The purpose of a maintenance check is to identify defective and worn parts and similar issues. We recommend an annual overhaul of the chair as well as an overhaul when a new user takes over the chair. The following sections contain further details about the checklist ("Checklist for Testing and Checking" section).
CHECKLIST FOR TESTING AND CHECKING
- Frame
- Inspect weldings
- Inspect for factures
- Tighten screws
- Column
- Column, gas spring
- Check function
- Lubrication of moving parts
- Inspect for wear
- Tighten screws
- Column, electrical
- Inspect wires for damage
- Lubrication of moving parts
- Tighten screws
- Listen for bad sounds
- Charging function
- Column, gas spring
- Castors
- Inspect rolling resistance
- Inspect bearings for backlash
- Tighten screws
- Remove built-up dirt
- Clean castors
- Brake function
- Inspect brake function
- Inspect weldings
- Listen for bad sounds
- Tighten screws
- Seat mechanism
- Inspect all functions
- Listen for bad sounds
- Tighten screws
- Lubricate moving parts (not the lamellae)
- Armrests
- Inspect function
- Inspect weldings
- Inspect for fractures
- Tighten screws
- Inspect surface/upholstery
- Upholstery
- Inspect seat unholstery
- Inspect backrest upholstery
- Inspect headrest upholstery
- Inspect body support upholstery
- Inspect loose seat covers
- Accessories
- Inspect function of body support
- Inspect function of push bar
- Inspect function of head support
- Inspect function of leg supports
- Inspect function of thigh support
- Electrical accessories
- Electric brakes
- Switches
- Hand control unit
- Cleaning
- Upholstery
- Frame
- Armrests
- Accessories
GENERAL
Place the chair on a level surface. Check that all castors are in contact with the ground. If this is not the case, the chair has one or more incorrectly installed or defective castors, or a defective frame, which must be replaced.
All welded components must be visually inspected for cracks or fractures.
Parts with visible wear should be replaced.
CASTORS
It is recommended to check the castors regularly and to wipe off any residual threads, etc. Certain floor types and floor cleaning agents have a greater tendency to accumulate on the castors and build up a layer of dirt. Dirt on the castors can transfer back onto the floors. Therefore, ensure to clean the castors or replace the castors. All castors should also be tested for wear and tear in castor bearings and swivel bearings. If there is noticeable wear and tear in any castor, it must be replaced. It is recommended to replace all castors at the same time to ensure the chair rolls optimally.
LUBRICATION OF INNER AND OUTER TUBES
It is recommended to regularly lubricate inner and outer tubes on chairs with gas spring to ensure that the chair can be easily raised and lowered. Follow these steps:
- Raise the chair to its top position.
- Clean inner tube/gas spring with a degreaser.
- Apply lubricant (e.g. HHS2000) in an even layer to all surfaces of the inner tube/gas spring.
- When the chair is subsequently raised and lowered, the lubricant will be distributed to the outer tube.
Chairs with electric lift are lubricated on the inside by the factory and should not be wiped or lubricated during the life of the chair.
WIRES
Check all wires and plugs for damage and loose connections and replace damaged or defective components. Please refer to the spare parts drawing (available at www.vela.eu) for a wiring chart of your model.
SEAT MECHANISM
The seat mechanism is located under the seat and controls the seat-tilt feature. The release levers are also mounted on this plate.
Inspect the seat mechanism for excessive wear and tear as well as any noise during use. Noise in itself is not dangerous but may indicate that something else needs attention.
Moving parts should be lubricated, except for clutch plates (see "Adjusting Clutch Plates" section). Clutch plates should be cleaned of grease and dust and gently lubricated at one end to prevent noise during use. It is important to only lubricate one end, otherwise, the clutch plate may lose function. After applying, check that the lubricant does not run down to the opposite end.
Loose screws must be identified and tightened.
Note: Do not tighten nuts described in "Adjusting Clutch Plates" section unless experiencing seat or backrest angle sliding, even when the release lever is not activated.
SEAT AND BACKREST
Check seat and backrest for worn upholstery. If there is a hole in the upholstery, it is recommended to replace the entire seat or backrest.
Make sure the seat is firmly secured by tilting it, rocking from side to side, and back and forth. If the seat seems loose, it is important to check and tighten the screws that secure the seat.
ARMREST
Check the condition of the armrest padding and replace it if there are cracks.
Check that all welds are intact and that hand screws are sufficiently tight so that the armrest is secure and stable.
ACCESSORIES
Check that the accessories are in proper condition and securely mounted on the chair.
REPLACING COMPONENTS
Regular service and maintenance may require parts of the chair to be disassembled to inspect individual components and provide access to other components, and to replace spare parts. Detailed assembly instructions with text and images are available on www.vela.eu, where they are divided into model-specific instructions, which include both standard configurations and accessories.
Some instructions also include video tutorials.
RECOMMENDED TOOLS
Only a small number of tools are required to disassemble a VELA/VELA Medical chair. As a minimum, it is recommended to always have the following tools available in the toolbox:
- Allen key sizes 4, 5, and 6
- Small, flat-bladed screwdriver
- Philips screwdriver
- Shifting spanner up to 24 mm
- Fibre hammer/rubber hammer
- Lubricant, e.g. HSS2000
Several of the screws on VELA/VELA Medical chairs are fitted with locking glue from the factory to provide optimum safety for use. Therefore, only use original screws when replacing components to preserve locking glue in the intended locations.
ADJUSTING COMPONENTS
REMEMBER: VELA/VELA Medical chairs are medical devices and the chair is customised for the individual user. Pay special attention to the position settings of various parts, such as the armrests, before carrying out any work on them.
An occupational therapist may have decided on a precise setting for the user, so settings should always be set as they were before maintenance.
ADJUSTING BRAKE PRESSURE ON CASTORS
(Does not apply to VELA Samba and VELA Latin)
The brake function works by clamping the wheel thread, so it may be necessary to adjust the brake pressure on a worn castor as follows:
- Remove the castor (see mounting instructions on www.vela.eu).
- Tighten the inner plastic part of the castor a half or a full turn with a shifting spanner (see image below)
![]()
- Remount the castor.

INTERVAL ADJUSTMENT
(Does not apply to VELA Samba, VELA Latin and VELA Tango 300/310)
As part of the customisation, VELA/VELA Medical chairs can be adjusted in height beyond the range of the gas spring and actuator. This may be necessary if the user of the chair grows taller, or if the chair is to be reused by another user. In this way, the seat height of the chair may be increased or decreased further.
Interval adjustment instructions for each chair model (including illustrations and procedure) are available on our website: www.vela.eu
ADJUSTING ARMREST AND OTHER FUNCTIONS
Several of the chair adjustment options are made with hand screws so the user can set the function without using tools.
If the user is unable to perform such adjustments, the hand screws can be replaced with screws and nuts with common metric threads. However, be sure to use the right sizes and lengths.
ADJUSTING CLUTCH PLATES
(Does not apply to VELA Samba, VELA Latin and VELA Tango 300/310)

The seat and back angles are generally adjusted by clutch plates, which consist of a stack of thin plates that fix the angle by means of friction. A spring presses on to the plates and creates friction. This spring can be tightened if any issues are encountered with the seat or back angles, even when the release lever is not activated. To tighten the clutch plate, tighten the nut as shown in the figure above. Note: if the nut is tightened too much, the angle can no longer be adjusted by activating the release lever. In this case, loosen the nut a little.
The nut may be hidden behind a plug which can be removed by hand or with gentle use of a flatheaded screwdriver.
TROUBLESHOOTING
The wiring for VELA/VELA Medical chairs with electric lift can be found on the spare parts drawing, which is available on our website: www.vela.eu
INSPECTION OF CHARGER AND BATTERIES
Inspection of the charger:
There is no light in the LED indicator when the charger is plugged into a powered outlet. The charger needs to be replaced.
There is a green light in the LED indicator when the charger is plugged into a powered outlet. The charger is working.
The LED indicator only lights up green when the charger is plugged into a powered outlet, and the charging plug is inserted into the chair. The batteries are not detected. Check the wires and fuse (see "Electrical Functions Do Not Work"). If no faults are found in the wires or fuse, the batteries need to be replaced.
The LED indicator turns orange and after a few seconds turns green again. The charger has detected the batteries. However, the voltage of the batteries is too low. The batteries need to be replaced.
The LED indicator remains orange. The charging process is ongoing, and the batteries and charger are okay. Continue charging until the charger turns off, and the LED indicator turns green (this can take up to six hours).
Daily charging is recommended.
Daily charging extends the battery life and ensures sufficient power for everyday use (we recommend charging the chair overnight).
Note: The chair should not be used during charging.
ELECTRICAL FUNCTIONS DO NOT WORK
Check if the switches on the armrest/hand control are defective. Test with another armrest pad/hand control.
Does the relay not click when pressing the switch?
(Not applicable for chairs with soft start/stop).
Check if the fuse has blown. The location of the fuse is shown on the spare parts diagram for the specific model..
Has the fuse blown? Replace the fuse and check all wires thoroughly. Then check the chair's electrical functions, such as up, down, and charging.
Has the fuse not blown? Check the battery voltage - it should be ≥ 24V. Check the chair's batteries and charger (see "Inspection of Charger and Batteries").
If the battery charges correctly (see "Inspection of Charger and Batteries"), charge until the LED indicator turns green, preferably for a longer period, such as overnight. If the batteries do not charge correctly, check that all wires are connected as indicated in the spare parts diagram.
If the batteries still do not charge correctly, contact VELA/VELA Medical.
ELECTRIC LIFT CAN MOVE UP BUT NOT DOWN

Activate the end switch for the downward lift function (not applicable for chairs with soft start/ stop): Press the adjusting screw down a few times. The adjusting screw is a galvanized screw with a star head. It is located close to the column, near the underside of the bearing plate. See picture above.
ELECTRIC LIFT CAN MOVE DOWN BUT NOT UP
Check that the chair's battery charges correctly. Check the voltage across the batteries. The voltage should be ≥ 24V on a fully charged battery. If the voltage is ≤ 24V, the batteries need to be replaced.
If this does not solve the problem, replace the actuator or contact VELA/VELA Medical.
PRODUCTS WITH SOFT START/STOP CANNOT BE MOVED UP
Perform a reset of the actuator. Hold both buttons (up and down) simultaneously for 20 seconds.
Keep holding the buttons until the actuator has fully retracted and then moved approximately 5 mm up again.
If this does not solve the problem, replace the actuator or contact VELA/VELA Medical.
Documents / Resources
References
Download manual
Here you can download full pdf version of manual, it may contain additional safety instructions, warranty information, FCC rules, etc.
Advertisement


Need help?
Do you have a question about the Tango and is the answer not in the manual?
Questions and answers