Neato Botvac D5 Connected Manual
- User manual ,
- Quick start manual (53 pages) ,
- Trouble-shooting & faq (6 pages)
Advertisement
- 1 Meet Your Neato Robot
- 2 Overview
- 3 Robot Control Panel
- 4 Important Items and Tips
- 5 Preparation and Set Up
- 6 Using your robot with the Neato app
- 7 Setting up your robot with the Neato app
- 8 Robot setup without the Neato app
- 9 Using your Neato robot with the robot control panel
- 10 Accessories
- 11 Register Your Neato
- 12 Getting Help
- 13 Documents / Resources
Meet Your Neato Robot
Congratulations on your new Neato robot – now "connected" so you can manage your floor cleaning from anywhere using your smartphone or tablet.
This guide will help get your robot set up and connected via the Neato app. You'll also ind some important information on operating and maintaining your robot for best performance. Then relax. Your robot will let you know when your floors are clean.
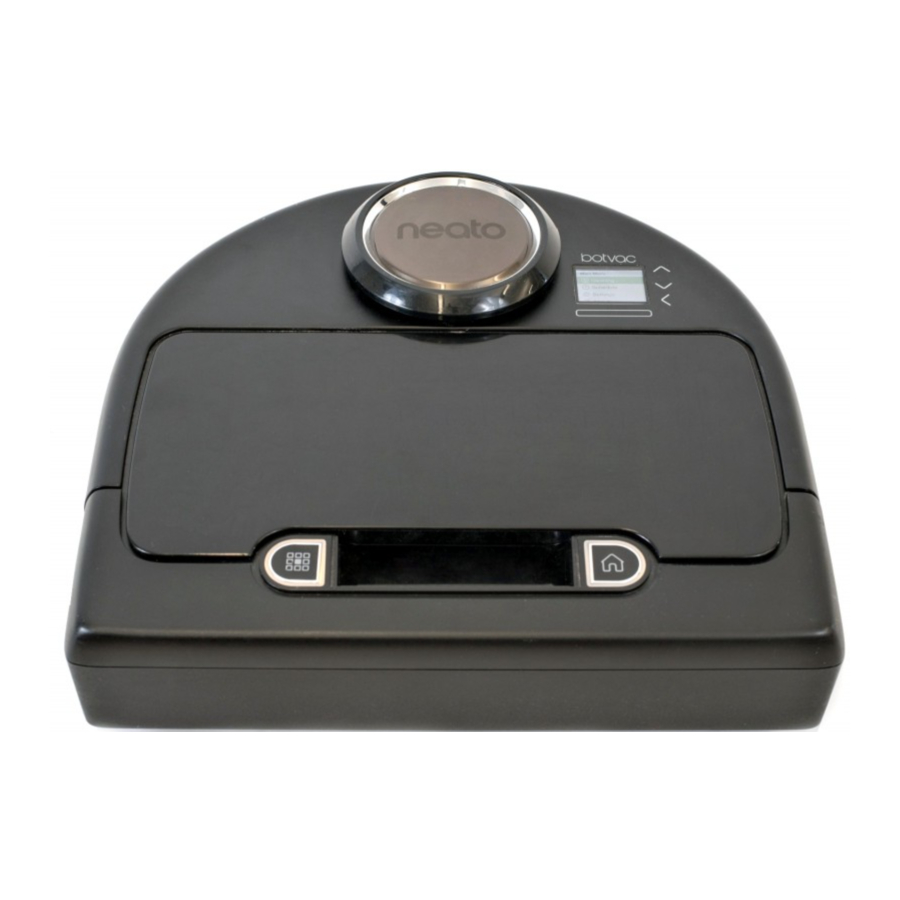
Overview

- Dirt Bin and Filter
- Top
- Laser Cover
- Display & Touch Controls
- Clean Spot Button
- Clean House Button
- Front Bumper
- Status Lights
- Handle
- Brush Guard
- Brush
- Side Brush
- Drop Sensor Window
- Battery Door
- Robot Label
- Charging Contacts
- Wheels
Robot Control Panel
Robot Status Lights
The lights around the  and
and  buttons are used to indicate Battery Status and Error Conditions.

SOLID WHITE
Fully charged and ready to clean.
BLINKING WHITE
Charging, battery not fully charged, but can clean.
BLINKING AMBER
Charging, cannot clean yet.
SOLID AMBER
Error, see message on robot screen for additional information.
Robot Home Screen
Robot status bar

Important Items and Tips
IMPORTANT ITEMS
Keep your robot away from liquids and wet areas. Move or cover pet bowls and plant trays.
Clear the area of small items like toys and clothing.
Tie up wires, curtains and other low-hanging items.
Thick carpet on top stair may affect the robot's navigation system (top stair with lowpile carpet is OK). To make sure your robot sees the drop, place boundary markers 6 inches/15cm from the edge of the stair.
Keep your Neato inside the house. It was not designed for outdoor cleaning or freezing temperatures.
In MANUAL Clean, the only active sensors are the front drop sensors. Because you direct the robot yourself, you can run it into things without the robot stopping. Be careful if you drive the robot backwards as it could fall off of your stairs or cliff if you don't stop it.
Tips
To keep your robot out of places you don't want it to go, set down boundary markers included in the package.
You can use scissors to cut boundary markers to a shorter length.
You can use removable tape such as gaffer tape or painters' tape to keep boundary markers lat on the floor.
To put Neato to sleep, press and hold the ![]() button for 2 seconds and the light on the screen will go off.
button for 2 seconds and the light on the screen will go off.
To do a Reset of the Neato robot, press and hold the ![]() button for 15 seconds and all the lights and the screen will turn off. The robot will automatically turn back on.
button for 15 seconds and all the lights and the screen will turn off. The robot will automatically turn back on.
The combo brush offers superior pick-up of pet hair, reduced noise during operation, and is ideal for homes with multiple types of flooring.
The spiral blade brush offers superior cleaning performance across all floor surfaces.
If you do not plan to use your Neato for an extended period, push the power switch inside the dirt bin UP to power it off.
Shiny surfaces and black floors might cause navigation issues.
Preparation and Set Up
- Remove Films and Stickers
![]()
Remove all protective films and shipping material from the robot and charge base.
If they are not removed, Neato will not operate correctly. - Set Up Charge Base
Plug the power cord securely into the charge base.
Adjust the length of the cord by wrapping it as shown.
![]()
Choose a wall outlet that has a 3' (1 m) clearance on both sides and in front of the charge base. This helps your robot ind the charge base.
![]()
Plug in the power cord and push the charge base against the wall.
Tip: Locate the charge base on a hard floor surface.
Tip: Make sure the power outlet is not controlled by a switch. - Set Power Switch On
![]()
Open the dirt bin and remove the tab.
![]()
Push DOWN on the switch to power on the robot
![]()
Put the dirt bin back in the robot. - Charge Robot
Place the rounded side of your Neato robot against the metal charging contacts on the charge base.
![]()
Before using for the first time, charge your Neato robot fully until both robot status lights are solid white and the battery indicator shows green.
Always make sure Neato is on its charge base when finished cleaning.
NOTE
The robot wakes up in two steps- The Lights turn on in about 5 seconds and
- The LCD turns on about 15 seconds later.
- Choose Your Language
![]()
Find your language using![]() buttons.
buttons.
Press SELECT to choose a language.
To change language later, go to Main Menu, SELECT Settings, Language, and then choose your language.


 buttons.
Using your robot with the Neato app
The benefits of using the Neato app are:
Easy access and control, wherever you are
- Pause cleaning, set up a schedule, change cleaning modes all in the palm of your hand.
Start your robot cleaning when you are not home
- Select CLEAN House and your robot will clean the entire floor so you come home to that just cleaned look.
Enhanced SPOT Clean options
- Options only available on the Neato app are size (small 7'x7' or large 13' x 13') and number of cleaning passes (1x or 2x).
Directed cleaning with MANUAL Clean
- Lets you direct the path of the robot while it is cleaning.
- MANUAL clean is only available on the Neato app.
- MANUAL Clean works only if the robot and the smart phone or tablet are connected to the same internet service.
Instant Notifications
- Learn when your robot is done cleaning, alerts, and other information.
Setting up your robot with the Neato app
App Set-Up
Download the Neato app from the App Store or Google Play.


You can setup your robot to work with or without the Neato app.
We recommend using the Neato app so you can control your robot and receive notifications via your smartphone or tablet.
Follow the directions within the Neato app. You will be prompted to:
- Create a Neato account or Sign In to existing account
- Verify your account via email (if new account)
- Add/Setup your robot
The robot day and time will automatically be set.
NOTE
Before you begin, here's what you will need:
- Your home Wi-Fi name and password
- Fully charged robot
The Neato app can run on multiple devices in a household. Just download the Neato app to other devices and sign in to the same My Neato account using the username and password used to setup the robot.
Robot setup without the Neato app
You may use your Neato robot without Wi-Fi or Neato app, but you will be missing out on extra convenience and functionality.
Follow these steps for setup without Wi-Fi:
Turn Wi-Fi Off
If the robot screen is off, press  to wake up Neato.

If there is no Wi-Fi icon on top left of the robot screen, then Wi-Fi is Off. Go to next step to see how to Set Day and Time.
If there is a Wi-Fi icon in upper left, press SELECT to go to Main Menu.
Use right  to highlight Settings. Press SELECT.

Use right to highlight Wi-Fi. Press SELECT.

 Unchecked box means Wi-Fi is OFF
 Checked box means Wi-Fi is ON
On the Wi-Fi screen, press SELECT to uncheck and turn Wi-Fi Off. This will help save battery power.
Set Day and Time
Day and Time must be set before you can schedule your Neato robot for automatic cleaning. You must turn Wi-Fi off before setting Day and Time

Press SELECT on Home screen to go to the Main Menu.

Use ![]() to highlight:
to highlight:
Settings. Press SELECT.
Day and Time. Press SELECT.
Continue to follow the prompts on screen to set 12 or 24 Hour format, Day, and Time.
Using your Neato robot with the robot control panel
If the robot screen is off, press to wake up your Neato robot.
Start Cleaning
CLEAN House
Press to clean your house.
CLEAN Spot
Press on the robot for 1-pass clean of a 7' x 7'/2m x 2m square.

Place your robot centered and facing the area to be cleaned.
Pause, Stop, Return to Start
Press or to Pause Cleaning.
When ready to continue, press ![]() to make your selection on the robot screen to:
to make your selection on the robot screen to:
- Resume Cleaning
- Stop Cleaning
- Return to Start or Base
![]()

Cleaning Modes
Your Neato robot has two cleaning modes:
 : Most powerful clean
 : Quieter, longer runtime
The default cleaning mode is Turbo.

To change the cleaning mode go to the Home screen and press SELECT to get to the Main Menu.
Use to highlight Cleaning. Press SELECT.
Use to highlight Eco.
Press SELECT to change the mode.

 Unchecked box means Turbo mode is ON – the most powerful clean
 Checked box means Eco mode is ON, quieter and longer runtimes.
Once set to ON, the robot continues each cleaning started with Eco ON, when you use the robot control panel. You must uncheck the box to turn Eco OFF for the robot to switch to Turbo for the next cleaning.
Schedule Cleaning
If the robot screen is off, press to wake up Neato.

Press SELECT to go to the Main Menu.

Use to highlight Schedule Press SELECT.
Use right to highlight Day for scheduled cleaning.
Press SELECT and follow screens to schedule a weekly cleaning.
At the end, choose the Cleaning Mode:

Unchecked box means Turbo mode is ON – the most powerful clean
Checked box means Eco mode is ON, quieter and longer runtimes.
The clock icon indicates if there is a scheduled cleaning.

NOTE
You can schedule up to one cleaning for every day of the week.
Maintaining your Neato robot

Your robot needs regular maintenance to operate reliably. This means checking/ cleaning the brushes and emptying the dirt bin after every use or as needed, depending on your environment. Failure to do this may cause problems with your robot and impact your robot's performance and possibly warranty coverage.
Dirt Bin and Filters
After each use, empty the dirt bin, clean the airways/openings and filter. To remove the filter, pinch the handle and pull out.

Use the cleaning tool comb to clean the filter.
Replace the filter every 1 to 2 months or more frequently as needed.

Brushes
Remove the guard over the brush by pulling up on both sides.
PULL UP ON BOTH SIDES SIMULTANEOUSLY

Use the cleaning tool blade to cut and remove hair and comb to remove dirt from the brush. Clean the brush ends. Replace the brush and guard over the brush.
Robot Top
Clean the top of the robot and the area around the laser top with a damp cotton cloth.

Sensors
Use a dry cotton swab to clean the two drop sensor windows on the bottom of the robot.

Accessories
You can ind information about accessories and replacement parts for your Neato robot at NeatoRobotics.com.
Always purchase Neato Genuine accessories and parts:

- Ffilters
- Brushes
- Boundary Markers
- Batteries
- Cleaning Tool
- Dirt Bin
- Charge Base
Using unauthorized or 3rd party accessories (non-Neato Genuine) can damage your robot and void your warranty.
Recommended replacement schedule depends on use.
- Ffilters - every 1 to 2 months
- Batteries – every 12 to 18 months
Register Your Neato
Even if you are not using the Neato app, you can stay up to date on software releases and special offers by registering your robot. Go to NeatoRobotics.com/My-Neato to create an account and register your Neato robot.
Getting Help
Find more helpful information, including frequently asked questions, and tips and tricks for optimal operation.
Go to:
NeatoRobotics.com/Support
YouTube.com/NeatoRobotics
Documents / Resources
References
Download manual
Here you can download full pdf version of manual, it may contain additional safety instructions, warranty information, FCC rules, etc.
Advertisement


Need help?
Do you have a question about the Botvac D5 Connected and is the answer not in the manual?
Questions and answers