SiriusXM SXV300 Manual
- Accessory manual (24 pages) ,
- Installation manual (13 pages) ,
- Installation manual (13 pages)
Advertisement
- 1 Plan the Antenna Location and Mounting Option
- 2 Install the Antenna
- 3 Make the Connections
- 4 Secure the Main Unit
- 5 Subscribe
-
6
Troubleshooting
- 6.1 No Signal
- 6.2 Check Antenna
- 6.3 Antenna Disconnected
- 6.4 Antenna Cable Shorted
- 6.5 Check Tuner
- 6.6 Channel Not Available
- 6.7 Channel Not Subscribed
- 6.8 Subscription Updated - Press enter to continue (or similar message)
- 6.9 No song title or artist name is displayed
- 6.10 Traffic and Weather channels sound different from other channels
- 6.11 Audio fades or has static when listening
- 7 What's in the Box?
- 8 Check Your Headunit For Compatibility
- 9 Specifications
- 10 12-Month Limited Warranty
- 11 Documents / Resources
Plan the Antenna Location and Mounting Option

When installing the antenna, do not cut or alter the antenna cable, or remove the cable Choose Antenna Mounting Option connectors.
Two considerations are necessary before installing the antenna. First, finding a suitable mounting location, and second determining how the antenna will be mounted. There are several in-box mounting options for the antenna, or accessories can be purchased from a marine store for additional marine mounting options.
In choosing where to mount the antenna, consider whether you will be securing the antenna from the underside of the mounting surface, or attaching the antenna to the mounting surface. Also determine if the antenna wire will be passed through the mounting surface, or if it will be routed along the surface.
If the distance between the antenna and the SXV300 Connect Tuner is more than 25 feet, replacement antenna cables are available from Shakespeare in 35, 50, and 90 foot lengths. The part numbers are SRC-35, SRC-50, and SRC-90. (Note that these are not extension cables.)
Choose a Location
The antenna must be mounted horizontally, and in a location that is open and has a clear view of the sky.
The antenna must also be mounted away from any metal objects or other structures that could block the line-of-sight reception of the satellite signal. The height of the antenna is not as important as having a clear view of the sky.

*Keep antenna at least 1 meter (3 ft.) away from engine to avoid interference.
The antenna should be mounted a minimum of 1 meter (3 ft.) away from other radio transmitting antennas (such as CB, VHF, or Sideband antennas), and also in a marine installation a minimum of 2 meters (7 ft.) from a radar antenna.

Once you have selected a possible mounting location, sight a full 360° circle around the antenna at an elevation angle of 25° to make sure no obstacles block the antenna's view of the sky.

Choose Antenna Mounting Option
| In-Box Mounting Options | ||
| Surface Mount |  | Antenna is secured from the underside of the mounting surface. For mounting surfaces between 1/4" and 1" thick, use the supplied extension shaft. Route the antenna cable through the mounting surface. Secure from below the mounting surface using the lock washer & retaining nut. (Marine or RV sealant required, purchased separately.) |
| Surface Mount with Base |  | Antenna is secured topside to the mounting surface, and is also used when the antenna cable cannot be routed through the mounting surface to the underside. Secure to the surface using 4 screws. |
| Pedestal Mount |  | Antenna is secured topside above the mounting surface. Route antenna cable either through or above the mounting surface. Secure to the surface using 3 screws. |
| Optional Marine Mounting Options (purchased separately) | ||
| Extension Mast Mount (Marine only) |  | Compatible with thirdparty 1"-14 threaded masts (purchased separately) which can be purchased in varying lengths to extend the antenna up a greater distance above the mounting surface on a vessel. Antenna is secured topside to the mounting surface. Route antenna cable either through or above the mounting surface. Secure to the surface using 3 screws. |
| Rail Mount (Shakespeare model 4720 Rail Mount) |  | Use a rail mount (purchased separately) to attach the antenna to an existing 7/8", 1", or 1-1/4"rail on the vessel. |
Install the Antenna
Always mount the antenna so that it does not interfere with safe operation of the vessel or RV.

When mounting to a surface using the low-profile, pedestal, or extension mast mounting method where the antenna cable will exit above the mounting surface, orient the base or pedestal bottom so that the antenna cable exits towards the rear of the vessel or RV, away from oncoming wind from normal vessel or vehicle motion.
Surface Mount

- Drill a 9/16" mounting hole. When drilling fiberglass surfaces, use a small backup block of scrap wood underneath to control push-through splintering. Use caution to avoid drilling through or near fuel lines, fuel tanks, hydraulic lines, plumbing, or electrical wiring,
- For mounting surfaces greater than 1/4" thick (up to 1" thick), use the extension shaft (provided), otherwise continue with step 3.
- Route the 6" antenna lead with T NC female connector through the center of the extension shaft.
- Thread the extension shaft onto the existing antenna shaft and tighten.
- Pass the 6" antenna lead connector and cable, and extension shaft (if used), through the hole that was drilled.
![]()
- Apply a small bead of marine or RV sealant around the outer edge of the antenna base to insure a watertight seal.
- Secure the antenna to the mounting surface with the supplied retaining nut and lock washer.
- Connect the antenna cable to the 6" antenna lead.
- Route the antenna cable to the SXV300 Connect Tuner and connect to the Antenna connection.
Surface Mount with Base

- If you are going to route the antenna cable through the mounting surface, drill a 9/16" center hole for the antenna cable. When drilling fiberglass surfaces, use a small backup block of scrap wood to control push-through splintering. Use caution to avoid drilling through or near fuel lines, fuel tanks, hydraulic lines, plumbing, or electrical wiring.
- Attach the antenna onto the base by using the lock washer and retaining nut.
- Orient the antenna as desired. Place on the mounting surface and take off the antenna and base leaving the base gasket in the same position. Use the base gasket as a template to mark the locations for screws.
- The provided mounting screws will accommodate most surfaces. If you find them too long, too short, or otherwise unsuitable for your application, substitute wood screws, machine screws/washers/nuts, or other hardware (not provided). Be sure to use only stainless steel hardware. If you find it too difficult to start the mounting screws, drill 3 mm (7/64") pilot holes.
- Either pass the 6" antenna lead along with the connector through the center hole, or, lay the 6" antenna lead into the cable opening in the base gasket. Place the antenna, base, and base gasket on the mounting surface aligning it to the marks made in step 3.
- Use the provided mounting screws (or other stainless steel hardware, not provided) to mount the antenna to the surface. Do not over-tighten the screws.
- Connect the antenna cable to the 6" antenna lead.
- Route the antenna cable to the SXV300 Connect Tuner and connect to the Antenna connection.
Pedestal Mount

- If you are going to route the antenna cable through the mounting surface, drill a 9/ 16" mounting hole. When drilling fiberglass surfaces, use a small backup block of scrap wood to control push-through splintering. Use caution to avoid drilling through or near fuel lines, fuel tanks, hydraulic lines, plumbing, or electrical wiring.
- Assemble the antenna as shown:
- Attach the antenna to the base with the lock washer and retaining nut.
- Align the base with the antenna, the base gasket, and the pedestal top so that the openings for the 4 screws are aligned, and use the provided screws to screw them together.
- Place the rubber a-ring between the pedestal top and the pedestal bottom, and screw the pedestal bottom into the pedestal top.
- Place the pedestal gasket into the pedestal bottom, aligning the screw holes.
- Orient the antenna as desired and mark a pencil line on the pedestal bottom and on the mounting surface to serve as an alignment index later.
- While holding the pedestal gasket to the mounting surface, lift off the remainder of the antenna assembly and use the pedestal gasket as a template to mark the locations for the screws.
- The provided mounting screws will accommodate most surfaces. If you find them too long, too short, or otherwise unsuitable for your application, substitute wood screws, machine screws/washers/nuts, or other hardware (not provided). Be sure to use only stainless steel hardware. If you find it too difficult to start the screws, drill 7/64" pilot holes.
- Unscrew the pedestal bottom from the rest of the antenna assembly, keeping the rubber o-ring in place.
- If you are not routing the 6" antenna lead out through the side of the pedestal bottom, continue with step 9.
A needle nose pliers may be used to break off one of the three cable knockouts in the pedestal bottom to align with the cable groove in the pedestal gasket. Refer to the alignment mark made in step 3 to ensure the antenna cable exits the pedestal in the correct direction. - Place the 6" antenna lead into the cable groove in the pedestal gasket and align with the cable knockout in the pedestal bottom.
- Attach the pedestal bottom and pedestal gasket to the mounting surface, orienting them according to the alignment mark made in step 3. Use the provided mounting screws (or other stainless steel hardware, not provided) to mount the pedestal to the surface. If you are routing the 6" antenna lead out through the side of the pedestal bottom, do not fully tighten the screws yet - the 6" antenna lead must be free to turn. If the 6" antenna lead is routing through the mounting surface, route it through the mounting surface and tighten the screws. Do not over-tighten.
- Verify that the rubber o-ring is in place and attach the rest of the antenna assembly to the mounted pedestal bottom by screwing it onto the pedestal bottom until tight.
Note: If you are routing the 6" antenna lead out through the side of the pedestal bottom, make sure the antenna lead can turn freely so that it does not get twisted as you screw the antenna assembly onto the pedestal bottom. When complete, finish tightening the 3 screws that hold the pedestal base to the mounting surface. Do not over tighten. - Connect the antenna cable to the 6" antenna lead.
- Route the antenna cable to the SXV300 Connect Tuner and connect to the Antenna connection.
Extension Mast Mount
(Optional, Marine Only)
- Fol low the installation steps 2a and 2b in the Pedestal Mount section, Place the rubber o-ring over the threads of the extension mast.
- You will need to feed the 25' antenna cable through the pedestal gasket and pedestal bottom, and through the extension mast (purchased separately), and connect it to the 6" antenna lead. Screw down the assembled antenna into the extension mast.
- Route the antenna cable to the SXV300 Connect Tuner and connect to the Antenna connection.
Rail Mount
(Optional, Marine Only)
Note: The center hole in ratchet-type antenna mounts will not accommodate the antenna connector. You must use a rail mount which will allow the antenna cable and its connector to pass through.
Do not cut the antenna cable and do not remove the connector in an attempt to accommodate a ratchet-type antenna mount.
- Follow installation steps 2a and 2b in the Pedestal Mount section.
- Place the rubber o-ring over the threads of the rail mount (purchased separately) and route the 6" antenna lead through the rail mount.
- Attach the antenna assembly to the rail mount by screwing it onto the rail mount until tight.
- Follow the instructions included with the rail mount for attaching the rail mount to the rail.
- Connect the antenna cable to the 6" antenna lead.
- Route the antenna cable to the SXV300 Connect Tuner and connect to the Antenna connection.
Make the Connections
Connect the SXV300 Connect Tuner to the radio/headunit, and the antenna to the Tuner (if you have not yet done so).
- You'll need to access the back of the SiriusXM-Ready radio/headunit so you can plug the Tuner connector into it. This may require you to remove the radio/headunit from the dashboard. If you are uncomfortable with this step, consult a professional installer
- Be sure to turn OFF the SiriusXM-Ready radio/headunit before connecting the Tuner.
- The radio/headunit may have a panel mount type connector or it may have a pigtail type connector. Locate the SiriusXM connector on the radio/headunit and push-in the SXV300 Connect Tuner connector until it "clicks" into place. You may want to tug gently on the cable to make sure it is locked into place. In some cases, you may need to pull the slide lock* to help insert and lock in the connection.

- Connect (or verify) that the antenna cable is connected to the SXV300 Connect Tuner.


Secure the Main Unit
The SXV300 Connect Tuner should be secured in a hidden location that is dry and not exposed to moisture.
- Secure the SXV300 Connect Tuner behind the radio/headunit location, or behind the vessel's helm, or the under the RV dashboard using wire ties (not included).
- Thread the wire ties through the molded brackets on the underside of the Tuner as shown. Then secure it to a bracket or wiring harness using the wire ties. Avoid brackets with sharp edges and any moving parts such as the gas and brake pedals in an RV.
![]()
- Reinstall the radio/headunit if it had been removed.

Subscribe
- Make sure the radio/headunit is turned on and that Satellite Radio is selected. Verify that you are receiving the SiriusXM signal so that you can hear the SiriusXM audio.
- Make a note of your Radio ID. You can find it on channel O, on a label on the bottom of the packaging, and on the label on the bottom of the SXV300 Connect Tuner.
Note! The Radio ID does not use the letters l, O, S, or E - Activate your service:
- First see our Customer Agreement for complete terms at www.siriusxm.com and then:
- Online: Go to www.siriusxm.com/activatenow
OR - By phone: Call 1-866-587-4225 (If calling to activate, be sure to mention "3 Months Free Service")
- Activation usually takes 10 to 15 minutes, but may take up to an hour. We recommend that the radio/headunit remain on until subscribed. When your service is activated, you will see the SUBSCRIPTION UPDATED, PRESS ENTER TO CONTINUE or similar message displayed. Once subscribed, you can tune to channels in your subscription plan.
- Activation signals can be sent again at any time by visiting www.siriusxm.com/refresh.
Troubleshooting
This troubleshooting information is for general reference. Consult the User Guide for your SiriusXM-Ready radio/headunit for specific operating instructions and advisory messages that may be displayed. Your radio/headunit may display slightly different messages.
| If you see this on the screen: | Try this: |
No Signal(NoSignal) |
|
Check Antenna(Chek Antenna, CHK Antena, Chek Ant) |
|
Antenna Disconnected | Check the antenna connection to make sure it is fully plugged into the SXV300 Connect Tuner. |
Antenna Cable Shorted | Replace the antenna. |
Check Tuner(Chek Tuner, Chk Tunr) | Check the SXV300 Connect Tuner connection to the radio/headunit and make sure it is plugged all the way in. |
Channel Not Available(Chan Unavailable, Ch Unavailable, Ch Unavail, Ch Unavl) | The channel you have selected is not available. |
Channel Not Subscribed(CH Unsubscribed, Chan Unsub, Ch Unsub) | The channel you have selected is not part of your current subscription plan. First see our Customer Agreement for complete terms at www.siriusxm.com, and then call 1-866-635-2349 to subscribe. |
Subscription Updated - Press enter to continue (or similar message) | Your subscription has been updated; press the appropriate button (or other identified key) to continue. |
| If this happens: | Try this: |
| You do not receive all the channels to which you subscribe |
|
No song title or artist name is displayed | The information may not be available or updates may be in progress. |
Traffic and Weather channels sound different from other channels | These channels use a different audio technology than other channels, so they often sound different from other channels. |
Audio fades or has static when listening |
|
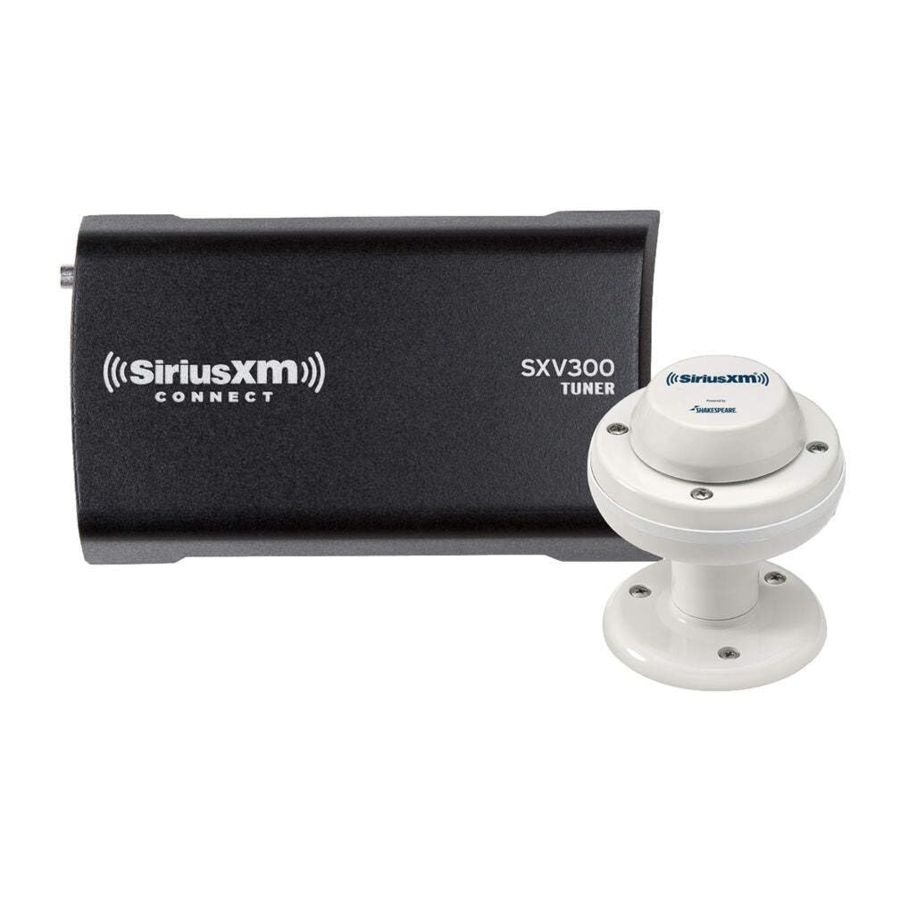
What's in the Box?
Thank you for purchasing the SXV300M1 SiriusXM Direct Connect Tuner & Marine/RV Antenna.
Included is everything you need to add Satellite Radio to your SiriusXM-Ready radio/headunit. Consult your radio/headunit User Guide for features and detailed operational instructions.
For questions or support, please visit www.siriusxm.com or call 1-866-635-2349.

Shakespeare SRA-50 Antenna
(Includes 25' Antenna Cable & Mounting Accessories)
Check Your Headunit For Compatibility
If your radio/headunit has the official SiriusXM-Ready logo it is compatible with the SXV300 Connect Tuner. All SiriusXM-Ready radios and headunits include a dedicated connector, allowing for quick and easy connection of the SXV300 Connect Tuner.

Products with this logo are compatible

Products with these logos are not compatible
Specifications
| SXV300 Connect Tuner | |
| Dimensions: | 3.42 in (W) x 2 in (H) x 0.7 in (87 mm (W) x 51.8 mm (H) x 17.9 mm (D)) |
| Weight: | 3 oz (85 g) |
| Pigtail Cable Length: | 25.6 in (650 mm) |
| Power Requirements: | 12v DC, 0.3 A (MAX) (supplied by radio/headunit) |
| Operating Temperature: | -4°F to +158°F (-20°C to +70°C) |
| Marine/RV Antenna | |
| Type: | SiriusXM approved Marine Antenna |
| Pigtail Cable: | 6 in (152 mm), TNC female |
| Antenna Cable: | 25 ft (7.6 m), TNC male to SMB |
| Waterproof Rating: | IPX67 |
| Network Operation: | XM Network Only |
Specifications are subject to change without notice.
12-Month Limited Warranty
How to Obtain Warranty Service
To obtain warranty service, please call SiriusXM Listener Care at 1-866-635-7191. You will be required to provide proof of purchase and a description of the defect. You must prepay the cost of shipping the product to an approved service center.
With activation of this tuner, you're eligible for 3 MONTHS FREE SERVICE of out Platinum Plan Subscription

Scan to Activate Offer
Sirius XM Radio Inc.
1221 Avenue of the Americas, 36th Floor
New York, NY 10020
1.866.635.2349
Documents / Resources
References
Download manual
Here you can download full pdf version of manual, it may contain additional safety instructions, warranty information, FCC rules, etc.
Advertisement


Need help?
Do you have a question about the SXV300 and is the answer not in the manual?
Questions and answers