Advertisement
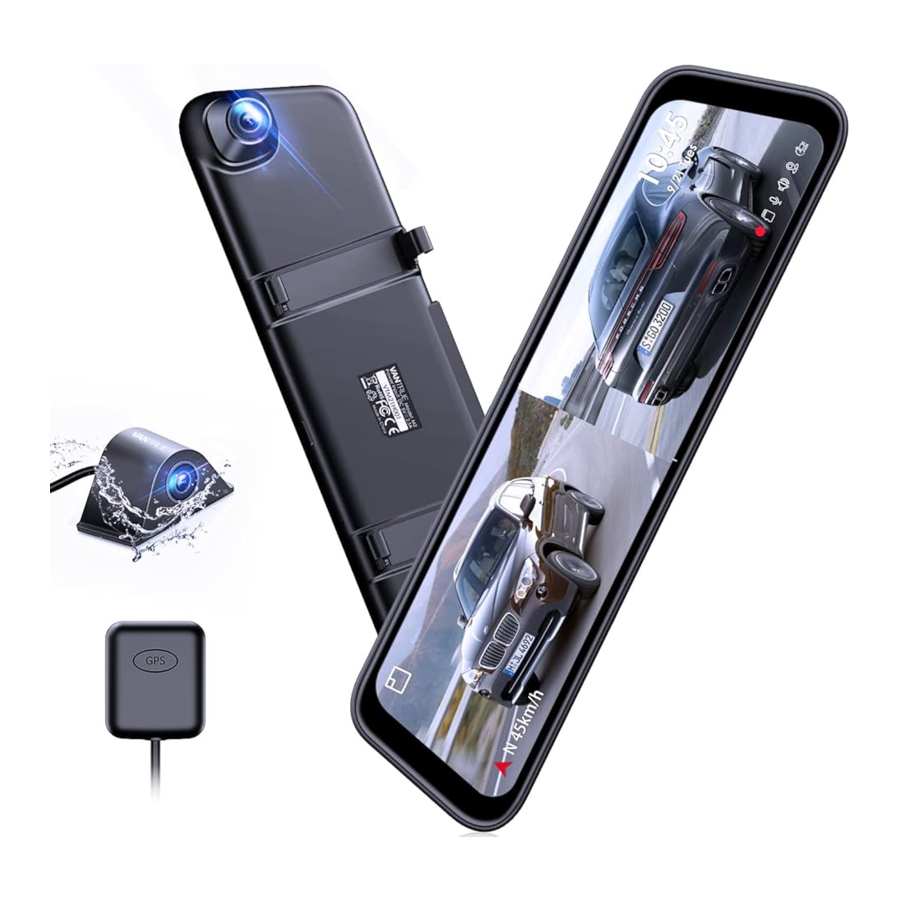
What's in the Box?

- Vantrue M2 Mirror Dash Cam
- Car Charger (11.5ft)
- Backup Camera with 1.64ftCabIe
- Backup Camera Cable (19.7ft)
- GPS Logger(6.6ft)
- Rubber Mounting Straps*4
- 3M Adhesive Pads*2
- User Manual
- Mini USB Date Cable(3.3ft)
Camera Overview

| No. | Name | Description |
| 1 | Screen | 12 (11.8)inch LCD Display Screen |
| 2 | Lens | Front Camera for video recording |
| 3 | GPS | For GPS Antenna connection |
| 4 | Reset | Reset the Mirror |
| 5 | AV Port | Connect the backup camera for image transmission |
| 6 | SD Card Slot | Support Micro SD Card up to 512GB in FAT32, class 10 |
| 7 | Port | Connect to MINI USB cable or car charger for external power supply |
| 8 | Microphone | Records clear audio with the video footage |
| 9 | Power Button | Long press to power on or power off, short press for screen off |
Screen Overview

 | Enter the video interface icon, click to return to the video interface |
 | Direction and Speed |
 | Screen brightness adjustment |
 | Current Time |
 | Current Date (MM-DD-WW) |
 | Normal Video Recording |
 | Video Pause |
 | Event video recording |
 | Memory card inserted |
 | No Memory Card Inserted |
 | MIC is ON |
 | MIC is OFF |
 | Speaker is ON |
 | Speaker is OFF |
 | GPS is on, GPS is connecting |
 | GPS is connected |
 | GPS is on, GPS module is not connected |
 | Motion Detection ON |
 | Collision Detection ON |
 | Time Lapse ON (In Parking Mode) |
 | Time Lapse ON |
Video Interface Display

 | Return to the previous menu |
 | Go Back |
 | Menu Setting |
 | Start/Stop Recording |
 | Video/Photo Playback |
 | Emergency File Locked |
 | Into Parking Mode |
 | Recording Lock |
 | Photograph |
 | Recording Time (current clip) |
 | Rear Image, Switching front and rear cameras |
Installing a Memory Card (Recommend Vantrue SD Card)
Please use a genuine Micro SD memory card from 32GB to 512GB with a speed rating of CIO or higher. We recommend to use Vantrue Micro SD Card (not included). Please insert the SD card when dash cam is off. Carefully insert the memory card into the camera's card slot until it clicks. To remove the card, power off the camera first, then push the card into the slot until it clicks again.
NOTE: Before using, please format it to FAT32 on the camera first. Please insert the card into the camera, go to Storage Space on the Menu Settings, then press Format SD Card option to format it. If it says "SD card error, PIease format the card!" here, please press the format button and choose 'Format SD Card'. Then the card will work well on the camera. (If you format it on computer, please search the Internet for "How to format a 64GB micro SD card to FAT32)

Reminder:
- Ideally, the micro SD card should be formatted once a month to maximize the lifetime of the memory card.
- We recommend VANTRUE Card. Some SD cards may not compatible with our dash cam, such as SanDisk, Transcend, etc.
Menu Settings
After powering ON the camera, press the  button to enter the setup process. (If the camera is recording video, press the button to stop recording before pressing the button.)

Language: Adjust menu language. English, Deutsch, Italiano, Espaäol, Franqais, русский язык, Polskie.
Date & Time: Automatically sets the time by GPS, Set the date and time, the time system (24-hour Format by Default), and the time zone.
Storage Space: Display Total Memory/Available Memory/- Format SD Card
Format Reminder Setup: If this function is enabled, you are reminded to format the micro SD card every 30 days
Resolution: Adjust front camera video quality, 1440P/1080P/720P optional. The rear camera resolution is fixed at 1080P.
Video Frame rate: Select the video frames. 30FPS/28FPS optional.
Loop Recording: 1min/3min/5min/OFF optional. The default is 3 minutes. If you select "off", the looping recording is 20 minutes per clip Video Format: TS/MP4 video format optional. Default is TS video format.
Rear Camera Flip (1800): ON/OFF. Audio Recording: ON/OFF. Default is ON.
G-Sensor: You can set the g-sensor values of Forward & Backward, Leftward & Rightward, Upward & Downward of the car. The G-sensor value in each direction can be selected I /2/3/4/5.The highest sensitivity of G-Sensor is 5.
Parking Mode: Collision Detection, Time-Lapse recording, and Motion Detection are optional.
Exposure: Adjust exposure value for the front lens, +2.0, +5/3, +4/3, +1.0, +2-3, +1/3,+0.0,- 1/3, -2/3, -1.0, -4/3, -5/3, -2.0 optional.
Frequency: 50Hz/60Hz available. Default is 60Hz.
Device Sound: Set the volume of the device, such as the startup sound, prompt sound, button sound, and video playback sound. You can select off, low, Medium, or high. The default value is Medium.
Prompt Tone: Turn on or off the operation prompts, such as Time Formatting Prompt Tone, Video Locked Prompt Tone, Abnormal Video Recording Stopped Prompt Tone, Touch Tone and ON&Off Tone. Default is ON.
Auto LCD Off: 1Min/3Min/5Min/ OFF optional. Default is OFF. If it is set to Off, it will keep the screen always on.
LCD Brightness: Manual/Auto LCD brightness adjustable
Reversing Setting: Set the Reverse Reverse Assist Lines and Reverse preview Settings
Time Lapse: Select the video frames of time lapse. 1FPS/3F- PS/ 5FPS/1OFPS/OFF optional.
GPS Info: Set the GPS on or off, set the speed unit km/h or mp/h, and check the GPS signal strength information.
Stamp: Enable or disable the watermark stamp of the video and photos. The watermark stamp includes VANTRUE label, date and time label, speed label.
Default Settings: Restore default settings
System Info: Check the Model Number/Firmware Version/Website.
Functions
Turn ON/OFF the camera
Once connected to the car charger, the camera will auto power on after you start your car, it will auto off after you turn off the car engine even if it is recording. Please long press the Power Button to turn off the camera
Note: Please charge the dash cam with included car charger on your car, don't charge it with other car chargers.
Set Date & Time

There are two ways to set the time and date: automatically and manually. Automatic update: Connect it with GPS module, go to the "Time Setting", turn on "Automatically sets the time by GPS'I, and select your time zone, then the time and date can be automatically corrected. Automatically sets the time by GPS is off by default.

Manual update: Go to the "Time Setting", turn off the "Automatically sets the time by GPS'I, and then manually adjust the time and date.
Auto LCD OFF
Set the time to automatically turn off the LCD display after no operation. There are 3 kinds of display mode: 1 Min/3 Min/5 Min, and OFF. Please go to "Menu Setting"> "Auto LCD OFF", then switch the screen mode. Default is off. If it is set to Off, it will keep the screen always on. Note: In the parking mode, in order to save power and increase the protection time of the parking mode, the screen will turn off within 3 seconds after the dash cam enters the parking mode.


Resolution
By default (Front + Rear recording mode), both the front and back camera capture the road in front and back of the car at 1440P+1080P 30FPS. To show better video, the resolution of the rear camera is fixed at 1080P, and the front camera's resolution can be adjusted as needed. Please go to "Menu Settings" > "Resolution" and select the front resolution between 1440P/1080P/720P.

Front view/Rear view Switch
In dual recording mode, there are two ways to switch between front and rear view:
- In the recording interface, click the small window in the lower right corner to switch the display of the front and back view.


- On the screen saver interface, you can switch between the front recording screen display, the rear recording screen display and the dual recording screen display by sliding the screen left and right.


When entering the screen saver mode, the first displayed screen is front recording. You can swipe left or right to switch between different screens. The switching sequence is the front recording screen  the rear recording screen dual recording screen.
Loop recordings
This feature allows the camera to continuous loop by it can delete the Oldest video files when the memory card is full, so you don't have to manually delete them. This feature will split each video files into the appropriate length based on your selection.
After inserting the memory card and connecting the power supply, the M2 dash cam will auto turn on and enter the loop recording. When recording, the icon in the middle of the video interface flashes, and the recording time will be recorded according to the loop recording time you set. If you are back to the screensaver screen, you can view the recording status icon (The red icon means recording is in progress, the orange icon means event recording, white icon  means recording has been paused.) in the lower right corner of the screen to learn about the current recording status.

Note: In screensaver mode, you need to go to the recording interface, stop the recording first, and then make settings. Enter the menu, in the 'Iloop recording" option, you can select I Min / 3 Min / 5 Min/ OFF. After the recording reaches the setting, the new recording will automatically overwrite the first recording. When the loop recording option is turned off, , the video will be recorded in 20 minutes each clip. After the Micro SD card is full, the recording will stop and will not start recording again until there is enough memory space.
Event video
The event video is triggered by the G-sensor, which can be automatically triggered or manually locked.
When the dash cam detects that the current vibration value of the vehicle has reached the preset G-sensor level, the video will be automatically locked, and the recording icon will change from red to orange , the recording time will be until the end of the recording or manually stop, and the event video be saved in the event video folder.
Videos and images in the event video folder will no longer be looping over.
Manually lock the video. In the video recording interface, click the icon and the video will be locked and saved in the event video folder. You can set the G-sensor Sensitivity values of Forward & Backward, Leftward & Rightward, Upward & Downward of the car. The G-sensor value in each direction can be selected I /2/3/4/5/OFF. The default sensitivity for the three dimensions is 3. The highest sensitivity of G-Sensor is 5. Please go to "Menu Setting">"G-sensor", then adjust the G-sensor value.

Note: Once the event video folder exceeds 30% of the total memory, the dash cam will automatically overwrite old event videos with new event videos. Periodically transfer important event videos to your computer or other stored tools (e.g. External hard drive).To ensure good read and write performance, the micro SD card must be formatted at least once a month.
Video Format
By default, the video format is TS. TS format video, more convenient to store, not easy to lose. MP4 format video, memory space between small occupancy, suitable for most of the mainstream players. After stop recording, please go to "Menu Setting"> "Video Format", then you can switch between IITS'I/"MP4 1',then the video will be saved in the selected format.
Rear Camera Flip (180º)
If your rear camera is mounted upside down, the screen will stand upside down. You can turn on this function to flip the videos. Please go to I'FIip (1800) on the "Menu Settings" and select By default, this function is disabled.
")
Parking Mode
There are 3 modes to choose from in the parking mode of M2: collision detection, time-lapse recording, and motion detection. After the parking mode is enabled, you can choose to enable one of the parking modes.

- Please note that a continuous power supply is required when using the parking mode. You can use a step-down wire to connect the car battery to supply power, or use a safe external power supply to power it.
- The best working environment temperature of M2 is 14-122ºF (-10ºC to 50ºC). We recommend using collision detection within this temperature range, so once the temperature exceeds the normal working temperature range, it will automatically shut down. If the temperature is high, please turn off the camera when parking.
Triggered by Collision Detection
When the collision detection  is turned on, the
  icon appears in the center of the screen after the car stops for 5 minutes, and then the dash cam is automatically turned off. When the dash cam is turned off, it will start to record for 1 minute after being shaken, and then turn off the dash cam again.

After the parking mode switch is turned on, the collision detection sensitivity can be selected. There are three levels of low/medium/high respectively. The default collision detection is off.
Note:
- If it is shaken again during the collision detection recording, it will exit the collision detection and lock the recording. 5 minutes after the end of the vibration, the dash cam will enter the collision detection mode again, and finally turn off the recorder.
- The collision detection will be disabled automatically after the normal time-lapse recording is enabled.
Time Lapse
Select the parking mode for time-lapse video. Select 1FPS/3FPS/5FPS/10FPS to record and dip a video. Default is 3FPS. Then select the recording time of parking, there are 4 hours, 8 hours, 12 hours, 24 hours or unlimited to choose from, default is unlimited. After the Time Lapse is turned on, it will enter the time lapse mode after parking for 5 minutes, and the icon will appear in the center of the screen. After 3 seconds, the screen will be closed and start time-lapse recording.

If Time Lapse is selected, the camera will take static photos at the set recording frame rate - either 1FPS, 5FPS, 10FPS to create a video montage. For example, if you set Time Lapse 1FPS, the camera will take one photo every second, and then stitch the photos together into a I fps video. With a maximum recording frame rate of 30fps, recording 8 hours of video with Time Lapse 1 Sec will generate a time lapse video lasting just 16 minutes(8x60x60/30/60). This Eco Mode is recommended for storage cards with with smaller capacity.
[Real Recording Time (Sec) = Time Lapse Recording Time (Sec) x Video Frame Rate FPS / Time Lapse Option FPSI
Note: Time-lapse videos in parking mode work in the same mode as normal time-lapse videos, but they have different entry modes. When normal time-lapse recording is enabled, time-lapse recording in parking will be automatically disabled.
Triggered by Motion Detection
There are three levels of motion detection sensitivity: High [Medium /Low, and the default is off. Select the recording time of parking, there are 4 hours, 8 hours, 12 hours, 24 hours or unlimited to choose from. Default is unlimited. When motion detection is turned on, i icon appears at the right bottom corner of the screen. If no movement is detected after 5 minutes of recording, an orange icon will appear in the center Of the screen, indicating that the parking mode has been activated, and the screen will turn off after 3 seconds. Once the camera detects movement, it will start recording automatically; it will stop recording after 20 seconds of inactivity.

Note:
- After manually turning off the dash cam, it will not enter the motion detection mode.
- Motion detection will be disabled automatically after the normal time-lapse recording is enabled.
Brightness Adjustment
Manual/Auto LCD brightness adjustment: Swipe up and down on the right side of the screen with your finger to adjust the brightness of the screen.

Or enter the Menu settings and adjust the screen brightness to high/medium/low mode as needed.

Reversing settings
Under the guidance of the installation video (www.vantrue.net) provided by us, after connecting the rear lens to the reversing light, the reversing assist function will be automatically activated when reversing.

Reverse Image: This function is disabled by default. When your rear camera is installed upside down, the picture will be inverted by 1800 and the picture will be in mirror mode. After this mode is enabled, the picture will be in original image mode. Reverse Assist Lines: It is on by default. When the rear light is connected to the rear camera, the reverse guide line will be displayed automatically when reversing. Reverse Preview Settings: According to your car model, adjust up and down the reverse assist line display, click "back" to confirm and save the settings. The default setting of reverse image is on, and the reversing aid line is turned on by default (the front and rear direction is to adjust the extension or shortening of the reversing aid line, the size direction is to adjust its width, left and right and up and down are to adjust the direction of the reversing aid line.
Time Lapse
After this function is enabled, it will enter the time lapse mode immediately after exiting the Settings screen. Note: When this mode is turned on (The  icon appears in the lower right corner of the video; This icon will not appear when time lapse mode is off), all parking modes will be automatically turned off. Only after the time-lapse recording mode is turned off can the parking mode function be turned on again.

When the camera is turned on again, it will record in time lapse recording mode.
Connecting External GPS Receiver
- Install the GPS Antenna onto the camera, the GPS Antenna will start to search for GPS signal.


- After the GPS module is connected, a white GPS icon
![]() will be displayed at the bottom right corner of the screen when GPS is searching for signals.
will be displayed at the bottom right corner of the screen when GPS is searching for signals.

When GPS is enable, once the GPS signal has been received, the GPS red icon![]() will be displayed in the lower right corner of the screen.
will be displayed in the lower right corner of the screen.

 will be displayed at the bottom right corner of the screen when GPS is searching for signals.

- To track the Speed, Status, Direction, GPS Signal Strength, please go to GPS info on the Menu Setting.
- You can review recorded video with GPS info on your PC using the VANTRUEO GPS Viewer (available for download on www.vantrue.net).
Stamp
Stamp option will help you to select the stamping that you want to be done on your recorded video. Select the box against each option to activate the specific parameter to be stamped on your recorded video. The stamp is enabled by default, so the VANTRUE logo stamp/time and date/speed information stamp will be displayed in the video file. You can also go to 'Menu Settings"> "Stamps" to turn on or off these watermark stamp as needed.

Playback Video/Photos on the Camera
Playback Video/Photos
After stop recording, press File button  and go to View and Playback videos/Photos on the camera.


Video Playback
Click on the video file in the list to play it back, and you can choose to lock/delete/previous/fast forward/play/pause/rewind/next in the playback interface.

Note: Click the fast forward button once to speed up the playback speed by 2 times; click the rewind button once to speed up the rewind speed by 2 times.
View Photos

When viewing a photo, you can choose to view the previous or next picture lock or delete the picture.

Note: The locked video files and pictures will be moved to the event video folder.
Delete/Lock Files
Delete/Lock Normal Files- Go to Normal Video, on the video playing interface, click the Delete/Lock Option on the left of the screen, press OK to delete/Lock selected file.

Delete/Unlock Event Files - Go to Event video, on the video playback interface; click "Delete/Unlock Options" on the left side of the interface, and press "OK" to delete/unlock the selected files.

Delete Photo- Go to Photo, in the photo viewing page, click the Delete icon in the lower left corner, press OK to delete selected file.

On the file browsing interface, click the multiple selection  button to delete multiple files in batches.

Front Camera Installation
- Pull out front camera lens, attach upper side of the buckle to the camera

- Cover the OEM mirror, press the bandage to make it closer and attach another side of the buckle.

- Adjust the angle and done!


Note: Make sure that the camera's view is not obstructed by any window tint or any other objects
Rearview Camera Installation

- Fix camera with 3M adhesive
Find a best location, tear off the 3M adhesive on the rear camera, and fix the rear camera near by the car license plate lamp. (If you need to adjust the angle, please attach the rear camera bracket to the rear camera and tighten it with screws first)

- Remove the Panel
Remove your trunk's interior panel to expose the car's rear wiring chambers. Pop open your trunk and look for a solid interior panel covering the opposite side of your license plate mounting area. Then, insert a trim removal tool or other thin device behind the panel and pry it off

- Snake the cable
Use a trim removal tool to pop out tailgate trim, then runs the cable from the outside of the car into the trunk of your car.

- Connect the rear camera's power cable to the extension cable.
After snaking your rear camera's extension cable, connect the power cable to your rear camera's extension cord.

- Connecting the red wire with the reverse light wires.
Reverse light wires are normally located on the rear side of your car although their placement may vary so be sure to refer to your car's manual. Once spotted, use a pair of pliers or wire stripper to peel the rubber to expose the live wire. For safety, make sure you do this while the car is turned off. Lastly, please poke the red positive bare wire through the positive reverse light wire and then wrap with an electrical tape.

- Route your rear camera's power cable to the front of the car.
If you'd like, use a trim removal tool to pop out the headlining panel directly above your windshield. Then, run your cable through the exposed chamber.

- Power on the dash cam with box included car charger, don't charge it with your own chargers.

- Test the camera to make sure everything works.


Specification

Documents / Resources
References
Download manual
Here you can download full pdf version of manual, it may contain additional safety instructions, warranty information, FCC rules, etc.
Advertisement


Need help?
Do you have a question about the Mirror M2 and is the answer not in the manual?
Questions and answers