Advertisement
- 1 What is in the Box?
- 2 Controls & Functions
- 3 ALARM OPERATION (REMOTE CONTROL ONLY)
- 4 RADIO OPERATION
- 5 CD/MP3 CD OPERATION
- 6 DIFFERENT CD PLAY MODES (REMOTE CONTROL ONLY)
- 7 CD PLAYBACK PROGRAMMING
- 8 BLUETOOTH OPERATION
- 9 AUXILIARY INPUT OPERATION
- 10 PRESET EQ (REMOTE CONTROL ONLY)
- 11 MUTE
- 12 X-BASS BUTTON (REMOTE CONTROL ONLY)
- 13 SLEEP OPERATIONS (REMOTE CONTROL ONLY)
- 14 SNOOZE OPERATIONS (REMOTE CONTROL ONLY)
- 15 SPECIFICATIONS
- 16 Warranty + Support
- 17 Safety Information
- 18 Documents / Resources
Register your product for a FREE 3-Year Warranty at www.oakcastle.co.uk
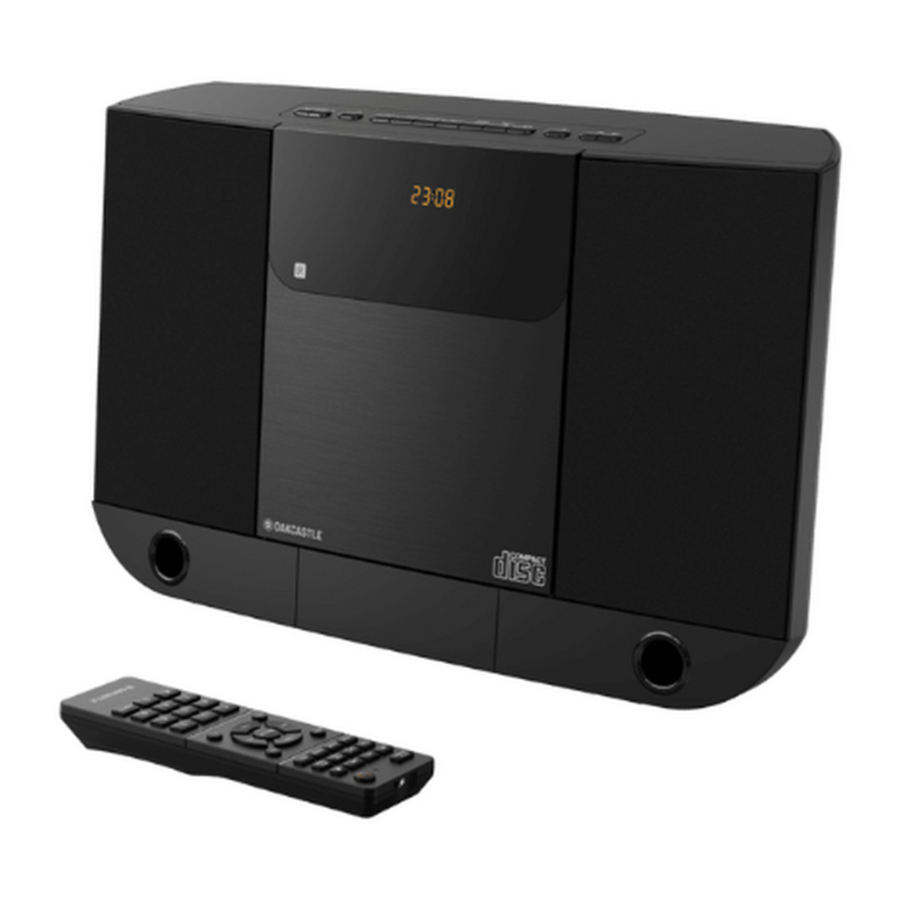
What is in the Box?
Oakcastle HIFI100
Power Adapter
Instructions Guide
Remote Control
Controls & Functions
Top View/Control Buttons

|
|
 POWER /STANDBY BUTTON
 BUTTON/ BLUETOOTH PAIR BUTTON
 BUTTON
 / FM TUNE- BUTTON
 / FM TUNE+ BUTTON
Front View

- RIGHT/LEFT SPEAKER
- REMOTE SENSOR
- LED DISPLAY
Remote Control

| 1. CD OPEN/CLOSE BUTTON | 14.  POWER /STANDBYBUTTON POWER /STANDBYBUTTON |
2. CD/BLUETOOTH SKIP PREVIOUS  BUTTON BUTTON | 15. CD/BLUETOOTH SKIP NEXT  BUTTON BUTTON |
3. PLAY/PAUSE  BUTTON BUTTON | 16. CD STOP  BUTTON BUTTON |
| 4. CD REPEAT BUTTON | 17. ALARM BUTTON |
| 5. CD RANDOM BUTTON | 18. BLUETOOTH PAIR BUTTON |
| 6. CLOCK BUTTON | 19. EQ BUTTON |
| 7. SLEEP BUTTON | 20. X-BASS BUTTON |
| 8. MODE BUTTON | 21. TUNER PRESET UP ( ) ) |
| 9. SNOOZE BUTTON | 22. TUNE+ BUTTON FOLDER UP BUTTON |
| 10. VOLUME DOWN (-) BUTTON | 23. VOLUME UP (+) BUTTON |
| 11. FM MONO/STEREO BUTTON | 24. TUNE- BUTTON FOLDER DOWN BUTTON |
| 12. CD TRACK DIRECT ACCESS BUTTON | 25. TUNER PRESET DOWN ( ) BUTTON ) BUTTON |
| 13. MUTE BUTTON | 26. MEMORY BUTTON |
GETTING STARTED
POWER SOURCE
This unit operates on AC 230V ~ 50Hz AC-DC adaptor household current and requires two "AAA" (UM-4) battery (included) for the remote control. Do not attempt to operate the unit from any other power source. You could cause damage to the unit and void your warranty.

AC Power Connection
Plug the AC/DC Adapter into an available 230V~ 50Hz AC Outlet. Make sure the plug is securely inserted into the AC outlet.
STANDBY MODE
Standby Mode is when the unit is first plugged into an AC power source (display flashes and shows 00:00) or after all the settings have been made and the time is showing on the display. Standby mode is also enabled when the button is pressed and all functions (Bluetooth/Radio/CD/AUX) are off, no buttons are pressed and no alarms are sounding.
TURNING THE UNIT POWER ON/OFF
The LED DISPLAY will flash 00:00 when the unit is plugged in for the first time.
The unit is now in standby mode. Turning the unit ON:
- In Off (standby) mode, press the
![]() POWER/ STANDBY BUTTON on top of the main unit or on the remote control to turn the unit ON. The last selected source icon will show on LED display.
POWER/ STANDBY BUTTON on top of the main unit or on the remote control to turn the unit ON. The last selected source icon will show on LED display.
Turning the unit OFF:
- To turn the unit OFF (standby mode), press the
![]() POWER/ STANDBY BUTTON on top of the main unit or on the remote control to turn the unit OFF. The LED display will dim and show the current time.
POWER/ STANDBY BUTTON on top of the main unit or on the remote control to turn the unit OFF. The LED display will dim and show the current time.
SETTING THE CLOCK
The LED DISPLAY will flash 00:00 when the unit is plugged in for the first time.
The unit is now in standby mode.
Setting the Time:
- In standby mode, press and hold the CLOCK button on the main unit or remote control, the unit defaults to 24 HOUR format and "24 H" shows on the display.
- Tap the
![]() or
or ![]() Button on either the main unit or remote control to change between 24 Hour mode "24-H" and 12 Hour mode "12-H" if needed.
Button on either the main unit or remote control to change between 24 Hour mode "24-H" and 12 Hour mode "12-H" if needed. - When "24H" is showing on the LED Display, press the CLOCK button on top of the main unit or remote control to select 24 Hour clock format. The LED display will change to the time and the Hour digit will begin flashing.
- Tap the
![]() or
or ![]() Bbutton on either the main unit or remote control to adjust the hour. Press and hold the
Bbutton on either the main unit or remote control to adjust the hour. Press and hold the ![]() or
or ![]() Bbuttons for fast advance / reverse setting. Make sure the correct AM or PM time is selected when setting the hour.
Bbuttons for fast advance / reverse setting. Make sure the correct AM or PM time is selected when setting the hour. - Press the CLOCK button to confirm the hour setting, the minute digits will begin flashing.
- Tap the
![]() or
or ![]() button on either the main unit or remote control to adjust the minutes. Press and hold the
button on either the main unit or remote control to adjust the minutes. Press and hold the ![]() or
or ![]() buttons for fast advance / reverse setting.
buttons for fast advance / reverse setting. - Press the CLOCK button to complete the time setting.
 or
or  Button on either the main unit or remote control to change between 24 Hour mode "24-H" and 12 Hour mode "12-H" if needed.
 NOTE: The clock will need to be reset if the power is interrupted or in the event of a power outage. "00:00" will appear and start blinking on the LED display to notify you that the power was interrupted and the clock will need to be reset.
Please follow steps 1-7 above to reset the clock.
CHECKING THE CLOCK (REMOTE CONTROL ONLY)
The unit will show current time in standby mode. To check the current time in Power ON mode, tap the CLOCK Button on remote control, the current time will show for 3 seconds and then return to the previous screen.
ALARM OPERATION (REMOTE CONTROL ONLY)
SETTING THE ALARM CLOCK
This feature allows the system to turn on automatically and wake you using a beeping alarm, the CD or the RADIO.
- In standby mode, press and hold the ALARM Button
![]() on remote control, hour digits of alarm clock start flashing. You can also tap the ALARM Button
on remote control, hour digits of alarm clock start flashing. You can also tap the ALARM Button ![]() to direct enter alarm time setting mode without waiting.
to direct enter alarm time setting mode without waiting. - Press the
![]() button to set the hour and then press the ALARM
button to set the hour and then press the ALARM ![]() Button again to confirm, minute digits will be flashing.
Button again to confirm, minute digits will be flashing.
 button to set the hour and then press the ALARM
 Note: The PM INDICATOR "P" will light located to the right of the Hour digits when the hour digits selected are for PM time.
The AM INDICATOR "A" will light when the Hour digits selected are for AM time.
- Press the
![]() button to set the minute and then press the ALARM Button
button to set the minute and then press the ALARM Button ![]() again to confirm, alarm wake up source will appear in display.
again to confirm, alarm wake up source will appear in display. - Press the
![]() button to select wake to Beep (buzz), CD or and FM (RADIO) then press the ALARM button again to finish alarm setup.
button to select wake to Beep (buzz), CD or and FM (RADIO) then press the ALARM button again to finish alarm setup.
NOTE:
- If "Wake to CD" is selected but a CD is not inserted, the alarm will default to the Beeping Alarm automatically when the alarm wake time is reached.
- For 'Wake to Radio", the system will default to the last radio station listened to before switching off.
ACTIVE/DE-ACTIVE ALARM FUNCTION
- To activate ALARM, tap the "ALARM" Button
![]() once, the alarm icon "
once, the alarm icon "![]() " will shown on LED display.
" will shown on LED display. - To cancel ALARM function by tap again the "ALARM" Button
![]() until the alarm icon "
until the alarm icon "![]() " goes off.
" goes off.
Wake to Radio, CD or Beeping Alarm
- When the alarm time is reached, the CD, radio or beeping alarm will sound for the time you set then shut off and reset itself for the following day.
- To stop the alarm immediately after it sounds, press the
![]() button on main or remote control once. It resets itself for the following day.
button on main or remote control once. It resets itself for the following day. - To cancel the following day alarm, tap the ALARM Button once, ALARM icon"
![]() " goes off.
" goes off.
RADIO OPERATION
- In Off (standby) mode, press the POWER/ STANDBY BUTTON
![]() on top of the main unit or on the remote control to turn the unit ON.
on top of the main unit or on the remote control to turn the unit ON. - Tap the MODE Button to select FM Radio mode. The FM channel frequency shown on the LED Display to confirm what mode you are in.
- To manually tune to a specific radio station, tap the
![]() or
or ![]() button on either main unit or TUNE+ or TUNE- button on remote control repeatedly. Use the manual tuning method to tune in weaker stations that are bypassed during Automatic Tuning.
button on either main unit or TUNE+ or TUNE- button on remote control repeatedly. Use the manual tuning method to tune in weaker stations that are bypassed during Automatic Tuning. - To automatically tune to the next available radio station, press and hold the
![]() or
or ![]() button on main unit or TUNE+ or TUNE- Button on remote control for 1-2 seconds until frequency readout on the display begins to scan and then release the button. The tuner will stop scanning when it receives the next broadcasting station of adequate signal strength.
button on main unit or TUNE+ or TUNE- Button on remote control for 1-2 seconds until frequency readout on the display begins to scan and then release the button. The tuner will stop scanning when it receives the next broadcasting station of adequate signal strength. - Press the volume control VOLUME+/– button on main unit or remote control to adjust the volume to the desired level.
FM & FM-Stereo Reception
- When listening to the FM radio, press the FM ST. button on remote control or main unit to switch between stereo mode and mono mode. The FM stereo icon "ST" will appear on the display if unit is in stereo mode. It is preferable to receive the program in mono when you are receiving a weak station.
HINTS FOR BEST RECEPTION:
FM - For best FM reception, the FM lead wire antenna located on the back of the unit should be fully unwrapped and extended.
NOTE: Automatic tuning depends on the signal strength of the broadcasting station, so weak stations may be skipped. You can manually tune to find the weak stations if a station gets skipped. With strong signals, the tuner may stop before it reaches the actual broadcast frequency, so you may need to manually tune for the best reception.
PRESET RADIO STATIONS
- Press the POWER/ STANDBY
![]() BUTTON on top of the main unit or on the remote control to turn on the unit.
BUTTON on top of the main unit or on the remote control to turn on the unit. - If it is not in FM radio mode, tap the MODE Button to select FM radio mode.
- Tune to the desired radio station either by "manually" or "automatically" tuning method.
- Press and hold the PRESET/MEMORY Button on main unit or tap MEMORY Button on remote control, display will show memory preset number "P01" flashing and memory icon "PROG" showing in the LED display.
- Tap the P+ or P- Button on remote control to select the preset number you want to assign the station to.
- Tap the MEMORY Button on remote control to confirm the setting.
- Repeat above steps 4 - 6 to preset up to 30 FM stations.
RECALLING PRESET MEMORY CHANNELS
In radio mode, to recall the pre-set channels by
- Pressing the PRESET/MEMORY BUTTON on main unit, then tape the
![]() or
or ![]() Button repeatedly to select the preset radio station you want.
Button repeatedly to select the preset radio station you want. - Pressing P+ or P- Button on remote control repeatedly to select directly.
CD/MP3 CD OPERATION
PLAYING A CD
- In Off (standby) mode, press the POWER/ STANDBY
![]() BUTTON on top of the main unit or on the remote control to turn the unit ON.
BUTTON on top of the main unit or on the remote control to turn the unit ON. - Tap the MODE Button to select CD mode.
- Press the open/close button on remote control or
![]() button on top of the main unit to open the disc tray.
button on top of the main unit to open the disc tray. - Place the CD with the label side up into the CD compartment, and then press the open/close button to close the disc tray.
- Unit starts to read the disc, "READING" shows in display. After few seconds, the total number of tracks show one second.
- PLAY indicator
![]() shows in display, the CD will start playing from first track.
shows in display, the CD will start playing from first track. - Press the volume control VOLUME+/- Button on main unit or remote control to adjust to the desired volume level.
- To pause playback, press the PLAY/PAUSE
![]() Button on main unit orremote control. The elapsed timer will be paused and the pause icon will be shown on the display. To resume playing, press the CD PLAY/PAUSE
Button on main unit orremote control. The elapsed timer will be paused and the pause icon will be shown on the display. To resume playing, press the CD PLAY/PAUSE ![]() Button again.
Button again. - You can choose to play your favorite track directly by pressing either the SKIP NEXT
![]() Button or SKIP PREVIOUS
Button or SKIP PREVIOUS ![]() Button. The LED Display will indicate the correct track number selected.
Button. The LED Display will indicate the correct track number selected. - To locate a particular section within a track, press and hold the
![]() or
or ![]() Button until the section is found. Release the button to continue playing your selection.
Button until the section is found. Release the button to continue playing your selection. - To stop playing, press the STOP
![]() Button.
Button.
 Button or SKIP PREVIOUS
  Button. The LED Display will indicate the correct track number selected.
SKIP AND SEARCH MODE
- During Play or Pause mode, tap the SKIP NEXT
![]() or SKIP PREVIOUS
or SKIP PREVIOUS ![]() Button to go to the next track or go back to the beginning of the current track.
Button to go to the next track or go back to the beginning of the current track. - During playback, press and hold the
![]() or
or ![]() Button to search within the current track with audible high speed playback.
Button to search within the current track with audible high speed playback.
FOLDER SELECTION
If you are playing an MP3 CD, press the FOLDER  or
or  on remote control to select MP3 songs store in different folders.
CD/MP3 TRACK DIRECT ACCESS BUTTON (CD MODE ONLY)
By using the direct track access button, the desired track number on the current disc can be played.
- In CD play or pause mode, press the direct access button on the remote control to select the desired track, the number you pressed will show on LED display for 2 seconds and then changed to show track number and start to play automatically.
- The direct access button allows you to select up to track number 9 by one press. To select track number 10 or higher, use two or three buttons method.
For example, to choose track 13 in the disc,
- Press the "1" button once.
- Press the "3" button within 2 seconds.
To choose track 130 in the disc,
- Press the "1" button once.
- And then press the "3" button.
- Finally press the "0" button. All 3 buttons must be pressed within 2 seconds.
![]()

Notes:
- A track number higher than the number of tracks on the disc cannot be selected.
- Direct access function is not available in Random Play Mode and CD Stop Mode.
DIFFERENT CD PLAY MODES (REMOTE CONTROL ONLY)
Press the REPEAT Button on remote control repeatedly to select different play modes when CD or MP3 CD is playing.
Repeat Playing
During playback press the REPEAT ![]() button once the display shows flashing "
button once the display shows flashing " ![]() ". This is Repeat One mode. The current track will be played repeatedly.
". This is Repeat One mode. The current track will be played repeatedly.
Press the REPEAT ![]() button again the display shows "
button again the display shows " ![]() " without flashing. This is Repeat All mode. All tracks will be played repeatedly. Press the REPEAT
" without flashing. This is Repeat All mode. All tracks will be played repeatedly. Press the REPEAT ![]() button again to resume normal playback.
button again to resume normal playback.
REPEAT FOLDER- Folder tracks will repeat continuously. Repeat Folder ![]() icon FOLDER shows in display.
icon FOLDER shows in display.
Random Play
During playback press the RANDOM ![]() button to play music in random order. The display will show "RAN". Press the RANDOM
button to play music in random order. The display will show "RAN". Press the RANDOM ![]() button again to resume normal playback.
button again to resume normal playback.
CD PLAYBACK PROGRAMMING
This function allows the tracks to be played in a programmed sequence.
NOTE: Program can only be set in STOP mode.
- Tap the PRESET/MEMORY Button on main unit or MEMORY Button on remote control, display will show program track number "P01" and memory icon "PROG" will be flashing in the LED display.
- Use the
![]() or
or ![]() Button on main unit or remote control to select the desired track. The track number will be shown in display.
Button on main unit or remote control to select the desired track. The track number will be shown in display. - Tap the PRESET/MEMORY Button on main unit or MEMORY Button on remote control to store the selected track in the memory, the next program number will advance one (i.e."P02") in LED display.
- Repeat steps 2 to 3 to store more tracks in the memory. You can store up to 32 tracks. Display will show "FULL" after 32 tracks have been programmed.
- Tap the
![]() Button on main unit or remote control to start playing the CD or MP3 CD in the programmed sequence.
Button on main unit or remote control to start playing the CD or MP3 CD in the programmed sequence. - Press the REPEAT Button
![]() on remote control to select Repeat 1/All if necessary.
on remote control to select Repeat 1/All if necessary. - To stop playing, press the STOP Button
![]() on main unit or remote control.
on main unit or remote control. - To cancel the program play, press the STOP Button
![]() on main unit or remote control twice, "PROG" icon disappears from display.
on main unit or remote control twice, "PROG" icon disappears from display.
BLUETOOTH OPERATION
In Off (standby) mode, press the POWER/ STANDBY BUTTON on top of the main unit or on the remote control to turn the unit ON and follow the directions below to connect via Bluetooth.
PAIRING (Linking) a BLUETOOTH ENABLED cell phone OR OTHER BLUETOOTH ENABLED DEVICE to the Oakcastle HIFI100
The never been paired with a Bluetooth device before, you need to follow the pairing instructions below to link the with your Bluetooth device.
- In Off (standby) mode, press the POWER/ STANDBY BUTTON
![]() on top of the main unit or on the remote control to turn the unit ON.
on top of the main unit or on the remote control to turn the unit ON. - Tap the MODE Button to select Bluetooth mode, "PAIRING" message running in LED display is in search mode
- If the HIFI100 has never been paired with a Bluetooth device before or cannot find the last paired device, the running message "PAIRING" on LED will indicate the search mode. You need to follow the pairing instructions below to link your Bluetooth device.
- Turn on the Bluetooth function of your Bluetooth device and enable the search or scan function to find the Oakcastle HIFI100.
- Select " Oakcastle HIFI100 " from the device list when it appears on your device screen. If required, enter the pass code "0000" to pair (link) the your device.
- After successfully pairing (linking), display will change to show "BT AUDIO" steadily, the Bluetooth icon also will show in display. You can begin playing steadily. You can begin playing music from your Bluetooth device music from your Bluetooth device wirelessly to the speaker. wirelessly to the speaker.
- After selecting your favourite song, press PLAY/PAUSE Button
![]() on the unit or remote control to play or pause the song.
on the unit or remote control to play or pause the song. - Press the volume control on main unit or remote control to adjust to the desired volume level.
- Press
![]() or
or ![]() Button on main unit or remote control to skip to previous or next song.
Button on main unit or remote control to skip to previous or next song. - If you want to pair another Bluetooth enabled device, press and hold If you want to pair another Bluetooth enabled device, press and hold the the PAIR Button for 2 seconds or turn off the Bluetooth function of device BT PAIR Button on remote control or PAIRING button on main unit for 2 currently paired the repeat step 3 above.seconds or turn off the Bluetooth function of device currently paired then repeat step 3 above.
 or
or  Button on main unit or remote control to skip to previous or next song.
AUXILIARY INPUT OPERATION
This unit features an auxiliary audio signal input jack for connecting external audio devices like MP3 players, Digital Audio Device and listen to them through the speakers of this unit.
- Use an audio cable (not included) with one 3.5 mm stereo plug on each end of the cable.
- Plug one end into the AUDIO IN JACK on main unit and the other end of the cable into the Line-out Jack or Headphone Jack of your external audio device.
- Turn on the unit and external audio device.
- Tap the MODE Button to select AUX mode, "AUDIO IN" icon turns on, display shows the current time.
- The volume level can now be controlled through the main unit.
Operate all other functions on the auxiliary device as usual.
PRESET EQ (REMOTE CONTROL ONLY)
This unit provides 4 different EQ modes to enhance your listening experience. You can select the desired effect by pressing the EQ Button on remote control repeatedly at following sequence

MUTE
- Press the MUTE Button on remote control to mute the sound output fromthe speaker temporarily.
- Press the MUTE Button again or VOLUME+/- Button to resume to normal speaker playback.
X-BASS BUTTON (REMOTE CONTROL ONLY)
Press the X-BASS button on remote control if you want to enhance the bass when listening to the system, "X-BASS" icon will appear in display. Press the button again to turn off extra bass effect; "X-BASS" icon will disappear in display.
SLEEP OPERATIONS (REMOTE CONTROL ONLY)
The sleep timer allows you to turn the unit off after a designated time is reached.
- To activate the sleep timer, turn the unit on and tap the MODE button to select FM Radio, CD, Bluetooth or listening to music via AUDIO IN
- Tap the SLEEP button on remote control, the sleep time icon
![]() appears on the display.
appears on the display. - Repeatedly tap the SLEEP button to select a sleep time. The unit will turn off after 10, 20, 30, 40, 50, 60, 70, 80 or 90 minutes. Wait for 5 seconds after your selection for the unit to confirm the selection, the unit will play for the selected length of time then automatically turn off.
- To cancel the sleep timer, tap the SLEEP button repeatedly until timer shows "00", the sleep time icon disappears on the display.
- To turn the unit off before the selected length of time, press the STANDBY
![]() button at any time.
button at any time.
Notes:
- To check the remaining sleep time, tap the SLEEP button once.
- If you are falling asleep to music from an external device connected to the AUX input, the sleep timer will shut off the power to this system but it will not turn off the external device.
SNOOZE OPERATIONS (REMOTE CONTROL ONLY)
SNOOZE FUNCTION
- Should you wish to delay the alarm for 9 minutes you can activate the SNOOZE function.
- When the alarm sounds, press the SNOOZE button to delay the alarm for 9 minutes.
- After alarm off, the SNOOZE function will no longer operate.
SPECIFICATIONS
CD Play:
Type: Single disc multi-play compact disc player
Signal readout: Non-contact, 3-beam semiconductor laser pickup
D/A converter: Multi bit D/A converter
Frequency response: 20 - 20,000 Hz
Support Disc: CD, CD-RW,CD-DA,CD-MP3,CD-WMA
Bitrate support: MP3 (32 ~ 320 kbps) WMA (64 ~ 160 kbps)
Power requirement:
| Power | AC Adaptor: Input AC 230V ~ Output: DC 9V  2.5A 2.5A  |
| Remote control: | 2 x AAA (UM-4) Batteries |
| Frequency Range Bluetooth: | FM 87.5 ~ 108 MHz Version 5.0 |
Warranty + Support
All products come with a standard 12 month warranty. All items must be registered on www.oakcastle.co.uk for the warranty to be valid. Once on the web page, use the menu to find "Register Your Product". You will also be given the chance to extend your warranty for an additional 24 months, free of charge. If you require further assistance with your new radio, please contact our support team at info@oakcastle.co.uk
Safety Information
- Read these instructions.
- Keep these instructions. Instructions are alsoavailable for download at www.oakcastle.co.uk
- Heed all Warnings.
- Follow all instructions.
- Do not clean the apparatus near or with water
- Do not block any ventilation openings. Install in accordance with the manufacturer's instructions
- Do not install near any heat sources such as radiators, heat registers, stoves, or other apparatus (including amplifiers) that produce heat.
- Protect the power from being walked on or pinchedparticularly at plugs, convenience receptacles, and the point where they exit from the apparatus.
- Only use attachments/accessories specified by themanufacturer.
- Unplug this apparatus during light storms or whenunused for long periods of time.
- Refer all servicing to qualified service personnel. Servicing is required when the apparatus has been damaged in a way, such as power-supply cord or plug is damaged, liquid has been spilled or objects have fallen into the apparatus, the apparatus has been exposed to the rain or moisture, does not operate normally or has been dropped.
- No naked flame sources, such as lit candles, shouldbe placed on the apparatus.
- Dispose of used electrical products and batteriessafely according to your local authority and regulations.
 |
| RISK OF ELECTRIC SHOCK DO NOT OPEN |
ADDITIONAL WARNINGS
The apparatus shall not be exposed to dripping or splashing and no objects filled with liquid, such as vases, shall be places on the apparatus. Main plug is used to disconnect device and it should remain readily operable during intended use. In order to disconnect the apparatus from the main mains completely, the mains plug should be disconnected from the main socket outlet completely. Battery shall not be exposed to excessive heat such as sunshine, fire or the like.

Please read all instructions carefully before use and keep for future reference.
 Risk of electric shock. Do not open
 Read all instructions carefully before use and keep for future reference
![]() When servicing, use only identical replacement parts
When servicing, use only identical replacement parts
Please read all instructions carefully ! before use and keep for future reference
Documents / Resources
References
Download manual
Here you can download full pdf version of manual, it may contain additional safety instructions, warranty information, FCC rules, etc.
Advertisement


Need help?
Do you have a question about the Oakcastle HIFI100 and is the answer not in the manual?
Questions and answers