MAJORITY Oakington Instruction Manual
Compact music system
Hide thumbs
Also See for Oakington:
- Instruction manual (38 pages) ,
- Instruction manual (32 pages) ,
- User manual
Table of Contents
Advertisement
Advertisement
Table of Contents

Related Manuals for MAJORITY Oakington


Summary of Contents for MAJORITY Oakington
- Page 1 OAKINGTON COMPACT MUSIC SYSTEM OAK-CDAB-WAL Instructions Guide...
-
Page 2: Table Of Contents
Contents Controls And Functions ���������������������������������������������� Fron What’s In The Box? ��������������������������������������������������� Support ��������������������������������������������������������������������� Instructions Guide ���������������������������������������������������� Basic Operation �������������������������������������������������������� DAB/DAB+ Radio ������������������������������������������������������ DAB/DAB+ Settings ��������������������������������������������������� FM Radio ������������������������������������������������������������������ FM Radio Settings ���������������������������������������������������� Connecting to a TV/Music System ��������������������������� CD Functions ������������������������������������������������������������ Bluetooth and Phone Connection ���������������������������... -
Page 3: Controls And Functions
Controls And Functions ����� Front View ���� ����� ���� ����� ���� ����� ���� ���� ���� ���� ���� ���� ���� ���� ��� Remote Sensor Mode ��� Display Screen Power/Standby ��� Standby Indicator Play/Pause/Menu ��� Disc Port 10. Equaliser Previous 11. Info Next 12. - Page 4 Controls And Functions Rear View 13. Navigate - Rotate to move up or down the menu screen 14. A when in DAB or FM. 15. 5 OK: Press to skip to subsequent menu in DAB or FM. Volume +/- Rotate to increase or decrease the volume level. 16.
- Page 5 Controls And Functions Bottom View 14. Antenna 17. USB Input 15. 5V 1A Port for charging 18. Earphone Jack Mobile Device 19. Power Switch evel. 16. Audio Input 20. AC Power Connector...
- Page 6 Controls And Functions Remote Control 1. ON/STANDBY 16. EJE 2. MODE (CD/USB/Radio/BT) 17. AU 3. INTRO/AMS (Automatic Music Scan) 18. SLE Press to scan all tracks in CD or USB 19. RA Press to automatically search for a 20. TR channel in FM.
- Page 7 Controls And Functions 16. EJECT - Press to put disc in or out 17. AUDIO - Press Audio/CD/USB/DAB/FM/ BT (Bluetooth Connection) 18. SLEEP - Press to set the sleep timer 19. RANDOM - Press to play tracks randomly in CD or USB. 20.
-
Page 8: What's In The Box
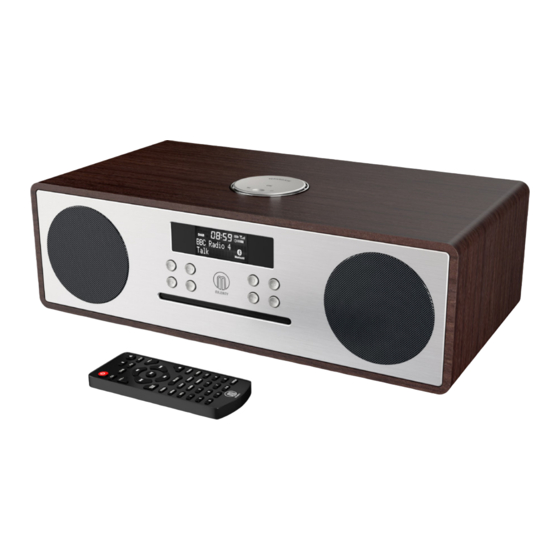
What’s In The Box? Box Contents Supp 1. Majority Oakington DAB/DAB+ and CD Music System Thank 2. Remote Control Pleas 3. UK Standard Power Adapter system 4. User Guide If you pleas https... -
Page 9: Support
Support Support Thank you for your purchase of the Majority Oakington. Please follow the guidance of the manual to set up your music system and enjoy its fantastic variety of stations and features. If you require further assistance with your new radio, please contact our support team on the Majority website: https://www.majorityradios.co.uk/support/... -
Page 10: Instructions Guide
Instructions Guide Basic Operation Stand Please note all (Ref.) refer to Page 1 Controls and Functions mapping guide. To pu butto Plug the connector into the back of the system labelled AC- (Ref.19) and the power supply into the mains. remo Ensure the antenna (Ref.20) is extended as far as possible so that To tur... - Page 11 Instructions Guide Standby To put the music system in standby, press the ‘Power/Standby’ button (Ref.8) or the ‘ON/STANDBY’ button (Rem.1) on the remote. To turn off fully, switch it off at the mains. The cord must be out of reach of children. Language Setting The default display language is English.
-
Page 12: Dab/Dab+ Radio
Instructions Guide DAB/DAB+ Radio Press the ‘Mode’ button (Ref.7) multiple times on the unit to Prun switch to DAB/DAB+ Radio. To select the mode from the remote To rem press the ‘FM/DAB’ button (Rem.2). turn o On first use when DAB Radio is activated for the first time the To do display will show “Full Scan”, press the ‘OK’... -
Page 13: Dab/Dab+ Settings
Instructions Guide DAB/DAB+ Settings Prune mote To remove stations that are listed but are unavailable, you can turn on the ‘Prune’ setting. To do this, press the ‘Menu’ button (Rem.8) on the remote and use the ‘Next’ (Rem.23) and ‘Previous’ buttons (Rem.10) to scroll through options. - Page 14 Instructions Guide DAB+ Manual Tuning As well as an auto tune function, you can manually tune the Up to receiver. This can help you when aligning your aerial or when easy n adding stations that were missed while auto tuning. you w Press the ‘Menu’...
- Page 15 Instructions Guide DAB/DAB+ Presets How to store a preset station Up to 40 stations can be set as your preset favourite stations for easy navigation. It is advisable to be listening to the station that you wish to preset. Next’ Begin by pressing and holding the ‘Program’...
- Page 16 Instructions Guide Station Information for DAB/DAB+ Radio FM R Press the ‘Info’ button on the remote (Rem.14) repeatedly to Press choo show the different programme information. The fi Bit Rate: The data rate which the signal is being transmitted. MHz” Bit Error Rate (BER): Provide details of the signal error rate.
-
Page 17: Fm Radio
Instructions Guide FM Radio Press the ‘Mode’ button (Ref.7) multiple times on the unit to choose ‘FM’ , or press the ‘FM/DAB’ button (Rem.2)on the remote. The first time you switch to FM mode, the FM frequency “87.5 MHz” will be displayed on the screen. Fully extend the antenna (Ref.20). -
Page 18: Fm Radio Settings
Instructions Guide FM Radio Settings FM R FM Scan Setting Choose between scanning strong and weak signals (All) or only Up to the stations with strong signal (Only). easy n wish Press the ‘Menu’ button (Rem.8) on the remote. To make your choice, use the ‘Previous/Next’... - Page 19 Instructions Guide FM Radio Presets How to store a preset station only Up to 40 stations can be set as your preset favourite stations for easy navigation. You must be listening to the station that you wish to preset. Press and hold ‘Program’ button (Rem.20) on the remote for 3 to 5 seconds.
- Page 20 Instructions Guide Station Information for FM Radio Press the ‘Info’ button on the remote (Rem.14) repeatedly to show the different programme information. Signal Strength: Displays a signal bar with the strength of the current station. Time and Date: Displays the time and the date. Frequency: Displays the station’s transmission frequency.
-
Page 21: Connecting To A Tv/Music System
Instructions Guide Connecting to a TV/Music System AUDIO To connect the Music System/TV outputs to analogue inputs from the sound board, use the 3.5mm RCA audio cable (supplied) to connect the Music System/TV outputs with the AUDIO AUX (L/R) input socket from the sound board. - Page 22 Instructions Guide Analogue Inputs Connection CD P Please To ch repet AUDIO press Insert CD w Press on th Press butto Press Use a line-in audio cable 3.5mm (not supplied) to connect to the forwa Music System/TV outputs with the AUDIO input socket from the sound board.
- Page 23 Instructions Guide CD Playback Please note all (Ref.) refer to Page 1 Controls and Functions mapping guide. To choose CD Mode, press the ‘Mode’ button on the unit (Ref.7) repetedly until CD mode displays on the screen. Alteratively, press the ‘CD’ button on the remote (Rem.2). Insert the CD into the CD port at the front of the unit (Ref.4).
-
Page 24: Cd Functions
Instructions Guide CD Functions To ch Playing Repeatedly ‘Mod For CDs, press the ‘REPEAT’ button (Rem.4) on the remote multiple times to view options: Repeat All (ALL), Current Track contr (SINGLE) or Repeat Off (OFF). Remain on the option you would scree like to save, and it will store this setting automatically in a few seconds. -
Page 25: Bluetooth And Phone Connection
‘Mode’ button on the unit (Ref.7) or select ‘BT’ on the remote control (Rem.2). The choices will be displayed on the front screen (Ref.2). Turn on Bluetooth on your phone and “Majority Oakington” will appear. Click on this to connect. When the unit makes a short sound, it has successfully connected. -
Page 26: Aux-In
Instructions Guide AUX-In USB C AUX Audio-In To ch You can connect your phone or tablet with an Aux 3.5mm powe cable that connects to the Audio-in jack on the back of the unit your d (Ref.15). will st Insert the audio cable. To choose AUX mode, press the ‘Mode’ button (Ref.7) repeatedly on the unit until ‘AUX’... -
Page 27: Usb
Instructions Guide USB Charging To charge your device via the USB port, simply insert a USB power cable into the USB charging port (Ref.14) and connect to unit your device. Remain on the option you would like to save, and it will store this setting automatically in a few seconds. -
Page 28: Settings
Settings Settings: Time and Date Manually Setting the Time and Date The time will automatically update after the first use of DAB Radio. However, you can still set the time manually as follows. Ensure the unit is in standby. Press and hold the ‘Clock’ button (Rem.26) on the remote for a few seconds. - Page 29 Settings Settings: Alarm or Timer Option In Standby, a timer can be set to automatically turn on and off at certain times and can also be used as an alarm. Press and hold the ‘Timer’ button (Rem.28) on the remote control. The options available will flash on the display.
- Page 30 Settings Settings: Sleep Timer Setti This enables you to programme the radio to switch off at a specific time, up to 120 minutes from activation. In working mode, press and hold the ‘Sleep’ button (Rem.16) on the remote control. Choose from: Off/15mins/30mins/60mins/90mins or 120mins by pressing the ‘Sleep’...
- Page 31 Settings Settings: Additional Functions System Reset Press the ‘Menu’ button (Rem.8) on the remote control. 6) on Use the ‘Previous’ or ‘Next’ buttons (Rem. ) to scroll to 10/23 “System” and press the ‘Enter’ button (Rem ) on the remote control.
-
Page 32: Troubleshooting
Troubleshooting Spec Observation Potential Cause/Solution No sound The station is not tuned in. Fine tune the station. The volume Powe is set to a low position. Increase the volume. Headphones may be connected. Disconnect the headphones. Buttons are not Turn off the unit and turn on after a few seconds. Please also Mode working try unplugging/replugging the radio. -
Page 33: Specifications
Specifications Specifications lume AC 200-240V 50/60Hz Power Supply FM(87.5MHz - 108MHz DAB / DAB+ 174-240MHz also Modes Bluetooth it to a 3.5mm Earphone Jack Output Connector Dimension (WxHxD) 40 x 13 x 20 cm Net Weight 1.5kg Warranty y to All products come with a standard 12 month warranty. -
Page 34: Safety Information
Safety Information 1. Read these instructions. ADDITIONAL WARNINGS 2. Keep these instructions. Instructions are also The apparatus shall not be exposed to dripping or available for download at www.majorityradios.co.uk splashing and no objects filled with liquid, such as 3. Heed all Warnings vases, shall be places on the apparatus. - Page 35 g or h as hould n order ected such as oods and should old waste. ility for ully...
- Page 36 www.majorityradios.co.uk...
Need help?
Do you have a question about the Oakington and is the answer not in the manual?
Questions and answers
Static on radio, tried resetting and moving around the house still no better
To fix static on the MAJORITY Oakington radio after resetting and moving it:
1. Adjust the aerial for better signal reception.
2. Move the unit to a location with a stronger signal.
3. For DAB mode, perform a re-scan of stations.
4. For FM mode, fine-tune the station if needed.
These steps help improve reception and reduce static.
This answer is automatically generated
I want to change a radio station without a remote, but the previous/ next buttons just say preset empty on the radio. I am sure I did it like this before as the remote doesn't work.
To change the radio station on a MAJORITY Oakington without using the remote, use the buttons on the front of the unit (Ref.5 and Ref.6) to cycle through available stations. If the preset stations are empty, you must manually tune to a station first. Use Manual Tune mode to find and store stations by aligning the aerial and using the unit's controls to navigate through channels. Once stations are stored, you can select them using the front panel buttons.
This answer is automatically generated