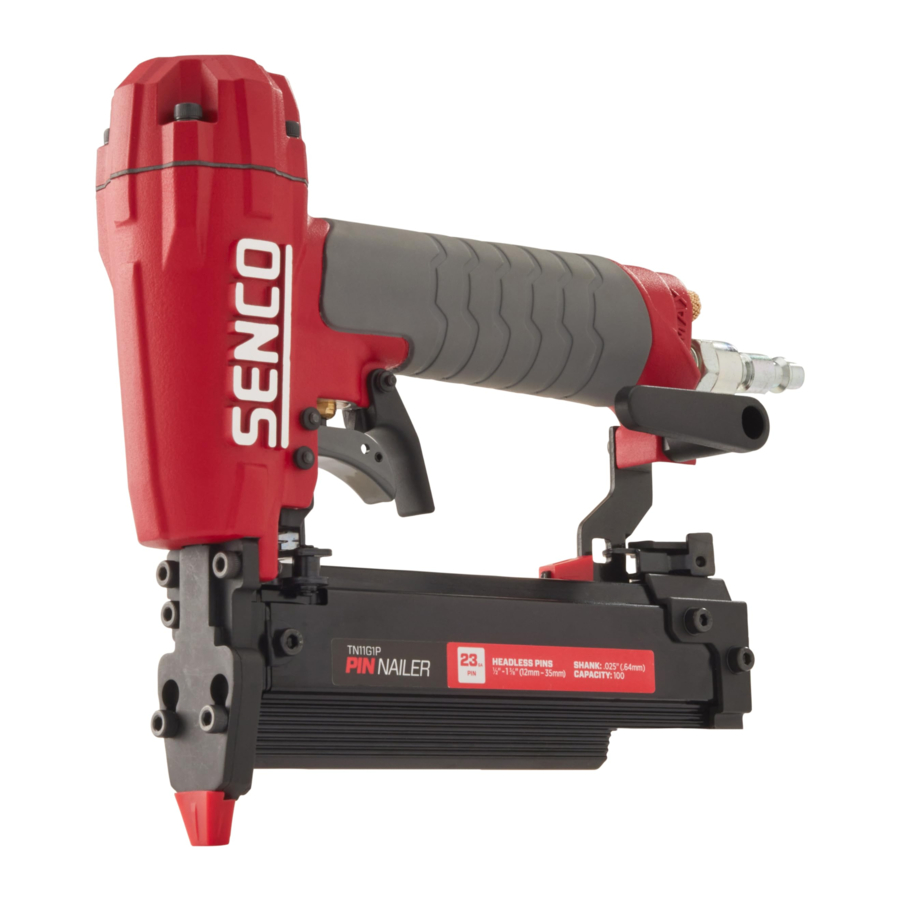
Senco TN11G1P - 23 Gauge Pin Nailer Manual
- Operating instructions manual (12 pages)
Advertisement
EMPLOYER'S RESPONSIBILITIES
Keep this manual available for use by all people assigned to the use of this tool.
Employer must enforce compliance with the safety warnings and all other instructions which accompany this tool as shipped from the manufacturer.
Tool actuation system must be appropriate taking into consideration the work application.
The operator must be trained in the safe use of the tool described in the operating safety manual.
Only persons who have read and understand the tool operating safety instructions shall operate the tool.
SAFETY WARNINGS

Read and understand tool labels and manual. Failure to follow warnings will result in DEATH or SERIOUS INJURY. Save These Instructions.

Personal Protective equipment
Use safety equipment. Always wear ANSI Z87+ safety glasses with permanently attached side shields. Dust mask, non-skid safety shoes, hard hat, or hearing protection must be used for appropriate conditions. Failure to do so could result in personal injury. Eye protection equipment must be worn by the operator and other people in the work area. Employer is responsible to enforce the use of personal protective equipment by the tool operator and all other personnel in the work area. Eye protection shall conform to the requirements of ANSI Z87+ and shall provide protection against flying particles both from front and side. Hearing protection shall have Noise Reduction Rating determined in accordance with US Environmental Protection Agency Rules that is appropriate for the noise exposure. Head protection shall conform to ANSI Z89.1.

 Explosion Hazard
Never use tool in an explosive atmosphere or in the presence of combustible materials such as flammable liquids, gases or dust.
Hazardous
Never use oxygen, carbon dioxide or any other bottled gas as a power source for this tool; the tool will explode and cause serious injury. Hazardous power sources shall not be used. Explosion may occur. Hazardous power sources include, but are not limited to:

- Reactive gases including, but not limited to oxygen and combustible gases.
- Pressure sources that can deliver in excess of 1.5 times the maximum air pressure of a tool or 200 psig (13.8 bar), whichever is greater, if a regulator fails.
Triggering Systems
Always select an actuation system that is appropriate for the fastener application and training of tool operator. Contact Senco at www.senco.com for information on actuation system options.
Tools are manufactured with a variety of triggering systems based on tool application, fastener size and operator preference. Please read the operating instructions so that you are familiar with the operation of each type of triggering system.
- A sequential actuation mechanism is preferred when exact fastener placement is desired or the employer / operator prefer that the tool be reset for each fastener drive. The operating controls must be activated in a specific sequence to activate the tool. If the tool has a trigger and workpiece contact, the workpiece contact must be activated before the trigger for the tool to operate. This type trigger is easily identified in your Senco tool by a GREY trigger.
- A contact actuation mechanism is an option when rapid fastener placement is desired. This actuation system can be activated in any sequence. Additional activations can occur when any operating control is released and re-activated. This type trigger is easily identified in your Senco tool by a BLACK trigger.
- Some tools have a selectable trigger option built into the triggering mechanism. These tools can be switched between sequential operation and contact actuation by moving a button, lever or switch. See operator manual to determine if this selectable trigger is provided in your fastener driving tool. This type trigger is easily identified in your Senco tool by a RED trigger or BLACK trigger with RED switch.
- Light duty tools may have only a finger trigger and do not require a work contact element. These tools are used in specialty applications and are typically used in industrial applications.
- Light duty tools may have a dual action trigger. The two - stage trigger must be actuated in a sequence in order to drive a fastener. This type tool does not require a work contact element and is used for specialty applications.
- Some special application tools utilize a retracted workpiece contact mechanism. These tools are used for attaching straps to plates through pre-punched holes.
*Trigger color designation does not apply to metal connector.
It is recommended that operators that are less experienced using pneumatic fastener driving tools choose a sequential mechanism until they become familiar with the tool and its operation.
Please call Senco Customer Service to obtain an alternate trigger type in those tools that can be user modified to fit the application and/or level of operator experience.
Personal Safety
Always remove finger from trigger when not driving fasteners. Never carry the tool with finger on or under trigger. Tool will eject a fastener if the safety element is bumped.
Do not actuate tool unless tool is placed firmly against the work surface.
Before operating, inspect tool to confirm:
- Use of proper power source.
- That tool is in proper working condition.
- Actuation system is on tool and how it operates.
- No misalignment or binding of moving parts.
- All conditions necessary for proper and safe tool operation.
Always assume the tool contains fasteners. - No horseplay.
- Respect the tool as a working implement.
- Keep tool pointed away from yourself and others when connecting air to tool.
Do not use tool while tired or under the influence of drugs, alcohol or medication. A moment of inattention while operating power tools may result in serious personal injury.
Do not overreach. Keep proper footing and balance at all times.
Always place yourself in a firmly balanced position.
Stay alert, focus on your work and use common sense when using tool.
Keep bystanders and children away while operating tool.
Store idle tools out of the reach of minors or other untrained persons.
Drive fasteners into work surface only; never into materials too hard to penetrate.
Do not force tool. Let the tool do the work.
Use the correct tool for the application. The correct tool will do the job better and safer.
Tools shall be operated at the lowest pressure needed for the application. This will reduce noise levels, part wear, and energy use.
Do not drive fasteners on top of other fasteners or with the tool at too steep of an angle; the fasteners can ricochet and may cause injury.
When using tool, care should be taken due to possibility of tool recoil after a fastener is driven.
If safety element is unintentionally allowed to re-contact work surface following a recoil, an unwanted fastener will be driven. Therefore, allow tool to recoil completely off work surface after a fastener is driven to avoid this condition.
Do not push safety element on work surface until a second fastener is desired.
Do not drive fasteners close to the edge of the work surface. Keep face and body parts away from tool and work surface. The workpiece is likely to split and the fastener could fly free or ricochet and may cause injury.
Tool may eject a fastener when connected to air supply; therefore,

- remove all fasteners from tool
- before connecting air.
Do not load fasteners with trigger or workpiece contact element depressed. Keep hands and body away from the fastener discharge area of tool near workpiece contact.

Operating Controls
Do not use tool without danger label on tool. If label is missing, damaged or unreadable, contact your SENCO representative to obtain a new label.
Never use tool if safety element, trigger or springs have become inoperable, missing or damaged. Do not tamper with or remove safety element, trigger or springs.
Disconnect tool from air before doing tool maintenance, clearing a jammed fastener, leaving work area, moving tool to another location or handing the tool to another person, when not in use or outside of the operator's supervision. Tools shall not be modified unless authorized in tool manual or approved in writing by manufacturer.
Use only parts, fasteners, and accessories recommended or sold by SENCO. Do not modify tool without authorization from SENCO.
Proper Power Source

Use only clean, dry, regulated compressed air at recommended pressure. Do not operate the tool with any alternate power source.
Do not connect tools to air pressure that potentially exceeds 200 psig or 13.7 bar. Regulators shall be used to limit compressed air pressure supplied to tool. Regulators shall be set at an operational pressure that is lower than or equal to manufacturers specified maximum.
Air hose must have a minimum working pressure rating of 150 PSIG (10.3 bar) or 150% of the maximum pressure produced in the system, whichever is higher.
The tool and air supply hose must have a hose coupling such that all pressure is removed from the tool when the coupling joint is disconnected.

Use extra caution when driving fasteners into existing walls or other blind areas to prevent contact with hidden objects or persons on other side (e.g. wires, pipes, etc.).
Never use a tool that leaks air or needs repair.
Never lift, pull or lower the tool by the hose.
Keep tool pointed away from yourself and others while connecting air to the tool.
Never use any part of the tool (cap or main body) as a hammer. The tool could activate or become unsafe.
Read and understand all safety instructions.
Product Safety Messages

- Read and Understand tool labels and manual. Failure to follow warnings will result in DEATH or SERIOUS INJURY.
- Operators and others in work area MUST wear safety glasses with side shields.
- Keep fingers AWAY from trigger when not driving fasteners to avoid accidental discharge.
- Know and understand what trigger system you are using. Check manual for triggering options.
- NEVER point tool at yourself or others in work area.
- NEVER use oxygen or other bottled gases. Explosion may occur.
Maintenance
Always refer to both tool maintenance instructions below and the troubleshooting guide in this manual to assure years of reliable service.
Make sure all screws and caps are securely tightened at all times. Make daily inspections for free movement of trigger and safety element. Never use the tool if parts are missing or damaged.
When tool is disconnected from air, make daily inspection to assure free movement of safety element and trigger. Do not use tool if safety element or trigger sticks or binds. Wipe tool clean daily and inspect for wear. Use non-flammable cleaning solutions only if necessary.
DO NOT SOaK. No routine oiling necessary.

Repairs other than those described here should be performed only by trained, qualified personnel. Contact SENCO for information at 1-800-543-4596.
The employer, tool owner and tool operator:
- are responsible for ensuring that the tools are kept in safe working order.
- are responsible for ensuring that only qualified personnel shall repair the tool.
- are responsible for ensuring that manufacturers tool maintenance instructions are available to personnel performing maintenance.
- shall ensure that tools that require repair are removed from service and that tags and physical segregation are used as a means of control.
Tool conditions that require the tool to be taken out of service:
- Excessive leaks from pressure vessel.
- Inoperable workpiece contact (safety element).
- Workpiece contact (safety element) that appears to bind during use.
- Missing guards.
- Missing safety labels.
- Delayed firing due to worn or damaged parts.
Functional Operation

This tool does not have a Workpiece Contact. Additional precautions should be taken to assure that tool nose is placed against the workpiece before actuating each trigger.
Tool use
Read section titled "Safety Warnings" before using tool.

LOADING THE TOOL:

- Place strip of fasteners into magazine with points resting on fastener guide.
- Push rail forward until it latches.
NOTe: Make sure the arrow printed on the fastener is pointing toward the the nose of the tool.
Do not load with trigger depressed.
Use only genuine SENCO fasteners (see Fastener Specifications).
TO DRIVE FASTENERS:

- Position tool against work surface.
This tool is equipped with a secondary trigger.
- Using your middle finger, pull secondary trigger clear of primary trigger.
![]()
- Using your first finger, pull the primary trigger to actuate the tool.
![]()


NOTE: Order of operation is important.
These tools are not required to have a workpiece contact. uSe CauTiON, as these tools will drive a fastener when the trigger is pulled.
Clearing Jams:
Should a fastener jam occur, disconnect air supply.

- Push latch and slide rail open.
- Remove fasteners.
Remove jammed fastener.
If you are still unable to remove jammed fastener, use the on-board wrench to undo the bottom two front screws and remove the front plate for better access to the jammed fastener.
Before removing the front plate, disconnect air and make sure the magazine is OPeN. removing the front plate with the magazine ClOSeD could cause fasteners to be ejected under pressure.
Push rail forward until it latches.

Features
The tool is equipped with a last fastener lockout and is designed to stop firing after the last fastener is driven.
This feature prevents unnecessary wear on the tool and prevents the driver tip from marring the workpiece. When the tool locks out, load an additional strip of fasteners, and continue.

Maintenance
Read section titled "Safety Warnings" before using tool.

All screws should be kept tight. Loose screws result in unsafe operation and parts breakage.
With tool disconnected, make daily inspection to assure free movement of trigger. Do not use tool if trigger sticks or binds.
Wipe tool clean daily and inspect for wear. Use non-flammable cleaning solutions only if necessary–DO NOT SOaK

Such solutions may damage O-rings and other tool parts.
No routine oiling necessary.
Repairs other than those described here should be performed only by trained, qualified personnel. Contact SeNCO for information at 1-800-543-4596.
Troubleshooting

| Problem/Symptom | Potential Cause | Corrective action | |
| 1 | Air leak near top of tool / Sluggish operation | Firing valve seal | Verify air supply / Tighten screws or install Parts Kit YK0910 |
| 2 | Air leak near bottom of tool / Poor return | Piston stop/Piston seal | Check for piston seal or sleeve wear If parts are worn or damaged, parts are detailed in the parts chart Clean tool / Tighten screws |
| 3 | |||
Other problems | Contact SENCO | ||
Accessories
SENCO offers a full line of accessories for your SENCO tools, including:
- Air Compressors
- Safety Glasses
- Hose
- Pressure Gauges
- Couplers
- Regulators
- Fittings
- Filters
Technical Specifications
| Minimum to maximum operating pressure | 70 - 100 | 4,8 – 6,9 bar |
| Air Inlet | 1/4 in. | 1/4 in. |
| Maximum Speed (cycles per second) | 5 | 5 |
| Weight | 2.3 lbs. | 1.0 kg |
| Fastener Capacity | 1 Strip / 100 Pins | 1 Strip / 100 Pins |
| Tool size: Height | 7.5" | 191 mm |
| Tool size: Length | 7.5" | 191 mm |
| Tool size: Width: Main Body | 1.9" | 48 mm |
Fastener Specifications
 | |
| A | |
| Inches | mm |
| 1/2 | 12 |
| 5/8 | 16 |
| 3/4 | 19 |
| 1 | 25 |
| 1 1/4 | 32 |
| 1 3/8 | 35 |
1-800-543-4596
www.senco.com
Warnings for the safe use of this tool are included in this manual.
Documents / Resources
References
Download manual
Here you can download full pdf version of manual, it may contain additional safety instructions, warranty information, FCC rules, etc.
Advertisement


Need help?
Do you have a question about the TN11G1P and is the answer not in the manual?
Questions and answers