Lowrance HOOK2 Series - Marine Equipment Manual
- Troubleshooting and help manual (9 pages) ,
- Manual (4 pages) ,
- Quick manual (2 pages)
Advertisement
Front controls
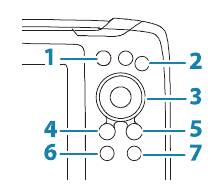
| 1 | Pages | Press to toggle between available pages. |
| 2 | Zoom in/ out | Press to zoom the image. Press both keys simultaneous to create a MOB (Man Over Board) waypoint at the vessel's position. |
| 3 | Arrows | On the GPS Plotter page: press to position the cursor on the image. Press to pan the image in any direction. In menus and dialogs: press to highlight an option. |
| 4 | Exit (X) | In menus and dialogs: press to return to previous menu level and to exit a dialog. |
| 5 | Menu/ Enter | With no menu or dialog active: press to display the menu. In menus and dialogs: press to confirm a selection. |
| 6 | Cursor/ Waypoint | On the GPS Plotter page: Press to activate/ deactivate the cursor. On any page: press and hold to save a waypoint. |
| 7 | Power | Press to display the System Controls dialog. Press and hold to power the unit on/off. |
System Controls dialog

Display illumination
- Set brightness and select day/night mode from the System Controls dialog
- Repeat short presses on the Power key to cycle the backlight brightness
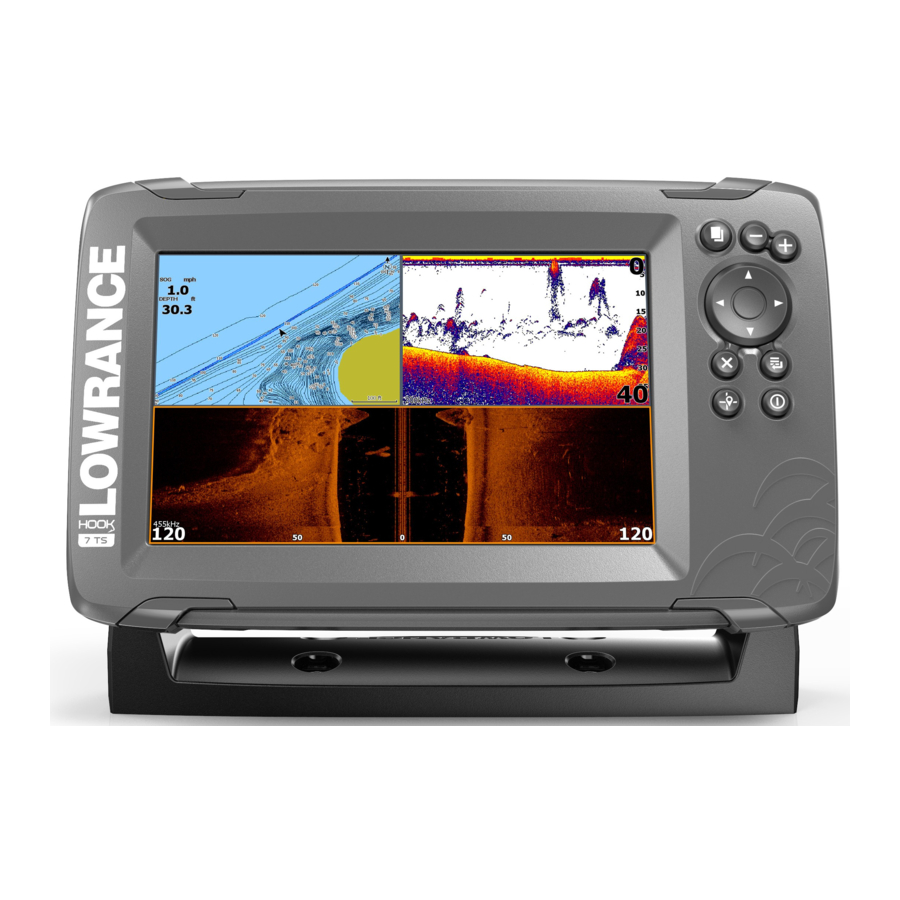
Sonar/Flasher/DownScan pages

By default the unit is set to Auto mode, and all settings are automated.
- Change to Custom mode to allow for customizing the settings.


GPS Plotter page
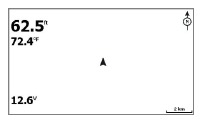
- Zoom the image by using the Zoom keys
- Pan the image in any direction by using the Arrow keys
- Display item information by positioning the cursor on an item and then pressing Menu/Enter key
Creating a route on the GPS Plotter page
Press an Arrow key to activate cursor mode
- Press the Menu/Enter key to activate the menu, then select the New route option in the menu
- Press the Arrow keys to position the first route point, then press the Menu/Enter key to confirm the position
- Repeat step 3 to position additional route points
- Press the X key to save the route
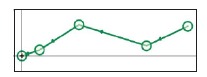
Trails
The system automatically tracks and draws the vessel's movement on the chart panel. Trails are managed from the Trails dialog. To display the trails dialog:
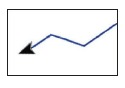
- Select W/R/T from the menu
- Select the Trails tab in the dialog
- Select the trail you want to edit
![]()
Creating waypoints
Press and hold the Cursor/Waypoint key to save a new waypoint.

- With cursor inactive, the waypoint is placed at the vessel's position
- With cursor active, the waypoint is placed at the cursor position
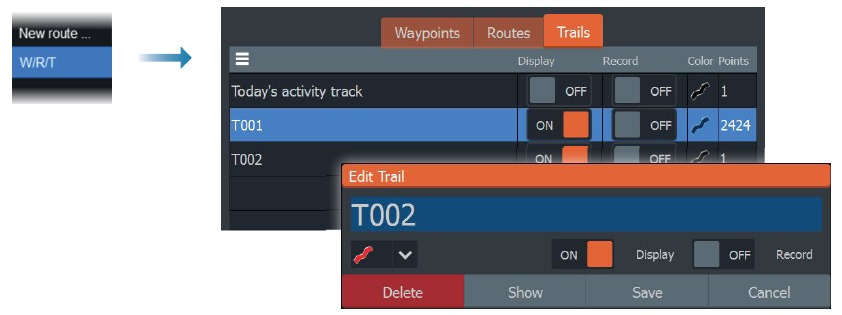
Overlay data
The data type can be changed, and the item position on the image is selectable. The data items can be turned on/off from the System Controls dialog. Each data item can be removed individually from the panel:
- Select the Edit overlay option in the System Controls dialog to turn the unit into edit mode
- Press the Menu/Enter key to display edit options
- Press the X key to leave edit mode
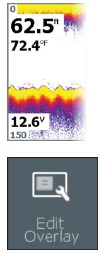
Stopping the sonar
Use the Stop Sonar option in the System controls dialog to stop the transducer from pinging without turning the unit off.
Creating a Man Over Board (MOB) waypoint
Activate a MOB waypoint by pressing both Zoom keys simultaneously.
 waypoint")
Settings dialogs
Used for system configuration.

Documents / ResourcesDownload manual
Here you can download full pdf version of manual, it may contain additional safety instructions, warranty information, FCC rules, etc.
Advertisement


Need help?
Do you have a question about the HOOK2 Series and is the answer not in the manual?
Questions and answers