Sign In
Upload
Download
Table of Contents
Contents
Add to my manuals
Delete from my manuals
Share
URL of this page:
HTML Link:
Bookmark this page
Add
Manual will be automatically added to "My Manuals"
Print this page
×
Bookmark added
×
Added to my manuals
Manuals
Brands
Bosch Manuals
Heat Pump
CL6000i-Set 25 E
Service manual
Bosch CL6000i-Set 25 E Service Manual
Air heat pump
Hide thumbs
1
Table Of Contents
2
3
4
5
6
7
8
9
10
11
12
13
14
15
16
17
18
19
20
21
22
23
24
25
26
27
28
29
30
31
32
33
34
35
36
37
38
39
40
41
42
43
44
45
46
47
48
49
50
51
52
53
54
55
56
57
58
59
60
61
62
63
64
65
66
67
68
69
70
71
72
73
74
75
76
page
of
76
Go
/
76
Contents
Table of Contents
Troubleshooting
Bookmarks
Table of Contents
Table of Contents
Explanation of Symbols and Safety Instructions
Explanation of Symbols
General Safety Instructions
Overview
Refrigerant
Electricity
General Information
External Dimension
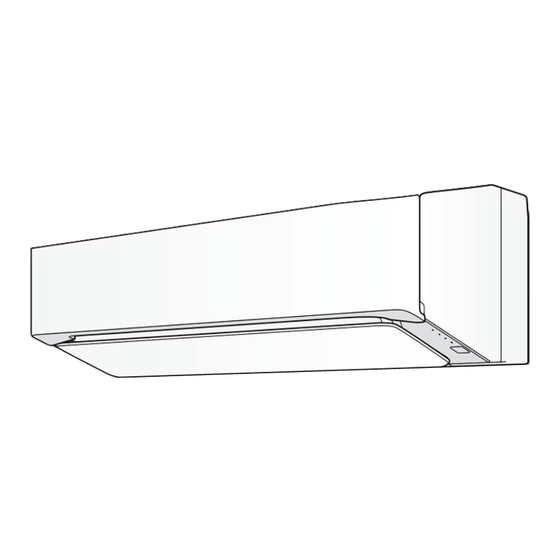
Indoor Unit
Outdoor Unit
Specification
Cl6000I
Cl6100I
Electrical Specifications Indoor Unit
Electrical Specifications Outdoor Unit
Functions
ON Timer
OFF Timer
Power on Start
Auto Mode
Auto Restart
Electrical Components and Wiring Diagrams
Wiring Diagram
Indoor Unit
Outdoor Unit
Micro Computer Control System
Indoor Unit
Outdoor Unit
Function and Operation of Protective Procedures
Control
Restart Control
Indoor Unit Heat Exchanger Freeze Prevention Control
Outdoor Unit Overheat Prevention Control
Compressor Overheat Prevention Control
Start up Control
Outdoor Unit Fan Delay Control
Protection Device Functions and Operations
Air Conditioner Operation in Thermistor Error
Indoor Unit
Outdoor Unit
Short Circuit
Open-Circuit
Thermistor Temperature Characteristics
Indoor Unit
Outdoor Unit
General Troubleshooting Chart
Indoor Unit Does Not Turn on
Indoor Unit Fan Does Not Operate
Indoor Unit Fan Speed Does Not Change
Remote Control Signal Is Not Received
Louvers Do Not Move
There Is Noise in Tv/Radio
Malfunction Occurs
Compressor Does Not Start
Operation Stops after a few Minutes and Restarts, and this Process Repeats
Malfunction (Parts) Check Method
Procedure for Determining Defective Outdoor Unit Ipm/Compressor
Replace Compressor
Diode Bridge Check Method
Inverter Electrolytic Capacitor (C5, C6) Check Method
IPM Check Method
DC Current Error (6-0 Error)
Compressor Rotation
Heating Mode
Troubleshooting Guide
Self-Diagnosis Function
Self-Diagnosis Function (by Remote Control)
Chart for Reading Self-Diagnosis Results
Other Malfunction Error Indications/Buzzers
Refrigeration Cycle
Schematic Diagram
Standard Condition (Cooling)
Temperature at each Part and Pressure in 3-Way Valve
Performance Curves
Disassembly Procedure
Indoor Unit
Outdoor Unit
Thermistor Assembly Installation Drawing
Models Cl6000I
Models Cl6100I
Troubleshooting
Error Code 1: Short Circuit of the Outdoor Unit Thermistor
Error Code 2: Overheat Error (Compressor or Cycle)
Error Code 5: Open Circuit of Outdoor Unit Thermistor
Error Code 6: DC Current Error
Error Code 7: AC Current Error
Error Code 9: Cycle Error
Error Code 11: Outcoor Unit Fan Motor Error
Error Code 13: Compressor Rotation Error
Error Code 14: PAM Error
Error Code 17: Serial Open Error
Error Code 18: Serial Short Error
Error Code 19: Indoor Fan Error
Error Code 24-0: WLAN Module Communication Error
Error Code 24-1: WLAN Router Connection Error
Error Code 26-1: Indoor Unit Room Temperature Thermistor Open Short Error
Error Code 26-2: Indoor Unit Pipe Thermistor Open Short Error
Environmental Protection and Disposal
Data Protection Notice
Advertisement
Quick Links
Download this manual
Service manual
Air/Air Heat Pump
Air heat Pump 6000i/6100i
CL6000i-Set 25 E | CL6000i-Set 35 E | CL6100i-Set 50 HE | CL6100i-Set 65 HE |
Table of
Contents
Previous
Page
Next
Page
1
2
3
4
5
Advertisement
Table of Contents
Troubleshooting
General troubleshooting chart
19
Troubleshooting Guide
25
Troubleshooting
58
Need help?
Do you have a question about the CL6000i-Set 25 E and is the answer not in the manual?
Ask a question
Questions and answers
Related Manuals for Bosch CL6000i-Set 25 E
Air Conditioner Bosch Climate Class CLC6001i-Set 35 E Operation Manual
(209 pages)
Air Conditioner Bosch Climate Class 6000i Operation Manual
(208 pages)
Air Conditioner Bosch CL6001iU W 26 E Installer's Manual
(192 pages)
Air Conditioner Bosch Climate Class 8000i Series Installer's Manual
(192 pages)
Air Conditioner Bosch Climate Class 6000i Installer's Manual
(176 pages)
Air Conditioner Bosch Climate Class 6000i Operation Manual
(144 pages)
Air Conditioner Bosch Climate 6000i Installer's Manual
(116 pages)
Heat Pump Bosch Climate Class 6100i Operation Manual
Air/air heat pump (88 pages)
Heat Pump Bosch Climate Class 6100i Installer's Manual
Air/air heat pump (80 pages)
Heat Pump Bosch Climate Class 6100i Series Installer's Manual
Air/air heat pump (64 pages)
Heat Pump Bosch Climate 6100i Operation Manual
Air/air heat pump (56 pages)
Air Conditioner Bosch CLC6001i-Set 25 E Installer's Manual
(48 pages)
Heat Pump Bosch Climate 6100i Installation Manual
Air/air heat pump (44 pages)
Bosch Climate 5000 Series Manual
(article)
Heat Pump Bosch CLC6101i-W 50 HE Service Manual
Air/air heat pump (120 pages)
Heat Pump Bosch CL Series Installation, Operation And Maintenance Manual
(100 pages)
This manual is also suitable for:
6100i
6000i
Cl6000i-set 35 e
Cl6100i-set 50 he
Cl6100i-set 65 he
Cl6000i-w 25 e
...
Show all
Cl6000i 25 e
Cl6000i-w 35
Cl6000i 35 e
Cl6100i-w 50 he
Cl6100i 50 he
Cl6100i-w 65 he
Cl6100i 65 he
Table of Contents
Print
Rename the bookmark
Delete bookmark?
Delete from my manuals?
Login
Sign In
OR
Sign in with Facebook
Sign in with Google
Upload manual
Upload from disk
Upload from URL


Need help?
Do you have a question about the CL6000i-Set 25 E and is the answer not in the manual?
Questions and answers