
Related Manuals for PCE Instruments PCE-SCD 50


Summary of Contents for PCE Instruments PCE-SCD 50
- Page 1 USER MANUAL SOIL DENSITY METER PCE-SCD 50 User manuals in various languages (français, italiano, español, português, nederlands, türk, polski) can be found via our product search on: www.pce-instruments.com...
-
Page 2: Table Of Contents
CONTENTS I. Introduction ................................3 II. Operation of EDG..............................5 EDG Main................................5 Calibration MODE ............................5 Project Test ..............................8 Export Data..............................12 System Settings............................13 III. Notice..................................13 IV. Watch for suspicious readings ........................14... -
Page 3: Introduction
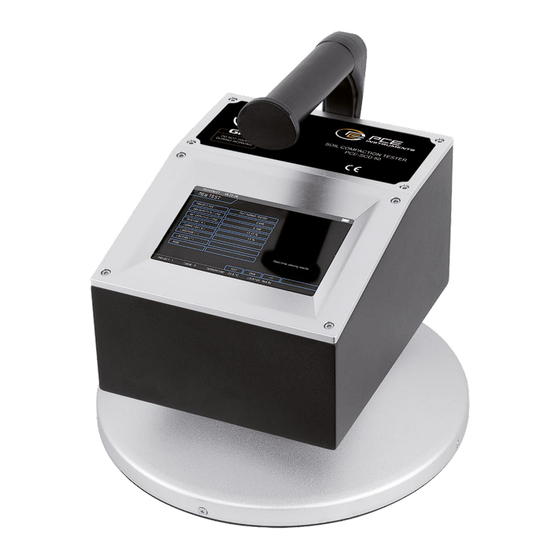
I.INTRODUCTION Features EDG utilizes advanced electromagnetic technology to obtain accurate soil density readings. Primary features: » No radioactive materials or special license required » Light weight and easy to use » 12 hours of portable operation » Measures density in common units (g/cm3) »... -
Page 4: Packing List
PACKING LIST The EDG shipment package includes the items listed below. Please contact your dealer if any part missing. » One USB flash disk » One EDG unit » One battery charger (220V/50Hz) with USB cable » User manual, warranty card CHARGING THE BATTERY Charging the Battery Note: Be sure to use the original charger for charging. -
Page 5: Operation Of Edg
II. OPERATION OF EDG Starting EDG for the first time. Turn EDG on by flipping the POWER switch on the left. The internal buzzer emits a beep sound. Then the unit begins self-test and starts. After a few seconds the display will show the MAIN menu. - Page 6 Click the button „New Curve“ and input a name: New Test Point In the „Curve List“ menu, button „Settings“ has two kinds of state. You can amendment the curve and calibration again by clicking the name of a curve when it shows „Settings“. Menu as follows: Press „New Point“, Menu as follows:...
- Page 7 Obtain readings at the positions as shown below. Draw a circle around the sensor‘s outer edge of EDG and take readings in the center (1) and at 2 o‘clock, 5 o‘clock, 8 o‘clock and 11 o’clock positions. After reading number 5 is complete, the average of the 5 readings will be stored.
-
Page 8: Project Test
To calculate compactness and moisture content, input the maximum dry density and optimum moisture content. Then a curve is calibrated. The thickness is only used to record the information of the soil. Delete a test point In the „Curve Settings“ menu, you can delete one or more curves which is selected by pressing „Delete“ button. - Page 9 New Project Input a name of the new project, then click “Save”. You can see as follows: Associate with a curve Click „Not Associate“ area, it shows as follows: Click the button „curve1“, it will be associated with the current project.
- Page 10 Start Test Select a project, and click the button „Start Test“, test menu will be show: EDG can be used in three different measurement or run modes, respectively: » Continuous Reading Mode » Single Reading Mode » Average Reading Mode Continuous Reading Mode: Continuous reading mode is used to provide instantaneous density measurements for quality control purposes.
- Page 11 Note: The data cannot be saved in this mode. Single Reading Mode: Single reading mode is used to provide density measurement for one specific point, and conduct single reading each time. In the mode, click “Test” to start a reading. The unit begins to read and display data from the probe four seconds later after pressing “Test”.
-
Page 12: Export Data
EXPORT DATA In the EDG MAIN menu, connect EDG to a PC using the cable. Open EDG software on your computer, you can export the data to your computer. After EDG and computer connected, we should check the com of the computer as follows: Then press „SET COM“... -
Page 13: System Settings
SYSTEM SETTINGS In this menu, you can set temperature deviation, time and backlight. III. NOTICE(ROUTINE OPERATIONS) 1. Once calibrated the EDG is ready to be used at each job site and asphalt mix. It is suggested that 5 rea- dings be taken at each site following the average reading pattern. 2. -
Page 14: Watch For Suspicious Readings
IV. WATCH FOR SUSPICIOUS READINGS If a reading seems unusual or suspicious, check for possible measurement errors (dirty surface, wet surfa- ce, low battery voltage) and retake the reading. Rest results are obtained when moisture levels for a series of readings are kept relatively constant. If the moisture level for a reading is more than a percentage point higher or lower than the previous readings, the reading should be treated as suspicious. - Page 15 We either re-use them or give them to a recycling company which disposes of the devi- ces in line with law. For countries outside the EU, batteries and devices should be disposed of in accordan- ce with your local waste regulations. If you have any questions, please contact PCE Instruments. PCE INSTRUMENTS CONTACT INFORMATION...
Need help?
Do you have a question about the PCE-SCD 50 and is the answer not in the manual?
Questions and answers