KERN YKN-A01 Operating Instructions Manual
Statistics printer
Hide thumbs
Also See for YKN-A01:
- Operating instructions manual (11 pages) ,
- Operating instructions manual (14 pages) ,
- Operating instructions manual (12 pages)
Table of Contents
Advertisement
Quick Links
Advertisement
Table of Contents

Subscribe to Our Youtube Channel
Related Manuals for KERN YKN-A01


Summary of Contents for KERN YKN-A01
- Page 1 KERN & Sohn GmbH Ziegelei 1 Phone: +49-[0]7433- 9933-0 D-72336 Balingen Fax: +49-[0]7433-9933-149 email: info@kern-sohn.com Internet: www.kern-sohn.com Operating instructions Statistics printer KERN YKS-01 Version 1.3 2021-11 YKS-01-BA-e-2113...
-
Page 2: Table Of Contents
KERN YKS-01 Version 1.3 2021-11 Operating Manual Statistics printer Table of Contents Technical Data ......................3 Declaration of Conformity ..................4 Unpacking ......................... 4 Installation and commissioning ................4 Printer parts ......................5 Preparing your printer for operation ..............5 Operating elements .................... -
Page 3: Technical Data
Printer YKS-01 is a standard thermal printer 1 Technical Data Printout Bi-directional thermal print with moveable 8 dot matrix head Character 8x8 dot matrix composition Print speed 0.75 lines Number of characters per 40, 80 line Character set IBM set 2 Thermal paper One roll, width 112mm, length 20m Max. -
Page 4: Declaration Of Conformity
Do not expose printer to direct sunlight or impacts. Power is supplied via the external mains adapter. The stated voltage value must be the same as the local voltage. Only use original KERN mains adapters. Using other makes requires consent by KERN. YKS-01-BA-e-2113... -
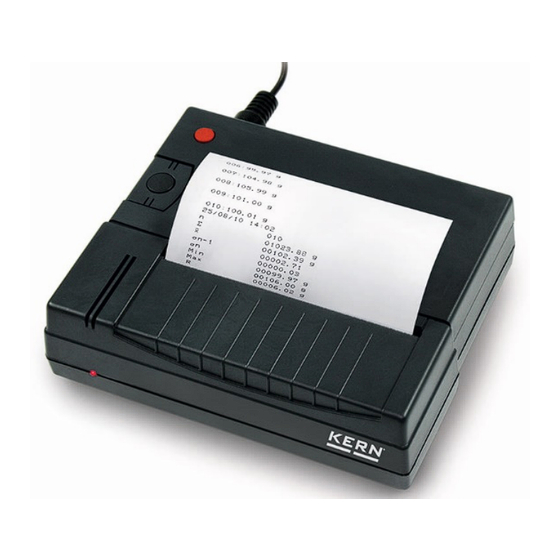
Page 5: Printer Parts
5 Printer parts 1 – ON/OFF switch 2 – Cover of paper compartment 3 – LED display ON/OFF 4 – Interface for connection to weighing balance 5 – Interface for printer supply 6 – Feed button 7 – Functional button 6 Preparing your printer for operation Remove the cover from the paper compartment... - Page 6 There are two interfaces at the back wall of the housing: Terminal printer cable Terminal power supply unit Always use KERN accessories and weighing balances when working with your printer. Disconnect the printer from the mains voltage before connecting the cable to the printer.
- Page 7 Preparing the paper: ⇒ Fold over one end of the paper before inserting it into the printer Inserting the paper ⇒ Insert the folded-over end of the paper into the mechanism ⇒ Turning on the printer supply ⇒ Press and hold the FEED key until the paper emerges from the outlet slot of the mechanism Tearing off paper...
-
Page 8: Operating Elements
7 Operating elements After the power supply unit has been connected to the printer and the mains, and after ON/OFF switch of the printer has been switched to “ON” position, the red indicator for the power supply will light up. This indicator also signals that the printer is ready for operation. -
Page 9: Statistics Function
9 Statistics function To create statistics, the numerator must be switched on. After having processed several weighings, statistics will be printed by pressing the functional button: Example Numerator ON: Numerator ON 001: 0.366 g 002: 0.363 g 003: 0.357 g 004: 0.354 g 18/05/10... -
Page 10: Arithmetic Mean Value Of The Basic Totality
9.2 Arithmetic mean value of the basic totality: 9.3 Standard deviation of the basic totality 9.4 Standard deviation of a random sample YKS-01-BA-e-2113... -
Page 11: Date And Time
Date and time To set date and time, “SetClock Kern” software by KERN is required. You can download it from KERN e-store in the Downloads tab of the printer. Connect the printer to the COM1 port of your PC using a null modem cable. -
Page 12: Glp Log
11 GLP log To create a GLP log, press the functional button when switching on. The following log is created and can be completed hand-written: Documentation of Adjustment (GLP) Date: 18/05/10 Hour: 14:26 Balance Manufacturer: ___________________ _________________________________________ Model: ___________________ _________________________________________ Serial no.: ___________________ _________________________________________... -
Page 13: Storage Conditions And Use Of Thermal Paper
12 Storage conditions and use of thermal paper Long-term usability of thermal paper is achieved by correct storage. Storage: - Dark storage location (no direct sunlight) - Maximum relative air humidity 65% - Maximum temperature 25°C Always store printed paper under the following conditions: - Do not expose to direct sunlight or intensive room lights - Avoid contact with alcohol, solvents or similar substances (e. -
Page 14: Cleaning
14 Cleaning 1. Remove the screws at the printer’s back. 2. The thermal head should be cleaned carefully with isopropyl alcohol. 3. When cleaning, take care not to move the printing head. CAUTION YKS-01-BA-e-2113... -
Page 15: Instant Help
15 Instant help Symptom Remedy The supply indicator is not Check whether the power supply unit is connected to the printer and to lit up. the mains. Paper does not emerge. Check whether the paper has been inserted correctly, whether the input slot of the mechanism is free of obstructions Paper leaves printer Check whether the paper has been inserted with its thermo-sensitive without print:...
Need help?
Do you have a question about the YKN-A01 and is the answer not in the manual?
Questions and answers