KERN YKH-01 User Manual
Hide thumbs
Also See for YKH-01:
- Operating instructions manual (11 pages) ,
- Operating instructions manual (14 pages) ,
- Operating instructions manual (12 pages)

Subscribe to Our Youtube Channel
Related Manuals for KERN YKH-01


Summary of Contents for KERN YKH-01
- Page 1 KERN & Sohn GmbH Ziegelei 1 Phone: +49-[0]7433-9933-0 D-72336 Balingen Fax: +49-[0]7433-9933-149 E-mail: info@kern-sohn.com www.kern-sohn.com User Manual Thermal Printer KERN YKH-01 Version 1.0 2019-08 YKH-01-e-1910...
-
Page 2: Table Of Contents
KERN YKH-01 Version 1.0 2019-08 User Manual Thermal Printer Contents Technical specification ..................3 Unpacking ......................3 Scope of delivery ........................4 Device overview ....................5 Basic instructions ..................... 6 Safety instructions/Warning plates ..................6 Warranty ............................ 7 Power supply ..........................7 Cable connection ........................ -
Page 3: Technical Specification
1 Technical specification KERN YKH-01 Product number/type TYKH-01-A Printing method Thermal line print Printing speed 200 mm/s Paper width 80 mm Paper width 58 mm Paper KERN YKH-A01 NTP058-80 Width 79.5 mm ±0.5 mm 57.5 mm ±0.5 mm Paper roll... -
Page 4: Scope Of Delivery
Disconnector switch cover Rubber feet for vertical installation Watertight disconnector switch cover Control panel for vertical installation Wall bracket Paper roll Paper guide rail 58 mm wide Null modem (not in the picture) Gender Changer (not in the picture) YKH-01-BA-e-1910... -
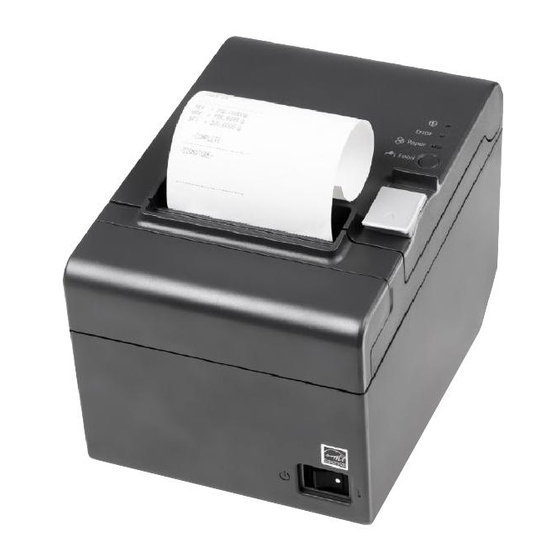
Page 5: Device Overview
Is lit after an error has occurred in the device. indicator “Paper” LED — Paper Informs the paper has been used up. indicator If the LED flashes, the device is in the stand-by mode. “Feed” button — Moving the paper forward. Movement button YKH-01-BA-e-1910... -
Page 6: Basic Instructions
4 Basic instructions Before you set and start the device, read this user manual thor- oughly even if you are familiar with KERN products. All language versions contain non-binding translation. Only the original document in German is binding. -
Page 7: Warranty
The device can be connected to the power grid only when the voltage specified on the device (sticker) and the local voltage are identical. Always use the original power supply by KERN. Using any other prod- WARNING ucts requires KERN consent. -
Page 8: Cable Connection
If you use a serial interface, error-free operation can be ensured solely with the included interface cable and the appropriate interface cable by KERN (optional). Whenever required, use a null modem and a Gender Changer deliv- CAUTION ered with the device. -
Page 9: Printer Installation
When you install the printer vertically, remember to place the control panel for vertical installation on the paper roll cover and to fix four rubber feet in the rectangular re- cesses of the printer enclosure, as shown in the figure below. Control panel for vertical installation Rubber feet YKH-01-BA-e-1910... -
Page 10: Hanging The Printer On The Wall
The wall bracket for safe installation of the printer should be fixed to the wooden, concrete or metal wall. The wall thickness should be 10 mm or more. Always use metal screws. CAUTION The breaking strength of screws on the wall side must be 150 N or more. YKH-01-BA-e-1910... - Page 11 3. Attach the wall bracket to the printer and fix it with two screws removed in step 2. Screws Wall bracket 4. Align the openings in the wall bracket and screws for the wall brackets and hang the bracket. YKH-01-BA-e-1910...
-
Page 12: Inserting Paper
The paper movement direction is shown in the figure below. 3. Pull out a piece of paper and close the paper roll cover. After the printer power supply is switched on, the paper roll piece will be cut automatically. YKH-01-BA-e-1910... -
Page 13: Changing Paper Width
2. Align the three ribs of the paper guide rail 58 mm wide and the rectangular open- ings of the printer and press the rail downwards. Paper guide rail 58 mm wide Rectangular openings 3. Install the paper roll. 4. Close the paper roll cover. YKH-01-BA-e-1910... -
Page 14: Disconnector Switch Cover
To use it, install it as shown in the figure below. When the installed disconnector switch cover is damaged, unplug the device immediately. Continued operation of the device causes the risk of fire or electric shock. WARNING Disconnector switch Watertight disconnector cover switch cover YKH-01-BA-e-1910... -
Page 15: Printer Set-Up
Disconnect the balance from the power supply and connect with the device inter- face using an appropriate cord. Error-free operation can be ensured solely with the included interface cable and the appropriate interface cable by KERN. Communication parameters (e.g. transmission speed, bits and parity) of the bal- ance and printer interface must be compliant. - Page 16 Follow the instructions on the printout again: Step 1: Enter the numbers in the <Modes> col- umn, pressing the “Feed” button the number of times corresponding to the relevant option. Step 2: Then press and hold the “Feed” button. YKH-01-BA-e-1910...
- Page 17 The <Baud Rate> setting list will be printed. 5. To change the transmission speed to 9,600 bps, press the “Feed” button three times and then press and hold it. The following will be printed: the current transmission speed setting and the list of available settings. YKH-01-BA-e-1910...
-
Page 18: Help For Any Minor Failures
If the printer head is overheated, printing is suspended and restored automatically after it has cooled down. For any other errors, switch the printer off and switch it on again in 10 s. YKH-01-BA-e-1910... - Page 19 Thanks to this, a blade was set in the initial position. See the user manual on the back of the paper cutter cover. Wheel Triangle 4. Replace the paper cutter cover. 5. Open the paper roll cover and remove the jammed paper. YKH-01-BA-e-1910...
-
Page 20: Cleaning
Switch the printer off, open the paper roll cover and clean the ther- mal head thermocouple using a cotton swab moisturised with an al- cohol solution (ethanol or isopropyl alcohol). To retain the original print quality, we recommend regular cleaning of the thermal head (basically every three months). Thermal head YKH-01-BA-e-1910...
Need help?
Do you have a question about the YKH-01 and is the answer not in the manual?
Questions and answers