Table of Contents
Advertisement
Quick Links
Advertisement
Table of Contents

Subscribe to Our Youtube Channel
Related Manuals for arcelik BEKO BQW12400X


Summary of Contents for arcelik BEKO BQW12400X
- Page 1 Mıcrowave Oven Better Timer MICROWAVE BETTER TIMER OVENS SERVICE BOOK 1 | EN...
-
Page 2: Table Of Contents
Mıcrowave Oven Better Timer 1.COVER 2.CONTENTS 1.COVER ............................2 3.SAFETY WARNINGS ........................5 3.1 G ........................5 ENERAL AFETY ULES 3.2. S ......................5 AFETY FOR ONFİGURATİONS 3.3 I ......................6 NFORMATİONS FOR ONSUMER 3.4M ....................... 6 İCROWAVE SAFETY İNSTRUCTİONS 3.5 G .............. - Page 3 Mıcrowave Oven Better Timer 8.1.1Normal Working Mode ......................32 8.1.2 Quick heating/ Booster Working Mode ................33 8.1.3 Servıce Modo ........................33 9. COMPONENT LIST / COMPONENT WORKING PRINCIPLES ............36 9.1. C ....................... 36 OMPONENT ECHNICAL ALUES 9.2 C ....................
- Page 4 Mıcrowave Oven Better Timer 12.13 C ................ 85 HANGING OF AGNETRON IMETAL HERMOSTATE 12.14.C ..................85 HANGING OF METAL HERMOSTATE 12.15 R ......................86 EMOVİNG THE BACK WALL 12.16 R ......................... 89 EMOVİNG SİDE WALLS 12.17 C ..................89 HANGİNG THE BOTTOM OF THE BASE PLATE 12.18 C .........................
-
Page 5: Safety Warnings
Mıcrowave Oven Better Timer 3.SAFETY WARNINGS This part consists of safety instructions that helps what you need to do for preventing dangers of personal injuries or financial damages. Service guide consists of this symbols: Important informations orinstructions of usage. Warning for dangerous situations. Warning for electric shock. -
Page 6: Informations For Consumer
Mıcrowave Oven Better Timer 3.3 Informations for Consumer Product may be hot during the usage.Do not touch with hot parts ,inside the oven,heating components etc. .When the product is working it is hot so do not put combustable materials near the product. ... - Page 7 Mıcrowave Oven Better Timer • Radio Interference • The cooking time and microwave power setting too high fry dishes. Some places of extreme dry the baking dish, burn or ignite. • Don not use aluminum foil on microwave cooking. • When microwave cooking, the oven door closer than 3 cm from the metal objects.Fırın içine korozif kimyasallar ya da korozif buhar içeren malzemeleri koymayın.
- Page 8 Mıcrowave Oven Better Timer • On your microwave oven paper, using materials such as wood or plastic, leave from the oven. Paper, board and other flammable materials, plastic materials in the melt. Convection oven, grill and mixed containers made of materials that do not use for cooking operations.
-
Page 9: General Information About Cooking With Microwave
Mıcrowave Oven Better Timer Purpose of usage • This product is designed for home usage. Commercial usage is not allowed. • This product should be used only cooking. Shouldn’t use this product for heating environment and room. • This product is not allowed on caravans and movable houses e.t.c.. •... - Page 10 Mıcrowave Oven Better Timer Candies whose inside water is low and floury foods should be heated carefully. Egg with its shell and solid eggs should not be heated in the microwave because they can be blown, although microwave’s work of heating finishes. Advantages of Microwave Microwave ovens decreases cooking time.
- Page 11 Mıcrowave Oven Better Timer Paper napkins are useful to prevent flowing oil on the tray by wrapping foods. Do not use recycled papers because they may include particles which may cause arcs. Wooden and mat plates Microwaves dry wooden buildings and make them brittle so big wooden plates should not be used.
-
Page 12: Product Assembly/ Assembly Rules/ Settings
Mıcrowave Oven Better Timer 5. PRODUCT ASSEMBLY/ ASSEMBLY RULES/ SETTINGS 5.1 Product Transportation To carry or move the product, do not use door or handle of the product. Door, handle or hinges can be harmed. Product should be carried by two person for safety of the product and ergonomics When the product is being carried or the product is being put to the ground, do not put it... -
Page 13: Unpacking Product
Mıcrowave Oven Better Timer 5.2 Unpacking Product To consider product changing in the mounting process, please do not harm package, product and the product package when extracting. Extract package with a knife without harming top and bottom carton. Take the top carton. Take lathes on the product’s front and behind sides, like shown in below. - Page 14 Mıcrowave Oven Better Timer Take stripers which are left and right side of the products. Symbols on the package of the products and meaning of them; Do not carry Carry the product Carry with Preserve the product in this way by Do not step on Fragile barrow in...
-
Page 15: Controlling The Setup Place And Energy Sources
Mıcrowave Oven Better Timer 5.3 Controlling the setup place and energy sources. 5.3.1 Measurement control of the mounting place In the setup of the product, local standards about electric and gas should be applied. Product is designed according to kitchens’ bench so it is placeable. Appropriate safety interval should be between kitchen wall and the furniture. -
Page 16: Electric Installment Control
Mıcrowave Oven Better Timer 5.3.2 Electric Installment Control Values locating below must be considered. Below informations should be on mind when electrical montage controlled. GENERAL Voltage/frequency 220-240 V ~ 50 Hz Total electric power 3,6 kW Present fuse min. 16 A Cable type/cross section H05VV-FG 3 x 1,5 mm Cable length... - Page 17 Mıcrowave Oven Better Timer For cooler fan included devices; 1 – Cooler fan 2 – Control panel 3 - Cap Connected cooler fan montaged on the product not only ancastre case but only the fornt of product cooler. 17 | EN...
-
Page 18: Usage Of Product
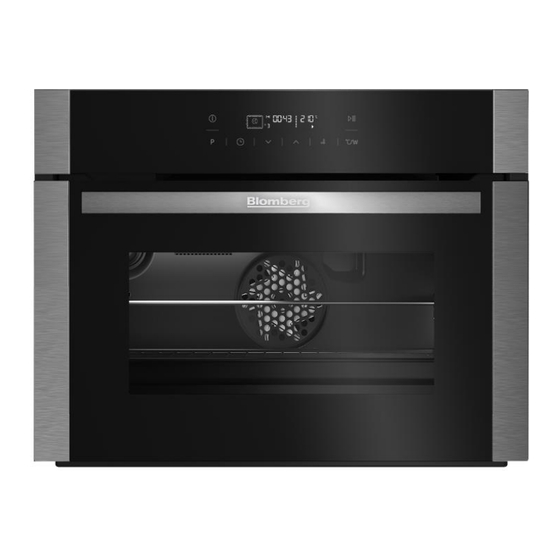
Mıcrowave Oven Better Timer 6.USAGE OF PRODUCT Plug in the electric cable, and open the device’s fuse. Set language then set clock adjustment. NOT:All settings that you set, when you quit, it will automatically save your settings. NOT:Before using your oven, set the clock 6.2 Starting the oven 1 ON/OFF Key 2 Function Display... -
Page 19: Selecting The Temperature And Operating Mode
Mıcrowave Oven Better Timer 19 | EN... - Page 20 Mıcrowave Oven Better Timer The order of operating modes shown here may vary according to the arrangement on your product. 1 ON/OFF Key 2 Function Display 3 Current time indicator field 4 Oven inner temperature symbol 5 Temperature indicator field 6 Start/Stop cooking key 7 Temperature/power setting key 8 Booster Symbol(quick preheating)
- Page 21 Mıcrowave Oven Better Timer 21 | EN...
- Page 22 Grundıg Mıcrowave Oven...
-
Page 23: Accessories /Tags On Products
Grundıg Mıcrowave Oven 7. ACCESSORIES /TAGS on products 7.1 Accessory Grill Tray It is used for frozen foods, pastry and big part of fried food. Depth Tray It is used for big part of fried food, juicy foods and collecting oil when making grill. Wire Grill It is used for making fried food, putting food cooked in a crock on desired shelf.. -
Page 24: Tags On Products And Their Explanations
Grundıg Mıcrowave Oven 7.2 Tags on Products and Their Explanations 7.2.1 Type of tag It contains some information about the product. Type tag location; It appears when front and buttom cover is opened or it locates in back side of the product. -
Page 25: Barcode Of Tags
Grundıg Mıcrowave Oven 7.2.2 Barcode of Tags Barcode label includes many lines and spaces which represent producer country, brand and feature of model. Location of barcode label; It is glued onto pasteboard of the product. 7.2.3 Energy Label It shows energy class and volume of the product. - Page 26 Grundıg Mıcrowave Oven...
- Page 27 Grundıg Mıcrowave Oven Location of Enegy Label; It is given inside of printed documents.
-
Page 28: General Working Principle
Grundıg Mıcrowave Oven 8. GENERAL WORKING PRINCIPLE Microwave oven is some kind oven which cooks foods with elektromagnetic waves.Microwave varies between 2400 and 2500 Mhz.Ionization of a matter with elctomagnetic waves means that matter splits up (+) and (-) ions also it means that the matter can be devastated.Polarization of a matter means that its molecules divide (+) and (- ) ions only definite rate.Either electric ion or magnetic ion can exist in polarization.That is to say, molecules just vibrate, they can’t be devastated.Molecules can be devastated some... - Page 29 Grundıg Mıcrowave Oven overheating.Oven continues to work without resistances , however inside the oven can not be warmed.An error message is send to microprocessor. Oven is protected against by bi-metal type thermic interruptin case of any wrong action. Bi metal type breaker locates left-back-top of the oven frame except Pyro model and its operating temperature is 250°C.
- Page 30 Grundıg Mıcrowave Oven Please, hold the device as shown with antistatic gloves. LCD Panel must be holded its sides. Wrong Please don’t touch IC directly.Don’t order LCM on end. Storage temperature must be hold between 0°C and 35°C . Damp value must be hold between 40-60%RH . Connector locating on LED should not be pulled away from its cable.
-
Page 31: Working Modes
Grundıg Mıcrowave Oven 8.1 Working Modes Electronic control includes 2 different working modes. Normal Working Mode Service Mode... -
Page 32: 1Normal Working Mode
Grundıg Mıcrowave Oven 8.1.1Normal Working Mode It is a mode which can cook and runs oven function normally.When the oven plugged in first time, it works in this mode. Function Fan supported Grill+fan Grill Small grill Eco fan Holding warm Cooking with low heat * Functions varies respect to product model. -
Page 33: Quick Heating/ Booster Working Mode
Grundıg Mıcrowave Oven 8.1.2 Quick heating/ Booster Working Mode Fast heating function can be chosen with any cooking function.Turbo heater’s fan motor provides getting desired temperature.When oven temperature arrives desired value, heaters start to run. Cooking time includes fast heating.,If chosen cooking time is smaller than time of getting desired temperature of chosen function, oven just makes pre heating. - Page 34 Grundıg Mıcrowave Oven * This screen oven lamp control screen will activate the oven lamp. * This grill resistance screen display control, resistance becomes active. * This screen turbo resistance control screen activates resistance. * This display screen turbo fan control, the fan becomes active.
- Page 35 Grundıg Mıcrowave Oven * This cooling fan control display screen, the active cooling fan. * This screen display control cooling fan, cooling fan 2 activates it. This display screen turbo fan control, the turbo fan becomes active.
-
Page 36: Component List / Component Working Principles
Grundıg Mıcrowave Oven 9. Component List / COMPONENT WORKING PRINCIPLES 9.1. Component Technical Values Componenets Power Turbo resistance 1800 W Top resistance / static 1100 W Gril resistance 2200 W Gril + top resistance (1100+1100) 2200 W Turbo motor 22-26 W Lamp 15-25 W Unit... - Page 37 Grundıg Mıcrowave Oven Pin terminal connector Network cordon and cables in the oven are attached to this element. The cables which goes to the components in the oven are distiributed by this pin terminal connector. Turbo Motor At turbo and multifunctionel ovens, it works defrost function by itself.
- Page 38 Grundıg Mıcrowave Oven ThermicCutter Purpose of thermic cutter is when thermostate on the oven or any heater is short circuited and it continues to working, thermic cutter cut phase or neutral to limit heat. Attached point of thermic cutter is reference for temperature value so it does not stop circuit when it is working normally but it stops the circuit when abnormal situation occurs.
- Page 39 Grundıg Mıcrowave Oven Transformer It produces high voltage for activating the magnetron to microwave producing. Capacitor High voltage capacitor works with high voltage diode to increase the power change by two times at secondary side. This DC voltage provides pushing to revive magnetron inside the oscillator. Magnetron It provides high frequency.220 V alternative current is applied...
- Page 40 Grundıg Mıcrowave Oven Wave Mixing Motor It is a small size synchronous motor which is used to rotate the wave mixer in the oven. Measurements are done across its terminals. Magnetron Airing Motor High Voltage Diode It converts the 4000 V voltages which provided by high voltage transformer to the right voltage and gives it to the anode probe...
- Page 41 Grundıg Mıcrowave Oven EMC Filter It prevents electrical shocks...
-
Page 42: Failure / Errorcodes
Grundıg Mıcrowave Oven 10.Failure / ErrorCodes 10.1 Hardware Errors... -
Page 43: Hardware Errors-2
Grundıg Mıcrowave Oven 10.2 Hardware errors-2... -
Page 44: On/Off, Alarm, Lampand Start/Stop Button Errors
Grundıg Mıcrowave Oven 10.3 ON/OFF, alarm, lampand Start/stop button errors... -
Page 45: Touch Controller Errors
Grundıg Mıcrowave Oven 10.4 Touch controller errors... -
Page 46: 500 Error-1
Grundıg Mıcrowave Oven 10.5 PT 500 error-1... -
Page 47: 500 Error-2
Grundıg Mıcrowave Oven 10.6 PT 500 error-2... -
Page 48: Display Error
Grundıg Mıcrowave Oven 10.7 Display error... -
Page 49: Door Switch Error
Grundıg Mıcrowave Oven 10.8 Door switch error... -
Page 50: Oven Lamp Error
Grundıg Mıcrowave Oven 10.9 Oven Lamp Error... -
Page 51: Top Resistance Error
Grundıg Mıcrowave Oven 10.10 Top resistance error... -
Page 52: Top Interior Resistance Error
Grundıg Mıcrowave Oven 10.11 Top interior resistance error... -
Page 53: Turbo Resistance Error
Grundıg Mıcrowave Oven 10.12 Turbo resistance error... -
Page 54: Airing Motor 1. Level Error
Grundıg Mıcrowave Oven 10.13 Airing motor 1. level error... -
Page 55: Turbo Motor Error
Grundıg Mıcrowave Oven 10.14 Turbo Motor Error... -
Page 56: Oven Inside Temperature
Grundıg Mıcrowave Oven 10.15 Oven inside temperature... -
Page 57: Lamp Errors
Grundıg Mıcrowave Oven 10.16 Lamp Errors 10.17.1 Oven works but oven lamps do not light up... -
Page 58: Thermostat Errors
Grundıg Mıcrowave Oven 10.18 Thermostat Errors 10.18.1 Oven continuously works,thermostat does not cut the circuit... - Page 59 Grundıg Mıcrowave Oven Components Power Turbo resistance 1800 W Top resistance / static 1100 W Grill resistance 2200 W Grill + top resistance (1100+1100) 2200 W Turbo motor 22-26 W Lamp 15-25 W Voltage and current values which are consumed by components on the product can be measured by avometer.
- Page 60 Grundıg Mıcrowave Oven The cables of resistance are get out and touch avometer probes to the terminals. Any value on the avometer shows resistance is okey. If there is no value on avometer, it means resistance is broken.
-
Page 61: Measuring Capacitor
Grundıg Mıcrowave Oven 10.22.1 Measuring Capacitor Before doing this discharge all high voltage capacitors. Take of the plug of the oven. Take out all connection from capacitor terminals carefully. (If there exist a discharge resistor, it does not need to discharge. However, do not forget that at some measurements resistor can affect meg-ohm resistance.) - Page 62 Grundıg Mıcrowave Oven Measure one terminal to other terminal’s infinite normal reading value ( or discharge resistor value) Now change pole position to opposite side. Reading value will decrease. All new measurements which applied to capacitor’s metal case are done for infinite normal reading value.
-
Page 63: Diode (High Voltage Regulator ) Measurement
Grundıg Mıcrowave Oven 10.22.2 Diode (High Voltage Regulator ) Measurement DISCHARGE ALL HIGH VOLTAGE CAPACITORS Put out plug of oven. Put out the connection cable of capacitor. Adjust avometer to ohm mod. -
Page 64: Magnetron's On/ Off And Low Power Test
Grundıg Mıcrowave Oven Measure the resistance of diode by touching positive prob to anode and negative prob to cathode. ( Cathode is connected to ground, generally it is marked by arrow, point or bar.) 10.22.3 Magnetron’s On/ Off and Low Power Test The below test shows magnetron’s On/ Off position. - Page 65 Grundıg Mıcrowave Oven Step-2 Adjust Ohm-meter to the highest resistance scale. As shown at the left picture, measure the value of magnetron’s one terminal to metal case. Measurement device should read infinite value ( open circuit). This value does not change according to the poles of measurement device. it is short circuited or less then 1 Ω...
- Page 66 Grundıg Mıcrowave Oven Isolation corruptionStarts with a small burned spot around magnetron then after every cooking circle it produces strengthen arcs and burns. Finally as it can be seen at right picture fault occurs. Symptoms:noisy hums, not heating, arc noises, electrical burns Solution:Change magnetron.
- Page 67 Grundıg Mıcrowave Oven Solution:faulty terminals as described below: (1) clean burned/ corrupted magnetron terminals and change telescopic connections, be sure that terminals matched correctly or (2) cut burned connections and cables (be sure that with some loose ones there exist enough cable remaining). If it is necessary do 1. and 2. steps together.
-
Page 68: Pulling Out The Board
Grundıg Mıcrowave Oven COMPONENT MOUNTING / DEMOUNTING P.S.: There is a removing procesdures below. To insert, do the steps vice-versa. 12.1 Pulling out the Board The top wall should be removed before the removing electrical panel. Remove the top wall connections via phillips screwdriver. - Page 69 Grundıg Mıcrowave Oven Take off all cables on their sockets on located behind the electrical panel. Electrical panel is attached front profile with 2 screws. 69 | TR...
- Page 70 Grundıg Mıcrowave Oven Electrical panel is attached by 2 notches to side-stitching. By pulling up the electrical panel, you canmake the notch out. You may change idled electrical panel with new one instead. 70 | TR...
-
Page 71: Changing Mainboard
Grundıg Mıcrowave Oven 12.2 Changing mainboard Take off the cables where belong to sockets on located the card. 71 | TR... - Page 72 Grundıg Mıcrowave Oven Mainboard is attached with 3 screws to ventilation cap. In order to make the card idled, remove the 3 scre ws with phillips screwdriver. 72 | TR...
-
Page 73: Changing Clock Display
Grundıg Mıcrowave Oven You may change idled card. 12.3 Changing Clock Display Clock display card is on back electrical panel behind. Pull to remove connected sockets on the card. 73 | TR... - Page 74 Grundıg Mıcrowave Oven Card has 2 screws to get connected. Remove screws with screwdriver. 74 | TR...
-
Page 75: Changing Wave-Mixer Motor
Grundıg Mıcrowave Oven Take idled display card. 12.4 Changing Wave-Mixer Motor First, remove power cords wave mixer motor. Wave mixer motor is connected with 3 screws. 3 screws to remove with the help of phillips screwdriver. 75 | TR... -
Page 76: Removing Wave-Mixer
Grundıg Mıcrowave Oven Use new wave-mixer motor instead of idled one. 12.5 Removing Wave-Mixer In order to remove Wave-mixer, first, remove wave-mixer motor. Unscrew the end of the wave- mixer. Before removing spring, wave-mixer’s conservation should be removed. After removing the spring, wave- mixer should be idled. -
Page 77: Changing Wave-Mixer's Conservation Glass
Grundıg Mıcrowave Oven 12.6 Changing Wave-Mixer’s Conservation Glass Conservation glass is attached to oven’s plate with 3 screws. Remove via phillips screwdriver. After montaging, the screws should be controlled. After the removing step, conservation glass should be idled. Change it and use new one. -
Page 78: Changing The Front Cover Hinge
Grundıg Mıcrowave Oven 12.7 Changing the front cover hinge 1. After taking off the cap, there are 2 screws on the hinges side, remove them with screwdriver. 2. After removing screws, there should be idled higes. Pull up the hinges and replace with new ones. -
Page 79: Making Hinge's Settings
Grundıg Mıcrowave Oven 12.8 Making Hinge’s Settings Hinge’s setting home’s cap is attached on 1 screw. Remove it with chargable screwdriver. Make hinge’s setting loaf and set with wrench number 8 as your wish. 79 | TR... -
Page 80: Changing Handle
Grundıg Mıcrowave Oven 12.9 Changing Handle In order to do this task, firstly remove front cap. With allen numbered 2, remove handle screws as seen on this picture. 80 | TR... - Page 81 Grundıg Mıcrowave Oven Put out the empty handle from handle pins. Handle rubber which stays in handle should be change like this way. 81 | TR...
-
Page 82: Front Cover Group
Grundıg Mıcrowave Oven 12.10 Front Cover Group At microwave ovens front cover group must go to service complete groups. 12.11 Doing of Cover Leakage Adjusment at consumer’s home. Cover changing and leakage adjustment certainly should not be done All processes belong to the cover must be done at service atelier. - Page 83 Grundıg Mıcrowave Oven Open the oven and run microwave function. When the leakage adjusment is When you are showing around doing show around the detector how big the numbers on the probe on the cover as shown screen means high leakage. above picture.
-
Page 84: Changing Of Top Wall
Grundıg Mıcrowave Oven 12.12 Changing of top wall Pull out 10 screws with the help of screwdriver which links the top wall to the oven chassis. Lift the top wall to up and take it. 84 | TR... -
Page 85: Changing Of Magnetron Bimetal Thermostate
Grundıg Mıcrowave Oven 12.13 Changing of Magnetron Bimetal Thermostate Pull out 2 screws with the help of screwdriver next to magnetron whivh belongs to the bimetal thermostate. Change old thermostate with new one. 12.14.Changing of Bi-metal Thermostate Pull out the cables on the Bi- metal thermostate 85 | TR... -
Page 86: Removing The Back Wall
Grundıg Mıcrowave Oven Bi-metal thermostat has 2 screws. With the help Philips screwdriver to remove charged. Replace the bi-metal thermostat with a new one. 12.15 Removing the back wall 86 | TR... - Page 87 Grundıg Mıcrowave Oven Remove 8 screw can be seen on the picture that already connected oven’s back side. . 87 | TR...
- Page 88 Grundıg Mıcrowave Oven The back wall of the oven is in opened position. Since the cover position is opened, you can remove the notches as marked on picture. Remove the 7 screws so as to connect between side walls and oven. 88 | TR...
-
Page 89: Removing Side Walls
Grundıg Mıcrowave Oven 12.16 Removing side walls In order to remove oven’s right and left decorations, remove the side walls first. Then, unplug 3 screws located on the profile. Change the profiles with new ones by removing with their notches. 12.17 Changing the bottom of the base plate 89 | TR... - Page 90 Grundıg Mıcrowave Oven Sheet metal in the bottom of the base to the sides and bottom of the oven to remove a total of 10 screws. Remove the bottom of the base plate as shown in the photo parts of the ground in the past. 90 | TR...
-
Page 91: Changing The Switch
Grundıg Mıcrowave Oven 12.18 Changing the switch There are 2 switch groups on the left and right side of the oven. POSSIBLE ERROR TYPES Mechanism reversed: it cause fuse problem on the product and house Mechanism not fully touch on switch: Front door open warning (on the display). - Page 92 Grundıg Mıcrowave Oven THE CORRECT CASE Plastic mechanism must centered switch cam when the oven front door is closed For changing the switchs on the oven, the items defined below must be applied Before changing oven plug must be removed from the network ATTENTION: power 1.
- Page 93 Grundıg Mıcrowave Oven 2. STEP Remove 2 screws that are mounted on the side of the switch and side wall of the oven by a screwdriver 3. STEP Remove the screw on the top of the switch by a screwdriver inside the oven 4.
- Page 94 Grundıg Mıcrowave Oven 5. STEP Swicth can be removed from its location 6. STEP Old and new switch groups must be placed side by side, so that the sockets can be mounted according to the color and the correct positions of the cables easily.
-
Page 95: Changing The Grid Resistance
Grundıg Mıcrowave Oven 7. STEP After finishing the change, all the parts must mounted as disassambled. OLD AND NEW SWITCH VIEWS OLD SWITCH NEW SWITCH SWITCH 12.19 Changing the grid resistance To do this task, first, remove oven’s top and back walls. Then, Dismount resistance’s electrical cables in order. - Page 96 Grundıg Mıcrowave Oven Grid resistance is connected to oven’s plate with 2 screw, rip off them with a help of screwdriver. Open the front cover and remove 2 screws that connect grid’s resistance to plate wall. 96 | TR...
- Page 97 Grundıg Mıcrowave Oven Get off the grid’s idled resistance to front(from the plate). Then, insert new resistance’s terminales by following electrical schematic, and close the back wall. Rip off the resistance’s connection screws with the aid of screwdriver. 97 | TR...
-
Page 98: Changing Turbo Resistance
Grundıg Mıcrowave Oven 12.20 Changing Turbo Resistance To do this step, first, remove oven’s top and back walls. Then; Plug turbo resistance’s cables in order. Rip off fan protection plate’s two screws. 98 | TR... - Page 99 Grundıg Mıcrowave Oven Get turbo resistance idle by removing 2 screws which connected turbo resistance to plate. Take off turbo resistance from oven. Then remove first the resistance terminals and turbo resistance’s cables. Follow schematics to montage, and close the back wall. 99 | TR...
-
Page 100: Changing Oven's Plate Astringents
Grundıg Mıcrowave Oven 12.21 Changing oven’s plate astringents In order to take off astringents, firstly open oven’s front cover. Astringent that montaged to plate already attached take off it and replace with new one. 12.22 Changing Turbo Motor First of all, remove top and back walls of oven, and remove fan keeping. Then; 100 | TR... - Page 101 Grundıg Mıcrowave Oven Plug out cable’s connection respectively. Remove turbo fan’s bolt nut by nippers, and take off the fan. 101 | TR...
-
Page 102: Changing Terminals
Grundıg Mıcrowave Oven By removing 3 screws that connect turbo motor to oven’s plate to change it. After that, insert new turbo motor’s terminales by following electrical schematics and close the back wall. 12.23 Changing terminals To do this task, remove back wall firstly. Then; 102 | TR... - Page 103 Grundıg Mıcrowave Oven Open terminal’s cover. Remove the terminal with screwdriver that connected back wall on box located left and right (can be seen on photo).Take off the terminal’s cables where located in back wall. By removing the terminal, replace it with new one, and make an electrical connections as in order of cable schematics.
-
Page 104: Changi̇ng Ovens Bulb
Grundıg Mıcrowave Oven 12.24 Changing oven’s bulb There are 3 connection cable which is connected the bulb. Remove in order. There are 4 screw which connect the palte. Take of it with octogonal screwdriver. You may change it with new ones. 12.25.Ripping off transformer There are 4 screws connected to transformer. - Page 105 Grundıg Mıcrowave Oven Remove 4 screws within help of chargable screwdriver. After removing, take off transformer’s attached cables. There are some cables which connected emergency fuse and capacitance. 105 | TR...
-
Page 106: Charging Before Removing Capacitance(Careful)
Grundıg Mıcrowave Oven Take off in order. You can replace the transformer with new one. 12.26 Charging before removing capacitance(CAREFUL) High voltaged capacitance forced itselft to double power changes on secondery flap. To do this, it is worked with high voltaged diode.This high DC voltge magneton makes a pushing through the oscillator. -
Page 107: Removing Capacitance (High Voltage)
Grundıg Mıcrowave Oven First Method: Charge the capacitance between capacitance therminal and oven’s plate’s soil therminal. Use isolated screwdriver to touch the therminal. Shift it till the contact. Wait a few after contaction(This may make a suprisely voice as “pat” ) P.S.: If there is a lightning, capacitance is working as charging so this means that our capacitance is working, not means defective. -
Page 108: Changing Fuses
Grundıg Mıcrowave Oven Take off the cables which attached to capacitance. After taking off the cables, remove it with chargable screwdriver. Replace with new one. 12.28. Changing fuses Before changing the fuse, firstly close the electrical connection. Fuse is already attached between two springs. -
Page 109: Removing Emc Cart
Grundıg Mıcrowave Oven By pulling up the fuse’s middle side, take it to yourside and replace with new one. 12.29Removing EMC cart Take off the cables which located top on the EMC cart. After removing, take off with 13 numbered wrench. 109 | TR... -
Page 110: Changing Ventilation Plate
Grundıg Mıcrowave Oven You can replace the old EMC kart with new one. 12.30 Changing Ventilation Plate The top side of oven’s wall should be removed in order to change ventilation plate.. Remove the left sided ventilation plate’s plastics so as to replace ventilation plate. There are 2 screw on the ventilation plate’s plastic, within help of screwdriver remove it and take the plastic. - Page 111 Grundıg Mıcrowave Oven Before removing ventilation plate, remove top sided cable’s gr. Wave mixer-capacitance-mainboard-fuse spares are removed then remove ventilation plate’s already connected screws. Right ventilation out’s remove is below. Ventilation plate is conntected to the oven’s plate with 3 screws. 111 | TR...
- Page 112 Grundıg Mıcrowave Oven Remove screws via phillips screwdriver in order. Ventilation plate is connected with 4 screws. Remove in order via Philips screwdriver. 112 | TR...
- Page 113 Grundıg Mıcrowave Oven Take the ventilation plate off to your side. 113 | TR...
-
Page 114: Changing Cooling Motor
Grundıg Mıcrowave Oven 12.31 Changing cooling motor In order to change the colling motor, firstly remove top wall. Remove with screwdriver 3 screws which connects coolling motor ventilation 114 | TR... - Page 115 Grundıg Mıcrowave Oven Replace unworking motor with new one and build up the connections. 115 | TR...
-
Page 116: Blasted Photos
Grundıg Mıcrowave Oven 13.Blasted photos You can get blasted photos of products from e-library and manusofts. 116 | TR... -
Page 117: Spare Pack List
Grundıg Mıcrowave Oven 14.Spare pack list You can get spare pack list from e-library and manusoft. 117 | TR... -
Page 118: Revi̇sion Date
Envelope IV REVİSION DATE EXPLANATION 24.07.2013 Microwave oven handbook. 118 | TR... - Page 119 Envelope IV 119 | TR...
Need help?
Do you have a question about the BEKO BQW12400X and is the answer not in the manual?
Questions and answers