
Related Manuals for arcelik MD 893 FS


Summary of Contents for arcelik MD 893 FS
- Page 1 Mikrodalga Fırın Kullanma Kılavuzu MD 893 FS - MD 893 FB - MD 893 FG TR - EN 01M-8840821100-0721-03 01M-8845291100-0721-03 01M-8860811100-0721-03...
- Page 2 Lütfen önce bu kılavuzu okuyun! Değerli Müşterimiz, Arçelik ürününü tercih ettiğiniz için teşekkür ederiz. Yüksek kalite ve teknoloji ile üre- tilmiş olan ürününüzün size en iyi verimi sunmasını istiyoruz. Bunun için, bu kılavuzun tamamını ve verilen diğer belgeleri ürünü kullanmadan önce dikkatle okuyun ve bir başvuru kaynağı...
-
Page 3: Table Of Contents
İÇİNDEKİLER 1 Önemli güvenlik ve çevre talimatları 1.1 Güvenlik uyarıları ....4 1.2 AEEE Yönetmeliğine Uyum ve Atık Ürünün Elden Çıkarılması ..... 8 1.3 Ambalaj bilgisi . -
Page 4: Önemli Güvenlik Ve Çevre Talimatları
1 Önemli güvenlik ve çevre talimatları Önemli Güvenlik Talimatları Otel, motel ve diğer konaklama – mekânlarında müşteriler tara- Dikkatle Okuyun ve Daha fından; Sonra Başvurmak Üzere Pansiyon türü mekanlarda. Saklayın. – Endüstriyel kullanım veya labora- • tuvarda kullanım için tasarlanma- 1.1 Güvenlik uyarıları... - Page 5 1 Önemli güvenlik ve çevre talimatları Ürününüz canlı varlıkları kurutmak Ürünü yalnızca bu kılavuzda açık- • • için tasarlanmamıştır. lanan kullanım amacı doğrultu- sunda çalıştırın. Ürününüzü, elbiseleri veya mutfak • havlularını kurutmak için kullan- Ürün kullanım sırasında çok ısına- • mayın.
- Page 6 1 Önemli güvenlik ve çevre talimatları Ürünü güç kaynağından ayırmanın Ürünü, elektrik kablosunu veya • • tek yolu elektrik fişini prizden çek- elektrik fişini suya ya da diğer sı- mektir. vılara batırmayın. Suyun altına tut- mayın. Ürünü yalnızca topraklı bir prizle •...
- Page 7 1 Önemli güvenlik ve çevre talimatları Sınıf B ekipmanlar, konutlarda ve Fırın düzenli olarak temizlenmelidir • • düşük voltajlı güç kaynağı ağlarına ve yemek artıkları çıkarılmalıdır. doğrudan bağlantılı tesislerde kul- Ürünün üst yüzeyinin üzerinde en • lanım için uygundur. az 20 cm’lik bir boşluk olması ge- Üründe pişirme yağı...
-
Page 8: Aeee Yönetmeliğine Uyum Ve Atık Ürünün Elden Çıkarılması
1 Önemli güvenlik ve çevre talimatları Boğulma tehlikesi! Tüm ambalaj Ankastre ürün kapaklı bir kabin • • malzemelerini çocuklardan uzak içerisine yerleştirildi ise, ürün tutun. kabin kapağı açık şekilde çalıştı- rılmalıdır. Izgara ve kombinasyon modlarında • aşırı ısı açığa çıktığı için çocukların 1.2 AEEE Yönetmeliğine Uyum ve bu modları... -
Page 9: Mikrodalga Fırınınız
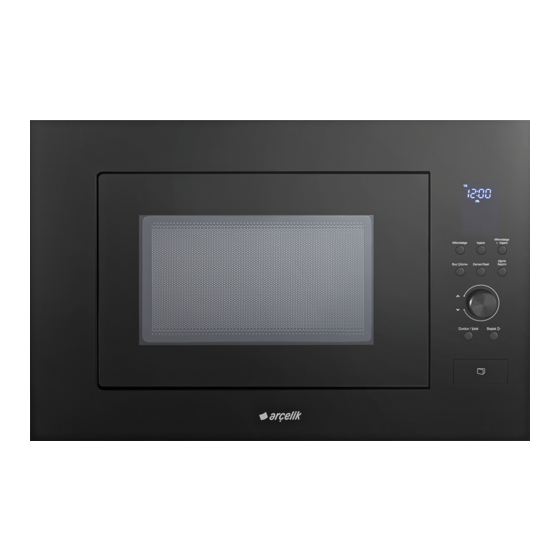
2 Mikrodalga fırınınız 2.1 Genel bakış Kontrol ve parçalar 2.2. Teknik veriler 1. Kapak güvenlik kilidi sistemi Güç Tüketimi 230-240 V~50 Hz, 2. Fırın camı 1400 W (Mikrodalga) 1000 W (Grill) 3. Döner tabla mili 4. Döner tabla desteği Çıkış 900 W 5. -
Page 10: Kurulum
3 Kurulum 3.1 Montaj 3.3 Mikrodalga Fırın Kabini • Montaj işlemi yetkili servis çalışanları tarafından yapılmalıdır. • Kapağın iç kısmındaki tüm ambalaj malzemele- rinin çıkartıldığından emin olun. • Bu cihaz, fırınla birlikte içinde pişirilme olasılığı olan en ağır yiyeceğin ağırlığını taşıyacak kadar sağlam olan düz bir yüzeye yerleştirilmelidir. - Page 11 3 Kurulum Cihazı kaldırın ve kabinin içine yerleștirin. Merkezlenmeli Cihazı kabine koyduktan sonra çerçevenin 4 köşe- sine bastırarak braket üzerindeki tırnakları çerçe- veye oturtun. 11 / TR Mikrodalga Fırın / Kullanma Kılavuzu...
-
Page 12: Radyo Paraziti
3 Kurulum 3.4 Radyo paraziti Elektriğin kısa devre yapması durumunda toprak- lama sistemi elektrik akımı için bir kaçış teli sağla- Mikrodalga fırının çalışması radyo, televizyon veya yarak elektrik çarpma riskini azaltır. Sadece cihaza benzeri donanımlarda parazite neden olabilir. özel bir elektrik devresinin kullanılması tavsiye Parazit olması... - Page 13 3 Kurulum • Açıkta kalan alanların aşırı pişmesini önlemek için dar alüminyum folyo şeritler kullanılabi- lir. Ancak dikkatli olun, çok fazla kullanmayın ve folyo ile cihaz iç yüzeyi arasında 2,5 cm (1 inç) mesafe bırakın. Aşağıdaki liste doğru kap seçmenize yardımcı ola- cak genel bir kılavuzdur.
-
Page 14: Kullanım
4 Kullanım 4.1 Kontrol panosu Mikrodalga Mikrodalga pişirme güç seviyesini ayarlamak için bu tuşa birkaç kez basın. Izgara Izgara pişirme programını seçmek için basın. Mikrodalga + Izgara Kombi pişirme programlarından birin seçmek için basın. Menü İșlem Buz çözme ekranı Yiyeceğin buzunu ağırlığa göre çözmek için basın. Zaman / Saat Saati ayarlamak için bu tuşa basın. -
Page 15: Dijital Saatin Ayarlanması
4 Kullanım 4.3 Dijital saatin ayarlanması “MİKRODALGA” tuşuna basarak pişirme sürerken pişirme gücünü Örnek: Fırın saatini 8:30’a ayarlamak istiyor- kontrol edebilirsiniz. sunuz. 1. Bekletme modundayken “ZAMAN/SAAT” tuşuna Pişirme/buz çözme süresi sona er- 3 saniye boyunca basın. Ekranda “Hr 12” yazısı dikten sonra cihaz sinyal verir ve görünecektir. -
Page 16: Sıralı Pişirme (Çok Amaçlı Pişirme)
4 Kullanım 4.7 Sıralı pişirme (Çok amaçlı Otomatik Pişirme Menüsü pişirme) Yiyecek/pişirme Süt/kahve, patates modu için yiyecek ağırlığı Cihazda 3 otomatik pişirme sıralaması program- değil, servis adedi Patlamış Mısır lanabilir. girilir. Aşağıdaki pişirme programını ayarlamak istediği- Süt/Kahve (200 ml/ Patlamış mısır için bir nizi varsayalım;... -
Page 17: Kombi
4 Kullanım Izgara/Kombi pişirme modlarında yi- yeceğin her iki tarafının eşit pişmesi için programı durdurarak yiyeceği ters çevirmeniz gerekir. 4.10 Kombi Kombi pişirmede en uzun pişirme süresi 95 da- kikadır. Örnek: Kombi ile 12 dakika pişirmek istedi- ğinizi varsayalım. 1. “DURDUR/İPTAL” tuşuna basın. 2. -
Page 18: Temizlik Ve Bakım
5 Temizlik ve bakım 5.1 Temizlik 10. Cihazın alt yüzeyini yumuşak bir deterjanla sil- meniz yeterlidir. Silindir halkası hafif köpüklü UYARI: Cihazı temizlemek için ke- suda veya bulaşık makinesinde yıkanabilir. sinlikle benzin, solvent, aşındırıcı te- Temizlik için silindir halkasını cihaz iç boşluk mizleyiciler, metal nesneler veya sert zemininden çıkarttığınızda, geri takarken doğ- fırçalar kullanmayın. -
Page 19: Tüketici Hizmetleri
Sistemi”nde (www.servis.gov.tr) yer almaktadır. * e-posta Adresimiz: - Yedek parça malzemeleri yetkili servislerimizden - musteri.hizmetleri@arcelik.com.tr temin edilebilir. • Müșterilerimizden iletilen istek ve önerilerin Arçelik’e ulaștığı bilgisini, müșteri profili ayrımı yapılmaksızın kendilerine 24 saat içinde veririz. • Müșteri Hizmetleri sürecimiz: Müșterilerimizin istek ve önerilerini;... - Page 20 6 Tüketici hizmetleri Hizmet talebinin değerlendirilmesi Müșteri Bașvurusu Web sitesi 0850 210 0 888 Yetkili Servis musteri.hizmetleri Yetkili Satıcı Faks @arcelik.com.tr Çağrı merkezi 0216 423 2353 Bașvuru kaydı Bașvuru Konusu Müșteri Adı, Soyadı Müșteri Telefonu Müșteri Adresi Hizmet talebinin alınması...
- Page 21 Bu kılavuzu okumadan ürününüzü çalıştırmayınız. Ürününüz ile ilgili garanti şartları, kullanımı ve sorun giderme yöntemleri kılavuzda yer almaktadır. Uygun Kullanım ve Garanti ile İlgili Dikkat Edilmesi Gereken Hususlar; Aşağıda belirtilen sorunların giderilmesi ücret karşılığında yapılır. Bu durumlar için garanti şartları uygu- lanmaz;...
- Page 22 Arçelik Adresi: Cinsi: Arçelik A.Ş. Karaağaç Caddesi No:2-6, Mikrodalga Fırın 34445, Sütlüce / İSTANBUL Modeli: MD 893 FS / MD 893 FB / MD 893 FG Telefonu: Bandrol ve Seri No: 0216 585 8 888 Faks: 0216 423 2353 Garanti Süresi:...
- Page 23 Please read this user manual first! Dear Valued Customer, Thank you for preferring this Arçelik appliance. We hope that you get the best results from your appliance which has been manufactured with high quality and state-of-the- art technology. Therefore, please read this entire user manual and all other accompa- nying documents carefully before using the appliance and keep it as a reference for future use.
- Page 24 CONTENTS 1 Important safety and environmental instructions 1.1 Safety warnings ....25 1.2 Compliance with the WEEE Directive and Disposing of the Waste Product: ..30 1.3 Package information .
-
Page 25: Important Safety And Environmental Instructions
1 Important safety and environmental instructions Important Safety Instruc- This appliance is intended to be • used in household and similar tions Read Carefully And applications such as: Keep For Future Reference – Staff kitchen areas in shops, 1.1 Safety warnings offices and other working en- vironments;... - Page 26 1 Important safety and environmental instructions Do not place any object between Never attempt to dismantle the • • the front side and the door of the appliance. No warranty claims oven. Do not allow dirt or clean- are accepted for damage ing agent remnants to build up caused by improper handling.
- Page 27 1 Important safety and environmental instructions Do not operate the oven empty. The only way to disconnect the • • appliance from the power sup- Cooking utensil may get hot due • ply is to remove the power plug to the heat transferred from the from the power outlet.
- Page 28 1 Important safety and environmental instructions Unplug the appliance before The contents of feeding bot- • • each cleaning and when the ap- tles and baby food jars should pliance is not in use. be stirred or shaken and the temperature checked before Do not pull the power cable of •...
- Page 29 1 Important safety and environmental instructions Appliance must be placed so The oven should be cleaned • • that the rear side is facing the regularly and any food deposits wall. removed. Before moving the appliance, There should be min 20 cm free •...
-
Page 30: Compliance With The Weee Directive And Disposing Of The Waste Product
1 Important safety and environmental instructions Cleaning and user maintenance Microwave oven is intended for • procedures should not be per- built-in use only. formed by children unless they If built-in appliances being used • are controlled by their elders. equal or higher than 900 mm Danger of choking! Keep all above the floor, care should be... -
Page 31: Package Information
1 Important safety and environmental instructions 1.3 Package information Packaging materials of the product are manufactured from recyclable materi- als in accordance with our National Environment Regulations. Do not dis- pose of the packaging materials together with the domestic or other wastes. Take them to the pack- aging material collection points designated by the local authorities. -
Page 32: Your Microwave Oven
2 Your microwave oven 2.1 Overview Control and parts 2.2. Technical data 1. Door safety interlock system Power Consumption 230-240 V~50 Hz, 2. Oven window 1400 W (Microwave) 1000 W (Grill) 3. Turntable shaft 4. Turntable support Output 900 W 5. -
Page 33: Installation
3 Installation 3.3 Microwave Oven Cabinet 3.1. Installation • Installation should be performed by authorised service personnel. • Make sure that all packing materials inside the door are removed. • This appliance should be placed on a level sur- face that could bear the weight of the oven and the heaviest food that may be cooked inside the oven. - Page 34 3 Installation Lift the appliance and place it in the cabinet. Must be centered After locating the appliance inside the cabinet, press the 4 corners of the frame to have the tabs on the brackets seated on the frame. 34 / EN Microwave Oven / User Manual...
-
Page 35: Radio Interference
3 Installation 3.4 Radio interference Grounding system allows a leak wire for the elec- trical current in case of a short circuit and reduces Operation of the microwave oven may cause in- the risk of electric shock. It is recommended to terference on radios, TVs and similar appliances. - Page 36 3 Installation • You may use narrow aluminium foil straps in order to prevent the exposed pieces from being overcooked. However, please be careful! Do not use it excessively and keep a distance of 2.5 cm (1 inch) between the foil and inner surface of the appliance.
-
Page 37: Operation
4 Operation 4.1 Control panel Power Press this key a few times to set the level of mi- crowave cooking. Grill Press this key to select the grilling programme. Microwave + Grill Press this key to select one of the combi cooking programmes. -
Page 38: Setting The Digital Clock
4 Operation 4.3 Setting the digital clock You can check the cooking power while cooking by pressing the Example: If you want to set the appliance “POWER” key. time to 08:30. 1. In stand-by mode, press the “CLOCK/KITCHEN Oven gives a signal sound when TIMMER”... -
Page 39: Queued Cooking (Multipurpose Cooking)
4 Operation 4.7 Queued cooking (Multipurpose Automatic Cooking Menu cooking) Code Food/cooking For milk/coffee and mode potatoes, number of You can programme 3 automatic cooking queues on the servings should be your appliance. Popcorn entered; not the food Let's assume that you want to set the following cook- Milk/Coffee (200 weight. -
Page 40: Combination
4 Operation You should pause the programme and turn the food over in order that both sides of the food are cooked evenly in the Grill/Combination cooking modes. 4.10 Combination The longest cooking duration is 95 minutes for combination cooking. Example: Let's assume that you want to cook for 12 minutes in Combination mode. -
Page 41: Cleaning And Maintenance
5 Cleaning and maintenance 5.1 Cleaning 10. It would be sufficient to wipe the lower surface of the appliance with a mild detergent. Roller WARNING: Never use gasoline, ring may be washed in warm soapy water or in solvent, abrasive cleaning agents, a dishwasher. - Page 42 Arçelik A.Ş. Karaağaç Caddesi No: 2-6, 34445, Sütlüce, İstanbul, Türkiye www.arcelik.com.tr...
Need help?
Do you have a question about the MD 893 FS and is the answer not in the manual?
Questions and answers