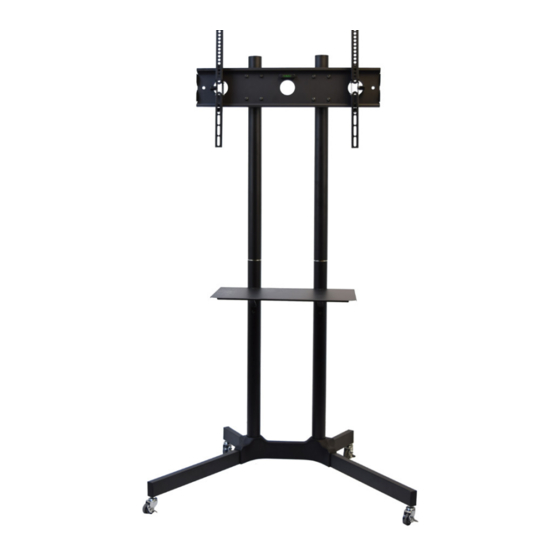
Vivo STAND-TV03E Assembly Manual
Mobile tv cart
Hide thumbs
Also See for STAND-TV03E:
- Instruction manual (8 pages) ,
- Instruction manual (3 pages) ,
- Instruction manual (4 pages)
Summary of Contents for Vivo STAND-TV03E
- Page 1 Mobile TV Cart STAND-TV03E Assembly Manual Individual Product SKUs STAND-TV03E STAND-TV03E/W...
-
Page 2: We're Here For You
Email Us Chat with Live Agent Give Us a Call help@vivo-us.com www.vivo-us.com 309-278-5303 ext. 1 Assembly Video Available Navigate to the middle of the product page to watch as our product specialists walk you through the assembly process. https://vivo-us.com/products/stand-tv03e WATCH NOW... -
Page 3: Please Read
Returns: We offer a hassle-free 30 day return on all products. Contact customer support at 309-278-5303 or help@vivo-us.com. Please note: For items ordered in error or no longer needed, the return shipping charges will be at the buyer’s expense. Product Specific Warnings: WARNING: CHOKING HAZARD SMALL PARTS - NOT FOR CHILDREN UNDER 3 YEARS. -
Page 4: Package Contents
Package Contents A (x2) B (x2) C (x1) D (x2) Long Leg Short Leg Base Rubber Sleeves with Cover F (x2) G (x2) H (x4) E (x2) Upper Pole Pole Connector Pole Cap Lower Pole I (x4) J (x2) K (x2) L (x4) Caster Plastic Pad... -
Page 5: Weight Capacity
Included Hardware & Tools - Cont’d M-E (x4) M-F (x4) M-G (x4) M-H (x4) M8x20mm M8x35mm M8x50mm M4 Washer Screw Screw Screw M-I (x12) M-J (x4) M-K (x4) M-L (x4) M6 Washer M8 Washer Small Large Spacer Spacer M-M (x8) T-A (x1) T-B (x1) T-C (x1) -
Page 6: Assembly Steps
Assembly Steps STEP 1 Attach Casters (I) to Long and Short Legs (A, B) using Wrench (T-D). STEP 2 Separate Base with Cover (C) into Base (C1) and Cover (C2). Attach Long and Short Legs (A, B) to Base (C1) using M6x60mm Screws (S-A), Threaded Plates (L), and 5mm Allen Wrench (T-C). - Page 7 STEP 3 Thread Pole Connecters (G) onto Lower Poles (E). Carefully thread the pole connector in perfectly straight to avoid cross-threading. If you feel resistance, back the connector out and restart. Once you are certain the connector is going in straight, use additional force to tighten. Insert Lower Poles (E) into Base (C1) and secure using M6x10mm Screws (S-B) and 4mm Allen Wrench (T-B).
- Page 8 STEP 4 Slide Cover (C2) over Lower Poles (E) and onto Base (C1). To ensure a correct fit, make sure side with logo is facing the front. Place Rubber Sleeves (D) into the holes on the backside Lower Poles. (Front) (Back) Thread Upper Poles (F) into Pole Connectors (G).
- Page 9 STEP 5 Hold Plastic Pad (J) inside of Adapter Bracket (K) and slide onto Upper Pole (F). Tighten the set screw on Adapter Bracket to secure using 4mm Allen Wrench (T-B). When positioning, ensure that the set screw is facing the back and that the mounting holes are facing the front of the assembled cart. Attach Mounting Plate (O) to Adapter Brackets (K) using M6x10mm Screws (S-B), M6 Washers (M-I), and 4mm Allen Wrench (T-B).
- Page 10 STEP 6 Clip Level (T-E) onto Mounting Plate (O). STEP 7 Secure VESA Bracket Set (P) to back of TV using appropriate Screws (M-A ~ M-G) with Washers (M-H ~M-J), and Spacers (M-K ~ M-M). Flat Back TV Non-Flat Back TV (M-A~M-G) (M-A~M-G) (M-H~M-J)
- Page 11 STEP 8 Loosen Set Screws on Adaptor Brackets (K) with 4mm Allen Wrench and make adjustments as necessary to level out Mounting Plate (O). Retighten Set Screws. Hang TV with VESA Brackets (P) onto Mounting Plate (O). Tighten locking screws on VESA Brackets using the Phillips end on 5mm Allen Wrench (T-C).
- Page 12 STEP 9 Attach Shelf Supports (N) to Lower Poles (E) using M6x10mm Screws (S-B) and 4mm Allen Wrench (T-B) at desired height. Do not fully tighten screws yet. Attach Shelf (M) to Shelf Supports (N) using M4x6mm Screws (S-D) and the Phillips end on 5mm Allen Wrench (T-C).
- Page 13 STEP 10 Manage cables through the top of Upper Poles (F), the Cable Slots on Lower Poles (E), and through the bottom of Base with Cover (C). Cable Slot...
- Page 14 [ THIS PAGE HAS BEEN INTENTIONALLY LEFT BLANK ]...
- Page 15 Securely store your PC in Clamp on & under desk and more with our clamp-on an under desk mount or keyboard tray options for and wall mount solutions. cart for easy access. all setup types. Explore Endless Workspace Solutions www.vivo-us.com...
- Page 16 Need Help? We’re Here For You Monday-Friday from 7am-7pm CST Saturday 8am-4pm CST Email Us Chat with Live Agent Give Us a Call help@vivo-us.com www.vivo-us.com 309-278-5303 ext. 1 FOR MORE GREAT VIVO PRODUCTS, CHECK OUT OUR WEBSITE AT: WWW.VIVO-US.COM VIVO-us @vivo_us @VIVOus VIVO...


Need help?
Do you have a question about the STAND-TV03E and is the answer not in the manual?
Questions and answers