Table of Contents
Advertisement
Advertisement
Table of Contents

Subscribe to Our Youtube Channel
Related Manuals for Datavideo VDR-3000


Summary of Contents for Datavideo VDR-3000
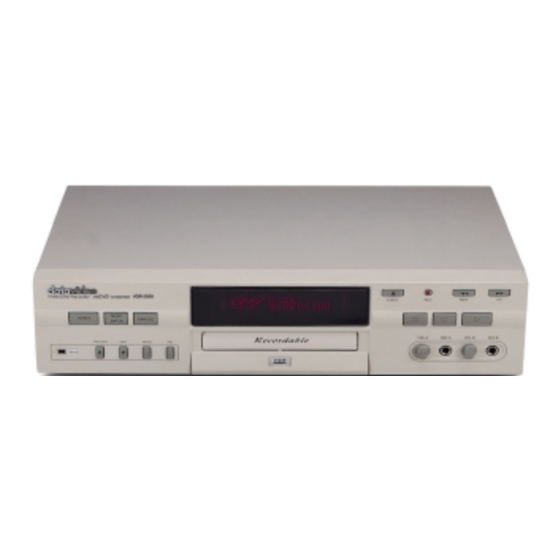
- Page 1 VIDEO DISK RECORDER VDR-3000 INSTRUCTION MANUAL http://www.datavideo-tek.com...
-
Page 2: Table Of Contents
CONTENTS Introduction Packing list --------------------------------------------------------------------------- 3 Front & Rear Panel ---------------------------------------------------------------- 4 Display Panel ----------------------------------------------------------------------- 7 Remote Control Handset -------------------------------------------------------- 8 Connections Connection a TV/Monitor --------------------------------------------------------- 11 Connecting an analog video source ------------------------------------------- 12 Connecting a DV video source (DV Model only) --------------------------- 13 Connecting a digital still camera ----------------------------------------------- 14 Connecting to a Project TV /monitor with component video------------- 15 Connecting a digital audio CD player ----------------------------------------- 16... -
Page 3: Packing List
PACKING LIST VDR-3000 is supplied with the following accessories: Infrared Remote Control Handset 2 x “AAA” Batteries for Handset Main Power Cord S-Video Cable 3 Phono (RCA) to 3 Phono (RCA) Audio/Video Cable IEEE1394 “Firewire” Cable (DV Model only) -
Page 4: Front & Rear Panel
CD-RW Rewritable CD. Rear Panel AC I N PUT AC VOLTS 1. Main Power Cord connecting socket To connect to the main power supply 2. AC Main voltage selector Sets the voltage input to 115 VAC or 230VAC. Note: This setting does not need to be changed under normal conditions. -
Page 5: Front Panel
To connect a audio digital signal from a CD player to duplicate an audio CD without sound quality loss. Please note: The Audio Digital Duplicate is only available with Audio CD-R due to copyright protection. Front Panel Video Di sk Recorder VDR-3000 DVD S-VCD/ VCD/ CD MENU POWER FI NALI ZE... - Page 6 15. PBC Button Playback control button for commercially produced VCD’s 16. CD Tray To load discs into the unit 17. Display Panel (see separate illustration) Shows current status of unit. 18. Eject Button To Open the CD Tray for loading or removing CD 19.
-
Page 7: Display Panel
Display Panel Super VC D Infrared receiver Receives signals from the Infrared Remote Control Handset DV on LED Indicates the DV source is selected CD/Super/VCD Indicates the format of the loaded disk or the selected recording format Play Indicator Indicates that the disk is playing Pause Indicator Indicates that the disk is paused Repeat... -
Page 8: Remote Control Handset
Infrared Remote Control Handset Power Button To switch the unit from On to Standby mode or vice versa. Numerical Keypad To give direct access to tracks on a disk RETURN Button To return to the first track on a disk ENT Button (ENTER) This button contents two functions: Menu and Enter Menu: Press this key to open the Color Processor on screen menu. - Page 9 REPEAT Button Offers repeat playback options. Press once to repeat a single track, twice to repeat the entire disk or three times to turn repeat function off. DOWN Arrow Navigates down through on screen menu options. Also with on screen controls reduces the setting PBC Button (Playback Control) Offers playback control options for commercially produced VCD’s...
- Page 10 PLAY Button To start the disk playing REW Button To picture search backwards through a track. Several speeds are available each press of the button will increase the speed Audio Input Button To select the digital audio or analog audio input source TS Button (Time Set) To jump to any point on a disk enter the time in minutes and seconds CL Button (Clear)
-
Page 11: Connections
CONNECTIONS Connecting to a TV Monitor NOTE: While connecting please ensure that the VDR 3000 and all devices that you are connecting to are switched off. The VDR 3000 should be connected to the video and audio inputs of a TV Monitor. The TV Monitor may have a SCART socket, PHONO (RCA) sockets or S-Video socket. -
Page 12: Connecting An Analog Video Source
Connecting an analog video source NOTE: While connecting please ensure that the VDR 3000 and all devices that you are connecting to are switched off. TV/ Moni tor Source Audi o/ Vi deo Sel ects the input source to Vi deo Sel ects the AC i nput range 1 1 5 VAC or 2 3 0 VAC for VDR-3 0 0 0 An analog video device can be connected via composite or S-Video if available. -
Page 13: Connecting A Dv Video Source (Dv Model Only)
Connecting a DV video source (DV Model only) NOTE: During connection please ensure that the VDR 3000 and all devices that you are connecting are switched off. Source Player TV/ M oni t or DV IN/OU T DV I n DV Out Sel ect s the i nput source t o DV Sel ect s the AC i nput range 1 1 5 VAC or 2 3 0 VAC for VDR-3 0 0 0... -
Page 14: Connecting A Digital Still Camera
Connecting a Digital Still Camera NOTE: While connecting please ensure that the VDR 3000 and all devices that you are connecting to are switched off. Audi o CD Pl ayer Sel ect s t he AC i nput range 1 1 5 VAC or 2 3 0 VAC for VDR- 3 0 0 0 Digital still cameras can be connected to the Video Input on the rear of the VDR 3000. -
Page 15: Connecting To A Project Tv /Monitor With Component Video
Connecting to a Projection TV / Monitor with Component Video NOTE: While connecting please ensure that the VDR 3000 and all devices that you are connecting to are switched off. The VDR 3000 should be connected to the component R.G.B. or Y.U.V. video and audio inputs of a Projection TV / Monitor. -
Page 16: Connecting A Digital Audio Cd Player
Connecting a Digital Audio CD Player (Optional) NOTE: During connection please ensure that the VDR 3000 and all devices that you are connecting are switched off. Di gi t al Audi o Pl ayer AU DI O CD OP T. Opt i cal Cabl e To H i -Fi Syst em or TV/ M oni t or Audi o I nput Ja ck Sel ect s t he AC i nput r ange 1 1 5 VAC or 2 3 0 VAC for VDR- 3 0 0 0... -
Page 17: Operation Switching On
OPERATION Switching on Once all cables are in place it is ok to power on the VDR-3000. Press the Power Button on the front of the VDR 3000 or on the remote control handset, the display panel should light up and display ” - - - -“. -
Page 18: Recording A Disk
To return to the previous track press the Previous Button on the VDR 3000 or remote control handset If you wish to search through a track during playback you can press the F.F. Button. There are several speeds available and pressing the F.F. Button will cycle through to a faster fast forward speed. - Page 19 The default setting is set at Video/S-Video format. Note: Please don’t hook up the video cables to Y.U.V./R.G.B. and Video/S-Video connectors at same time. It will cause the incorrect (lower) video output level. NOTE: The VDR-3000 will return to default settings when powered on. Screen Shots are simulated. Video/S-Video...
-
Page 20: Pc Playback
Eject Button again to close the CD tray. PC Playback Datavideo has provided a player that will be recorded onto every CD that is created by the VDR 3000. The player will auto-run in a Windows based Personal Computer. -
Page 21: Video Window
Playing CD’s in your PC 1. The PC auto player is a MPEG-2 decoder, which requires a large amount of PC resources. It is recommended that you close all running applications before inserting the autoplay disk. 2. Insert your disk into your CD-ROM drive. 3. -
Page 22: Player Control
Grabbing Frames from your CD to save or e-mail 1. Make sure the auto player is running. 2. On the player control window there is a Frame Grab Icon (picture of a camera). 3. Once you have decided on a specific frame press the Frame Grab icon immediately. -
Page 23: Advanced Operation
ADVANCED OPERATION Colour correcting the video source before recording The VDR-3000 has a built in a Digital Colour Processor that is very useful for recording a videodisc from a low quality video source such as old VHS and Video 8 tape. -
Page 24: Frequently Asked Questions
Note: These discs have been tested, there are many others that will work that have not been tested. Q 2. Why will a CD-R Disc written by the VDR-3000 not play back in some home VCD or DVD Players? Some VCD or DVD Players do not support CD-R disc playback, so it cannot recognize the CD-R that’s written by the VDR-3000. - Page 25 VCD/DVD player, such as Pioneer, SAMPO, ACER… so it is a VCD/DVD player related compatible problem. Q6. Why does the VDR-3000 take a much longer time on reading some various Brands of CD-R, CD-R/W discs? Some CD-R, CD-R/W disc are not fully compatible with the VDR 3000 CD-R/W drive, so it will take a longer time to recognize the new disc or sometimes it will fail.
- Page 26 VDR-1000/3000DV. Q11. Why am I getting the error message "Vencmpeg did not start"? The VDR-3000 needs to have a signal to synchronize to before it records. This error message is usually given when a user enables recording on the VDR-3000 before playing back source material.
- Page 27 "*.mpg" extension. Windows Media Player is able to recognize this format. Note: This will only work with mpeg-1 formats (VCD and HQ-VCD Modes) that are created on the VDR-3000. To achieve this, follow the directions below: Explore your VCD or HQ-VCD disk in Windows Explorer Look for a folder called "MPEGAV"...
- Page 28 Q17. DVD Players that can play back CD-R, CD-RW Discs and CD-DVD SVCD HQ- VCD and VCD format video (For reference only) DVD Model Playback Acer DVD-5150 Afreey LD-2060 Aiwa XD-DV500 Apex AD-500 /600/660/700/703 Amoisonic DVR2000 Amoisonic DVD8506 Denon DVD1500 Denon DV3000 Denver JVD200 Digitron DVS360...
- Page 29 DVD Model Capable of CD-R Playback MICO A980 Microboss MP3 Rock Micromega minium Oritron DVD200 Panasonic A100 Panasonic A105 Panasonic A110 Panasonic A115 Panasonic A120 Panasonic A160 Panasonic A300/ 310/320/350/360 Panasonic L50 Panasonic LV75 Panasonic M360K Panasonic P10 Panasonic RV20 Panasonic RV30 Panasonic SCHT80 Panasonic T-2000...
- Page 30 DVD Model Capable of CD-R Playback Sampo DVE 560+ Sampo DVE-611 Sampo DVE-660 Samsung DVD608/611/709/711 /811/812/909 Samsung DVD 927 Sanyo DVD 6070 Sharp 600U Shinco DVD 360 Shinco DVD 8320 Shinco DVD 868 Skyworth Smart DVD 2000 SMC 330S/530 SM Supervision 2000 Sony DAVS-300 Sony DVP-C600D Sony DVP-C650D...
- Page 31 ? ? ? ? : Means it has not been tested. It would be appreciated if you can add to the compatibility information of DVD players, which we can share with other users. For new information on DVD players, please mail to service@datavideo.com.tw Capable Capable...
-
Page 32: Specifications
SPECIFICATIONS: Playback Disc Type Recorder Disc Type Audio CD sampling rate Video format CDDVD DVD-Photo S-VCD video resolution HQ-VCD video resolution VCD video resolution Video inputs: Video Outputs: Digital Audio Input Audio Inputs: Audio Outputs: Microphone input Power supply Dimension Weight CDDVD/DVD-Photo/SVCD/HQ-VCD/VCD/Audio CD CD-R, CD-R/W 650MB... -
Page 33: Contact Information
32 MB RAM VGA card Datavideo does not guarantee compatibility with all PCs. For further information or technical support, visit our website at: www.datavideo-tek.com. If your question cannot be answered from the website, please contact one of our locations. Datavideo Locations Datavideo Corporation USA 12300-U East Washington Blvd.,...
Need help?
Do you have a question about the VDR-3000 and is the answer not in the manual?
Questions and answers