
Subscribe to Our Youtube Channel
Related Manuals for Datavideo DN-300


Summary of Contents for Datavideo DN-300
- Page 1 DN-300 HDV / DV Hard Disk Recorder Instruction Manual www.datavideo-tek.com Rev 071107...
-
Page 2: Table Of Contents
Warnings and Precautions ------------------------------------------------------------------------------------- Warranty ------------------------------------------------------------------------------------------------------------ Disposal ------------------------------------------------------------------------------------------------------------- Packing List -------------------------------------------------------------------------------------------------------- Introduction -------------------------------------------------------------------------------------------------------- Features ------------------------------------------------------------------------------------------------------------- Connections & Controls ---------------------------------------------------------------------------------------- DN-300 Front Panel -------------------------------------------------------------------------------------- DN-300 Rear Panel --------------------------------------------------------------------------------------- Powering On ------------------------------------------------------------------------------------------------------ Menu Options - Overview--------------------------------------------------------------------------------------- HDD Mode Menu------------------------------------------------------------------------------------------- Record Formats Menu -----------------------------------------------------------------------------------10... - Page 3 Connecting to a PC---------------------------------------------------------------------------------------22 Connecting to a MAC ------------------------------------------------------------------------------------23 Specification-------------------------------------------------------------------------------------------------------25 Service and Support --------------------------------------------------------------------------------------------26...
-
Page 4: Warnings And Precautions
7. This product should only be operated from the type of power source indicated on the marking label of the AC adapter. If you are not sure of the type of power available, consult your Datavideo dealer or your local power company. -
Page 5: Warranty
Equipment that fails after the warranty period, has been operated or installed in a manner other than that specified by Datavideo, or has been subjected to abuse or modification, will be repaired for time and material charges at the Buyer’s expense. -
Page 6: Packing List
Full VTR playback functionality, including loop playback. RS-422 control GPI input Drag and Drop file transfer to PC or MAC via IEEE-1394. N.B. The DN-300 cannot be operated as a DV Device from a PC - The AVC Command set is not supported. -
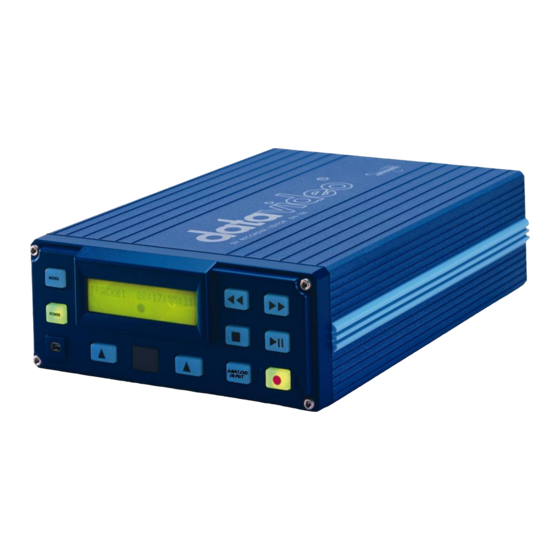
Page 7: Connections & Controls
Menu Button. This calls up the menu display which is navigated using the Fwd / Rew Buttons and Previous / Next Buttons Display Panel. Displays the status of the DN-300. The display will show Track Number, Timecode, or if the Menu Button is pressed the Menu Display Fwd / Rew Buttons. -
Page 8: Dn-300 Rear Panel
PC for file transfer. YUV In/Out Port. If you intend to run a YUV Component signal in or out of the DN-300 connect the special YUV breakout cable to this port. See Video Input Source Menu for more details. -
Page 9: Powering On
Menu Options The DN-300 is a menu driven unit; there are 18 menus which are used to initially set up the unit. The menu settings are non-volatile (they are stored even when the unit is switched off), so many of the settings, such as date and time, you will only need to set once. -
Page 10: Hdd Mode Menu
PC or MAC. The files appear in the root directory of the DN-300 hard disk, and are numbered with the track number that appears in the LCD display when you are recording or playing back the track. -
Page 11: Record Formats Menu
300 can then be used just like any external drive. See Connecting to a PC / Connecting to a MAC for more details. To return the DN-300 to Deck Mode either use “Safely Remove Hardware” with a PC, or with a MAC use “Eject” or Drag the DN-300 Drive to “Trash”. Once un-mounted the DN-300 display will return to Track Display. -
Page 12: Input Video Standard Menu
NTSC Setup Level Menu The NTSC Setup Level Menu sets the DN-300 either 0 ire or 7.5 ire - This is not necessary for PAL inputs. 7.5 ire is most commonly used in the U.S.A. and Canada and 0 ire in far eastern countries such as Japan. If you are unsure which to set, please consult your dealer. -
Page 13: Video Input Source Menu
Then press the Menu Button to leave menu mode Video Input Source Menu The Video Input Source Menu sets the analogue input mode of the DN-300. The DN-300 has Composite (CVBS), S-Video (Y/C) and Component (YPbPr) analogue inputs. N.B. It is only possible to record RAW DV (DV) from the analogue inputs - M2T (HDV) can only be recorded from a HDV stream via IEEE-1394 (iLink, FireWire). -
Page 14: Gpi Mode & Function Menus
GPI Mode & Functions Menus The DN-300 can be set to receive either pulse or level GPI triggers, which can be set to activate Play / Pause or Rec / Pause. To select the GPI Mode: Press the Menu Button, to enter menu mode Press the FWD (►►) Button to navigate the menus until SET GPI TRIGGER MODE is displayed... -
Page 15: Set Date & Time Menu
Set Date & Time Menu To set the Date & Time on the DN-300 Press the Menu Button, to enter menu mode Press the REW (◄◄) Button to navigate the menus until SET DATE & TIME is displayed Press the Next (▲) Button to enter the SET Date & Time menu You will see a flashing cursor on the date value. -
Page 16: Format Hard Disk Menu
You will see ARE YOU SURE? displayed Press the Next (▲) Button again to confirm that you want to format the hard disk. After a few seconds the DN-300 will reboot and the display will return to normal Erase Track Menu Erase Track is used for deleting individual tracks from the DN-300. -
Page 17: Convert Dv To Avi Menu
Convert DV to AVI Menu The DN-300 has a built in file conversion utility which can convert .dv files to .avi files (type 1 or type 2). You can choose the format that best suits your NLE platform. N.B. The DN-300 requires sufficient HDD space to create the .avi file. For example a One GB .dv file will require at least One GB of free space on the DN-300 for the .avi file to be created. -
Page 18: Operation With A Dv Camcorder / Deck / Vision Mixer
Recording a track To record from a DV Camcorder / Deck / Vision Mixer connect the DV device to the DN-300 via an IEEE- 1394 (iLink, FireWire) cable. You can connect to either of the rear 6 Pin ports, or to the front mounted 4 Pin port, but only connect one DV device to the DN-300 at a time. -
Page 19: Playing A Dv Track
There is some available space on the DN-300 Hard Disk - Go to the FREE SPACE Menu and check that the DN-300 is not full. During record you can pause the DN-300 by pressing the Play/Pause button, the counter on the LCD display will stop. -
Page 20: Operation With A Hdv Camcorder / Deck
The track you have selected on the DN-300 is empty. The counter next to the TrackNo. on the LCD display should b showing 00:00:00:00. There is some available space on the DN-300 Hard Disk - Go to the FREE SPACE Menu and check that the DN-300 is not full. -
Page 21: Playing A M2T Track
Button. It is also possible to set the DN-300 to loop play. In loop play the track will seamlessly looped until stopped. To set up loop play press the Menu Button to enter menu mode and then the FWD (►►) Button until SETUP LOOP PLAY is displayed. -
Page 22: Playing A Track
The track you have selected on the DN-300 is empty. The counter next to the TrackNo. on the LCD display should b showing 00:00:00:00. There is some available space on the DN-300 Hard Disk - Go to the FREE SPACE Menu and check that the DN-300 is not full. -
Page 23: Connecting To A Pc
Connecting to a PC NB: Although a PC may see the DN-300 as an AVC compliant DV Device it is not intended to be operated as such. If your PC sees an AVC DV Device select Take No Action. Connect the DN-300 IEEE-1394 output to a PC. -
Page 24: Connecting To A Mac
Once un-mounted from the PC the DN-300 display will leave HDD Mode and return to Track Display. Connecting to a MAC NB: Although a MAC may see the DN-300 as an AVC compliant DV Device it is not intended to be operated as such. - Page 25 The MAC should see the DN-300 as a HDD and the files will appear in the root directory of the drive. You can select the required files and drag and drop them to the required destination. To un-mount the DN-300 from your MAC either “Eject” the drive, or drag it to the Trash Can. Once the DN-...
-
Page 26: Specification
Power: 12V 4.2A Dimensions: 170mm (W) x 250mm (D) x 70mm (H) Weight: 2.5 Kg All the trademarks are the properties of their respective owners. Datavideo Technologies Co., Ltd. All rights reserved 2007. Specifications are subject to change without notice... -
Page 27: Service And Support
It is our goal to make your products ownership a satisfying experience. Our supporting staff is available to assist you in setting up and operating your system. Please refer to our web site www.datavideo-tek.com for answers to common questions, support requests or contact your local office below.
Need help?
Do you have a question about the DN-300 and is the answer not in the manual?
Questions and answers