Table of Contents
Advertisement
Advertisement
Table of Contents

Related Manuals for Datavideo DN-400


Summary of Contents for Datavideo DN-400
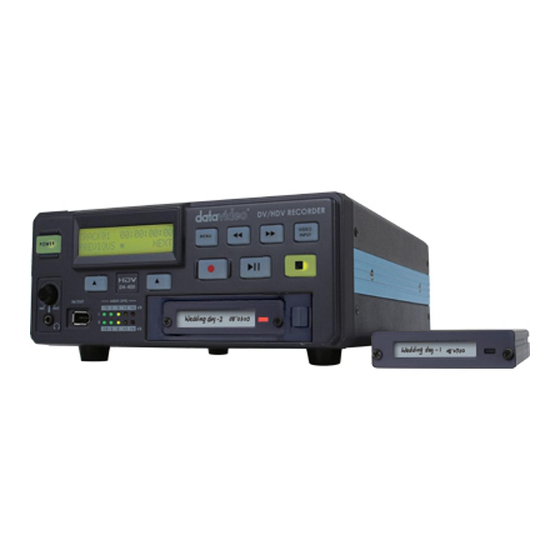
- Page 1 DV / HDV RECORDER. DN-400 Instruction Manual www.datavideo-tek.com...
-
Page 2: Table Of Contents
Connection to PC when HE-1 drive caddy is still inside DN-400 ............... 30 Connecting to a MAC when HE-1 drive caddy is still in DN-400 ..............32 Free DV File Converter Software CD ......................33 Software Overview ............................33 ... - Page 3 Disclaimer of Product and Services The information offered in this instruction manual is intended as a guide only. At all times, Datavideo Technologies will try to give correct, complete and suitable information. However, Datavideo Technologies cannot exclude that some information in this manual, from time to time, may not be correct or may be incomplete.
-
Page 4: Warnings And Precautions
7. This product should only be operated from the type of power source indicated on the marking label of the AC adapter. If you are not sure of the type of power available, consult your Datavideo dealer or your local power company. -
Page 5: Warranty
Certain parts with limited lifetime expectancy such as LCD Panels, DVD Drives, Hard Drives are only covered for the first 10,000 hours, or 1 year (whichever comes first). Any second year warranty claims must be made to your local Datavideo office or one of its authorized Distributors before the extended warranty expires. -
Page 6: Packing List
FireWire drive from which files can be dragged and dropped to a PC or MAC. The DN-400 has a built in utility to convert .dv files to .avi files, and is also supplied with DV File Converter software to allow conversion of .dv files to other file formats such Quicktime. -
Page 7: How To Fit A 2.5" Sata Hard Drive Into The Removable He-1 Caddy
How to fit a 2.5" SATA Hard Drive into the removable HE-1 Caddy If your DN-400 does not come with a hard drive already fitted inside the removable caddy please follow these instructions to fit your own drive. Please note the warnings on the removable caddy and only replace or install the hard drive from the end indicated. -
Page 8: Connections & Controls
Menu Button. This calls up the menu display which is navigated using the Fwd / Rew Buttons and Previous / Next Buttons Display Panel. Displays the status of the DN-400. The display will show Track Number, Timecode, or if the Menu Button is pressed the Menu Display Fwd / Rew Buttons. -
Page 9: Rear Panel
Mini XLR inputs and Outputs for Balanced Audio Connection. Note: XLR and RCA Phono inputs can not be used at the same time. GPI socket. Can be used for simple external control. The DN-400 can accept pulse or level trigger inputs, these can trigger record, playback and pause commands See GPI Mode &... -
Page 10: Powering On
Menu Options The DN-400 is a menu driven unit; there are 24 menus which are used to initially set up the unit. The menu settings are non-volatile (settings are stored even when the unit is switched off). So many of the settings, such as date and time, will only need to be set once. - Page 11 / Play Pause or Record / Record Pause. See GPI Mode & Function Menus for more details. SET DATE & TIME – Sets the date and time on the DN-400; the setting is non-volatile so it is stored when the unit is powered off. See Set Date &...
-
Page 12: Hdd Mode Menu
HDD Mode Menu will set the DN-400 up as an external IEEE-1394 (Firewire) drive, for direct drag and drop file transfer to a PC or MAC. The DN-400 drive will show up on the desktop of the MAC or in the My Computer window of a Windows PC. -
Page 13: Record Formats Menu
FireWire), it is not possible to record or play M2T files from an analogue connection on the DN-400. N.B: To view recorded M2T files set your HDV Camcorder / Deck to Playback Mode. The DN-400 M2T files can then be played back to the camcorder viewfinder / monitor. -
Page 14: Ntsc Setup Level Menu
NTSC Setup Level Menu The NTSC Setup Level Menu sets the DN-400 either 0 IRE or 7.5 IRE. This is not necessary for PAL inputs. 7.5 IRE is most commonly used in the U.S.A. and Canada and 0 IRE in far eastern countries such as Japan. -
Page 15: Video Input Source Menu
Then press the Menu Button to leave menu mode GPI Mode & Functions Menus The DN-400 can be set to receive either pulse or level GPI triggers, which can be set to activate Play / Pause or Rec / Pause. -
Page 16: Select The Gpi Function
Then press the Menu Button to leave menu mode Set Date & Time Menu To set the Date & Time on the DN-400 Press the Menu Button, to enter menu mode Press the REW (◄◄) Button to navigate the menus until SET DATE & TIME is displayed Press the Next (▲) Button to enter the SET Date &... -
Page 17: Set Full Syt Menu
Then press the Menu Button to leave menu mode Format Hard Disk Menu Format Hard Disk will remove or erase all tracks and any other files from the DN-400 hard drive. Press the Menu Button, to enter menu mode Press the REW (◄◄) Button to navigate the menus until FORMAT HARD DISK is displayed Press the Next (▲) Button to enter the FORMAT HARD DISK menu... -
Page 18: Erase Track Menu
After a few seconds the DN-400 will reboot and the display will return to normal Erase Track Menu Erase Track is used for deleting individual tracks from the DN-400 drive. Press the Menu Button, to enter menu mode Press the REW (◄◄) Button to navigate the menus until ERASE TRACK is displayed Press the Next (▲) Button to enter the ERASE TRACK menu... -
Page 19: Convert Dv To Avi Menu
N.B. Check free space first the DN-400 requires enough free drive space to create a converted .avi file. For example a 1 GB .dv file will require at least another 1 GB of free space on the DN-400 drive for the .avi file to be created. -
Page 20: Set Output Channel Menu
Output Channel of the DN-400 to overcome the conflict. For example if another DV device has the same output channel as the DN-400 this will result in a conflict, which will mean that the DN-400 output is blocked. -
Page 21: Operation With A Dv Camcorder / Deck / Vision Mixer
Press the Next (▲) Button to exit the surface scan. A txt file called Result.txt will have been created in the root directory of the DN-400 HDD, this file can be accessed via a computer as described earlier in this manual. -
Page 22: Playing A Dv Track
Button. It is also possible to set the DN-400 to loop play. In loop play the track will loop until stopped. To set up loop play press the Menu Button to enter menu mode and then the FWD (►►) Button until SETUP LOOP PLAY is displayed. -
Page 23: Operation With A Hdv Camcorder / Deck
Make sure that the DN-400 Record Format is set to .M2T (HDV). Please see Record Formats Menu for more details. Use the Next / Previous Buttons to select an empty track from the DN-400 track list, one that shows a duration of 00:00:00:00 in the LCD display. -
Page 24: Playing A M2T (Hdv) Track
Use the Previous (▲) / Next (▲) keys to select the track you want to play then press the Play (►II) Button. It is also possible to set the DN-400 to loop play. In loop play the track will seamlessly looped until stopped. - Page 25 The track you have selected on the DN-400 is empty. The counter next to the TrackNo. on the LCD display should be showing 00:00:00:00. There is some available space on the DN-400 Hard Disk - Go to the FREE SPACE Menu and check that the DN-400 is not full.
-
Page 26: Connecting The Removable He-1 Caddy Directly To A Pc
Connecting the removable HE-1 Caddy directly to a PC Files that have been recorded onto the DN-400 can be transferred directly to a PC or MAC via the IEEE- 1394 (iLink, FireWire) port – See HDD Mode menu. More conveniently, the HE-1 drive caddy can be ejected and connected to a PC or MAC with the supplied USB cable. - Page 27 The files appear in the root directory of the DN-400 hard disk, and are numbered with the track number that appears in the LCD display when you are recording or playing back the track.
-
Page 28: Connecting The He-1 Drive Caddy Directly To A Mac
MAC. If the drive does not power up correctly – connect the second USB connector as well as the first to another USB socket on your MAC. A Datavideo drive will appear on the desktop. If you access the drive you will see the .dv files are available for copying across to a local drive, or direct... - Page 29 To safely remove the drive from your MAC, either select Eject from the Finder File Options (Fig 1), or select Eject from the drive window options (Fig 2) Fig 1 Fig 2...
-
Page 30: Connection To Pc When He-1 Drive Caddy Is Still Inside Dn-400
Folder to View Files. The drive should also appear in My Computer as an internal HDD. Once connected the DN-400 can be used just like any HDD. You can select the required files and drag and drop them to the... - Page 31 SBP2 Device and click on Stop. A second dialog box will appear. Select Datavideo HDD IEEE SBP2 Device and click on OK. After a few seconds a “Safe To Remove Hardware” message should appear above the Taskbar. You can then disconnect the DN-400.
-
Page 32: Connecting To A Mac When He-1 Drive Caddy Is Still In Dn-400
Press the Next (▲) Button again to confirm, after a few seconds HDD Mode will be enabled The MAC should see the DN-400 as a HDD and the files will appear in the root directory of the drive. You can select the required files and drag and drop them to the required destination. -
Page 33: Free Dv File Converter Software Cd
128MB of RAM Software Registration The CD contains the Datavideo DV File Converter trial software. This allows the user trial access to the software for evaluation and any video files converted will show watermark text in the video playback. An activation code allows the software to produce files without the watermark text. -
Page 34: Rs 422 Command Set / Protocol Version 1.2
(Least Significant) nibble. It (CMD-1) indicates the command or return group to which the command belongs as per the table below. CMD-1 Function Initiator System Control Controller System Control Return Device (DN-400) Transport Control Controller Preset And Select Control Controller Sense Request Controller Sense Return... -
Page 35: Connector Pin Assignment
3. The CONTROLLER must transmit of bytes in a COMMAND block for with intervals less than 10 milliseconds. If a DEVICE (DN-400) detects an interruption of a byte in a COMMAND block that exceeds 10 milliseconds, it executes a TIME-OUT error sequence, voids the receiving COMMAND... -
Page 36: Command Table (Without Checksum Byte)
CONTROLLER detects a communication error, and must execute an appropriate process. 5. When a DEVICE (DN-400) detects a communication error, it must immediately transmit a NAK to the CONTROLLER. (The content of an error is shown on the COMMAND tables.) When the CONTROLLER receives a NAK, if must immediately stop transmission of the block. - Page 37 20h 10h : FAST FORWARD Send: 20h 10h 30h Return: 10h 01h 11h 2xh 13h : SHUTTLE FORWARD Send: 21h 13h 01h 35h Return: 10h 01h 11h 21h 13h 00h : PAUSE Send: 21h 13h 00h 34h Return: 10h 01h 11h 20h 20h : FAST REWIND Send: 20h 20h 40h Return: 10h 01h 11h...
-
Page 38: Return Data (Without Checksum Byte)
Return: 10h 01h 11h Return Data (without Checksum byte) 10h 01h : ACK When a command from the CONTROLLER is received normally, the DEVICE (DN-400) returns this command as acknowledgment. 11h 12h : NAK When a communication error is detected or an undefined COMMAND is received, the DEVICE returns this command as not-acknowledgment. -
Page 39: Status Return Data
Status Return Data BIT 7 BIT 6 BIT 5 BIT 4 BIT 3 BIT 2 BIT 1 BIT 0 Hardware Local Busy Disk Out Data 0 Error Enable Fast Stop Eject Rewind Record Play Data 1 Forward Fast Shuttle Still Data 2 Reverse Lamp... -
Page 40: Dn-400 Firmware Version
8. Turn on the DN-400 and the unit will update the mother board automatically and then restart*. 9. Now connect the 9pin D Sub to 3.5mm Jack cable between the PC and the DN-400. The D Sub connects to the PCs COM port and the Jack plug connects to the RS-232 socket on the DN-400 rear panel. -
Page 41: Specifications
Specifications Supported Video Formats: NTSC - DV 25 Mbps, 8-bit Y.U.V. 4:1:1 PAL- DV 25 Mbps, 8-bit Y.U.V. 4:2:0 HDV 1080i / 60 25 Mbps 8-bit Y.U.V. 4:2:0 HDV 1080i / 50 25 Mbps 8-bit Y.U.V. 4:2:0 Supported File Formats: HDV .m2t DV. -
Page 42: Service And Support
It is our goal to make your products ownership a satisfying experience. Our support staff are available to assist you in setting up and operating your system. Please refer to our web site www.datavideo-tek.com for answers to common questions, support requests or contact your local office below.
Need help?
Do you have a question about the DN-400 and is the answer not in the manual?
Questions and answers