Table of Contents
Advertisement
Advertisement
Table of Contents

Related Manuals for Inovance MD600 Series


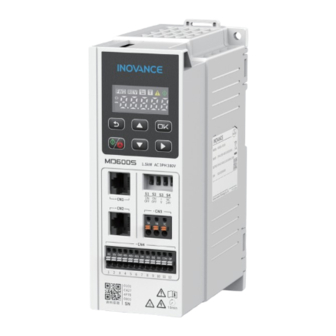
Summary of Contents for Inovance MD600 Series
-
Page 2: Preface
Preface About This Guide The MD600 series is a basic general‑purpose AC drive that is compact, easy to use, energy‑saving, and harsh environment resistant. It is mainly used to control and adjust speed of three‑phase AC asynchronous motors. The drive is suitable for industries such as the crystalline silicon, lithium battery, carpentry, logistics, food and beverage, cable, machine tool, and packaging. -
Page 3: Revision History
Preface Document Description Name Code MD600 Series 19012238 ④ This guide describes the basic function Basic AC Drive configuration, function application, Function Guide communication configuration, troubleshooting, and parameters of the drive. MD600 Series PS00012434 ⑤ This guide describes product selection,... -
Page 4: Warranty Disclaimer
Damage or secondary damage caused by force majeure (natural disaster, ● earthquake, and lightning strike) The maintenance fee is charged according to the latest Price List of Inovance. If otherwise agreed upon, the terms and conditions in the agreement shall prevail. For details, see Product Warranty Card. -
Page 5: Table Of Contents
Table of Contents T T a a b b l l e e o o f f C C o o n n t t e e n n t t s s Preface ................1 Fundamental Safety Instructions . -
Page 6: Fundamental Safety Instructions
Use this product in an environment that complies with the design specifications. ● Malfunction or component damage caused by improper usage is not covered by warranty. Inovance shall take no responsibility for any personal injuries or property damage ● caused by improper usage. Safety Levels and Definitions Indicates that failure to comply with the notice can result in death or severe personal injuries. -
Page 7: Storage And Transportation
Fundamental Safety Instructions Unpacking Do not install the equipment if you find damage, rust, or signs of use on the equipment ● or accessories upon unpacking. Do not install the equipment if you find water seepage or missing or damaged ●... - Page 8 Fundamental Safety Instructions Handle the equipment with care during transportation and mind your steps to prevent ● personal injuries or equipment damage. When carrying the equipment with bare hands, hold the equipment casing firmly with ● care to prevent parts from falling. Failure to comply may result in personal injuries. Store and transport the equipment based on the storage and transportation ●...
- Page 9 Fundamental Safety Instructions Cover the top of the equipment with a piece of cloth or paper during installation. This is ● to prevent unwanted objects such as metal chippings, oil, and water from falling into the equipment and causing faults. After installation, remove the cloth or paper on the top of the equipment to prevent over‑temperature caused by poor ventilation due to blocked ventilation holes.
-
Page 10: Operation
Fundamental Safety Instructions Before power‑on, check that the equipment is installed properly with reliable wiring and ● the motor can be restarted. Check that the power supply meets equipment requirements before power‑on to ● prevent equipment damage or a fire. Do not open the cabinet door or protective cover of the product, contact any wiring ●... -
Page 11: Safety Label
Fundamental Safety Instructions Perform routine and periodic inspection and maintenance on the equipment according ● to maintenance requirements and keep a maintenance record. Repair Equipment installation, wiring, maintenance, inspection, or parts replacement must be ● performed only by professionals. Do not repair the equipment with power on. Failure to comply can result in an electric ●... - Page 12 Fundamental Safety Instructions Safety Label Description Read through the safety instructions before operating the equipment. ● Failure to comply may result in death, personal injuries, or equipment damage. Do not touch the terminals or remove the cover with power ON or ●...
-
Page 13: Shipment Check
Shipment Check Shipment Check P P r r o o c c e e d d u u r r e e 1. Open the package and check whether the drive is intact. If the AC drive or other accessories are damaged, do not operate or install the damaged device. -
Page 14: Power Supply Compatibility Check
Power Supply Compatibility Check Power Supply Compatibility Check Check and ensure that the voltage of the mains power is compatible with the voltage of the AC drive power supply. The following table describes the AC drive models and power supply voltage. Table 2–1 AC drive models and power supply voltage AC Drive Model (Three‑Phase 380 V AC Drive Model (Single‑Phase 200 V to 240 V) -
Page 15: Unpacking And Handling
Unpacking and Handling Unpacking and Handling Unpacking 1. Open the package of the AC drive (①). 2. Take out the cushion (②). 3. Take out the AC drive (③) and the accessory kit (④). Figure 3‑1 AC drive unpacking Table 3–1 Unpacking list Name AC drive package ①... - Page 16 ● switch on the AC drive once for at least 5 hours every 6 months. Increase the input voltage slowly to the rated value by using a voltage regulator. Contact Inovance for technical support if necessary. Pack the drive strictly before transportation. Use a sealed box for long‑distance ●...
-
Page 17: Ac Drive Installation
P P r r e e r r e e q q u u i i s s i i t t e e s s Before installation, check that the installation tools and environment have been pre‑ pared. For details, see "Mechanical Design" in the MD600 Series Basic AC Drive Hard‑ ware Guide . This section describes quick backplate mounting steps. -
Page 18: Guide Rail Installation
To install the AC drive with the guide rail, prepare the DIN guide rail (option). For ● details, see "List of Options" in MD600 Series Basic AC Drive Hardware Guide . Before installation, check that the installation tools and environment have been ●... -
Page 19: Post-Installation Inspection
AC Drive Installation Figure 4‑1 Guide rail installation Post-installation Inspection After the installation is done, check the following items. Table 4–2 Post‑installation checklist Item Checked The ceiling height meets the minimum requirements for smooth ventilation. The air inlet and air outlet are free of obstruction and □... -
Page 20: Ac Drive Wiring
C C o o n n t t e e x x t t For details on main circuit terminals, see "Electrical Design" in the MD600 Series Basic AC Drive Hardware Guide . This section describes quick main circuit wiring. The follow‑... -
Page 21: Control Circuit Wiring
Figure 5‑1 Main circuit wiring Control Circuit Wiring For details on control circuit terminals, see "Electrical Design" in the MD600 Series Basic AC Drive Hardware Guide . This section describes quick control circuit wiring. The following figure takes the CAN model as an example to introduce the control circuit wiring. -
Page 22: Post-Wiring Inspection
AC Drive Wiring Figure 5‑2 Control circuit wiring Post-wiring Inspection After wiring is completed, check the following items and tick compliant items. Table 5–2 Post‑wiring inspection checklist Item Checked The power supply input cables are connected to the R, S, and T terminals (three‑phase 380 V) or L1 and L2 terminals (single‑phase □... - Page 23 AC Drive Wiring Item Checked The motor output cable does not exceed 50 m. Otherwise, the carrier □ frequency needs to be reduced through F0‑15. The ground cables are connected correctly. □ The output terminals and control signal terminals are securely □...
-
Page 24: Quick Operation
Quick Operation Quick Operation Operating Panel 6.1.1 Components The following figure describes the operating panel of the drive. For detailed descriptions, see the following table. Figure 6‑1 Operating panel Table 6–1 Operating panel description Description Name Status display area It displays the running state of the AC drive. For ①... - Page 25 Quick Operation Table 6–2 Status description Name Symbol Function Status Forward running Steady on: The AC drive is running forwardly or the forward running mode is set. Reverse running Steady on: The AC drive is running reversely or the reverse running mode is set.
-
Page 26: Parameter Settings And View
When the drive is in the faulty state, press the key to perform a reset operation. Do not repair or modify the AC drive by yourself. In case of any fault that cannot be rectified, contact the agent or Inovance for technical support. 6.1.2 Parameter Settings and View Parameter settings The operating panel provides three levels of menus for parameter settings. - Page 27 Quick Operation Figure 6‑2 Parameter modification example Parameter view The following figure takes viewing the value of F1‑03 as an example to describe how to view parameter values through the operating panel. ‑ ‑...
-
Page 28: Inspection Before Power-On
Quick Operation Figure 6‑3 Parameter view example Inspection Before Power-on Check the following items before powering on the drive. Check the following items before operating the drive and motor. ‑27‑... -
Page 29: Operation Upon Initial Power-On
Quick Operation Table 6–4 Check items before power‑on Item Checked The power supply voltage is correct (three‑phase 380–480 VAC, 50/60 Hz; single‑phase 200‑240 VAC, 50/60 □ Hz). The power supply input terminals and the AC drive input terminals (R/S/T or L1/L2) are connected properly. The power supply voltage is correct (three‑phase □... - Page 30 Quick Operation Figure 6‑4 Basic commissioning flow Note The following section introduces the required commissioning steps aiming at quick commissioning. ‑29‑...
-
Page 31: Power-On
Quick Operation 6.3.2 Power-on Close the power supply switch and check the display on the operating panel of the AC drive. If the operating panel displays 50.00, the AC drive is powered on. Figure 6‑5 Display on the operating panel upon power‑on 6.3.3 Restoring Parameters to Default Settings Set A0‑00 to 3 to restore parameters to default settings. -
Page 32: Checking Software Versions
Quick Operation Param Description Value Range rame eter fault Name Code 0: No operation 1: AC drive parameters except factory parameters, motor parameters, and 0: No operation records are restored to default settings. 1: Restore parameters 2: Fault records, cumulative running excluding motor time, cumulative power‑on time, and parameters to default... -
Page 33: Setting Motor Parameters
Quick Operation Param Parameter Name Description Value Range eter Code A2‑24 0.00‑655.35 Performance This parameter displays the temporary performance software software sub‑ version version. A2‑25 0.00‑655.35 Function software This parameter displays the sub‑version temporary function software version. Note Parameters in the preceding table cannot be changed. 6.3.5 Setting Motor Parameters Set motor parameters according to the motor nameplate, including the rated motor power, voltage, current, frequency, and speed, motor power factor, maximum... -
Page 34: Performing Motor Parameter Auto-Tuning
Quick Operation Param Parameter Description Value Range eter Name Code C4‑09 Motor power 0.600‑1.000 This parameter indicates the parameter factor power factor on the motor nameplate. C4‑10 Maximum C4‑06 to 599.00 Hz This parameter indicates the allowed motor maximum frequency of the motor. frequency C4‑11 Minimum... - Page 35 Quick Operation Then parameters C4‑20 to C4‑65 are obtained and written. ‑ ‑...
-
Page 36: Setting The Command Source
Quick Operation Parame Description Value Range rame fault Name Code C2‑ Auto‑ 0: No auto‑ Dynamic auto‑tuning and inertia auto‑tuning tuning tuning are suitable for occasions where the motor can selec 1: Partial static rotate without load. If little load torque is tion auto‑tuning of output after the motor rotates, the scenario... -
Page 37: Setting The Frequency Source
Quick Operation 4. When the AC drive is running, press to stop the AC drive (the RUN indicator is off). The following table describes parameters related to the command source. Table 6–5 Related parameter Param Parameter Name Description Value Range eter fault Code... - Page 38 Quick Operation Set b5‑00 or b6‑00 to 0 to select digital setting as the frequency source. Then you can set the frequency of the AC drive through the operating panel. 1. After power‑on, press to enter the parameter setting interface. Press , and to locate b0‑03 (set channel selection) and set it to 0 (set channel 1).
- Page 39 Quick Operation Table 6–6 Related parameter Parameter Value Range Description rame Name fault b0‑ Set channel 0: Set channel 1 This parameter is used to select the selection 1: Set channel 2 set channel. When it is set to 0, set 3: DI1 channel 1 is selected.
- Page 40 Quick Operation Parameter Description Value Range rame Name fault Main b5‐ 0: Digital setting 0: Digital setting frequency 2: AI1 The initial frequency is used as the source 5: Pulse reference main frequency. The frequency can 6: Multi‑reference be changed by using the ▲ and ▼ keys on the operating panel or the multi‑functional input terminal functioning as the UP/DOWN key.
- Page 41 Quick Operation Parameter Description Value Range rame Name fault Main b5‐ 7: Simple PLC 7: Simple PLC frequency 8: PID Simple PLC is a multi‑reference used source to control the running time and acceleration/deceleration time. Multi‑reference parameters are used to set the values of each frequency. The simple PLC module is used to set the running time and acceleration/deceleration time of...
- Page 42 Quick Operation Parameter Description Value Range rame Name fault Main 9: Communication 9: Communication b5‐ frequency 10: Potentiometer The frequency is set through source MD‑BP‑M communication. The frequency can Others: F connector be input through remote communication. The AC drive must be equipped with a communication card to communicate with the host controller.
- Page 43 Quick Operation Parameter Description Value Range rame Name fault Main b6‐ 0: Digital setting 0: Digital setting frequency 2: AI1 The initial frequency is used as the source main frequency. The frequency can be changed by using the ▲ and ▼ keys on the operating panel or the multi‑functional input terminal functioning as the UP/DOWN key.
- Page 44 Quick Operation Parameter Description Value Range rame Name fault Main b6‐ 5: Pulse reference 5: Pulse reference frequency 6: Multi‑reference The frequency is set by the DI pulse source 7: Simple PLC frequency. The frequency is 8: PID calculated according to the corresponding relationship curve between the pulse frequency and the frequency.
-
Page 45: Setting The Acceleration/Deceleration Time
Quick Operation Parameter Description Value Range rame Name fault Main 9: Communication 9: Communication b6‐ frequency 10: Potentiometer The frequency is set through source MD‑BP‑M communication. The frequency can Others: F connector be input through remote communication. The AC drive must be equipped with a communication card to communicate with the host controller. - Page 46 Quick Operation The following table describes parameters related to acceleration/deceleration time. ‑45‑...
-
Page 47: Setting Stop Mode Parameters
Quick Operation Table 6–7 Related parameter Param Parameter Description Default Value Range eter Name Code Ramp 0 to 3 b7‑01 It is used to select acceleration/ accelera deceleration time base frequency. tion/ Acceleration time indicates time deceleration required by the AC drive to accelerate time base from 0 Hz to the ramp acceleration/ frequency... - Page 48 Quick Operation 3. Start the AC drive. Then the drive accelerates to the frequency of 50 Hz and then runs at the frequency of 50 Hz. Stop the AC drive. Then the drive decelerates to zero frequency according to the set deceleration time. The following table describes parameters related to stop function.
- Page 49 Quick Operation Param Parameter Description Default Value Range eter Name Code 0.0s 0.0s to 100.0s d0‐29 DC braking During deceleration to stop, time for stop when the operating frequency is reduced to d0‑27, the drive blocks the output for the time set by d0‑28, outputs the DC braking current set by d0‑30 for the time set by d0‑29, and then...
-
Page 50: Troubleshooting
Troubleshooting The following table describes common faults, possible causes, check methods, and solutions. For a complete fault list, refer to the "Fault List" section in the MD600 Series Basic AC Drive Function Guide . Table 7–1 Symptoms, fault causes, and solutions... - Page 51 If they are normal, the control board or operating panel may be faulty. "‑H‑C" is The motor or the Check the motor and output Contact Inovance for technical displayed after motor cable is short cable voltage with a tramegger. support. power‑on.
- Page 52 AC high. 50°C. drive. Components Check the function of Contact Inovance for technical (thermistor or other components (thermistor or support. devices) inside the AC other devices) on the control drive are damaged.
- Page 53 AC drive is motor is abnormal. correct by referring to the running. electrical wiring diagram in MD600 Series Basic AC Drive Hardware Guide. Motor parameters Check whether the motor rated Restore to factory settings and reset are set incorrectly.
- Page 54 Increase the DI filter time (E0‑16/E0‑ interference. normal. 17) by step of 0.05s. The load fluctuates. Check the load condition. Contact Inovance for technical support. The motor coasts The overvoltage Check whether the braking If the braking resistor is configured,...
-
Page 55: Common Parameter Settings
Common Parameter Settings Common Parameter Settings The following table describes certain common parameters in brief. The parameter modification modes are as follows: Unchangeable ● At stop ● Real time ● For details on the complete parameter list, see "List of Parameters" in the MD600 Series Basic AC Drive Function Guide . - Page 56 Common Parameter Settings Param Commu Parameter Name Value Default Unit Change eter nication Mode Code Address F0‑10 0xF00A DI1 function 0: No function ‑ At stop selection 1: Terminal control IN1 2: Terminal control IN2 3: Terminal control IN3 4: Jogging 1 (JOG1) 5: Jogging 2 (JOG2) 6: Function as UP key for frequency adjustment...
- Page 57 Common Parameter Settings Param Commu Parameter Name Value Default Unit Change eter nication Mode Code Address F0‑10 0xF00A DI1 function Continued ‑ At stop selection 43: PID parameter switchover 44: User‑defined fault 1 45: User‑defined fault 2 46: Speed/Torque control selection 47: Emergency stop 49: Deceleration DC braking 50: Clear the current running time...
- Page 58 Common Parameter Settings Param Commu Parameter Name Value Default Unit Change eter nication Mode Code Address F0‑17 0xF011 RO1 output 0: No output ‑ Real time function selection 1: AC drive running 2: Fault output 3: Frequency level detection FDT1 output 4: Frequency reach 5: Zero‑speed running (no output at stop) 6: Motor overload warning...
- Page 59 Common Parameter Settings Param Commu Parameter Name Value Default Unit Change eter nication Mode Code Address F0‑21 0xF015 DO1 function 0: No output ‑ Real time selection (for 1: AC drive running MD600A) 2: Fault output 3: Frequency level detection FDT1 output 4: Frequency reach 5: Zero‑speed running (no output at stop) 6: Motor overload warning...
- Page 60 Common Parameter Settings Param Commu Parameter Name Value Default Unit Change eter nication Mode Code Address F0‑22 0xF016 DO2 function 0: No output ‑ Real time selection (for 1: AC drive running MD600A) 2: Fault output 3: Frequency level detection FDT1 output 4: Frequency reach 5: Zero‑speed running (no output at stop) 6: Motor overload warning...
- Page 61 Common Parameter Settings Param Commu Parameter Name Value Default Unit Change eter nication Mode Code Address F0‑26 0xF01A Maximum motor 0.00 Hz to 599.00 Hz 50.00 Unchangea frequency F0‑29 0xF01D Main frequency 0: F0‑30 ‑ Real time source 2: AI1 5: Pulse reference 6: Multi‑reference 7: Simple PLC...
- Page 62 Common Parameter Settings Param Commu Parameter Name Value Default Unit Change eter nication Mode Code Address F0‑35 0xF023 Auxiliary frequency 0: 100% ‑ Real time gain coefficient 2: AI1 source 5: Pulse reference 6: Multi‑reference 7: Simple PLC 8: PID 9: Communication 10: Potentiometer MD‑BP‑M Others: F connector...
- Page 63 Common Parameter Settings Param Commu Parameter Name Value Default Unit Change eter nication Mode Code Address F0‑56 0xF038 Jogging frequency 0: F0‑57 ‑ Real time 1 source 2: AI1 5: Pulse reference 6: Multi‑reference 7: Simple PLC 8: PID 9: Communication 10: Potentiometer MD‑BP‑M Others: F connector F0‑57...
- Page 64 Common Parameter Settings Param Commu Parameter Name Value Default Unit Change eter nication Mode Code Address F1‑22 0xF116 Asynchronous 0.001 Ω to 65.535 Ω 0.908 Ω Real time motor rotor resistance F1‑24 0xF118 Leakage 0.01 mH to 655.35 mH 5.28 Real time inductance of asynchronous...
- Page 65 Common Parameter Settings Param Commu Parameter Name Value Default Unit Change eter nication Mode Code Address F2‑20 0xF214 Positive speed 0: Prohibited ‑ Real time 1: Allowed 2: Terminal input 3: DI1 4: DI2 5: DI3 6: DI4 7: DI5 (MD600A) Others: B connector F2‑21 0xF215...
- Page 66 Common Parameter Settings Param Commu Parameter Name Value Default Unit Change eter nication Mode Code Address F2‑27 0xF21B Digital setting of d1‑04 to 0.0% At stop negative frequency lower limit F2‑36 0xF224 Overexcitation gain 0% to 200% Real time (V/f) F2‑37 0xF225 Overcurrent...
- Page 67 Common Parameter Settings Param Commu Parameter Name Value Default Unit Change eter nication Mode Code Address A0‑08 0xA008 Backed‑up 0: No operation ‑ At stop parameter 500: Restore user backup restoration 501: Restore user macro backup 1 502: Restore user macro backup 2 503: Restore user macro backup 3 504: Restore user macro backup 4 505: Restore User macro backup 5...
- Page 68 Common Parameter Settings Param Commu Parameter Name Value Default Unit Change eter nication Mode Code Address A0‑09 0xA009 User backup 0: No operation ‑ At stop 400: Back up user parameters 401: Back up user macro parameters to address 1 402: Back up user macro parameters to address 2 403: Back up user macro parameters to...
- Page 69 Common Parameter Settings Param Commu Parameter Name Value Default Unit Change eter nication Mode Code Address Contin Contin Continued 1071: Back up motor 1 parameters to Contin Contin Continued address 7 1081: Back up motor 1 parameters to address 8 1091: Back up motor 1 parameters to address 9 1101: Back up motor 1 parameters to...
- Page 70 Common Parameter Settings Param Commu Parameter Name Value Default Unit Change eter nication Mode Code Address A0‑12 0xA00C Number of decimal Ones: Number of decimal places of U0‑14/ 2220 ‑ Real time places for load U0‑24 speed display 0: 0 decimal place (group U0) 1: 1 decimal place 2: 2 decimal places...
- Page 71 Common Parameter Settings Param Commu Parameter Name Value Default Unit Change eter nication Mode Code Address A0‑17 0xA011 Parameter group Bit 0: Group F 0xEBFF ‑ Real time display setting 0: Hidden 1: Displayed Bit 1: Group A 0: Displayed 1: Displayed Bit 2: Group B 0: Hidden...
- Page 72 Common Parameter Settings Param Commu Parameter Name Value Default Unit Change eter nication Mode Code Address A1‑04 0xA104 Current fault 3 0.0–6553.5 ‑ Unchangea A1‑06 0xA106 Current fault 4 0.0–6553.5 ‑ Unchangea A1‑08 0xA108 Current fault 5 0.0–6553.5 ‑ Unchangea A1‑10 0xA10A Current fault 6...
- Page 73 Common Parameter Settings Param Commu Parameter Name Value Default Unit Change eter nication Mode Code Address A2‑01 0xA201 Per‑unit base value 0.0 A to 6553.5 A Unchangea of current A2‑02 0xA202 Per‑unit base value 0 RPM to 65535 RPM Unchangea of speed A2‑04 0xA204...
- Page 74 Common Parameter Settings Param Commu Parameter Name Value Default Unit Change eter nication Mode Code Address A3‑03 0xA303 Rated AC drive 0.0 A to 6553.5 A Unchangea current A3‑04 0xA304 Rated AC drive 0 V to 65535 V Unchangea voltage A3‑05 0xA305 Maximum AC drive...
- Page 75 Common Parameter Settings Param Commu Parameter Name Value Default Unit Change eter nication Mode Code Address A4‑15 0xA40F Reverse running 60s to 65535s Real time time of fan in forward/reverse running mode A5‑00 0xA500 Maximum AC drive 0.0 kHz to 24.0 kHz 16.0 Unchangea carrier frequency...
- Page 76 Common Parameter Settings Param Commu Parameter Name Value Default Unit Change eter nication Mode Code Address A6‑03 0xA603 Parameter 1 Bit 0: Operating frequency (Hz) 0x1F ‑ Real time displayed on LED 0: Hidden operating panel 1: Displayed during operation Bit 1: Set frequency (Hz) 0: Hidden 1: Displayed...
- Page 77 Common Parameter Settings Param Commu Parameter Name Value Default Unit Change eter nication Mode Code Address A6‑04 0xA604 Parameter 2 Bit 0: PID feedback ‑ Real time displayed on LED 0: Hidden operating panel 1: Displayed during operation Bit 1: PLC stage 0: Hidden 1: Displayed Bit 2: Pulse input frequency (kHz)
- Page 78 Common Parameter Settings Param Commu Parameter Name Value Default Unit Change eter nication Mode Code Address A6‑05 0xA605 Parameter Bit 0: Set frequency (Hz) 0x33 ‑ Real time displayed on the 0: Hidden LED operating 1: Displayed panel upon stop Bit 1: Bus voltage (V) 0: Hidden 1: Displayed...
- Page 79 Common Parameter Settings Param Commu Parameter Name Value Default Unit Change eter nication Mode Code Address A6‑08 0xA608 Format displayed Ones: Unit ‑ Real time by free mapping 0 0: None 1: Hz 2: A 3: RPM 4: V 5: Link 6: % 7: s 8: h...
- Page 80 Common Parameter Settings Param Commu Parameter Name Value Default Unit Change eter nication Mode Code Address A6‑10 0xA60A Format displayed Ones: Unit ‑ Real time by free mapping 1 0: None 1: Hz 2: A 3: RPM 4: V 5: Link 6: % 7: s 8: h...
- Page 81 Common Parameter Settings Param Commu Parameter Name Value Default Unit Change eter nication Mode Code Address A6‑22 0xA616 LED default display 0: Disable ‑ At stop check 1: All indicators on the LED operating panel are steady on. 2: All indicators on the LED operating panel are off.
- Page 82 Common Parameter Settings Param Commu Parameter Name Value Default Unit Change eter nication Mode Code Address A8‑07 0xA807 Triggering 0: > ‑ Real time condition A 1: = 2: < A8‑08 0xA808 Triggering level A ‑32768 to 32767 ‑ Real time A8‑09 0xA809 Triggering object B...
- Page 83 Common Parameter Settings Param Commu Parameter Name Value Default Unit Change eter nication Mode Code Address Ad‑06 0xAD06 Auxiliary 0 to 65535 ‑ Unchangea calculation 2 of cumulative power consumption Ad‑07 0xAD07 Cumulative power 0.0 kW·h to 6553.5 kW·h kW·h Unchangea consumption k Ad‑08...
- Page 84 Common Parameter Settings Param Commu Parameter Name Value Default Unit Change eter nication Mode Code Address AE‑00 0x2F00 User‑defined 0 to 65535 ‑ Real time parameter 0 AE‑01 0x2F01 User‑defined 0 to 65535 ‑ Real time parameter 1 AE‑02 0x2F02 User‑defined 0 to 65535 ‑...
- Page 85 Common Parameter Settings Param Commu Parameter Name Value Default Unit Change eter nication Mode Code Address AE‑21 0x2F15 User‑defined 0 to 65535 ‑ Real time parameter 21 AE‑22 0x2F16 User‑defined 0 to 65535 ‑ Real time parameter 22 AE‑23 0x2F17 User‑defined 0 to 65535 ‑...
- Page 86 Common Parameter Settings Param Commu Parameter Name Value Default Unit Change eter nication Mode Code Address U0‑07 0x7007 DI input state Bit 0: DI1 state ‑ Unchangea 0: Low level 1: High level Bit 1: DI2 state 0: Low level 1: High level Bit 2: DI3 state 0: Low level...
- Page 87 Common Parameter Settings Param Commu Parameter Name Value Default Unit Change eter nication Mode Code Address U0‑08 0x7008 DO output state Bit 0: RO1 state ‑ Unchangea 0: Low level 1: High level Bit 1: Reserved 0: Low level 1: High level Bit 2: Reserved 0: Low level 1: High level...
- Page 88 Common Parameter Settings Param Commu Parameter Name Value Default Unit Change eter nication Mode Code Address U0‑09 0x7009 AI1 voltage ‑10.57 V to 10.57 V 0.00 Unchangea U0‑12 0x700C Counting value 0 to 65535 ‑ Unchangea U0‑13 0x700D Length value 0 to 65535 ‑...
- Page 89 Common Parameter Settings Param Commu Parameter Name Value Default Unit Change eter nication Mode Code Address U0‑40 0x7028 Output voltage 0 V to 65535 V Unchangea upon V/f separation U0‑45 0x702D Fault code 0.0‑6553.5 ‑ Unchangea U0‑46 0x702E Minor fault code 0.0‑6553.5 ‑...
- Page 90 Common Parameter Settings Param Commu Parameter Name Value Default Unit Change eter nication Mode Code Address U0‑61 0x703D AC drive state 1 1: Forward running ‑ Unchangea 2: Reverse running 3: Stopped 4: Auto‑tuning 5: Faulty U0‑65 0x7041 Torque upper limit ‑2000.0% to 2000.0% Unchangea U0‑68...
- Page 91 Common Parameter Settings Param Commu Parameter Name Value Default Unit Change eter nication Mode Code Address U2‑09 0x7209 Incorrect internal 0–0xFFFF ‑ Unchangea index address of 16‑bit parameter U2‑10 0x720A Error type of 16‑bit 0 to 65535 ‑ Unchangea parameter U2‑11 0x720B Internal index...
- Page 92 Common Parameter Settings Param Commu Parameter Name Value Default Unit Change eter nication Mode Code Address U2‑36 0x7224 Parameter record 0 to 65535 ‑ Unchangea information 10 U2‑37 0x7225 Parameter record 0 to 65535 ‑ Unchangea information 11 U2‑38 0x7226 Parameter record 0 to 65535 ‑...
- Page 93 Common Parameter Settings Param Commu Parameter Name Value Default Unit Change eter nication Mode Code Address U2‑63 0x723F Communication 0 to 65535 ‑ Unchangea warning flag U2‑64 0x7240 Internal index 0 to 65535 ‑ Unchangea address of error‑ causing 16‑bit parameter U2‑65 0x7241...
- Page 94 Common Parameter Settings Param Commu Parameter Name Value Default Unit Change eter nication Mode Code Address U3‑23 0x7317 Monitoring of ‑32768 to 32767 ‑ Unchangea communication speed setting value 1 (0x1000) U3‑28 0x731C Communication 0 to 65535 ‑ Unchangea status word U3‑33 0x7321 Communication...
- Page 95 *19012337A01*...
Need help?
Do you have a question about the MD600 Series and is the answer not in the manual?
Questions and answers