VESTEL EVC04 Series Installation Manuallines
Electric vehicle charger
Hide thumbs
Also See for EVC04 Series:
- Installation manual ,
- Installation manuallines (182 pages) ,
- Assembly & installation manuallines (120 pages)

Related Manuals for VESTEL EVC04 Series


Summary of Contents for VESTEL EVC04 Series
- Page 1 ELECTRIC VEHICLE CHARGER ELECTRIC VEHICLE CHARGER EVC04 Ser�es BASE EVC04 Ser�es Installat�on Gu�del�ne Installation Guideline © 2024 VESTEL MOBILITY- All rights reserved English - 1...
-
Page 2: Table Of Contents
6.2.6.5.2 - POWER OPTIMIZER WITH EXTERNAL CURRENT TRANSFORMER (CT) ..............28 6.2.7 - LOAD SHEDDING ................30 6.2.8 - MONITORING WELDED RELAY CONTACT FAILURES ........31 6.3- OPENING THE RCD COVER (Optional) ..............32 © 2024 VESTEL MOBILITY- All rights reserved English - 1... -
Page 3: Safety Information
Moreover, the charging station shall not be exposed to spilled or splashed liquids. • Do not touch end terminals, electric vehicle connector and other hazardous live parts of the charging station with sharp metallic objects. © 2024 VESTEL MOBILITY- All rights reserved English - 2... -
Page 4: Ground Connection Warnings
To avoid a risk of fire or electric shock, do not use this device with an extension cable. If the mains cable or vehicle cable is damaged it must be replaced by the manufacturer, its service agent, or similarly qualified persons in order to avoid a hazard. © 2024 VESTEL MOBILITY- All rights reserved English - 3... -
Page 5: Wall Mounting Warnings
3. Asterisk (*): 3. The asterisk may indicate any of the following Empty : Case-B Connection with normal socket : Case-B Connection with protected socket : Case C Connection with Type-2 socket : Case C Connection with Type-1 socket Case EVC04 © 2024 VESTEL MOBILITY- All rights reserved English - 4... -
Page 6: General Information
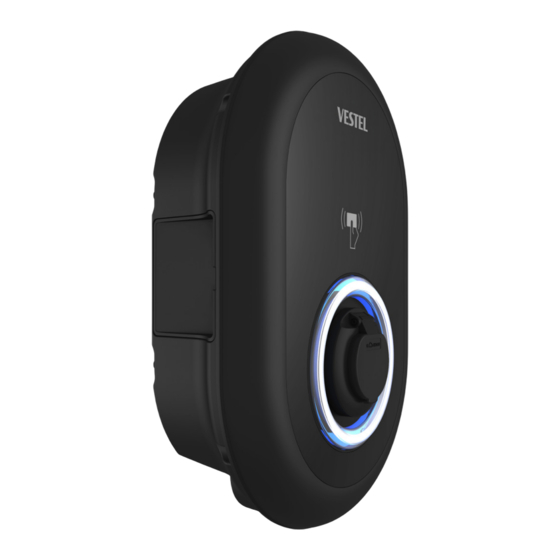
Socket Model RFID Card Reader LED status indicator Socket outlet Product label Ethernet charging station cable connection nut Charging cable (optional) or out of order Charging station cable connection nut © 2024 VESTEL MOBILITY- All rights reserved English - 5... -
Page 7: 2- Dimensional Drawings
3.1.2- DIMENSIONAL DRAWINGS 3.1.2.1- Without Display Model 135.0mm 315.0mm 177.5mm 459.5mm 101.0mm 181.0mm 3.1.2.2 - With Display Model 135.0mm 315.0mm 177.5mm 459.5mm 101.0mm 181.0mm © 2024 VESTEL MOBILITY- All rights reserved English - 6... -
Page 8: Required Equipment, Tools And Accessories
Screw M6X20 Screw M6X30 RCCB Wrench (Optional) IP Rubber O Ring MOBILITY ELECTRIC VEHICLE CHARGER ELECTRIC VEHICLE CHARGER BASE EVC04 Series EVC04 Series MANUALE DI AVVIAMENTO RAPIDO QUICK START GUIDE © 2024 VESTEL MOBILITY- All rights reserved English - 7... -
Page 9: Required Tools
Volt Indicator Torx T25 Security Screwdriver Water Level Flathead Screwdriver (tip Right Angle Screwdriver Pointed Spudger width 2.00-2.5 mm) Adapter/Torx T20, Safety Tip RJ45 Crimping Tool Ethernet Cable Cat5e or Cat6 © 2024 VESTEL MOBILITY- All rights reserved English - 8... -
Page 10: Specifications
5 kg for model with socket, 8.9 kg for model with cable, together with packaging AC Mains Cable Measurements Ø 18-25 mm for 22kW version Ø 18-25 mm for 11kW version Ø 13-18 mm for 7.4kW version © 2024 VESTEL MOBILITY- All rights reserved English - 9... -
Page 11: Environmental Specifications
5% - 95% (relative humidity, without condensation) Altitude 0 - 4,000m Storage Conditions Temperature -40 °C and 80 °C Humidity 5% - 95% (relative humidity, without condensation) Altitude 0 - 5,000m © 2024 VESTEL MOBILITY- All rights reserved English - 10... -
Page 12: Charging Station Installation
EVC04 Series EVC04 Ser�es ELECTRIC VEHICLE CHARGER BASE EVC04 Ser�es BASE EVC04 Series EVC04 Ser es Installat�on Gu�del�ne User Manual Installation Guideline User Manual Manuel Ut l sateur User Manual © 2024 VESTEL MOBILITY- All rights reserved English - 11... -
Page 13: Product Installation Steps
Please turn off the mains supply of the charging station By using Torx T20 Safety Tip, remove the screws of the cover with the Torx T20 Safety L-Wrench or the Right Angle Screwdriver Adapter. Open the cover. © 2024 VESTEL MOBILITY- All rights reserved English - 12... -
Page 14: Wall-Mounting
To close the cover of the charging station, tighten the cover screws which you were removed with Torx T20 Security L-Wrench or Right Angle Screwdriver Adapter using Torx T20 Security Bit. (Min:1.2Nm; Max:1.8Nm) Mounting the charging station on the wall is finished. © 2024 VESTEL MOBILITY- All rights reserved English - 13... - Page 15 Before next step (7), Please check the instructions for Single Phase or Three Phase cable connections. © 2024 VESTEL MOBILITY- All rights reserved English - 14...
- Page 16 Wrench AC Mains Cable Wrench Data cable Before closing the cover of the charging station, check next instructions if any function related to these sections are used. © 2024 VESTEL MOBILITY- All rights reserved English - 15...
- Page 17 For single phase IT Grid installation, wiring diagram which is shown below should be used. Also grounding type should be set to “IT Grid” from the ”Installation settings” menu in web user interface. © 2024 VESTEL MOBILITY- All rights reserved English - 16...
-
Page 18: Monophase Charging Station Ac Mains Connection
Tighten the screws of the terminal block with the 1.9-2 Nm tightening torque as shown in the figure. Electricity Terminal AC Cable Colour AC L1 (Brown) AC Neutral (Blue) Earth (Green-Yellow) © 2024 VESTEL MOBILITY- All rights reserved English - 17... -
Page 19: Triphase Charging Station Ac Mains Connection
AC Neutral (Blue) Earth (Green-Yellow) If the triphase charging station is to be installed as a a monophase station, phase-cable connection to L1 terminal should be made as shown in Figure below. © 2024 VESTEL MOBILITY- All rights reserved English - 18... -
Page 20: Setting The Current Limiter
32 A 30 A 40 A 32 A 40 A 10 A 10 A 13 A 13 A 16 A 16 A 20 A Phase 25 A 30 A 32 A © 2024 VESTEL MOBILITY- All rights reserved English - 19... -
Page 21: Dip Switch Settings
Pin Number Remarks Pin-1 Master and User RFID Card Resetting Pin-2 External Activation Inlet Function Pin-3 Locked Cable Function (only models with socket) Pin 4-5-6 Power Optimization (requires Optional Accessories) © 2024 VESTEL MOBILITY- All rights reserved English - 20... -
Page 22: Losing The Master Rfid Card
You can follow the steps in “Authorized Charging Mode” section for adding user RFID cards after registering the new master RFID card. “BEEP” 20 sec © 2024 VESTEL MOBILITY- All rights reserved English - 21... -
Page 23: Data Cable Connection
Power optimization measurement cable c. Ethernet Daisy Chain connection cables (optional) d. Load shedding trigger signal cable e. Shunt trigger module control signal cable for relay contact welding failure conditions © 2024 VESTEL MOBILITY- All rights reserved English - 22... -
Page 24: External Activation Inlet Function
If the external relay (RL) is in non-conducting (open), the charging station will not be not be able to charge the electric vehicle. You can connect potential free input signals as shown in above circuitry (see figure). © 2024 VESTEL MOBILITY- All rights reserved English - 23... - Page 25 Cable Terminal Cable Colour 1 (CN2-1) Green 2 (CN2-2) Green + White Green © 2024 VESTEL MOBILITY- All rights reserved English - 24...
-
Page 26: Lockable External Charging Cable Function (Model With Socket)
Note: The charging cable cannot be removed when the function is active (PIN 3 ON). The lock of the socket will be unlocked when this function is disabled (PIN 3 OFF). © 2024 VESTEL MOBILITY- All rights reserved English - 25... -
Page 27: Power Optimization (Requires Optional Accessories)
Last 3 DIP switch pins (4,5,6) shown in figure below corresponds to binary digits of the maximum current value as shown in the table. When 4, 5, 6 pins are in OFF position, power optimizer functionality is disabled. © 2024 VESTEL MOBILITY- All rights reserved English - 26... - Page 28 Power Optimizer Meter should be placed just after the main switch of the house as shown in the figure. Power Optimizer Meter wiring connections can be made according to the information below. © 2024 VESTEL MOBILITY- All rights reserved English - 27...
- Page 29 10-11: A-B (COM) Modbus connection over RS485 for single phase charging station models. Related board wiring of Power Optimizer connections can be made as shown below: Cable Terminal Cable Color Description 6 (CN20-2) White Blue A (COM) 5 (CN20-1) Blue B (COM) © 2024 VESTEL MOBILITY- All rights reserved English - 28...
-
Page 30: Power Optimizer With External Current
• The slide switch (SW2) on “ The Embedded Power Optimization Module” should be set as shown in Figure below. (Left side.) NOTE : CAT5 cable length to use should be below 100 meters. Phase 1 Phase 2 Phase 3 CT1 CT2 CT3 © 2024 VESTEL MOBILITY- All rights reserved English - 29... - Page 31 RCCB, there is no need to add an additional RCCB in the power line. The power optimizer with external CT should be placed as shown in the figure below. © 2024 VESTEL MOBILITY- All rights reserved English - 30...
-
Page 32: Load Shedding
You can connect the potential free load shedding signal as shown below. See Figure below, table below. Cable Terminal Inlet Load Shedding Inlet + Load Shedding Inlet- Load Shedding Inlet Status Behaviour Open Contact Charging at maximum current available Closed Contact Charging at minimum current (8A) © 2024 VESTEL MOBILITY- All rights reserved English - 31... -
Page 33: Monitoring Welded Relay Contact Failures
RCCB (or MCB) in the fuse box of the charging station. The circuit block diagram that should be used in the fuse box of the charging station is shown below. RCCB SHUNT EVSE 230V TRIP L1_W CN33 CN33 © 2024 VESTEL MOBILITY- All rights reserved English - 32... -
Page 34: Opening The Rcd Cover (Optional)
The residual current device can be accessed by opening the lock on the side cover as in Figure below. Insert the triangle key into the lock of the side cover and turn the key 90 degrees counter clockwise. © 2024 VESTEL MOBILITY- All rights reserved English - 33... - Page 35 © 2024 VESTEL MOBILITY- All rights reserved English - 34...
Need help?
Do you have a question about the EVC04 Series and is the answer not in the manual?
Questions and answers