
Related Manuals for Pfeiffer Vacuum TPG 202 NEO


Summary of Contents for Pfeiffer Vacuum TPG 202 NEO
- Page 1 OPERATING INSTRUCTIONS Translation of the Original TPG 202 NEO Piezo/Pirani handheld measurement instrument...
-
Page 2: Dear Customer
These operating instructions describe all models and variants of your product. Note that your product may not be equipped with all features described in this document. Pfeiffer Vacuum constantly adapts its products to the latest state of the art without prior notice. Please take into account that online operating instructions can deviate from the printed operating instructions supplied with your product. -
Page 3: Table Of Contents
Transporting product Storing product Installation Establishing vacuum connection Connecting USB cable Interfaces USB interface Pfeiffer Vacuum protocol for USB interface 6.2.1 Telegram frame 6.2.2 Telegram description 6.2.3 Telegram example 1 6.2.4 Telegram example 2 6.2.5 Data types Parameter set General... - Page 4 Table of contents Switching keyboard lock on and off Selecting operating mode Calling up additional information Opening and quitting main menu Logging data with data logger 8.10 Displaying pressure curve graphically 8.11 Calculating leakage rate Settings Setting data logger Setting graphical display mode Adjusting sensors 9.3.1 Handheld measurement instrument calibration 9.3.2 Setting gas type correction factor...
-
Page 5: List Of Tables
List of tables List of tables Tbl. 1: Abbreviations used Tbl. 2: Permissible ambient conditions Tbl. 3: Characteristics of the USB interface Tbl. 4: Explanation and meaning of the parameters Tbl. 5: Parameter set | Control commands Tbl. 6: Parameter set | Status requests Tbl. -
Page 6: List Of Figures
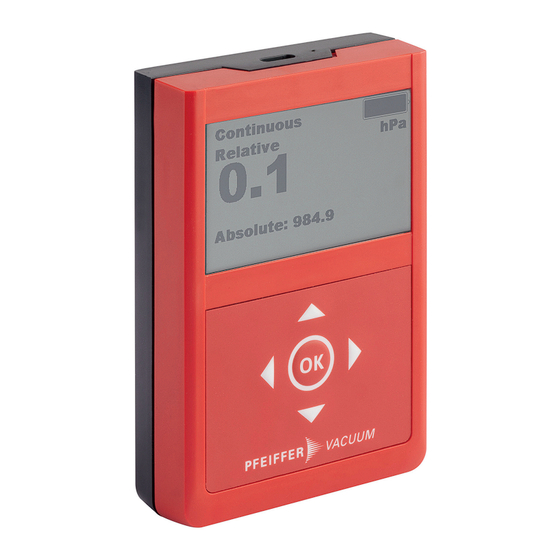
List of figures List of figures Fig. 1: Design of the handheld measurement instrument Fig. 2: Display layout (measured value display) Fig. 3: Keyboard with arrow keys and "OK" button Fig. 4: Measured value display menu with the current measured pressure Fig. -
Page 7: About This Manual
Declaration of conformity A component of these operating instructions 1.1.2 Variants This document applies to the TPG 202 Neo Piezo/Pirani handheld measurement instrument. ● Article number: PT G28 212 You can find the part number on the rating plate of the product. -
Page 8: Pictographs
This section describes all the labels on the product along with their meanings. Rating plate The rating plate is located on the back of the device. D-35614 Asslar Mod. TPG 202 Neo PT G28 212 xxxxxxxxx Range 5.0x10 - 1200 hPa Input 5 V DC Made in Germany 2024/07 1.3.4 Abbreviations... -
Page 9: Safety
Safety instructions according to product life stages All safety instructions in this document are based on the results of a risk assessment. Pfeiffer Vacuum has taken into account all the relevant life stages of the product. Risks during installation WARNING Risk of injury resulting from overpressure in the vacuum system Opening tensioning pieces with an overpressure >... - Page 10 Safety Risks during operation WARNING Risk of injury resulting from overpressure in the vacuum system Opening tensioning pieces with an overpressure > 1000 hPa in the vacuum system can lead to inju- ries as a result of flying parts, and escaping process medium could prove harmful to health. Elastomer seals in KF connections (e.g.
-
Page 11: Safety Precautions
Safety Risks during disposal WARNING Health hazard through poisoning from toxic contaminated components or devices Toxic process media result in contamination of devices or parts of them. During maintenance work, there is a risk to health from contact with these poisonous substances. Illegal disposal of toxic sub- stances causes environmental damage. -
Page 12: Proper Use
Safety 2.5 Proper use The handheld measurement instrument provides vacuum measurement of gases within the range of 5 × 10 to 1200 hPa. Use the product according to its intended purpose ► Install, operate and maintain the handheld measurement instrument only in accordance with these operating instructions. -
Page 13: Product Description
You will need all the data from the rating plate to safely identify the product when communicating with Pfeiffer Vacuum. ► To ensure clear identification of the product when communicating with Pfeiffer Vacuum, always keep all of the information on the rating plate to hand. -
Page 14: Keyboard Layout
Pfeiffer Vacuum Download Center. Functions of the USB connector ● Configure unit parameters (Pfeiffer Vacuum protocol) ● Record and read out measured values ● Retrieve data or edit parameters with customer's own program using the LabView driver ● Utilize unit as a USB mass storage device ●... - Page 15 Product description 4. Check that the shipment is complete. 5. Ensure that no parts are damaged. 15/56...
-
Page 16: Transport And Storage
Transport and storage 4 Transport and storage 4.1 Transporting product NOTICE Damage caused by incorrect transport Transport in unsuitable packaging or failure to install all transport locks can result in damage to the product. ► Comply with the instructions for safe transport. Packing We recommend keeping the transport packaging and original protective cover. -
Page 17: Installation
Procedure 1. Remove the protective cap and store in a safe place. 2. Install the handheld measurement instrument on the vacuum system, with vacuum components from the Pfeiffer Vacuum Components Shop. 5.2 Connecting USB cable Required material ● Commercially available USB-C cable (not included in scope of delivery) - Page 18 Installation Connecting USB cable ► Connect the USB cable to the handheld measurement instrument and the PC. – When switched on, the handheld measurement instrument is ready for bidirectional data transfer and ends the current measured value display and any data recording currently run- ning.
-
Page 19: Interfaces
Characteristics of the USB interface 6.2 Pfeiffer Vacuum protocol for USB interface 6.2.1 Telegram frame The telegram frame of the Pfeiffer Vacuum protocol contains only ASCII code characters [32; 127], the exception being the end character of the telegram C . Basically, a host (e.g. -
Page 20: Telegram Example
Interfaces 6.2.3 Telegram example 1 Query pressure value Current measured pressure (parameter [P:740], device address: "001") --> ASCII Data response: measured pressure 1 × 10 hPa as exponent 1E+3 Current measured pressure (parameter [P:740], device address: "001") --> ASCII 6.2.4 Telegram example 2 Incorrect command Incorrect command (parameter [P:888], device address: "001"... - Page 21 Interfaces Data type Description Length Example l1 – l0 string16 Any character string with 16 characters. PrezelBeer&Sausage ASCII codes between 32 and 127 string8 Any character string with 8 characters. Example ASCII codes between 32 and 127 21/56...
-
Page 22: Parameter Set
Brief description of the parameters Functions Function description of the parameters Data type Type of formatting of the parameter for the use with the Pfeiffer Vacuum protocol Access type R (read): Read access; W (write): Write access Unit Physical unit of the described variable min. -
Page 23: Set Value Settings And Pressure Value Query
Parameter set 7.4 Set value settings and pressure value query Indicator Description Functions Data Unit min. max. type cess fault type PhysUnits Physical unit 0 = mbar 1 = Pa 2 = mTorr 3 = Torr 4 = hPa Pressure 1 Absolute pres- Pressure value in format sure... -
Page 24: Operation
Operation 8 Operation WARNING Risk of injury resulting from overpressure in the vacuum system Opening tensioning pieces with an overpressure > 1000 hPa in the vacuum system can lead to inju- ries as a result of flying parts, and escaping process medium could prove harmful to health. Elastomer seals in KF connections (e.g. -
Page 25: Switching Off Handheld Measurement Instrument
Operation 8.3 Switching off handheld measurement instrument Procedure ► Press the "OK" button for 3 seconds. 8.4 Operating unit with keyboard In the measured value display In the menu "up" ● Switch operating mode ● Move up ● Keypad lock ● Increase input value "down"... -
Page 26: Calling Up Additional Information
Operation Fig. 6: Auto-Off and Continuous operating modes Procedure ► Press the "up" button and set "Continuous operation" (Continuous) operating mode. ► Press the "up" button and set "Automatic cutoff" (Auto-Off) operating mode. In continuous operation, the unit remains switched on for an unlimited period or until a set maximum operating period (see page 34) expires depending on the setting. -
Page 27: Opening And Quitting Main Menu
Operation 8.8 Opening and quitting main menu Fig. 8: Main menu Procedure ► Press the "OK" button in the measured value display. – The main menu is displayed. ► Press the "left" button until the measured value display appears. 8.9 Logging data with data logger The unit stores multiple measurements in separate files in its internal data memory. -
Page 28: Displaying Pressure Curve Graphically
Operation 8.10 Displaying pressure curve graphically The unit can display the measured pressure curve graphically as a pressure/time diagram. (see chap- ter “Setting graphical display mode”, page 31) Prerequisite ● Unit in main menu Fig. 10: Pressure/time diagram Procedure 1. Select the "Graph" item in the main menu. –... - Page 29 Operation 3. Confirm your entries with "OK". – The measurement of pressure rise starts with continuous calculation of the leakage rate. The unit displays the leakage rate and the pumping speed alternately. 4. Press "OK" to stop the measurement of pressure rise. –...
-
Page 30: Settings
Settings 9 Settings Prerequisite ● Unit in main menu Fig. 13: Opening Settings menu Procedure 1. Select the "Settings" item in the main menu. 2. Press "OK". – The Settings menu is displayed. 9.1 Setting data logger Avoiding high data volume Tune the logging interval to match the logging period to avoid an unnecessarily high data volume. -
Page 31: Setting Graphical Display Mode
Settings Setting logging period 1. Select the "Logging Auto Stop" item in the menu. 2. Press "OK". 3. Use the "up" and "down" buttons to switch the Auto Stop functions ON or OFF. – When the Auto Stop function is switched off, the unit logs data without a time limit. 4. -
Page 32: Adjusting Sensors
Settings Fig. 18: Set the time window for a rolling display (Graph Window) Setting time window for rolling display 1. Select the "Graph Window" item in the menu. 2. Press "OK". 3. Use the "up" and "down" buttons to select the desired time window. –... -
Page 33: Handheld Measurement Instrument Calibration
Settings 9.3.1 Handheld measurement instrument calibration Prerequisite ● Unit in Settings - Sensor - Adjust menu (see chapter “Handheld measurement instrument calibration”, page 42) 9.3.2 Setting gas type correction factor The pressure display of Pirani sensors depends on the type and composition of the gas being meas- ured. -
Page 34: Configuring Device Settings
Settings Fig. 23: Setting transition type Setting transition type 1. Select the "Transition Mode" item in the menu. 2. Press "OK". 3. Use the "up" and "down" buttons to select the desired transition mode. – Direct = hard switchover at a configurable pressure (default =1 hPa) –... -
Page 35: Fig. 26: Adjust The Alarm Volume
Settings Selecting measurement signal for the alarm 1. Select the "Datasource" item in the menu. 2. Press "OK". 3. Select the desired measuring signal. – Off = Alarm switched off – Absolute = Absolute pressure – Relative = Relative pressure –... -
Page 36: Setting Maximum Operating Time
Settings Setting switching values for the alarm 1. Select the "Switch Values" item in the menu. 2. Press "OK". 3. Use the "left", "right", "up", and "down" buttons to set the desired switch-on value. 4. Confirm the setting with "OK". 5. -
Page 37: Setting Language And Display Units
Settings Setting time zone 1. Select the "Time Zone" item in the menu. 2. Press "OK". 3. Use the "left", "right", "up", and "down" buttons to set the time zone. 4. Confirm the setting with "OK". 9.4.4 Setting language and display units Prerequisite ●... -
Page 38: Formatting Data Storage Device File System
Settings Fig. 32: Adjusting USB interface Configuring unit as mass storage device 1. Select the "USB MSD" item in the menu. 2. Use the "up" and "down" buttons to select "MSD Enabled" to switch the function on, or "MSD Dis- abled"... -
Page 39: Device Information
Device information 10 Device information Prerequisite ● Unit in Service menu TP 202 Neo Fig. 33: Calling up unit information Calling up unit information 1. Select the "Device Info" item in the menu. 2. Press "OK". You will find information on the unit's sensor in Sensor information. This also includes parameters rele- vant to assessing the degree of wear. -
Page 40: Dismantling
Dismantling 11 Dismantling WARNING Health hazard through poisoning from toxic contaminated components or devices Toxic process media result in contamination of devices or parts of them. During maintenance work, there is a risk to health from contact with these poisonous substances. Illegal disposal of toxic sub- stances causes environmental damage. -
Page 41: Maintenance
Warranty claim Opening the device during the warranty period or damaging/removing the warranty seal will void the warranty. Contact the Pfeiffer Vacuum Service Center in the event of process-related shorter mainte- nance intervals. Warranty Malfunctioning of the equipment as a direct result of contamination or wear, as well as wear parts, is not covered by the warranty. -
Page 42: Handheld Measurement Instrument Calibration
► Operate the unit away from fluids and sources of moisture. ► Take special precautions if there is a risk of dripping water. ► Do not switch on the unit if fluid has penetrated into it, instead contact the Pfeiffer Vacuum Serv- ice Center. -
Page 43: 1Zero Point Calibration
Maintenance – Adjust ATM = atmospheric pressure calibration – Adjust Relative = relative pressure display zero point calibration – Cancel = cancel calibration 4. Confirm your entries with "OK". 12.2.1 Zero point calibration Prerequisites ● Handheld measurement instrument installed on vacuum system ●... -
Page 44: 3Calibrating Zero Point Of Relative Pressure Display
Download Center or product page as a ZIP folder ● TPG 202 Neo connected to the PC Procedure 1. Start the update tool (FirmwareUpdater.exe). 2. Search for the unit in the Update tool in "Select the interfaces to search for devices". -
Page 45: Replacing Rechargeable Battery
Maintenance 12.5 Replacing rechargeable battery Pfeiffer Vacuum Service handles the replacement. ► Contact Pfeiffer Vacuum Service. 12.6 Replacing housing cover Pfeiffer Vacuum Service handles the replacement. ► Contact Pfeiffer Vacuum Service. 45/56... -
Page 46: Malfunctions
● Perform a zero point calibration at ● Incorrect calibration < 4 × 10 hPa. ● Replace the sensor. ● Contact Pfeiffer Vacuum Service. Zero point devia- Measured value deviation ex- ● Replace the sensor. tion not possible ceeds setting range ●... -
Page 47: Shipping
► Comply with the notices for safe shipment. Decontamination subject to charge Pfeiffer Vacuum decontaminates products not clearly declared "Free of contamination" at your expense. Safe shipping of the product ► Do not ship microbiological, explosive or radioactively contaminated products. -
Page 48: Recycling And Disposal
– Potentially contaminated components that come into contact with media 15.2 Disposing of handheld measurement instrument Pfeiffer Vacuum handheld measurement instruments contain materials that must be recycled. 1. Decontaminate the components that come into contact with process gases. 2. Separate the components into recyclable materials. - Page 49 ● The end user is legally obliged to return used energy storage devices (batteries and rechargeable batteries). ● Pfeiffer Vacuum disposes of energy storage devices in returned units professionally and free of charge. ● The symbols shown on the energy storage devices have the following meanings: ─...
-
Page 50: Spare Parts
Spare parts 16 Spare parts Ordering spare parts ► Have the part number to hand, along with other details from the rating plate as required. ► Install original spare parts only. Description Order number Silicone protective sleeve (black) PT 350 113 -T Lithium-ion battery PT 350 114 -T Sensor... -
Page 51: Accessories
Accessories 17 Accessories 17.1 Accessory information Transport case Transport case for TPG 202 Neo and customer's own accessories Centering ring and filter Filter available in different pore sizes to protect the measuring system against contamination in the event of potential contaminating applications 17.2 Ordering accessories... -
Page 52: Technical Data And Dimensions
Technical data and dimensions 18 Technical data and dimensions 18.1 General mbar Torr | mm Hg mbar 1 · 10 0.75 1000 1000 1 · 10 0.01 0.01 1 · 10 1 · 10 7.5 · 10 0.75 1 · 10 0.01 1000 Torr | mm Hg 1.33... -
Page 53: Dimensions
Technical data and dimensions Part number PT G28 212 Materials in contact with media Stainless steel 1.4307 (AISI 304L), Tungsten, Nickel, Sili- con oxide, Glass, SnAg solder, Polyamide, Epoxy Weight 0.25 kg Tbl. 13: Technical data 18.3 Dimensions 24.4 46.4 Fig. 39: Dimensions Dimensions in mm 53/56... -
Page 54: Ec Declaration Of Conformity
EC Declaration of Conformity Declaration for product(s) of the type: Handheld measurement instrument TPG 202 Neo We hereby declare that the listed product satisfies all relevant provisions of the following European Directives. Low voltage 2014/35/EU Electromagnetic compatibility 2014/30/EU Radio systems 2014/53/EU... -
Page 55: Declaration Of Conformity
EN 62311: 2008 EN 61010-1: 2010 The manufacturer's authorized representative in the United Kingdom and the authorized agent for compiling the technical documentation is Pfeiffer Vacuum Ltd, 16 Plover Close, In- terchange Park, MK169PS Newport Pagnell. Signature: Pfeiffer Vacuum GmbH Berliner Straße 43...
Need help?
Do you have a question about the TPG 202 NEO and is the answer not in the manual?
Questions and answers