
Related Manuals for RealRooms Products RH LIV DESK 2DRW LRG WHT 3020119RR


Summary of Contents for RealRooms Products RH LIV DESK 2DRW LRG WHT 3020119RR
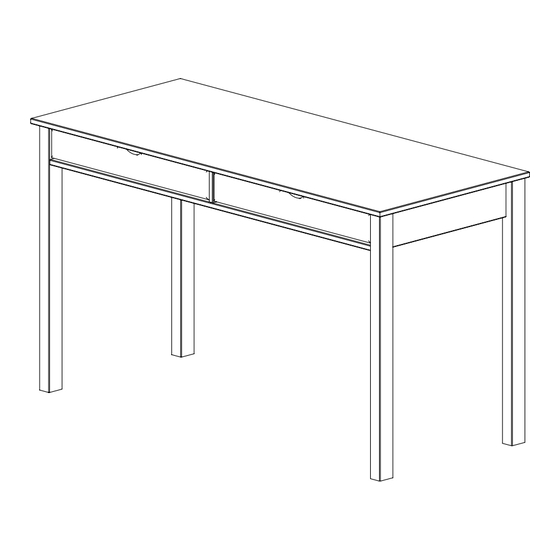
- Page 1 3020119RR (White) RH - LIV DESK 2DRW LRG WHT Weight Limit: 66 lbs / 30 kg (top) CJ 2023/09/04 B34300820900 - 147552...
- Page 2 Limited 1 year Warranty Read Before Beginning Assembly RealRoomswarrants this product to be free from defects in material and Work in a spacious area and near where the unit will be used, preferably on a workmanship and agrees to remedy any such defect. This warranty covers one carpet, or use a piece of the cardboard packaging to protect your floor and year from the date of original purchase from authorized retailers.
- Page 3 PARTS...
-
Page 4: Parts List
PARTS LIST TOP PANEL RIGHT SIDE TRAY LEFT SIDE TRAY REAR TRAY 1 PC 1 PC 1 PC 1 PC CENTER TRAY DRAWER SUPPORT RIGHT BACK LEG RIGHT FRONT LEG 1 PC 1 PC 1 PC 1 PC LEFT REAR LEG LEFT FRONT LEG DRAWER SIDE BIGGER DRAWER REAR PANEL... - Page 5 PARTS LIST Each part has a unique part number. Please reference the appropriate part number when contacting customer service for replacement parts. Before throwing any packaging, please verify all contents and make sure you have received all the parts listed above! FRONT PANEL OF THE BIGGER DRAWER BIGGER DRAWER BOTTOM 1 PC...
-
Page 6: Hardware List
HARDWARE LIST 08,0mm x 30mm 3,5mm x 30mm 3,5mm x 25mm 3,0mm x 16mm 4,0mm x 40mm WOOD DOWEL WOOD DOWEL WOOD DOWEL WOOD DOWEL WOOD DOWEL 29PC 27 PC 16 PC 02 PC 01 PC NAIL Plastic Slide Plastic Slide Plastic Slide Plastic Slide 02 PC... - Page 7 Step 1 Insert the slide G into the holes in the center trey (5),following the order and position indicated in this step. For best results, start by fastening ends pins, then fasten the center pin.
- Page 8 Step 2 Assemble the legs (8) and (10) on the left side connecting the left side tray (03).
- Page 9 Step 3 Assemble the legs (07) and (09) on the right side connecting the right side tray (02).
- Page 10 Step 4 Insert the slide F into the holes in the right trey (02). Following the order and position indicated in this step. Secure with the use of screw D For best results, start by fastening ends pins, then fasten the center pin. ■...
- Page 11 Step 5 Insert the slide F into the holes in the left tray (03) following the order and position indicated in this step. Secure with the use of screw D For best results, start by fastening ends pins, then fasten the center pin.
- Page 12 Step 6 Fit the drawer support (06) and the rear panel (04) on the legs (08) and (10), use the screw B and the dowel A. When positioning, ensure these set of holes are on the same side.
- Page 13 Step 7 Fit the drawer support (06) and the rear panel (04) on the legs (07) and (09), use the screw B and the dowel A. Apply the felt J to the table legs.
- Page 14 Step 8 Rotate the table to the correct position (top facing up), position and fit the central cross member (05) to the rear panel (04), use the dowel A and the screw B. Join the drawer support bar (06) to the central crosspiece (05), using the screw E.
- Page 15 Step 9 Fit the top panel to the assembled base, using the dowels A and screws B.
- Page 16 Step 10 Fix the sides of the bigger drawer (11) on the front panel of the bigger drawer (17) using the screws C. Fit and slide the bottom of the larger drawer (16) until it touches the rear face of the front panel (17).
- Page 17 Step 12 Fit the drawers on the table, fit the plastic lock H to the drawers.
- Page 18 CAUTION: This unit is intended for use only with the products and/or maximum Helpful Hints weights indicated. Use with other products and/or products heavier than the maximum weights indicated may result in instability or cause possible injury. • Move your new furniture carefully, with two people lifting and carrying the unit to its new location.
- Page 19 3008209 (Oak), 3008109 (Blanco) Escritorio Liv con Cajones Dobles 1:30 hora.
- Page 20 3020119RR (Blanco) HP#: 3020119RR-00 3020119RR-00 ÉTIQUETTE DESCRIPTION (Blanco) DES PIÈCES PANNEAU DU HAUT 3020119RR-01 3020119RR-02 VOIE DE CÔTÉ DROIT 3020119RR-03 RAIL CÔTÉ GAUCHE 3020119RR-04 VOIE ARRIÈRE 3020119RR-05 VOIE CENTRALE 3020119RR-06 SUPPORT DE TIROIR 3020119RR-07 JAMBE ARRIÈRE DROITE JAMBE AVANT DROITE 3020119RR-08 3020119RR-09 JAMBE ARRIÈRE GAUCHE...
- Page 21 lnstrucciones panel frontal (17). Paso 1 1 Inserte la corredera G en los orificios de la bandeja central (5) Paso 12 siguiendo el orden y posición indicados en este paso. Encajar y fijar el panel trasero del gavetero mayor (15) Mediante el tornillo C, fijar el fondo gavetero (16) Con el clavo I en el panel Paso 2 Ensamble las patas (8) y (10) en el lado izquierdo colgando de la...
- Page 22 3008109 (Oak), 3008209 (Blanc) Bureau Liv Avec Double Tiroirs 1:30 h.
- Page 23 3020119RR (Blanc) HP#: 3020119RR-00 3020119RR (Blanco) 3020119RR-01 PANEL SUPERIOR CARRIL LATERAL DERECHO 3020119RR-02 CARRIL LATERAL ESQUIERDO 3020119RR-03 CARRIL TRASERO 3020119RR-04 CARRIL CENTRAL 3020119RR-05 3020119RR-06 SOPORTE DEL GAVETERO 3020119RR-07 PIERNA TRASERA DERECHA 3020119RR-08 PIERNA DELANTERA DERECHA 3020119RR-09 PIERNA TRASERA ESQUIERDA 3020119RR-10 PIERNA DELANTERA ESQUIERDA LADO DEL GAVETERO 3020119RR-11...
- Page 24 Instructions Paso 1 Insérez le curseur (G) dans les trous du plateau central (5) en tiroir (16) jusqu'à ce qu'il touche le. Face arrière de la façade (17). suivant l'ordre et la position indiqués dans cette étape. Monter et fixer le panneau arrière du plus grand tiroir (15). A l'aide de Paso 12 Paso 2 Assemblez les pieds (8) et (10) sur le côté...
Need help?
Do you have a question about the RH LIV DESK 2DRW LRG WHT 3020119RR and is the answer not in the manual?
Questions and answers