
Related Manuals for RealRooms Products 3018209RR


Summary of Contents for RealRooms Products 3018209RR
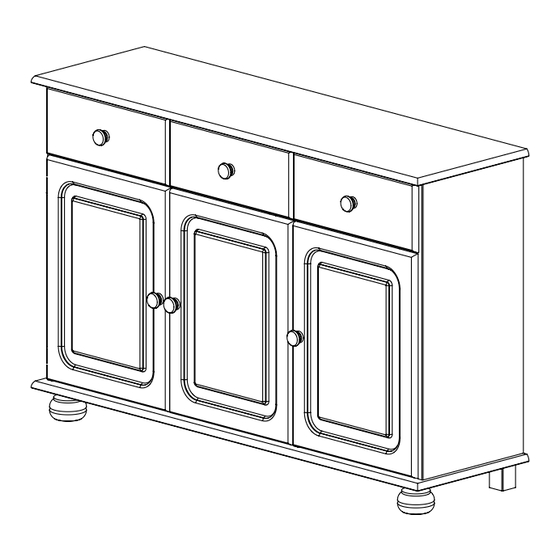
- Page 1 3018209RR (Stain / Wax), 3018009RR (Havana / Brown), 3018109RR (White / Lacquer), 3018309RR (White / Honey) CHESTER SIDEBOARD 3D/2DR Weight Limit: 66 lbs / 30 kg B343018209RR00 - 147552 CJ 2023/10/13...
- Page 2 Limited 1 year Warranty Read Before Beginning Assembly RealRoomswarrants this product to be free from defects in material and Work in a spacious area and near where the unit will be used, preferably on a workmanship and agrees to remedy any such defect. This warranty covers one carpet, or use a piece of the cardboard packaging to protect your floor and year from the date of original purchase from authorized retailers.
- Page 3 PARTS ■...
- Page 4 RIGHT SIDE LEFT SIDE CENTRAL PARTITION BACK FOOT 1 PC 1 PC 1 PC 2 PC FRONT FOOT BACK PANEL PLASTIC H PROFILE BIGGER SHELF 2 PC 3 PC 2 PC 1 PC FRONT THE LARGER DRAWER LEFT SIDE OF DRAWER RIGHT SIDE DRAWER BOTTOM THE BIGGER DRAWER 1 PC...
- Page 5 BACK OF BIGGER DRAWER DOOR RIGHT SIDE COVER 1 PC 3 PC 1 PC 1 PC BOTTOM SMALLER SHELF FRONT OF THE SMALLER DRAWER BOTTOM OF THE SMALLER DRAWER 1 PC 1 PC 1 PC 1 PC Each part has a unique part number. Please reference the appropriate part number when contacting customer service for replacement parts.
- Page 6 3018209RR 3018009RR 3018109RR 3018309RR (Stain/Wax) (Havana/Brown) (White/Lacquer) (White/Honey) 3018209RR-02 3018009RR-02 3018109RR-02 3018309RR-02 3018209RR-03 3018009RR-03 3018109RR-03 3018309RR-03 3018209RR-04 3018009RR-04 3018109RR-04 3018309RR-04 3018209RR-06 3018009RR-06 3018109RR-06 3018309RR-06 3018209RR-07 3018009RR-07 3018109RR-07 3018309RR-07 3018209RR-08 3018009RR-08 3018109RR-08 3018309RR-08 3018209RR-09 3018009RR-09 3018109RR-09 3018309RR-09 3018209RR-10 3018009RR-10 3018109RR-10 3018309RR-10...
-
Page 7: Hardware List
HARDWARE LIST 8mm x 30mm 8,0mm x 31mm 3,5mm x 14mm SHELF SUPPORT SCREW WOOD DOWEL MINIFIX SCREW 8 PC 46 PC 12 PC 13 PC Ø15mm 4,0mm x 40mm DRAWER SLIDERS RAIL MINIFIX SCREW 4 PC 4 PC 13 PC 13 PC 3,5mm x 30mm NAIL... - Page 8 HARDWARE LIST 4,5mm x 60mm 46x24x16 mm HINGE MOLDED SILICONE L-BRACKET SCREW 6 PC 1 PC 1 PC 3018209RR (Stain/Wax) HP#: TU3005212-01 3018009RR (Hanvana/Brown) 3018109RR (White/lacquer) HP#: TU3005219W-01 3018309RR (White/Honey)
- Page 9 Step 1 Insert wooden dowels A into the end of the piece (02), (03), (04), (12), (13). Attach minifix screws B into pieces (11), (19), (22). Insert C into pieces (02), (03), (04). shelf support...
- Page 10 Step 2 Attach the slides F to the side panels (02) (03) and to the central divider (04). use the screw D 180°...
- Page 11 Step 3 Attach the two sides (02) (03) and the central divider (04) to the top (19), using the minifix G...
- Page 12 Step 4 Attach the bottom (20) with the left side (02), right side (03) and the central partition (04), using the screw H.
- Page 13 Step 5 Attach the front foots (07) back foots (06), to the botton (20) using the screw H.
- Page 14 Step 6 Attach the back panel (08) with the left side (02) and center partition (04), using the nail I. Using the plastic H profile (09) to join the two back panels. Attach the back panel (08) with the right side (03) and center partition (04), using the nail I and plate J.
- Page 15 Step 7 Place the shelves in the indicated position, sliding them above the shelf supports. Glue the Q to the front shelfs. molded silicone...
- Page 16 Step 8 Attach the L-bracket O with the wall, using screw P. Attach the L-bracket from the bottom of the top panel, usind screw D. WARNINGS • Unit can tip over causing severe injury or death. • Anchor unit to stud or wall. •...
- Page 17 Step 9 9.1 - Fit the front of the larger drawer (11) to the right (13) and left (12) sides of the drawer. 9.2 - Fit the bottom of the bigger drawer (14) by sliding it down the track until the end of the travel.
- Page 18 10.1 Step 10 10.1 - Fit the front of the small drawer (22) to the right (13) and left (12) sides of the drawer. 10.2 - Fit the bottom of the small drawer (23) by 10.2 sliding it down the track until the end of the travel.
- Page 19 Step 11 Fit the drawers on the sideboard and adjust the height as indicated if necessary.
- Page 20 Step 12 Attach hinges N to the doors (17) using screws D. Attach door reinforcement (18) to the doors (17) using screws M.
- Page 21 Step 13 Attach the doors (17) on the right (03) and left (02) sides and in the central division (04) by fitting the hinge. Use the screw D. Attach the handles L in the doors. using the screws K...
-
Page 22: Helpful Hints
CAUTION: This unit is intended for use only with the products and/or maximum Helpful Hints weights indicated. Use with other products and/or products heavier than the maximum weights indicated may result in instability or cause possible injury. • Move your new furniture carefully, with two people lifting and carrying the unit to its new location. - Page 23 3021009RR (Marron Rico), 3021109RR (Blanco), 3021209RR (Marron), 3021309RR (Miel) APARADOR CHESTER 3D 2DR 1:30 hora.
- Page 24 3021209RR (Stain/Wax) HP#: TU3005212-01 3021009RR (Havana/Brown) 3021109RR (White/Lacquer) HP#: TU3005219W-01 3021309RR (White/Honey) 3018209RR 3018009RR 3018109RR 3018309RR (Stain/Wax) (Havana/Brown) (White/Lacquer) (White/Horney) 3018209RR-02 3018009RR-02 3018109RR-02 3018309RR-02 PANEL DERECHO 3018209RR-03 3018009RR-03 3018109RR-03 3018309RR-03 PANEL IZQUIERDO 3018209RR-04 3018009RR-04 3018109RR-04 3018309RR-04 PARTICIÓN CENTRAL 3018209RR-06 3018009RR-06...
- Page 25 lnstrucciones Paso 10 Instale las correderas E y F, si el tornillo D. Paso 1 Introducir tacos de madera A en el extremo de la pieza (02), (03), (04), (12), (13). Fije las manijas L, usando los tornillos K Coloque los tornillos minifix B en las piezas (11), (19), (22). Coloca los cajones sobre la mesa y ajusta la altura como se indica Inserte el soporte del estante C en las piezas (02), (03), (04).
- Page 26 3021009RR (Brun Riche), 3021109RR (Blanc), 3021209RR (Brun), 3021309RR (Miel) BUFFET CHESTER 3D 2DR 1:30 h.
- Page 27 3018209RR (Brun) HP#: TU3005212-01 3018009RR (Brun Riche) 3018109RR (Blanc) HP#: TU3005219W-01 3018309RR (Miel) LISTE DES PIÈCES 3018209RR 3018009RR 3018109RR 3018309RR (Stain/Wax) (Havana/Brown) (White/Lacquer) (White/Horney) 3018209RR-02 3018009RR-02 3018109RR-02 3018309RR-02 PANNEAU DROIT 3018209RR-03 3018009RR-03 3018109RR-03 3018309RR-03 PANNEAU GAUCHE 3018209RR-04 3018009RR-04 3018109RR-04 3018309RR-04...
- Page 28 Instructions Fixez les poignées L, à l'aide des vis K Insérez des blocs de bois A dans les extrémités de la pièce (02), (03), Etape 1 (04), (12), (13). Etape 11 Placez les tiroirs sur la table et ajustez la hauteur comme indiqué Placer les vis minifix B sur les pièces (11), (19), (22).
Need help?
Do you have a question about the 3018209RR and is the answer not in the manual?
Questions and answers