Advertisement
Table of Contents
Assembly Instructions
Important
Before you begin, read and comply with all safety and operating instructions,
and ensure all parts and correct quantities are included.
Any parts damaged during shipment must be reported within 5 days of receipt.
To report information regarding missing parts or damage, to purchase parts or
accessories, or if you have any questions, please contact us.
www.spectrumfurniture.com
800-235-1262, 715-723-6750
Thank you for purchasing Spectrum products!
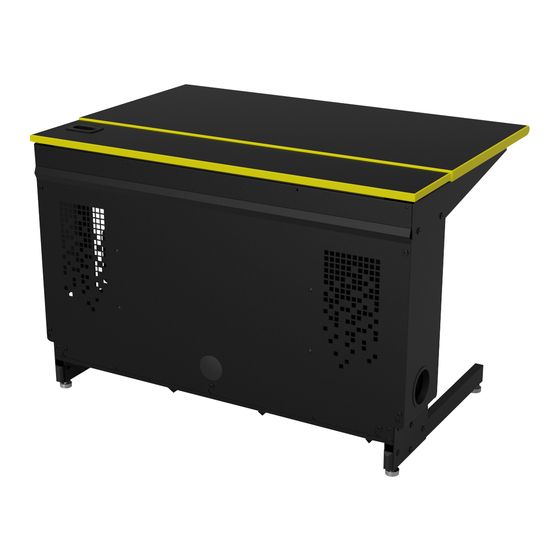
Components
(1) Desk
assembly
(1) 0181779
Worksurface
(1) 0181200
Left arm
(2) 0181976
Foot
Esports Champions Desk
37432
7
/
"
4mm
16
20
min
Assembly tip: Do not tighten component fasteners completely
until all have been installed. Keeping them loose will help with
alignment between parts during assembly.
X2
(1) 0107624
Swivel VESA
Monitor Mount
(1) 0181199
Right arm
(1) 0181796
CPU tray
0199791 Page 1 of 12
Advertisement
Table of Contents

Subscribe to Our Youtube Channel
Related Manuals for Spectrum Esports Champions Desk


Summary of Contents for Spectrum Esports Champions Desk
- Page 1 Any parts damaged during shipment must be reported within 5 days of receipt. To report information regarding missing parts or damage, to purchase parts or accessories, or if you have any questions, please contact us. www.spectrumfurniture.com 800-235-1262, 715-723-6750 Thank you for purchasing Spectrum products! Components Esports Champions Desk 37432 ”...
- Page 2 Glide hardware Caster hardware (2) 0181996 (2) 0182159 Outer foot Inner foot bracket bracket (4) 037779 (6) 0106543 (1) Premium 5-16-18 Glide 1/4-20 Keps nut 3” caster set (6) 053310 (12) 0100167 (6) 053310 (4) 0100167 1/4-20 x 40mm 8-32 x 1/2” PH 1/4-20 x 40mm 8-32 x 1/2”...
- Page 3 Attach foot assembly to desk Glides Casters 1. Carefully tip the desk assembly onto the audience-side to access the 1. Carefully tip the desk assembly onto the audience-side to access the bottom. bottom. 2. Attach the inner foot bracket as shown with (4) 8-32 x 1/2” PH Thrd 2.
- Page 4 Attach CPU tray Remove storage tray 1. Set the CPU tray into the opening in the desk and align the 1. Open desk lid. (4) mounting holes. 2. Loosen the (2) storage tray mounting screws. 2. Secure the tray with (4) 8-32 x 1/2” PH Thrd ctg screws and 3.
- Page 5 Keyboard storage The keyboard storage brackets store the keyboard under the monitor and can be adjusted left and right to support most keyboards. The keyboard should rest in the brackets without interference with the monitor, worksurface, or column. If bracket adjustment is necessary, remove the (2) mounting screws to relocate the bracket to another mounting hole along the rail, then retighten.
-
Page 6: Monitor Installation
Monitor installation 1. Attach the VESA mount (butterfly-shaped portion) to the back of your flat panel monitor with (4) M4 x 12mm PHM screws (not included). (Holes on top, slots on bottom). Note: It will be necessary to remove the standard base that comes with the monitor to use the VESA mount. -
Page 7: Cord Management
Cord management 1. With the back panel removed, connect the necessary monitor, keyboard, and mouse cords above the worksurface. 2. Use the wire loom attached to the back of the keyboard tray to route wire and cables down to the bottom of the desk. The wire loom keeps cords together and protects them while the monitor is being raised and lowered. - Page 8 Flat panel monitor Loom clip Wire loom Loom clip 120VAC Monitor, keyboard Zip ties Power cords and mouse cords to CPU To wall outlet Power strip (not included) Wire lace bars 0199791 Page 8 of 12...
-
Page 9: Maintenance
Optional power module installation 1. To install an optional power module, loosen the (2) keyhole screws 3. Remove the screws and cover plate from the storage tray. securing the storage tray. 4. Remove the (2) clamp flanges from the power module. (Not shown). 2. - Page 10 Accessories Audience-side display mount - 95557 • Provides display monitor mounting on audience-side • Adjustable VESA-compatible • Accommodates most monitors up to 50” diag (not included) • Customer-installed • Unit weight: 8 lb [3.6 kg] • Shipping weight: 9 lb [4.1 kg] Locking CPU enclosure - 95556 •...
- Page 11 Esports Genova Gaming Chair Esports Xpressions Gaming Chair 38151 38153 - no logo 38320 38156 - w/ logo • Rugged carbon PVC seat stands up to hours • Zip in custom embroidered logo panel of use (6” x 9”) - (38146) •...
-
Page 12: Warranty
If servicing is unplug by pulling only on the cord. We expressly warrant that Spectrum products will be of good quality and workmanship and free from necessary, please contact Spectrum Industries for assistance. • Do not step on, drive over, drag, or place objects on power cords.
Need help?
Do you have a question about the Esports Champions Desk and is the answer not in the manual?
Questions and answers