Table of Contents
Advertisement
Quick Links
Owner's Manual
60" Flex Insight Desk
38979
Important
Before using this product:
• Read this manual
• Comply with all safety and operating instructions
• Ensure all parts and correct quantities are included
Any parts damaged during shipment must be reported
within 5 days of receipt. To report information regarding
missing parts or damage, to purchase parts or acces-
sories, or if you have any questions, please contact us.
Thank you for purchasing Spectrum products!
Spectrum Industries, Inc
925 First Avenue, Chippewa Falls, WI 54729 USA
800 235 1262
715 723 6750
www.spectrumfurniture.com
™
with offset VESA mounts
0117128R5 Page 1 of 10
Advertisement
Table of Contents

Subscribe to Our Youtube Channel
Related Manuals for Spectrum 60 Flex Insight Desk 38979


Summary of Contents for Spectrum 60 Flex Insight Desk 38979
- Page 1 5 days of receipt. To report information regarding missing parts or damage, to purchase parts or acces- sories, or if you have any questions, please contact us. Thank you for purchasing Spectrum products! Spectrum Industries, Inc 925 First Avenue, Chippewa Falls, WI 54729 USA...
-
Page 2: Assembly & Set-Up
If servicing is • Do not step on, drive over, drag, or place objects on power cords. necessary, please contact Spectrum Industries for assistance. • For added safety, plug into a grounded outlet controlled by a GFI (Ground Fault Interrupter) circuit breaker. - Page 3 2. Install glides Glide wrench 1. Carefully lift one side of the desk and place a short wooden 4x4 or 2x4 block (or equivalent support) under the leg. This may require two people. Figure 2. 2. Thread the two glides into the leg, tighten securely, and remove block. 3.
-
Page 4: Monitor Installation
4. Monitor installation Note: On most flat panel monitors, it will be necessary to remove the standard base that comes with the monitor to use the VESA mounting option. 3. The offset VESA bracket and mount are pre-installed but need not be removed to install the monitor(s). -
Page 5: Cord Management
6. Cord management 1. With the back panel removed, connect the necessary monitor, keyboard, and mouse cords above the worksurface. 2. Position the keyboard as shown approximately 6” from the front edge of the worksurface with the mouse on the opposite side of the CPU as shown. - Page 6 4. With the loom removed, feed the monitor, keyboard, and mouse cords through the sliced opening of the loom to the bottom of the desk as shown. Figure 6D. 5. Split the CPU wires out of loom approximately 3/4 of the way down the loom and plug into the CPU. 6.
-
Page 7: Operation
Operation For classroom (worksurface) use: For computer use: 1. Place the keyboard and mouse in the compartment tray under the monitor. 1. Open the monitor compartment lid. 2. Lower the monitor by pushing down on the lift bracket until the 2. -
Page 8: Maintenance
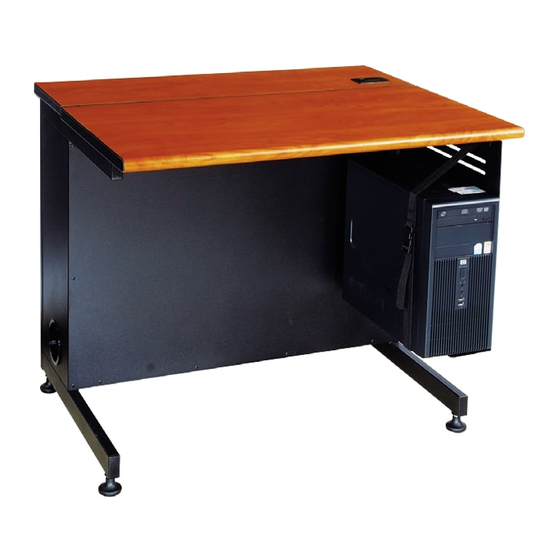
Instructor-side panel removal Metal panel: Laminate panel: 1. The panel is designed for easy removal using keyhole slots and 1. Open the monitor compartment lid. 1/4-20 JC bolts. If the bolts are tight, slightly loosen with a 4mm 2. Unscrew the 1/4-20 thumbscrews securing the panel. Figure 8.2. hex wrench. - Page 9 Accessories Note: Slings and cover plates are available should it later be necessary to convert from or to CPU towers. Single desks take one sling or cover plate, double desks take two. CPU Sling for 24”D desks - 38981 Cover Plate - 38978 •...
-
Page 10: Warranty
Quality Management System. We expressly warrant that Spectrum products will be of good quality and workmanship and free from defect for the period set out in the warranty table below from the date of delivery.
Need help?
Do you have a question about the 60 Flex Insight Desk 38979 and is the answer not in the manual?
Questions and answers