Table of Contents
Advertisement
Quick Links
Advertisement
Table of Contents

Related Manuals for Bosch PROSPERO PRP-CST


Summary of Contents for Bosch PROSPERO PRP-CST
- Page 1 PROSPERO Installation manual...
-
Page 3: Table Of Contents
Interface module, 2x2 control, 1x1 audio (PRP-IM2C1A) Introduction Equipment overview 7.2.1 Front view 7.2.2 Rear view 7.2.3 Top view Mounting 7.3.1 Delivery condition 7.3.2 Installation Device reset Technical data Cabinet loudspeaker, 15 W (PRP-UC15L) Introduction Bosch Security Systems B.V. 2024-10 | V1.00 | F.01U.429.436 Installation manual... - Page 4 Cabinet loudspeaker, 15 W, IP (PRP-UC15L-IP) Introduction Equipment overview Mounting 9.3.1 Delivery conditions 9.3.2 Installation Wire connection Device reset Technical data Maintenance and service 10.1 Preventive maintenance 10.2 Corrective maintenance 2024-10 | V1.00 | F.01U.429.436 Bosch Security Systems B.V. Installation manual...
-
Page 5: Safety Information
11. The system may receive power from multiple mains power outlet sockets and backup batteries. Warning! To prevent a shock hazard disconnect all power sources prior to system installation. Bosch Security Systems B.V. 2024-10 | V1.00 | F.01U.429.436 Installation manual... - Page 6 13. Devices installed above 2 m height may cause injury when falling down. Preventive measures must be taken. 14. To prevent hearing damage do not listen at high volume levels for long periods. 2024-10 | V1.00 | F.01U.429.436 Bosch Security Systems B.V. Installation manual...
-
Page 7: About This Manual
PROSPERO public address system and related products. How to use this manual If you are new to the Bosch PROSPERO Public Address System or are starting to configure a new Bosch PROSPERO Public Address System, it is recommended that you read this manual from start to finish. -
Page 8: Trademarks
Notice of liability While every effort has been taken to ensure the accuracy of this document, neither Bosch Security Systems nor any of its official representatives shall have any liability to any person or entity with respect to any liability, loss or damage caused or alleged to be caused directly or indirectly by the information contained in this document. -
Page 9: System Introduction
System introduction The PROSPERO system is a public address system based on TCP/IP technology released by Bosch. All components of the system can be directly connected to a standard Ethernet network and transmit audio and control signals directly through the network. -
Page 10: Product Overview
Product name PRP-CST Call station PRP-LSSW System software license PRP-IM1A Interface module, 1 audio output PRP-IM2C1A Interface module, 2x2 control, 1x1 audio PRP-UC15L Cabinet loudspeaker, 15W PRP-UC15L-IP Cabinet loudspeaker, 15W, 2024-10 | V1.00 | F.01U.429.436 Bosch Security Systems B.V. Installation manual... -
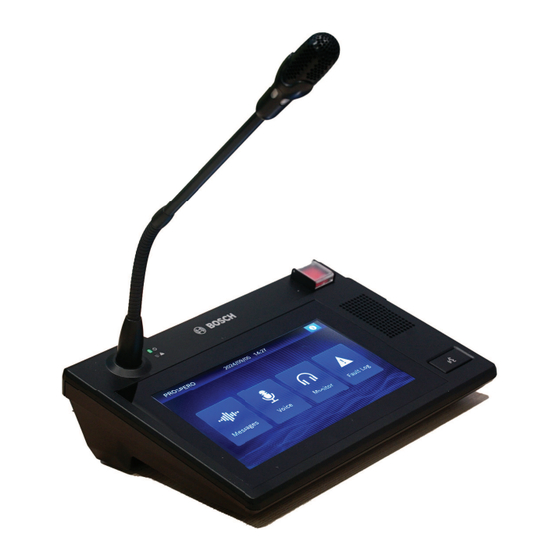
Page 11: Call Station (Prp-Cst)
The bottom provides a 1 channel audio input port for connecting to a local audio source. A built-in monitor speaker allows for zone monitoring using the touch screen. Equipment overview 5.2.1 Front view Bosch Security Systems B.V. 2024-10 | V1.00 | F.01U.429.436 Installation manual... -
Page 12: Rear View
Solid yellow: device failure Emergency broadcast For initiating button emergency broadcasts Built-in speaker For real-time zone listening PTT call button For initiating manual paging broadcasts 5.2.2 Rear view 2024-10 | V1.00 | F.01U.429.436 Bosch Security Systems B.V. Installation manual... - Page 13 Restore factory default settings Strain relief brackets Secure the alignment of the network cable so that it fits on the bottom of the call station Footrest Non-slip foot mats Bosch Security Systems B.V. 2024-10 | V1.00 | F.01U.429.436 Installation manual...
-
Page 14: Mounting
Name PRP-CST 5.3.2 Installation Refer to the diagram below to connect the call station's network cable and secure the cable with the provided strain relief bracket and two screws. 2024-10 | V1.00 | F.01U.429.436 Bosch Security Systems B.V. Installation manual... -
Page 15: Wire Connection
5.5.2 Device reset Press and hold the device reset button for 5 seconds, then release the device to reboot and return to the factory default configuration. Bosch Security Systems B.V. 2024-10 | V1.00 | F.01U.429.436 Installation manual... -
Page 16: Technical Data
PoE IEEE 802.3af Class 3 Power consumption <7 W Network interface Ethernet type 100 BASE-TX Ethernet protocol TCP/IP, UDP, RTP, TFTP, HTTP, HLS Audio encoding MP3, PCM Interface 1x RJ45 2024-10 | V1.00 | F.01U.429.436 Bosch Security Systems B.V. Installation manual... - Page 17 Maximum input level 0 dBu Input impedance >22 kΩ Mechanical Material PC, ABS Dimensions (H x W x D) 370 mm x 238 mm x 158 mm Weight 740 g Color (RAL) RAL 9017 Traffic black Bosch Security Systems B.V. 2024-10 | V1.00 | F.01U.429.436 Installation manual...
- Page 18 | Call station (PRP-CST) PROSPERO Environmental Operating temperature (°C) -5°C — 45°C Storage and transportation temperature (°C) -40°C — 70 C Operating relative humidity, non-condensing <95% (%%) 2024-10 | V1.00 | F.01U.429.436 Bosch Security Systems B.V. Installation manual...
-
Page 19: Interface Module, 1 Audio Output (Prp-Im1A)
Compact form factor, 1U rack height for 3 modules side by side Equipment overview 6.2.1 Front view Icon Indicator and control Description Fault warning Blinking yellow: indicator unauthorized Solid yellow: device failure Power indicator Green: On Bosch Security Systems B.V. 2024-10 | V1.00 | F.01U.429.436 Installation manual... -
Page 20: Rear View
Icon Indicator and control Description Network interface Connecting to a PoE network switch Device reset button Restore factory default settings Analog audio output Balanced line level connector audio output 2024-10 | V1.00 | F.01U.429.436 Bosch Security Systems B.V. Installation manual... -
Page 21: Top View
Secure the tray to the rack. Connect the network and audio cables to the module. Bosch Security Systems B.V. 2024-10 | V1.00 | F.01U.429.436 Installation manual... - Page 22 The cabinet trays need to be configured by the installer. 105 93 Figure 6.1: Fixing the module on the cabinet tray Description Screw Nut (female component of nut and bolt) 2024-10 | V1.00 | F.01U.429.436 Bosch Security Systems B.V. Installation manual...
- Page 23 PROSPERO Interface module, 1 audio output (PRP-IM1A) | en Figure 6.2: Fixing a tray in a rack Figure 6.3: Network connection Bosch Security Systems B.V. 2024-10 | V1.00 | F.01U.429.436 Installation manual...
- Page 24 Use Ultra Category 5 network cables (or higher). Figure 6.4: Analog audio output connection Use a three-pole balanced audio connection, paying attention to positive and negative polarity and grounding. Figure 6.5: Analog audio 3-pole balanced connection 2024-10 | V1.00 | F.01U.429.436 Bosch Security Systems B.V. Installation manual...
-
Page 25: Device Reset
Negative to ground jumper Device reset Press and hold the device reset button for 5 seconds, then release the device to reboot and return to the factory default configuration. Bosch Security Systems B.V. 2024-10 | V1.00 | F.01U.429.436 Installation manual... -
Page 26: Technical Data
TCP/IP, UDP, RTP, TFTP, HTTP, HLS Audio encoding MP3, PCM Interface 1x RJ45 Analog audio input Frequency response 100 Hz — 18 kHz Sampling rate 44.1 kHz Type 1x Line level output 2024-10 | V1.00 | F.01U.429.436 Bosch Security Systems B.V. Installation manual... - Page 27 Weight 465 g Color (RAL) RAL 9017 Traffic black Environmental Operating temperature (°C) -5°C — 45°C Storage and transportation temperature (°C) -40°C — 70 C Operating relative humidity, non-condensing <95% (%%) Bosch Security Systems B.V. 2024-10 | V1.00 | F.01U.429.436 Installation manual...
-
Page 28: Interface Module, 2X2 Control, 1X1 Audio (Prp-Im2C1A)
Power supply status and fault status indicators – Fixed to the cabinet tray by screw holes position – Compact form factor, 1U rack height for 3 modules side by side Equipment overview 7.2.1 Front view 2024-10 | V1.00 | F.01U.429.436 Bosch Security Systems B.V. Installation manual... -
Page 29: Rear View
Indicator and control Description (default configuration) Network interface Connecting to a PoE network switch Device reset button Restore factory default settings Analog audio input Balanced line level connector audio input Bosch Security Systems B.V. 2024-10 | V1.00 | F.01U.429.436 Installation manual... -
Page 30: Top View
Control output Relay control output connections 1-2 (normally closed/ normally open) 7.2.3 Top view Component Description (default configuration) 1, 2 Set screw hole Rack tray mounting screw holes 2024-10 | V1.00 | F.01U.429.436 Bosch Security Systems B.V. Installation manual... -
Page 31: Mounting
Secure the tray to the rack. Connect the network cable, audio cable, and control cable to the interface module. Notice! The cabinet trays need to be configured by the installer. Bosch Security Systems B.V. 2024-10 | V1.00 | F.01U.429.436 Installation manual... - Page 32 | Interface module, 2x2 control, 1x1 audio (PRP-IM2C1A) PROSPERO 105 93 Figure 7.1: Fixing the module on the cabinet tray Description Screw Nut (female component of nut and bolt) 2024-10 | V1.00 | F.01U.429.436 Bosch Security Systems B.V. Installation manual...
- Page 33 PROSPERO Interface module, 2x2 control, 1x1 audio (PRP-IM2C1A) | en Figure 7.2: Fixing a tray in a rack Figure 7.3: Network connection Bosch Security Systems B.V. 2024-10 | V1.00 | F.01U.429.436 Installation manual...
- Page 34 Use Ultra Category 5 network cables (or higher gauge). Figure 7.4: Analog audio input connection Use a three-pole balanced audio connection, paying attention to positive and negative polarity and grounding. 2024-10 | V1.00 | F.01U.429.436 Bosch Security Systems B.V. Installation manual...
- Page 35 Figure 7.5: Analog audio output connection Use a three-pole balanced audio connection, paying attention to positive and negative polarity and grounding. Figure 7.6: Analog audio 3-pole balanced connection Description Anodal Grounding Cathode Bosch Security Systems B.V. 2024-10 | V1.00 | F.01U.429.436 Installation manual...
- Page 36 | Interface module, 2x2 control, 1x1 audio (PRP-IM2C1A) PROSPERO Figure 7.7: Analog audio 2-pole unbalanced connection Description Anodal Grounding Negative to ground jumper 2024-10 | V1.00 | F.01U.429.436 Bosch Security Systems B.V. Installation manual...
- Page 37 PROSPERO Interface module, 2x2 control, 1x1 audio (PRP-IM2C1A) | en Figure 7.8: Dry contact control input connection Figure 7.9: Example of control input connection Bosch Security Systems B.V. 2024-10 | V1.00 | F.01U.429.436 Installation manual...
- Page 38 | Interface module, 2x2 control, 1x1 audio (PRP-IM2C1A) PROSPERO Figure 7.10: Relay control output connection Normally open or normally closed options are available. 24 VDC LIGHT/ RELAY Figure 7.11: Example of control output connection 2024-10 | V1.00 | F.01U.429.436 Bosch Security Systems B.V. Installation manual...
-
Page 39: Device Reset
Ethernet type 100 BASE-TX Ethernet protocol TCP/IP, UDP, RTP, TFTP, HTTP, HLS Audio encoding MP3, PCM Interface 1x RJ45 Analog audio input Frequency response 100 Hz — 18 kHz Sampling rate 44.1 kHz Bosch Security Systems B.V. 2024-10 | V1.00 | F.01U.429.436 Installation manual... - Page 40 Weight 475 g Color (RAL) RAL 9017 Traffic black Environmental Operating temperature (°C) -5°C — 45°C Storage and transportation temperature (°C) -40°C — 70 C Operating relative humidity, non-condensing <95% (%%) 2024-10 | V1.00 | F.01U.429.436 Bosch Security Systems B.V. Installation manual...
-
Page 41: Cabinet Loudspeaker, 15 W (Prp-Uc15L)
Rear panel comes with two sets of mounting brackets for optional horizontal or vertical wall mounting. Bosch logo on front panel rotates to match different mounting orientations. -
Page 42: Mounting
Rotate the front panel logo to the correct orientation. Notice! Expansion bolts and screws for installation should be prepared by the installer. 62.5 62.5 2-⌀6 2-⌀6 Figure 8.1: Selecting and positioning the mounting method 2024-10 | V1.00 | F.01U.429.436 Bosch Security Systems B.V. Installation manual... - Page 43 PROSPERO Cabinet loudspeaker, 15 W (PRP-UC15L) | en Figure 8.2: Organize speaker wiring Figure 8.3: Hanging to the wall Figure 8.4: Rotating logo Bosch Security Systems B.V. 2024-10 | V1.00 | F.01U.429.436 Installation manual...
-
Page 44: Wire Connection
184° x 170° Coverage angle HxV (-6 dB, 4 kHz) (°) 112° x 35° Analog audio input Type 1x Loudspeaker output Interface 1x 2-pin Phoenix connector Mechanical Speaker Material Wooden case, metal grille 2024-10 | V1.00 | F.01U.429.436 Bosch Security Systems B.V. Installation manual... - Page 45 RAL 9017 Traffic black Mounting Wall-mounted, optional horizontal or vertical orientation Environmental Operating temperature (°C) -5°C — 45°C Storage and transportation temperature (°C) -40°C — 70 C Operating relative humidity, non-condensing <95% (%%) Bosch Security Systems B.V. 2024-10 | V1.00 | F.01U.429.436 Installation manual...
-
Page 46: Cabinet Loudspeaker, 15 W, Ip (Prp-Uc15L-Ip)
The Bosch logo on the front panel can be rotated to match different mounting orientations. Other attributes: –... - Page 47 Fault warning Blinking yellow: indicator unauthorized Solid yellow: device failure Loudspeaker Suitable for interface connecting PRP- UC15L loudspeaker Mounting bracket Bracket for wall mounting, horizontal or vertical mounting available Bosch Security Systems B.V. 2024-10 | V1.00 | F.01U.429.436 Installation manual...
-
Page 48: Mounting
Rotate the front panel logo to the correct orientation. Notice! Expansion bolts and screws for installation should be prepared by the installer 62.5 62.5 2-⌀6 2-⌀6 Figure 9.1: Selection and positioning of the mounting method 2024-10 | V1.00 | F.01U.429.436 Bosch Security Systems B.V. Installation manual... - Page 49 PROSPERO Cabinet loudspeaker, 15 W, IP (PRP-UC15L-IP) | en Figure 9.2: Organize speaker wiring Figure 9.3: Hanging to the wall Bosch Security Systems B.V. 2024-10 | V1.00 | F.01U.429.436 Installation manual...
-
Page 50: Wire Connection
| Cabinet loudspeaker, 15 W, IP (PRP-UC15L-IP) PROSPERO Figure 9.4: Rotating logo Wire connection Figure 9.5: Power supply connection 2024-10 | V1.00 | F.01U.429.436 Bosch Security Systems B.V. Installation manual... - Page 51 PROSPERO Cabinet loudspeaker, 15 W, IP (PRP-UC15L-IP) | en Figure 9.6: Network connection Figure 9.7: 100 V audio input connection Bosch Security Systems B.V. 2024-10 | V1.00 | F.01U.429.436 Installation manual...
- Page 52 | Cabinet loudspeaker, 15 W, IP (PRP-UC15L-IP) PROSPERO Figure 9.8: Local analog audio input 1 connection 2024-10 | V1.00 | F.01U.429.436 Bosch Security Systems B.V. Installation manual...
- Page 53 PROSPERO Cabinet loudspeaker, 15 W, IP (PRP-UC15L-IP) | en Figure 9.9: Local analog audio input 2 connection Bosch Security Systems B.V. 2024-10 | V1.00 | F.01U.429.436 Installation manual...
-
Page 54: Device Reset
The PRP-UC15L-IP speaker can be connected to one PRP-UC15L 15 W loudspeaker. Device reset Press and hold the device reset button for 5 seconds, then release the device to reboot and return to the factory default configuration. 2024-10 | V1.00 | F.01U.429.436 Bosch Security Systems B.V. Installation manual... -
Page 55: Technical Data
TCP/IP, UDP, RTP, TFTP, HTTP, HLS Audio encoding MP3, PCM Interface 1x RJ45 Analog audio input Type 1x Loudspeaker output 1x 100 V high priority input 2x Line level input Bosch Security Systems B.V. 2024-10 | V1.00 | F.01U.429.436 Installation manual... - Page 56 RAL 9017 Traffic black Mounting Wall-mounted, optional horizontal or vertical orientation Environmental Operating temperature (°C) -5°C — 45°C Storage and transportation temperature (°C) -40°C — 70 C Operating relative humidity, non-condensing <95% (%%) 2024-10 | V1.00 | F.01U.429.436 Bosch Security Systems B.V. Installation manual...
-
Page 57: Maintenance And Service
In case of fault reports, a qualified technician should perform: – Fault analysis; – Elimination of the part that causes the failure; – Replacement of the part; – Test of the associated functions. Bosch Security Systems B.V. 2024-10 | V1.00 | F.01U.429.436 Installation manual... - Page 58 | Maintenance and service PROSPERO 2024-10 | V1.00 | F.01U.429.436 Bosch Security Systems B.V. Installation manual...
- Page 60 Bosch Security Systems B.V. Torenallee 49 5617 BA Eindhoven Netherlands www.boschsecurity.com © Bosch Security Systems B.V., 2024 Building solutions for a better life 202410311155...
Need help?
Do you have a question about the PROSPERO PRP-CST and is the answer not in the manual?
Questions and answers