
Subscribe to Our Youtube Channel
Related Manuals for Ross openGear GPI-100


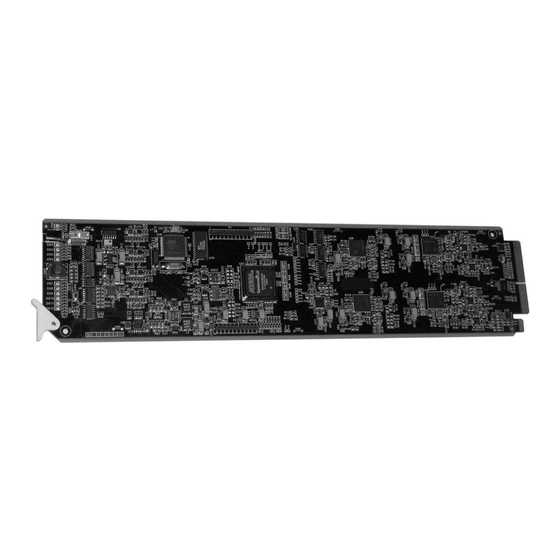
Summary of Contents for Ross openGear GPI-100
- Page 1 Ross Video Limited GPI-100 VANC to GPIO Trigger Inserter/Decoder User Manual Product Name: GPI-100...
- Page 2 The information contained in this User Manual is subject to change without notice or obligation. Copyright © 2010 Ross Video Limited. All rights reserved. Contents of this publication may not be reproduced in any form without the written permission of Ross Video Limited. Reproduction or reverse engineering of copyrighted software is prohibited. Notice The material in this manual is furnished for informational use only.
-
Page 3: Symbol Meanings
Important Regulatory and Safety Notices Before using this product and any associated equipment, refer to the “Important Safety Instructions” listed below so as to avoid personnel injury and to prevent product damage. Products may require specific equipment, and/or that installation procedures be carried out to satisfy certain regulatory compliance requirements. - Page 4 Operation of this equipment in a residential area is likely to cause harmful interference in which case users will be required to correct the interference at their own expense. Changes or modifications to this equipment not expressly approved by Ross Video Limited could void the user’s authority to operate this equipment.
-
Page 5: Environmental Information
Environmental Information The GPI-100 complies with the European Union's RoHS Directive. This stands for "the restriction of the use of certain hazardous substances in electrical and electronic equipment". This Directive bans the placing on the EU market of new electrical and electronic equipment containing more than agreed levels of lead, cadmium, mercury, hexavalent chromium, polybrominated biphenyl (PBB) and polybrominated diphenyl ether (PBDE) flame retardants. -
Page 7: Table Of Contents
Contents Introduction In This Chapter ........................1-1 A Word of Thanks ....................1-1 Overview ........................1-2 Features ........................1-2 Functional Block Diagram ..................1-3 Documentation Terms ....................1-3 Frame and Rear Module Compatibility ..............1-4 ... - Page 8 Using the On-screen Menus In This Chapter ........................6-1 Layout and Navigation .................... 6-2 Using the Menus ...................... 6-3 Specifications In This Chapter ........................7-1 Service Information In This Chapter ........................8-1 ...
-
Page 9: Introduction
Documentation Terms A Word of Thanks Congratulations on choosing the openGear GPI-100 VANC to GPIO Trigger Inserter/Decoder. The GPI-100 is part of a full line of Digital Products within the openGear Terminal Equipment family of products. You will be pleased at how easily your new GPI-100 fits into your overall working environment. Equally pleasing is the product quality, reliability and functionality. -
Page 10: Overview
Video bypass capability with ONG-MDL-R01, R21 or R23 rear module. • Fits openGear DFR-8300 series frames. • Compatible with the openGear frame’s SNMP option, allowing monitoring with third-party SNMP software systems. For more information, contact Ross Technical Support. 1-2 • Introduction GPI-100 User Manual (Iss. 02) -
Page 11: Functional Block Diagram
Functional Block Diagram SDI In SDI Out HD / SD pass* HD / SD Bypass relay in Equalize / Insert Serialize R01 rear module) Deserialize VANC MON Out Extract HD / SD VANC OSD SDI Serialize GPIO Video OSD SDI Analog Figure 1. -
Page 12: Frame And Rear Module Compatibility
Frame and Rear Module Compatibility The GPI-100 can operate with the following frame and rear modules combinations. It should be noted that rear module choice dictates the functionality of the GPI-100. Table 1.Combinations of GPI-100, Frame and Rear Module models Rear Module Frame Bi-Directional... -
Page 13: Quick Start
2. Install DashBoard on a computer connected to the LAN. The DashBoard Control System™ software and user manual are available from the Ross Video website. 3. Install two rear modules in the frame, as described in the section “Rear Module Installation” of this manual. - Page 14 1-6 • Introduction GPI-100 User Manual (Iss. 02)
-
Page 15: Installation And Setup
Unpack each GPI-100 you received from the shipping container, and check the contents against the packing list to ensure that all items are included. If any items are missing or damaged, contact your sales representative or Ross Video Limited directly. Installation and Setup • 2-1... -
Page 16: Rear Module Installation
Rear Module Installation The GPI-100 for both encoding and decoding require Ross Video Rear I/O Module with GPIO jacks. You will need to install the I/O module in your openGear frame before you can install the GPI-100 in the frame, or connect cables to the slot you have chosen for the GPI-100. -
Page 17: Board Installation
Board Installation Use the following procedure to install the GPI-100 in an openGear distribution frame: Notice — It is recommended to use a frame with the cooling fan option in all cases, in order to allow all slots to be used without exceeding heat dissipation limits. 1. -
Page 18: Cable Connections
Cable Connections This section provides information for connecting cables to the installed rear modules on the frame backplane. Connect the input and output cables according to the following diagram. It is not necessary to terminate unused outputs. Note that the BNCs are numbered 1-10 by convention, even though some may not be installed. - Page 19 BNC 1 SDI Input This jack accepts an SDI (SMPTE 259) or HD-SDI (SMPTE 292) video signal. The GPI-100 requires this input in all cases. It inserts or extracts VANC packets in this signal and routes the resulting output to BNC3. The input signal is internally terminated in 75 ohms when the GPI-100 is active;...
- Page 20 2-6 • Installation and Setup GPI-100 User Manual (Iss. 02)
-
Page 21: User Controls
User Controls In This Chapter This chapter contains a description of the GPI-100 user controls: • Switches • LEDs User Controls • 3-1 GPI-100 User Manual (Iss.02) -
Page 22: Bypass Switch
User Controls Figure 4 shows the front edge of the GPI-100. Following the illustration are descriptions of the controls and indicators identified here. Figure 4. Card-edge User Controls Bypass Switch If the GPI-100 is installed in a rear module such as the ONG-MDL-R01 that has a bypass relay, this two-position pushbutton can be used to control the relay. -
Page 23: Leds
LEDs The front-edge of the card features LEDs that display the status of the input signals. Descriptions are provided in the following table: Table 1. Selection and Status LED Descriptions Color Location Display and Description When off, there is no power. When lit and green the card is running with valid input. - Page 24 3-4 • User Controls GPI-100 User Manual (Iss.02)
-
Page 25: Dashboard And Gpi-100 Status
In This Chapter This chapter provides a detailed explanation of the functions available when using DashBoard to monitor and control the GPI-100. The program is available for download from the Ross Video website. The following topics are discussed in this chapter: •... -
Page 26: Layout And Navigation
Layout and Navigation This section focuses on the use of the DashBoard program to control and monitor a GPI-100. For a more complete description of DashBoard and its capabilities, please refer to the documentation supplied with the program. Selecting a GPI-100 Module Figure 5 shows a typical DashBoard screen. -
Page 27: Product Status
Product Status The left side of this figure shows product information that is useful in discussing the operation of the module with Ross Video’s Technical Support staff. Figure 5. Main GPI-100 DashBoard Screen, showing Product Status and Settings Menus • 4-3... -
Page 28: Gpio Status
GPIO Status Figure 6 shows the status of the eight GPIO inputs/outputs. The status of each of the inputs/outputs is either Open or Closed. When using a logic-level rear module (ONG-MDL-R01, R21 or R23), Open means logic level 1 (3.3V) and Closed means logic level 0 (0V). The chapter, “Setting Up the GPI-100”... -
Page 29: Setting Up The Gpi-100
Setting Up the GPI-100 In This Chapter This chapter explains how to use the user interface to set up the GPI-100. This discussion is based on the use of DashBoard through a network connection, however most of these functions are also available through the local Heads-up Display. -
Page 30: General Settings
The DID/SDID is the VANC address used to encoded and decode the triggers. Ross Video has chosen a default address of 84/2 decimal (54/02 hex) for this address. This should not be changed unless it conflicts with existing VANC data. -
Page 31: Selecting Gpios
The Configuration of the card may be saved to a file on the PC by clicking on the Save button. This brings up a dialog box which allows you to name the file and then, by selecting Save, to save it to the PC. Configuration files are a fast way to return to a configuration or to clone a configuration to another GPI-100. -
Page 32: Setting The Logging Timestamp
Setting The Logging Timestamp The GPI-100 logs any changes of the GPIO state for both the encode and decode cards. For the timestamp to be valid you must have the time set on the GPI-100. There are three possible methods for setting the time; network time server, time code or manually. - Page 33 In order to use network time, you also need to ensure that the network card in the openGear frame has been configured to acquire time from an NTP server. To do this, double-click the network card in slot 0 of the frame and then click the Network settings tab.
-
Page 34: Uploading Log Files
Uploading Log Files The Log tab shows the last 20 trigger events. An event occurs any time there is a change to any of the GPIOs that are currently enabled. It is logged when a GPIO goes high and also logged when it returns to low. Each log entry is time-stamped with the date and time. -
Page 35: Using The On-Screen Menus
Using the On-screen Menus In This Chapter This chapter explains how to use the Menu functions available on the Heads-Up Display of the GPI- 100. It does not describe each available menu; for information on these, see the chapters that describe the menus available through DashBoard. -
Page 36: Layout And Navigation
Layout and Navigation The Menu Switch is a five-direction square finger joystick located near the front edge of the GPI-100 card. With the card edge facing you, use the following menu switch actions to navigate the menu and configure parameters: •... -
Page 37: Using The Menus
Figure 13. Product Status Screen Using the Menus The available screens that can be selected are: Status Setup menus Exit (left column) (center column) (right column) Product Settings Exit GPIO Status Time GPIO Mask The use of the menus to change settings will be illustrated by the following example: 1. - Page 38 9. You can repeat steps 5-8 to select values for other items in this menu. 10. To switch to a different menu, press the Menu Switch Up or Down repeatedly until the selection bar moves to the title (Setup Encoding). Press the Menu Switch In and return to step 3. Figure 14.
-
Page 39: Specifications
Specifications In This Chapter This chapter contains the Technical Specifications table. Note that specifications are subject to change without notice. Specifications • 7-1 GPI-100 User Manual (Iss.02) - Page 40 Category Parameter Specification 1 Program input (bypass-protected if available in the Number Of Inputs rear module) 480i/59.94 (SMPTE 259M) 576i/50 (SMPTE 259M) Data Rates and 1080i/50, 59.94, 60 (SMPTE 292M) SMPTE Standards Accommodated 720p/50, 59.94, 60 (SMPTE 292M) Serial Digital 1080p/23.98, 24 (SMPTE 292M) Video Inputs 1080sf/23.98, 24 (SMPTE 292M)
-
Page 41: Service Information
Service Information In This Chapter This chapter contains the following sections: • Troubleshooting Checklist • Power LED Conditions • Bootload Sequence • Warranty and Repair Policy Troubleshooting Checklist Routine maintenance to this openGear product is not required. In the event of problems with your GPI-100, the following basic troubleshooting checklist may help identify the source of the problem. -
Page 42: Power Led Conditions
This User Manual provides all pertinent information for the safe installation and operation of your GPI-100. Ross Video policy dictates that all repairs to the GPI-100 are to be conducted only by an authorized Ross Video Limited factory representative. Therefore, any unauthorized attempt to repair this product, by anyone other than an authorized Ross Video Limited factory representative, will automatically void the warranty. -
Page 43: In Case Of Problems
Ross Video Limited will be shipped collect. The Ross Video Technical Support Department will continue to provide advice on any product manufactured by Ross Video Limited, beyond the warranty period without charge, for the life of the equipment. Service Information • 8-3... - Page 44 P.O. Box 880, Ross Video Incorporated Ogdensburg, New York, USA 13669-0880 Visit Us Please visit us at our website for: • Company information • Related products and full product lines • Trade show information • News Ross Part Number: GPI100DR-004-02...
Need help?
Do you have a question about the openGear GPI-100 and is the answer not in the manual?
Questions and answers