Table of Contents
Troubleshooting

Related Manuals for EG4 12000XP


Summary of Contents for EG4 12000XP
- Page 1 E G 4 ® 1 2 0 0 0 X P O F F - G R I D I N V E R T E R U S E R M A N U A L ©2024 EG4 ® ELECTRONICS, LLC. ALL RIGHTS RESERVED.
-
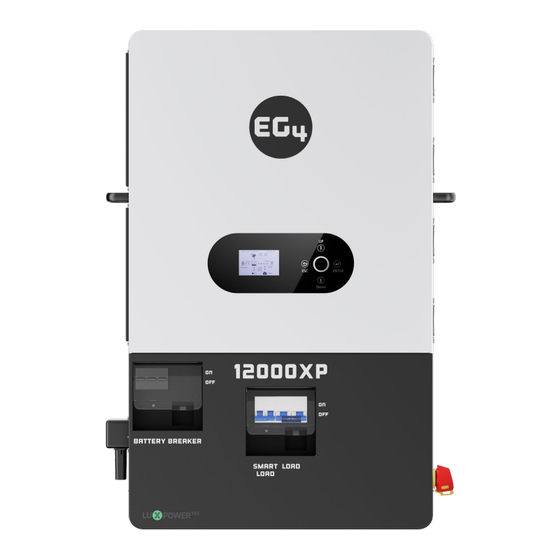
Page 2: Table Of Contents
TABLE OF CONTENTS TECHNICAL SPECIFICATIONS ..............................1 ABBREVIATIONS ..................................3 INVERTER SAFETY ..................................4 SAFETY INSTRUCTIONS ............................... 4 IMPORTANT SAFETY NOTIFICATIONS ........................4 PACKING LIST ..................................... 6 BRIEF INTRODUCTION ................................7 FEATURES ..................................7 INVERTER INTERFACE ..............................8 CABLE BOX KNOCKOUTS ............................. 9 OPERATION OVERVIEW ............................... - Page 3 DONGLE TROUBLESHOOTING .............................. 57 14.1 LEDS & BUTTON FUNCTIONALITY .......................... 57 14.2 DONGLE BOOTUP STEPS ............................57 14.3 CONNECTIVITY REQUIREMENTS ..........................58 14.4 DONGLE PARAMETERS .............................. 58 14.5 TROUBLESHOOTING DONGLE NETWORK CONFIGURATION ................60 14.6 NETWORK SECURITY ..............................61 14.7 UPDATE DONGLE FIRMWARE USING APP ......................
-
Page 4: Technical Specifications
1. TECHNICAL SPECIFICATIONS AC INPUT DATA 120/240VAC; 120/208VAC (L1/L2/N required) NOMINAL AC VOLTAGE (GRID | GENERATOR) 60 Hz (Default) | 50 Hz (Configurable) FREQUENCY (GRID | GENERATOR) 100A @ 240VAC GRID MAX. CONTINUOUS AC CURRENT 24000W MAX. AC INPUT POWER 62.5A @ 240VAC GENERATOR MAX. -
Page 5: Battery Data
INGRESS PROTECTION RATING PV Reverse Polarity Protection, Surge Protection Device, Output Over-Voltage Protection, SAFETY FEATURES Output Over-Voltage Protection Varistor STANDARDS AND CERTIFICATIONS UL1741 *Idle consumption value tested with constant 300 VDC PV source **See EG4 Warranty Registration for terms and conditions... -
Page 6: Abbreviations
2. ABBREVIATIONS • In-lbs. – Inch Pounds AWG – American Wire Gauge • • kW – Kilowatt A – Amps • • kWh – Kilowatt-hour • Ah – Amp hour(s) • LCD – Liquid Crystal Display • AC – Alternating Current LFP –... -
Page 7: Inverter Safety
3. INVERTER SAFETY SAFETY INSTRUCTIONS International safety regulations have been strictly observed in the design and testing of the inverter. Before beginning any work, carefully read all safety instructions, and always observe them when working on or with the inverter. The installation must follow all applicable national or local standards and regulations. - Page 8 Cancer and Reproductive Harm – See www.P65Warnings.ca.gov for more details. DISCLAIMER EG4 reserves the right to make changes to the material herein at any time without notice. Please refer to www.eg4electronics.com for the most updated version of our manuals/spec sheets.
-
Page 9: Packing List
When the product is unpackaged, the contents should match those listed below. Note: Pictures are for reference only, subject to our available products. Hex Head Wood Lag Expansion Bolts (x6) Cardboard Template 12000XP Off-Grid Screw (x6) Inverter Wi-Fi Dongle Parallel Communication... -
Page 10: Brief Introduction
28kW of DC (STC) solar PV on two 35A MPPTs and generate 12kW of power and can feed through 24kW (100A) of utility or 62.5A of generator split phase 120/240V AC power. The 12000XP has full generator support, 2-wire start/stop auto-start and full-featured generator support software. It also features a programmable smart port that supports either smart load control or AC coupled input up to 63A. -
Page 11: Inverter Interface
5.2 INVERTER INTERFACE LCD Panel Navigation Air Filters Controls LCD Panel Load Battery Comm Breaker Breaker Board PV Interface PV Disconnect Ground Battery Busbar Interface Grid Smart Load Interface Wi-Fi Dongle Breaker Generator Power Switch Neutral EPS Switch Interface Busbar... -
Page 12: Cable Box Knockouts
5.3 CABLE BOX KNOCKOUTS The image below represents the bottom view of the cable box area with knockout hole sizing shown in nominal trade sizes. 1 in. 1 1/2 in. 1 in. 1 1/2 in. 1 1/2 in. 1 1/2 in. 1 1/2 in. -
Page 13: Physical Installation
6. PHYSICAL INSTALLATION 6.1 STORING THE INVERTER If placing the inverter into storage before installation, keep the following factors in mind while selecting a storage location. CAUTION: • The inverter and its components must be stored in its original packaging. •... -
Page 14: Location Selection And Installation
6.2 LOCATION SELECTION AND INSTALLATION • The mounting wall should be strong enough to bear the weight of the inverter. • Maintain the minimum clearances presented to the right for adequate heat dissipation. • Install the inverter upright on a vertical surface. - Page 15 NOTE: • Ensure the surface the inverter is being mounted to can support the weight of the unit and has proper spacing as per the diagram above. Mounting Steps: 1. Select a suitable mounting location for the inverter. 2. Use the cardboard template to mark where the mounting bracket bolts or screws will be installed.
- Page 16 6. Temporarily mount the angle bracket to the side of the inverter (located at the bottom, one on each side). Mark a hole on the wall based on the hole location inside the right-angle bracket. (Repeat this step for both sides) 7.
-
Page 17: Cable Connections
7. CABLE CONNECTIONS To expose the cable box area, remove the bottom cover by removing the 4 screws identified in the image below. Once the cover is removed, follow the sections below for connecting the wiring for PV, AC, Battery, Generator, RSD, and Parallel cables. Before connecting any wiring to the inverter, verify each wire is not carrying voltage using a multimeter. - Page 18 Finally, calculate the maximum current of the string so as not to exceed the inverter’s MPPT circuit ratings. Double check if the calculated VMP range is within the 120 – 385VDC optimal MPPT circuit operating range. It is recommended to use the EG4 Solar String Sizer by scanning the QR code ®...
-
Page 19: Battery Connections
7.2 BATTERY CONNECTIONS The EG4 12000XP supports connecting to lithium or lead-acid batteries. There is a combination of ® settings that need to be configured depending on the battery type installed. When using lithium batteries, it is recommended to configure the battery to communicate with the inverter using the included battery communications cable. -
Page 20: Ac Connections
NOTE: https://www.eg4electronics.com/ for detailed information with configuring, connecting, and troubleshooting EG4 ® batteries. 7.3 AC CONNECTIONS The inverter supports 100 amps of AC current on the Grid and EPS Load port. The loads (EPS) output can receive AC current directly from the AC input (bypass mode) or current inverted from PV and battery. - Page 21 CAUTION: • Do not misconnect the grid input and loads output connections, which could cause damage to the inverter and attached devices. • Be sure to connect AC wires with correct phasing. If L and N wires are connected in reverse, it may cause a utility short circuit when the inverters are working in parallel operation.
-
Page 22: Neutral-Ground Bonding
(this is typically the Main Bonding Jumper located at the first grid system disconnect. However, if there is no neutral-ground bond in the system, the 12000XP can be configured to create the bond internally (see N-PE Connect setting on page 40). - Page 23 TERMINAL CONNECTION MIN. WIRE SIZE TORQUE VALUES Generator 4 AWG (21 mm 97 – 106 in-lbs. (11 – 12Nm) Cable Installation: 1. Before making any wiring connections, be sure to have the inverter(s) powered off, the generator powered off, and all circuit breakers open (off) to prevent damage to the unit.
- Page 24 Scroll to the “Generator Charge” section and select the “Generator Charge Type.” Normally, lead-acid batteries are charged according to voltage and lithium batteries are charged according to SOC. For more information on the EG4 Monitor Center and generator settings, see section 12.
-
Page 25: Off-Grid
The 12000XP can accept up to 63A (6kW – 15kW) of generator power and will pass through all available power to the loads. Therefore, the loads subpanel can be sized up to the size of the backup generator with 63A minimum per inverter. -
Page 26: Single Inverter
8.1 SINGLE INVERTER 1. Ensure each inverter circuit breaker is in the open (OFF) position. No voltage should be coming in or out of the inverter at this point. 2. Using a multimeter, check the following: a. Check the battery bank voltage is within operating range at the inverter DC breaker, or the external DC disconnect. -
Page 27: Multiple Inverters
(ON) position. The inverter should now be providing current to the loads panel. 8.2 MULTIPLE INVERTERS The EG4 12000XP Off-Grid inverter supports up to 6 units connected in parallel to reach a capacity ® of up to 72kW. To successfully connect inverters together in a parallel configuration, verify the following: A single string of solar panels cannot be shared between inverters. - Page 28 CAUTION: Only use the provided orange parallel cable when connecting the inverters together. Using the wrong cable could cause hardware damage. If a longer cable is required, see below for more information on creating a cable or contact the distributor. 1.
- Page 29 • PV1 and PV2 parallel Battery Type: Select No battery, Lead Acid or Lithium. Lithium Type: Select a supported brand of battery. (Select “0:EG4” if using an EG4 ® lithium battery) Set Time: Set the current date and time. Buzzer Enable: Remove the check mark to disable the beep when the display buttons are pressed.
- Page 30 Set System Type: Change from Not Parallel to Parallel. Battery Shared: Place a check mark in the battery shared box. Note: Repeat the “Set System Type” and “Battery Shared” settings on each inverter connected in a parallel configuration. The rest of the settings will be copied to each inverter as they are set on the master inverter.
-
Page 31: Rapid Shutdown / Ess Disconnect
For paralleled systems, the RSD needs only to connect to the master inverter. When the switch is engaged, it will shut down all inverters in parallel past the master. NOTE: When using supported EG4 ® batteries in closed loop communications with the inverter, the RSD also initiates ESS Disconnect. -
Page 32: Smart Port
62.5A of AC power while the MPPT channels can handle up to 24kW of solar. Off-grid inverters such as the 12000XP are capable of AC coupling, but not of selling back energy to the grid. To enable AC coupling or configure AC coupling settings, ensure the inverter is in standby mode. -
Page 33: Front Panel Display
AC Coupling Settings: The “AC Couple” setting must be enabled when connecting an existing on-grid system to the smart load port. It is recommended to keep the “Start SOC(%)/Voltage(V)” and the “End SOC(%)/Voltage(V)” within 5 – 10% of each other for optimal operations when utilizing AC coupling (see section 10.7 for settings through the LCD, see section 12.4 for settings through Monitor Center). -
Page 34: Inverter Status
11.2 INVERTER STATUS The information in the table below demonstrates the various status codes that can be displayed on the LCD panel. Normal/Running Status: Warning Status: Fault Status: Flash Status: Utility Grid Status: Generator Grid Status:... -
Page 35: Working Modes
11.3 WORKING MODES The table below describes how the inverter's LCD will display different modes of operation at a given scenario. The inverter logic will automatically operate in one of the modes listed in the table below without any required configuration. However, there are working mode settings that can be configured within Monitor Center to control when a particular working mode is used. - Page 36 PV charges the battery and PV Charge+Off-Grid powers the load 1. AC powers the battery from AC Input (Grid) or Generator Input (GEN) AC Charge 2. When batteries reach low threshold, charge bank with Grid/GEN PV & AC charge the battery. PV+AC Charge AC is from AC Input (Grid) or Generator Input (GEN)
-
Page 37: Lcd Menu Navigation
11.4 LCD MENU NAVIGATION There are four buttons on the front panel LCD screen used for navigation and setting changes. BUTTON FUNCTION Return Exit Enter Confirm, Enter Menu Previous Level, Increase Down Next Level, Decrease Pressing Enter on the home screen provides access to the main menu: Home •... -
Page 38: Data Menu
11.5 DATA MENU Solar Tab ________________________________________________________________ Vpv1: MPPT1 voltage Vpv2: MPPT2 voltage Ppv1: MPPT1 power Ppv2: MPPT2 power Epv1_day: MPPT1 power generation in one day Epv2_day: MPPT2 power generation in one day Epv1_all: MPPT1 total power generation Epv2_all: MPPT2 total power generation Battery Tab ________________________________________________________________ (Page 1 / 2) - Page 39 Grid Tab ________________________________________________________________ (Page 1 / 2) Vgrid: Grid voltage Fgrid: Grid frequency VgridL1N: Split phase L1-N voltage VgridL2N: Split phase L2-N voltage Vgen: Generator voltage Fgen: Generator frequency Pimport: Power input from the grid to the inverter Pexport: Power output from the inverter to the grid. The output should be 0kWh since this is an off-grid inverter.
- Page 40 (Page 2 / 2) Eeps_day: Daily load (L1-L2) power output Eeps_all: Total load (L1-L2) power output EepsL1N_day: Load (L1-N) output power in a day EepsL1N_all: Total power output of load (L1-N) EepsL2N_day: Load (L2-N) output power in a day EepsL2N_all: The total power output of load (L1-N) Parallel Tab ________________________________________________________________ Parallel Role: Role of the inverter in the parallel state...
-
Page 41: Notice Menu
11.6 NOTICE MENU Fault Status Tab ________________________________________________________________ When the inverter has an internal fault, this page displays the corresponding fault code. If there is no fault, no fault is displayed. Alarm Status Tab ________________________________________________________________ When the inverter goes into alarm status, this page will display the corresponding alarm code. -
Page 42: Settings Menu
Battery Type: No battery | Lead acid | Lithium Select the battery type connected to the inverter. Lithium Type: EG4 | (See battery compatibility list on EG4 Electronics web site for more info) ®... - Page 43 Application Tab ________________________________________________________________ (Page 1 / 3) EPS Voltage Set: 120/240 | 127/220 three phase | 100/200 split phase | 120/208 | 110/220 | 115/230 Set the inverter output voltage. EPS Frequency Set: 60Hz | 50Hz Set the inverter output frequency. AC Input Range: UPS: 170-280 | APL: 90-280 Set the voltage range for AC Input.
- Page 44 Application Tab (Cont.) ________________________________________________________________ (Page 3 / 3) Set System Type: Not Parallel | Single Phase Parallel | Three Phase Parallel Set to “Not Parallel” when using a single inverter. Set to “Single Phase Parallel” when connecting two or more inverters using split-phase 120/240VAC.
- Page 45 Charge Tab (Cont.) ________________________________________________________________ (Page 2 / 3) AC Chg Based On: According to time AC charging is configured according to time using up to three time periods. If one of the three time periods is met, AC will charge the battery. If only one time period is needed, it is recommended to set all time periods to the same value.
- Page 46 Charge Tab (Cont.) ________________________________________________________________ (Page 2 / 3) AC Chg Based On: Battery Volt and Time AC charging is configured according to battery voltage and time. When one of the three time periods and the battery voltage is met, AC charging will begin. Once the time period and voltage are outside the configured range, AC charging will end.
- Page 47 Discharge Tab ________________________________________________________________ (Page 1 / 3) Discharge Control: Use Vol | Use SOC Battery discharge can be based on voltage or SOC. Set to “According to Voltage” when using a lead-acid battery or a lithium battery in lead-acid mode. Set to “According to SOC”...
- Page 48 Discharge Tab ________________________________________________________________ (Page 3 / 3) - AC Coupling AC Couple Enable: Disable | Enable Enables the AC coupling function. AC Couple Start SOC: 50% Sets the start state of charge (SOC) for AC coupling. AC Couple End SOC: 90% Configure the SOC for AC coupling.
-
Page 49: Remote Monitoring And Configuration
If the dongle Wi-Fi LED does not illuminate, see section 13 Dongle Troubleshooting. New EG4 users will need to create a new account. Existing users can add the new dongle to an existing account, which is shown in section 11.3. - Page 50 2. Complete the online form. Contact the distributor for the customer code. The dongle serial number (SN) and dongle PIN can be found on the sticker attached to the side of the dongle. 3. Once the registration is complete, return to the EG4 Monitor Center web page and login ®...
-
Page 51: Existing User Accounts
Using the Phone App 1. Download the “EG4 Monitor” app for iOS or Android. After installation is complete, open the app. 2. Select “Register”, then complete the required information and press “Register”. Contact the distributor for the installer code. 3. Once the registration is complete, return to the login page and login using the username and password created during the registration process. - Page 52 ® Using the Phone App 1. Open the “EG4 Monitor” app and login using an existing name and password. 2. Select the back arrow in the upper left corner of the screen. 3. Select “Add Dongle”. Scan or enter the dongle information located on the dongle sticker, then...
-
Page 53: Monitor Center Settings
13. MONITOR CENTER SETTINGS This section describes using Monitor Center to configure basic settings as well as settings that may be specific to the 12000XP. For assistance using additional settings and features within Monitor Center, see the EG4 Monitor Center Overview available on the EG4 website or by scanning the code below. -
Page 54: Application Setting
13.2 APPLICATION SETTING EPS Voltage Set(V): Set the voltage to accommodate the rated grid voltage. • EPS Frequency Set(Hz): Set the inverter output frequency. • AC Input Range: Set the voltage range for AC Input. Switch over time will typically, be •... -
Page 55: Charge Settings
13.3 CHARGE SETTINGS Charge Current Limit(Adc): Set the charge current limit in amps according to battery • requirements. Range is 0 – 250 for a single inverter and 0 – 4480 for paralleled inverters. Lead Acid Charge Voltage(V): Sets the lead acid charge voltage. See the battery manufacturer’s •... - Page 56 AC Charge End Battery Voltage(V): Limit of voltage at which system will stop charging • batteries from AC. Range is 48 – 59V for end. AC Charge Start Battery SOC(%): Limit of SOC at which the system will start charging •...
-
Page 57: Discharge Settings
13.4 DISCHARGE SETTINGS Discharge Control: Battery discharge can be based on voltage or SOC. Set to “According to • Voltage” when using a lead-acid battery or a lithium battery in lead-acid mode. Set to “According to SOC” when using a compatible Lithium battery. Discharge Current Limit(Adc): Set the discharge current for lead-acid batteries. -
Page 58: Other Setting
13.7 WORKING MODES The “Working Mode” feature has several different preset working modes that allow the user to configure the system to meet their needs through customizing settings. Working modes for the EG4 ® 12000XP include AC Charge, AC First Mode, and Self Consumption. -
Page 59: Firmware Update
AC is only used as a last resort. 13.8 FIRMWARE UPDATE To update the inverter firmware, follow the steps below: 1. The firmware can be updated by using the EG4 Electronics Monitor Center website. Contact ® EG4 to ensure the files are correct. -
Page 60: Dongle Troubleshooting
14. DONGLE TROUBLESHOOTING 14.1 LEDS & BUTTON FUNCTIONALITY LEDs: Each of the three LEDs on the dongle will illuminate green when the boot/configuration process is complete. 1. Wi-Fi LED: Dongle has power, and the Wi-Fi hotspot is on. 2. Cloud LED: Dongle is communicating with the monitoring server. -
Page 61: Connectivity Requirements
When internal communication is successful, the INV LED is solid on. 4. When all three dongle LEDs are on, the inverter can be configured and monitored using the EG4 mobile app ® or the EG4 monitor website. - Page 62 “Dongle Connect”. Then select “Dongle Connect Params”. ® NOTE: If the home screen is bypassed after opening the EG4 app, press the user icon in the upper right of the screen and then select logout. NOTE: After selecting Dongle Connect, give the dongle time to respond to the EG4 monitor mobile app.
-
Page 63: Troubleshooting Dongle Network Configuration
14.5 TROUBLESHOOTING DONGLE NETWORK CONFIGURATION Error: “Set failed” and/or “Set parameter failed” Description: This error message may appear after selecting any button in the app that performs an action. For example, selecting the “HomeWiFi Connect” button as shown below. Fix: Confirm the phone is connected to the dongle’s Wi-Fi network and the dongle’s wireless LED is illuminated. -
Page 64: Network Security
CONNECT”. Then select “DONGLE CONNECT PARAMS”. NOTE: If the home screen is bypassed when opening the EG4 app, press the user icon in the upper right of the screen and then select logout. NOTE: After selecting “DONGLE CONNECT”, give the dongle time to respond to the Phone app. - Page 65 5. Select the “eye” icon and enter the verification code 123123. The “OK” button may need to be selected twice, depending on communication and/or software lag. 6. The default WPA2 password set at the factory is “12345678”. To change the default password, select inside the password area and over-write the existing password using the desired password.
- Page 66 This is the quickest and easiest option because it does not require using the currently set WPA2 password set on the dongle’s Wi-Fi network. Option 2: Use the EG4 App to disable the security settings on the dongle. This option can •...
-
Page 67: Update Dongle Firmware Using App
13. Then connect the phone to the dongle's wireless network. NOTE: Before starting a firmware update, verify the EG4 mobile app is Android version 1.3.1 or later. Apple iOS does not currently support dongle FW updating the. - Page 68 3. The current dongle firmware will be displayed on the Update firmware button. Select the “Vx.xx Update Firmware” button to start the upgrade process. The EG4 app will automatically locate the latest firmware version available. At the time of this writing, the latest version in the image below is 2.06.
-
Page 69: Inverter Troubleshooting
15. INVERTER TROUBLESHOOTING 15.1 ERROR DEFINITIONS AND TROUBLESHOOTING CODE DESCRIPTION TROUBLESHOOTING Restart the inverter. If the error persists, contact the E000 Internal Communication Fault distributor. Restart the inverter. If the error persists, contact the E001 Model Fault distributor. Restart the inverter. If the error persists, contact the E003 CT Fail distributor. -
Page 70: Warning Definitions And Troubleshooting
Sync trigger signal lost in parallel Ensure the CAN cable connection is connected to the E029 system correct COM port. Restart the inverter. If the error persists, contact the E031 Internal communication fault 4 distributor. 15.2 WARNING DEFINITIONS AND TROUBLESHOOTING CODE DESCRIPTION TROUBLESHOOTING... - Page 71 Check the battery for voltage using a multimeter. W027 Battery open Ensure all wires are correctly installed to inverter and battery. W028 Inverter overload Inverter is running beyond maximum output. Restart the inverter. If the error persists, contact the W029 Inverter voltage high distributor.
-
Page 72: Inverter Maintenance
Grid power is cut, and the inverter supplies the load with a combination 0×C0 PV & Battery Off-grid of solar and battery power. Grid power is cut, and solar power is used to supply the load and 0×88 PV Charge Off-grid charge batteries simultaneously. - Page 73 DANGER: Never disconnect battery, PV, or AC input power under loads. If there is an emergency where the inverter must be shut down, follow the steps outlined below. Shut Down 1. Turn off EPS output on side of inverter. 2. Open (turn OFF) the GRID and GENERATOR breaker on front of unit. 3.
-
Page 74: Warranty Information
10. Damages incurred from a voltage or current spikes due to open-loop lithium battery communications. EG4 product warranty is a limited warranty – EG4 limits its liability in the event of a product defect to repair or replacement in accordance with the terms of this limited warranty. EG4 is not responsible for any additional or indirect damages that may arise from the malfunctioning of the product. -
Page 75: Changelog
NOTES... - Page 76 CONTACT US support@eg4electronics.com (903) 609-1988 www.eg4electronics.com...
Need help?
Do you have a question about the 12000XP and is the answer not in the manual?
Questions and answers
Good afternoon I **** currently looking at installing a EG4 12000XP Inverter. The customer does not have solar panels yet and plans to add those later. The customer has informed me that this system is similar to a back up power supply on a computer and that the house will feed from this system and that the house will never lose power. From my understanding this is a back up system that requires a transfer switch and in the case of a power outage you would need to transfer power from the house the batteries.
To install the EG4 12000XP inverter as a backup power supply without solar panels, you need to:
1. Connect the inverter to your critical load circuits via a subpanel.
2. Use batteries (such as EG4 Wallmount Indoor batteries) for energy storage.
3. Ensure proper wiring and safety breakers are in place:
- Open the battery breaker on the front of the unit.
- Open external battery breaker (if used).
- Power down batteries one at a time, starting with the master.
- Turn the inverter’s side power switch to OFF during installation.
4. Use the built-in transfer switch to allow seamless switching between grid and inverter power.
5. Do not connect the inverter to send power back to the grid, as it is not designed for grid-tied export.
Solar panels are optional for backup use; the system can run entirely from battery power charged by the grid.
This answer is automatically generated
I HAVE THE eg4 INVERTOR 12000XP MY GENORATOR IS ON IT IS A 14KW THE INVERTER IS SENDING POWER TO THE HOUSE BUT NOT SENDING POWER TO THE BATTIERS AT THE SAME TIME. hOW DO I SET THE INVERTER TO SEND POWER TO THWE BATTIERS?