
Related Manuals for EG4 8KEXP-240V


Summary of Contents for EG4 8KEXP-240V
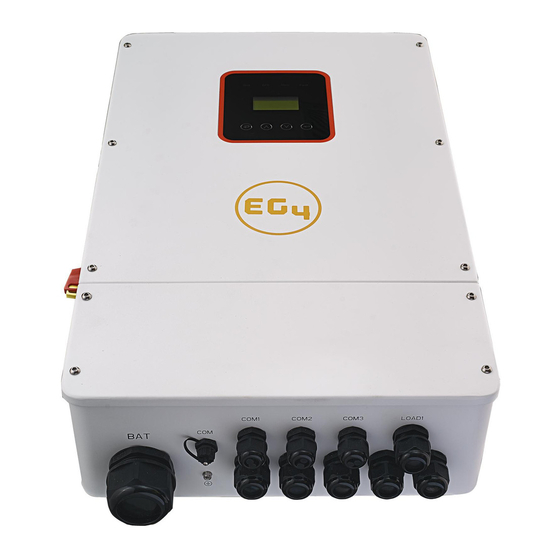
- Page 1 EG4 Electronics www.eg4electronics.com USER MANUAL EG4 8KEXP-240V HYBRID INVERTER/CHARGER 8000W 120/240 VAC...
-
Page 2: Table Of Contents
Table of Contents NOTES ON THIS MANUAL…………………………………………………………..3 SCOPE OF VALIDITY………………………………………………………………………………………………..3 TARGET GROUP ……………………………………………………………………………………………………..3 SYMBOLS USED………………………………………………………………………………………………………3 SAFETY...………………………………………………………………………………..4 IMPORTANT SAFETY INSTRUCTIONS………………………………………………………………………..4 EXPLANATION OF SYMBOL………………………………………………………………………………………7 INTRODUCTION...…………………………………………………………………..7 BASIC FEATURES…………………………………………………………………………………………………...7 SYSTEM DIAGRAM………………………………………………………………………………………………….8 DIMENSION…………………………………………………………………………………………………………..9 TERMINALS OF PV INVERTER………………………………………………………………………………….9 TECHNICAL PARAMETERS..……………………………………………………...10 INVERTER SPECIFICATION…………………………………………………………………………………….10 INSTALLATION………………………………………………………………………12 CHECK FOR PHYSICAL DAMAGE……………………………………………………………………………..12 PACKING LIST……………………………………………………………………………………………………….12 MOUNTING…………………………………………………………………………………………………………..12 ELECTRICAL CONNECTION……………………………………………………….15... -
Page 3: Notes On This Manual
Notes on this Manual Scope of Validity This manual describes installation, commissioning, operation, and troubleshooting. Please read the manual fully and carefully before installing and operating. This manual provides basic safety and installation guidelines as well as information on tools and wiring. Keep this manual for future use. 1.2 Target Group This manual is for qualified electricians and owner/builders with qualified electrician oversight. -
Page 4: Safety
Safety 2.1 Important Safety Instructions... - Page 5 Please keep this user manual for future use. Always follow the precautions, and safety instructions in this document. EG4 will not be liable for any consequence caused by the violation of the safety regulations, design, production, and usage standards. Only accessories included with the inverter shipment are recommended for use with the inverter.
- Page 6 Lightning will cause damage either from a direct strike or from surges due to a nearby strike. Induced surges are the most likely cause of lightning damage in majority or installations, especially in rural areas where electricity is usually provided by long overhead lines. Surge may be included on both the PV array conduction and the AC cables leading to the building.
-
Page 7: Explanation Of Symbol
Introduction Basic features The EG4 8KEXP-240 is a high-quality hybrid inverter which can convert solar energy to AC energy and store the energy in batteries. This inverter can be used to optimize self-consumption, store in the battery for future use or feed into the public grid. Work mode depends on PV energy and the user's preference. It can provide power for emergency use during grid loss by using the energy from the battery and inverter (generated from PV). -
Page 8: System Diagram
System Diagram... -
Page 9: Dimension
3.3 Dimension 3.4 Terminals of PV inverter... -
Page 10: Technical Parameters
Technical Parameters Inverter specification... -
Page 12: Installation
Installation Check for Physical Damage Make sure the inverter is intact after transportation. If there is any visible damage, please contact your distributor immediately. Packing List Open the package and take out the product, please check the accessories first. The packing list is shown below. - Page 13 Please AVOID direct sunlight, rain exposure, snow laying up during installation and operation. Space Requirement Mounting Tools required for installation. Installation tools: drill, crimping pliers, screwdriver, crescent wrench, etc. Step 1: Drill 4 holes in the wall according to the following dimensions, 50~60mm depth. Then use a proper hammer to fit the expansion bolt into the holes.
- Page 14 Step 2: Lift up the inverter and align the holes of the inverter with the expansion bolt, mount the inverter on the wall. Step 3: Tighten the nut of the expansion bolt and install a tamper proofing lock on the DC switch of the inverter.
-
Page 15: Electrical Connection
Step 5: Insert the conduit and fasten the joint. Electrical Connection PV connection This inverter can be connected with 4-strings of PV modules for 12kW (3kW per MPPT). Select PV modules within specs and reliable quality. Open-circuit voltage of module arrays connected in series should be less than max, temperature adjusted DC input voltage in accordance with NEC compliance. -
Page 16: Grid Connection (Gen Connection)
Step2. Feed the PV cables through the PV port, and connect the PV cables to the PV terminals. Grid Connection Step1. Check the grid voltage. Check the grid voltage and compare to acceptable voltage ranges (Please refer to technical data). Disconnect the circuit board, and secure against re-connection. - Page 17 ff ff...
-
Page 19: Battery Connection
Battery Connection The charging & discharging system of this inverter is designed for a 48V lithium battery. Before choosing a battery, please note the maximum voltage of the battery can’t exceed 60V and the battery communication should be compatible with this inverter. Battery breaker Before connecting to the battery, please install a non-polarized DC breaker to make sure the inverter can be securely disconnected during maintenance. -
Page 23: Outline For Settings Menu
Outline For Setting Menu... -
Page 25: Lcd Operation
LCD Operation LCD Interface Error information System setting1 System setting2 System setting3 PV1 Input display interface... - Page 26 PV2 Input display interface PV3 Input display interface PV4 Input display interface DC Voltage interface Battery interface...
- Page 27 Battery current interface Battery current interface Grid-connected Inverter Frequency LOAD...
- Page 28 ON GRID POWER INVERTER POWER LOAD POWER PER POWER Temperature State...
-
Page 29: Setting
SETTING State SET Password Setup... - Page 30 System setting Work mode Peak shift work time...
- Page 31 EPS enable Battery wake-up REMOTE CTRL START DELAY PV INPUT MODE...
- Page 32 Anti Reverse ARC ENABLE BUTTON ENABLE BATTERY SETTING BATTERY TYPE...
- Page 33 Lead-acid battery parameter DISC-DEPTH...
- Page 34 BAT-COMM Grid standard Grid set...
- Page 35 RUN SETTING REACT MODE...
- Page 36 GRID POWER DISCHARGE POWER CHARGE POWER PV POWER VAC-MIN...
- Page 37 VAC-MAX GRID FREQUENCY-MIN GRID FREQUENCY-MAX ACTIVE REF.
- Page 38 485 Address BAUD RATE LANGUAGE BACKLIGHT DATE/TIME...
- Page 39 Clear history PASSWORD MAINTENANCE FACTORY RESET...
- Page 40 INQUIRE INVERTER MODULE MODULE SN FIRMWARE RUNNING RECORDS...
- Page 41 DIAGNOSE STATISTIC...
-
Page 42: Fault Diagnosis And Solutions
Fault diagnosis and solutions This inverter is easy to maintain. When you encounter the following problems, please refer to the Solutions below, and contact the local distributor if the problem remains unsolved. The following table lists some of the basic problems that may occur during the actual operation as well as their corresponding basic solutions. -
Page 45: Inverter Parallel Guide
10. Inverter Parallel Guide 10.1 Parallel System Diagram Multiple inverters can be installed together to deliver more power. When AC loads are present, all units effectively share the load. The system diagram is as follows. -
Page 46: Parallel Communication Cable Connection
10.2 Parallel Communication Cable Connection For parallel communication, CAT 5 cables are needed. When using common batteries, BMS cable needs to be connected to the master unit. The inverter shares the BMS information by inter-unit parallel communication cable. 10.3 Parallel Operation Notes 1) Make sure all the units in parallel are with the same software version. -
Page 47: Parallel System Settings
10.4 Parallel System Setting The parallel setting page can be accessed in the following steps in the screen: USER->1. SETUP->PASSWORD CHECK->15.parallel 10.4.0 Setting 10.4.1 Parallel Error information... - Page 48 Notice: Warning: 1. Stick Logger Installation 4. Usage methods and notices for Reset button Type 1 4.1 Usage methods and key-press descriptions for Reset button Type 2 4.2 Notices for Reset button Notice: Do not remove waterproof plug. Warning: 2. Logger Status 2.1 Check Indicator light 3.
- Page 49 Notice: 5G WiFi is not supported .
Need help?
Do you have a question about the 8KEXP-240V and is the answer not in the manual?
Questions and answers