EG4 IV-8000-HYB-AW Troubleshooting & Maintenance Manual
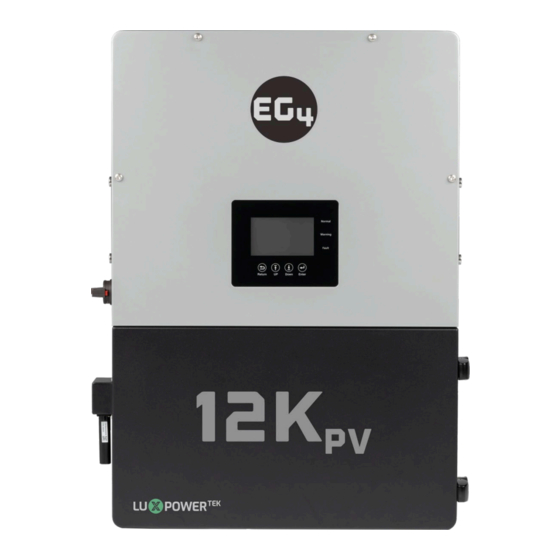
12 kpv hybrid inverter
Hide thumbs
Also See for IV-8000-HYB-AW:
- Quick start manual (44 pages) ,
- Connection manual (23 pages) ,
- Connections (20 pages)
Table of Contents
Advertisement
Quick Links
E G 4 ® 1 2 k P V H Y B R I D I N V E R T E R
The purpose of this document is to educate the end-user on troubleshooting and maintaining
the integrity of the 12kPV hybrid inverter.
©2024 EG4 ELECTRONICS, LLC. ALL RIGHTS RESERVED.
VERSION 1.0 | INFORMATION SUBJECT TO CHANGE WITHOUT NOTICE.
MODEL #: IV-8000-HYB-AW / IV-8000-HYB-AW-00
T R O U B L E S H O O T I N G &
M A I N T E N A N C E G U I D E
Advertisement
Table of Contents
Troubleshooting

Related Manuals for EG4 IV-8000-HYB-AW


Summary of Contents for EG4 IV-8000-HYB-AW
- Page 1 The purpose of this document is to educate the end-user on troubleshooting and maintaining the integrity of the 12kPV hybrid inverter. ©2024 EG4 ELECTRONICS, LLC. ALL RIGHTS RESERVED. VERSION 1.0 | INFORMATION SUBJECT TO CHANGE WITHOUT NOTICE. MODEL #: IV-8000-HYB-AW / IV-8000-HYB-AW-00...
-
Page 2: Table Of Contents
TABLE OF CONTENTS TECHNICAL SPECIFICATIONS ..........................1 SAFETY ..................................3 SAFETY INSTRUCTIONS ..........................3 IMPORTANT SAFETY NOTIFICATIONS ...................... 3 INVERTER TROUBLESHOOTING ..........................5 VIEWING INFORMATION AND ALARM FAULT/RECORD ..............5 REGULAR MAINTENANCE ..........................6 TROUBLESHOOTING BASED ON LCD SCREEN ..................6 3.3.1 FAULTS ON THE LCD AND FAULT LIST .................... -
Page 3: Technical Specifications
1. TECHNICAL SPECIFICATIONS AC INPUT DATA 120/240VAC; 120/208VAC (L1/L2/N required) NOMINAL AC VOLTAGE 50/60Hz FREQUENCY 12000W MAX. AC INPUT POWER >5000W MIN. GENERATOR SIZE 80A | 80A MAX. GEN | GRID PASSTHROUGH CURRENT AC GRID OUTPUT DATA 33.3A@240VAC | 38.5A @208VAC MAX. - Page 4 Surge Protection Device, integrated PV disconnect STANDARDS AND CERTIFICATIONS UL1741 SB CSA C22.2#107.1:2016 CSA C22.2#330:2017 ED 1 HECO SRD-IEEE-1547.1:2020 ED 2 RAPID SHUT DOWN (RSD) NEC 2020:690.12 FCC PART 15, CLASS B (PENDING) *See EG4 Warranty Registration for terms and conditions...
-
Page 5: Safety
2. SAFETY SAFETY INSTRUCTIONS International safety regulations have been strictly observed in the design and testing of the inverter. Before beginning any work, carefully read all safety instructions, and always observe them when working on or with the inverter. The installation must follow all applicable national or local standards and regulations. - Page 6 During operation, only the LCD and buttons should be touched. DISCLAIMER EG4 reserves the right to make changes to the material herein at any time without notice. Please refer to www.eg4electronics.com...
-
Page 7: Inverter Troubleshooting
3. INVERTER TROUBLESHOOTING Please follow the troubleshooting steps in the tables below when encountering any faults and/or errors on the inverter. VIEWING INFORMATION AND ALARM FAULT/RECORD Home Screen Touch the LCD screen to light it up if in sleep mode. The home page will appear on the display. -
Page 8: Regular Maintenance
REGULAR MAINTENANCE Inverter Maintenance • Inspect the inverter every 6 months to check for any damaged cables, accessories, or terminals, and inspect the inverter itself. Inspect the inverter every 3 months to verify if the operating parameters are normal and •... - Page 9 FAULT MEANING TROUBLESHOOTING M3 microprocessor fails to receive data M3 Rx failure Restart the inverter. If the error persists, from DSP contact the supplier. Model fault Incorrect model value 1. Check if the L1, L2, and N wires are connected correctly at the inverter load Inverter detected short-circuit on load output terminal.
- Page 10 If a Master has been configured in the system, the fault will automatically be removed after the Master works. If a Master has not been configured Para master loss No Master in the parallel system and there are only Slaves in the system, set the Master first.
-
Page 11: Alarm On The Lcd And Alarm List
3.4 ALARM ON THE LCD AND ALARM LIST If the dot to the left of the fault item is yellow, it means the fault is active. When it is grey, it means the fault is inactive. Alarm List ALARM MEANING TROUBLESHOOTING Check if the communication cable pinout is correct, and if the correct battery brand is... - Page 12 Check whether each PV string is connected correctly. PV short circuit Inverter detected a short circuit in PV input Restart inverter. If the alarm persists, contact the supplier. Restart inverter. If the alarm persists, GFCI module fault GFCI module is abnormal contact the supplier.
-
Page 13: Troubleshooting Wi-Fi Module
4. TROUBLESHOOTING WI-FI MODULE CENTER LIGHT FLASHING Why is the middle light for the Wi-Fi module flashing? After setting the right Wi-Fi password, all three lights should be on solidly. If it is still flashing, try the following: 1. Check to see if the Wi-Fi is connected and that the correct password has been entered. - Page 14 Step 2 After ~30 seconds, the dongle’s LED status will appear as shown below. INV LED “OFF” • Network LED “Blinking” • Module LED “ON” • Step 3 Connect the mobile device/PC to the dongle’s network. The network name will match the serial number (SN) on the outer shell of the dongle.
- Page 15 Step 5 Select the “Wifi Mode Select” option on the left-hand side of the screen. From here, select “AP and Station” and save. See image below. Step 6 Next, select the “AP Mode Setting” on the left-hand side of the screen. Enter the dongle’s SSID and select “save”.
- Page 16 Step 7 Navigate to the “Network Setting” page. Under “Network Connection 1 Setting”, enter the following data and save. Protocol: TCP Client • Remote Port: 4346 • Server Address (IP or domain) 3.101.7.137 • Under “Network Connection 2 Setting”, enter the following data and save. (see image below) Protocol: TCP Server •...
-
Page 17: Storage Information
5. STORAGE INFORMATION If placing the inverter into storage upon receipt, keep the following factors in mind when selecting a storage location. 1. The inverter and its components must be stored in its original packaging. 2. The storage environment temperature should remain within -13°F – 140°F (-25°C – 60°C), and humidity should be within 30% –... - Page 18 C H A N G E L O G Version 1.0 • First version complete...
- Page 19 CONTACT US support@eg4electronics.com (903) 609-1988 www.eg4electronics.com...
Need help?
Do you have a question about the IV-8000-HYB-AW and is the answer not in the manual?
Questions and answers