
Related Manuals for EG4 EG4-3000EHV-48


Summary of Contents for EG4 EG4-3000EHV-48
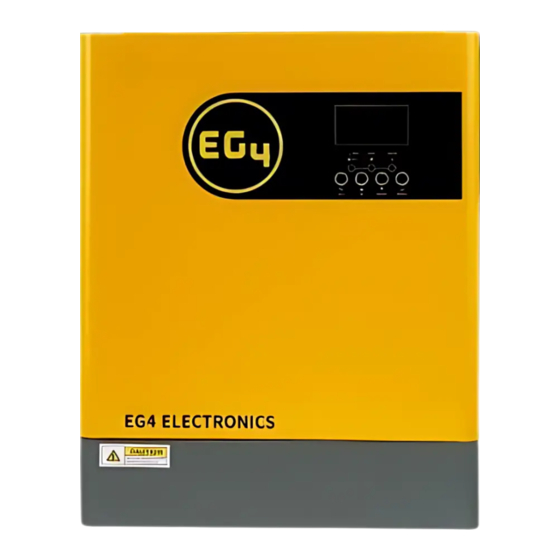
- Page 1 E G 4 - 3 0 0 0 E H V - 4 8 U S E R M A N U A L © 2023 EG4 Electronics, LLC. All rights reserved. Version 1.3.0 | Information subject to change without notice.
- Page 2 1. ABBREVIATIONS • In-lbs. – Inch Pounds • AWG – American Wire Gauge • kW – Kilowatt • A – Amps • kWh – Kilowatt-hour • Ah – Amp hour(s) • LCD – Liquid Crystal Display • AC – Alternating Current •...
-
Page 3: Inverter Safety
2. INVERTER SAFETY SAFETY INSTRUCTIONS International safety regulations have been strictly observed in the design and testing of the inverter. Before beginning any work, carefully read all safety instructions, and always observe them when working on or with the inverter. The installation must follow all applicable national or local standards and regulations. - Page 4 During operation, only the LCD and buttons should be touched. DISCLAIMER EG4 reserves the right to make changes to the material herein at any time without notice. Please refer to www.eg4electronics.com...
-
Page 5: Brief Introduction
• 3.2 BASIC SYSTEM ARCHITECTURE The following illustration shows a basic Energy Storage System (ESS) architecture utilizing the EG4 3000XP Inverter/Charger. A wide variety of appliances in the home or office environment can be powered using this inverter/charger, including compressor-based appliances such as a refrigerator or air conditioner. -
Page 6: Table Of Contents
3.3 PRODUCT OVERVIEW Description Description LCD Display PV Input (500VDC Max.) Status Indicator Battery Input (48VDC Nominal) Charging Indicator AC Input Circuit Breaker RS232 Communication Port for Wi-Fi Fault Indicator Comms Function Buttons Parallel Communication Port Power On/Off Switch Dry Contacts USB Communication Port for PC 15(*) AC Input (Line/Neutral) -
Page 7: Installation
4. INSTALLATION PACKAGING LIST AND PLACEMENT When the product is unpacked, the contents should match those listed below: EG4 3000XP Inverter • User manual • Battery BMS Cable • 125A DC Breaker • 6" DIN Rail • 6' Red and Black 4AWG Battery Cable •... -
Page 8: Installing The Inverter
4.2.3 INSTALLING THE INVERTER Consider the following points before selecting an indoor location for installation: • Do not mount the inverter on flammable construction materials • Mount vertically on a solid vertical surface or wall. • Install this inverter at eye level to allow the LCD display to be visible at all times. - Page 9 4.3 PV CONNECTION CAUTION: Before connecting to PV modules, please install a separate DC circuit breaker between the inverter and PV modules. We recommend all wiring be performed by a licensed professional. It is very important for system safety and efficient operation to use appropriate cable for PV module connection.
- Page 10 IMPORTANT: The table above is for example purposes only. Please use a string sizing calculator or contact a licensed professional for exact sizing measurements. **VOC max @ -25C/-14°F = 46.6Vdc and Vmp min @ 40°C/104F Ground mount = 27.5VDC 4.3.2 PV SYSTEM PARAMETERS When selecting proper PV modules, please be sure to consider the following parameters: 1.
-
Page 11: Battery Connection
Please Note: Maximum current drawn by the inverter is 80A. If using EG4 Batteries, the maximum output is 100A. One 125A breaker is recommended to support a maximum battery current of 100A. If using batteries other than EG4, please consult the manufacturer's manual to ensure proper breaker size. - Page 12 CAUTION! Installation must be performed with extreme care due to high battery voltage. • Do not place anything between the flat part of the inverter terminal blocks as overheating may occur. • Do not apply antioxidant substances on the terminals before terminals are secured.
-
Page 13: Ac Input/Output Connection
4.5 AC INPUT/OUTPUT CONNECTION CAUTION! • Before connecting to AC input power source, please install a separate AC breaker between inverter and AC input power source. This will ensure the inverter can be securely disconnected during maintenance and fully protected from AC input over current. - Page 14 WARNING! Ensure the AC power source is disconnected before attempting to hardwire into the unit.
- Page 15 4. Then, insert AC output wires according to polarities indicated on terminal block and tighten terminal screws. Be sure to connect the ground (PE) conductor ( ) first. Ground (Green or Green with Yellow stripe) L→LINE(Black for Line 1)(Red for Line 2 in 120/240 split-phase configuration) N→Neutral (White or Gray) NOTE: Wire colors may vary.
-
Page 16: Final Assembly
4.6 FINAL ASSEMBLY After connecting all wiring, please put bottom cover back by screwing in the two screws as shown below. 5. OPERATION GUIDE DRY CONTACT SIGNAL There is one dry contact (3A/250VAC) available on the rear panel which can be used to deliver signal to an external device when battery voltage reaches warning level. -
Page 17: Power On/Off Switch
5.2 POWER ON/OFF Once the unit has been installed and the batteries are connected properly, close (turn on) external battery breakers, power on the batteries and then press the ON/OFF switch located on the button of the inverter to turn the unit ON. 5.3 LCD DISPLAY Running status, real-time power, and daily/accumulated energy information can all be conveniently viewed on the inverter’s LCD screen. -
Page 18: Lcd Display Icons
5.3.3 LCD DISPLAY ICONS The table on the following page provides a description of the icons in the LDC Display. Icon Function Description Input Source Information Indicates the AC input. Indicates the PV input Indicate input voltage, input frequency, PV voltage, battery voltage and charger current. -
Page 19: Output Information
Output Information Indicates the output voltage, output frequency, load percentage, load in VA, load in Watt and discharge current. Battery Information Indicates battery level: 0-24%, 25-49%, 50-74% and 75-100% for each bar in battery mode and charging status in line mode. Load Information Indicates overload. -
Page 20: Program Settings
5.4 PROGRAM SETTINGS After pressing and holding the ENTER button for 3 seconds, the unit will enter setting mode. Press UP or DOWN button to select setting programs. Then, press the ENTER button to confirm the selection or ESC button to exit. 5.4.1 PROGRAM SETTINGS Program Description... -
Page 21: Ac Input Voltage Range
Solar energy provides power to the loads as top priority. SUB priority If solar energy is not sufficient to power all connected loads, utility energy will supply power to the loads at the same time. Maximum charging current: Configures the total charging current for solar and utility... - Page 22 AGM (default) Flooded User-Defined Customized Protocol Battery Type Customized Protocol Customized Protocol EG4 Battery Protocol Customized Protocol Restart disable (default) Restart enable Auto restart when overload occurs Restart disable (default) Auto restart when Restart enable over temperature occurs 110V 120V (default)
- Page 23 Point back to Utility: (Low battery voltage level setting range is from 44.0V to 57.2V for 48V model, switches the load to utility if SOL or SBU priority has been set in Program 1). Point back to Utility: (Low 46V (default) battery voltage level that switches the load...
- Page 24 If this inverter/charger is working in Line, Standby or Fault mode, charger source can be programmed as below: Solar energy will charge battery as top Solar first priority. Utility will charge battery only when solar energy is not available. Utility will charge battery as top Utility first priority.
-
Page 25: Backlight Control
Mode4(default) The buzzer sounds when there is a fault If selected, no matter Return to default display screen (default) how users switch display screen, it will automatically return Auto return to to default display screen after 1 minute default display of inactivity. - Page 26 L2 phase The inverter is operated in L2 phase in 3-phase application L3 phase The inverter is operated in L3 phase in 3-phase application The inverter is operated in L1 phase in split- phase application The inverter is operated in L2 phase in split- phase application 48V models default setting: 42.0V Low DC cut-off...
- Page 27 When “ALL” is selected, parallel or 3- phase system will continue working according to rule of “solar first” setting only when all of inverters are connected to PV modules. EXAMPLE: If two units are connected in parallel and set to All of Inverters: “SOL”...
- Page 28 Setting range is from 120min (default) Battery equalized 5min to 900 min. timeout Increment of each click is 5 min. 30days (default) Setting range is from 0 Equalization to 90 days. Increment of interval each click is 1 day Disable (default) Enable Equalization If equalization function is enabled in program 33, this program can...
-
Page 29: Display Setting
5.5 DISPLAY SETTING The LCD Display information can be switched by pressing the UP or DOWN key. The selectable information is switched in the following order: input/output voltage, input frequency, PV voltage, MPPT charging current, MPPT charging power, charging current, charging power, battery voltage, output voltage, output frequency, load percentage, load in VA, load in Watt, DC discharging current, main CPU Version and second CPU Version. - Page 30 AC Charging Current = 20A AC & PV Charging Power = 500W AC Charging Power = 500W Charging Power PV Charging Power = 500W Output Voltage = 120V Output Voltage Battery Discharge Output Current = 4 A Output Current...
-
Page 31: Ac Output (Line/Neutral)
Output Frequency = 60Hz Output Frequency Load Percentage = 20% Load Percentage When connected load is lower than 1 kVA, load in VA will present as xxxVA as in the image below. Load in VA When connected load in larger than 1kVA, load in VA will present AC Output as x.xkVA as in image below. -
Page 32: System Specifications
Model Number System Specifications Firmware Version & Revision Number 5.6 OPERATING MODE DESCRIPTION Operation mode Description LCD display Charging by utility and PV energy. Standby mode / Power saving mode Charging by utility. Note: *Standby mode: The inverter is not turned on yet but at this time, the No output is supplied by the inverter can charge... - Page 33 No charging. Charging by utility and PV energy. The unit will provide output power from the grid. It will also charge the battery at line mode. Line Mode Charging by utility. The unit will provide output power from the grid. It will also charge the battery at line mode.
- Page 34 PV energy will supply power to the loads and charge battery at the same time Power from battery only. Power from PV energy only. 5.7 TYPICAL APPLICATIONS 5.7.1 120V SINGLE PHASE IN PARALLEL For loads requiring 120V, up to twelve 3000EHV-48's can be set up in parallel.
- Page 35 5.7.2 240/120V SPLIT-PHASE IN PARALLEL For loads requiring both 120V & 240V, up to six 3000EHV-48's per phase can be set up in parallel. 5.8 PARALLEL INSTALLATION GUIDE 5.8.1 INSTRUCTIONS This inverter can be used in parallel with three different operation modes. 1.
-
Page 36: Package Contents
5.8.2 PACKAGE CONTENTS In the parallel kit, you will find the following items: (1) Parallel communication cable 5.8.3 MOUNTING THE UNIT When installing multiple units, please follow the chart below. NOTE: For proper air circulation and heat dissipation, allow a clearance of approx. 20 cm/7.9" to the side and approx. -
Page 37: Wiring Connection
5.8.4 WIRING CONNECTION WARNING: Be sure the length of all battery cables is the same. Inconsistent battery cable lengths will cause inconsistent voltage readings between inverter and battery, which could result in nonworking parallel inverters. Recommended battery cable specifications for each inverter (see section 4.4 for more details): Maximum Battery... - Page 38 “AGM”. ** "X" = Battery Communication Protocol Number. For EG4 batteries, set to Li4. Note: Make sure only one inverter is connected via RJ45 to USB-A cable and set as Lithium in LCD program 5 and all others set to AGM.
- Page 39 Power Connection Communication Connection 5.10 THREE INVERTERS IN SINGLE PHASE PARALLEL: Power Connection Communication Connection...
- Page 40 5.11 FOUR INVERTERS IN SINGLE PHASE PARALLEL Power Connection Communication Connection...
- Page 41 5.12 FIVE INVERTERS IN SINGLE PHASE PARALLEL Power Connection Communication Connection 5.13 SIX INVERTERS IN SINGLE PHASE PARALLEL Power Connection Communication Connection Note: Max of 12 units. The best practice is to minimize the number of jumps between inverters by alternating between 1 and 2 jumps on each inverter.
- Page 42 6. SUPPORT 3-PHASE EQUIPMENT ONE INVERTER IN EACH PHASE Program Description Selectable option L1 phase The inverter is operated in L1 phase in 3- phase application L2 phase The inverter is operated in L2 phase in 3- AC output mode phase application L3 phase The inverter is operated in L3 phase in 3-...
- Page 43 Power Connection Note: Depending on load demand, there can be up to 10 inverters on any one phase. P1: L1-phase, P2: L2-phase, P3: L3-phase. N=N1+N2+N3, Nmax=12units N1max=10 units are in one phase and one inverter for the other two phases (N2=N3=1): Power Connection Note: Depending on load demand, there may be up to 10 inverters on any one phase.
- Page 44 Power Connection Communication Connection...
- Page 45 7. SUPPORT FOR PARALLEL SPLIT-PHASE (120V/240V) TWO INVERTERS IN PARALLEL SPLIT-PHASE Program Description Selectable option The inverter is operated in L1 phase in split application AC output mode The inverter is operated in L2 phase in split application Two inverters in parallel Split-Phase...
- Page 46 7.2 GREATER THAN TWO INVERTERS IN PARALLEL SPLIT-PHASE Note: Depending on load demand, there may be up to 6 inverters on any one phase. 2P1: L1-phase, 2P2: L2-phase; N=N1+N2, Nmax=12units 7.3 PV CONNECTION CAUTION: Each inverter should connect to PV modules separately.
- Page 47 7.4 SPLIT-PHASE AND 3 PHASE LCD SETTING AND DISPLAY 7.4.1 SETTING PROGRAM: Program Description Selectable option Comments Single: This inverter is Parallel: This inverter is operated in used in single phase parallel application. application. L1 phase The inverter is operated in L1 phase in 3-phase application L2 phase The inverter is operated in L2 phase in 3-phase...
-
Page 48: Fault Code Display
When “ALL” is selected, parallel or 3-phase system will continue working according to the rule of “solar first” setting only when all inverters are connected to PV modules. All of Inverters: For example, two units are connected in parallel and set to “SOL”... - Page 49 7.5 COMMISSIONING PARALLEL SYSTEMS Step 1: Check the following requirements before commissioning: Ensure all wire connections are correct. • Ensure the communications cable is connected. • Ensure all AC In/Out breakers are open (off), and all neutral wires are connected. •...
- Page 50 7.6 PARALLEL TROUBLESHOOTING GUIDE Below is a list of faults, warning codes, potential scenario issues, explanations of code meaning, as well as possible steps for correction. In most cases a full system reboot will remedy any erroneous errors. The steps for a complete system reboot are (in this order) as follows: 1.
- Page 51 5 is incorrectly Ensure that all battery Battery Type configured. connections are tight. *With EG4 batteries we recommend the terminals be torqued to 6 ft.-lbs. or 8 Nm. **If problems persist, contact your retailer. Check the version of each...
- Page 52 Ensure that no communications cables have come unplugged or have been removed from the inverters. Do a complete system shutdown. Once the system has fully shut down, toggle the power switch between the ON and The inverter has stopped OFF position for Warning Code 16 –...
- Page 53 Ensure that all your battery’s terminal connections are sufficiently tightened. *With EG4 batteries we recommend the terminals be torqued to 6 ft.-lbs. or 8Nm. **If problem persists, contact your retailer.
- Page 54 8. LITHIUM BATTERY SETTINGS If choosing a Lithium battery for the inverter, there are two modes supported. 1. Inverter to BMS communication with the battery via RS 485 Modbus 2. User defined settings using voltage levels (Program Settings 26 and 27) LITHIUM BATTERY BMS CONNECTION There are two connections on the Lithium battery, the RS485 port for BMS and the DC power cables.
-
Page 55: Lcd Setting
AGM (default) Flooded User-Defined Standard communication Protocol form inverter supplier Battery type Customized Protocol Customized Protocol EG4 Protocol Customized Protocol Setting SOC point back to utility source when selecting “SBU Default 50%, 20%~50% Settable priority” or “Solar first” in program... - Page 56 Lithium battery state of charge (%) *Right Image Lithium battery SOC is 63Ah and 60% 8.3 SETTINGS FOR EG4 LITHIUM BATTERIES 1. EG4 Lithium battery settings: Dip Switch: There are 4 Dip Switches which set different baud rates and battery group addresses. If switch position is turned to the “OFF”...
- Page 57 BMS to recognize the new dipswitch address. 2. BMS Communication Guide Step 1: Use the RS485 cable to connect inverter and EG4 battery. Step 2: Turn on DC breaker between inverter and battery and switch on EG4 battery.
- Page 58 Step 3: Turn on the inverter. Step 4: Be sure to select battery type as “Li4” in LCD program 5. All other inverters need to be set to "AGM". If communication between the inverter and battery is successful, the battery icon on LCD display will light 8.4 SETTINGS FOR LITHIUM BATTERY WITHOUT COMMUNICATION...
- Page 59 5. Set Low DC cut-off voltage ≥discharging protection voltage of BMS+2V default setting: 42.0V Low DC cut-off voltage If self-defined is selected in program 5, this program can be set up. Setting range is from 20.0V to 27.0V for 24v mode and 40.0V to 54.0V for 48v model.
-
Page 60: Troubleshooting Guide
Ensure that the connections at both the battery and inverter are correct. Could indicate that the *With EG4 batteries we battery voltage is too low No response after recommend the terminals to let the inverter boot NO LED’s or alarms will power switch is set to be torqued to 6ft lbs. - Page 61 When the inverter is are sufficiently tight. Could indicate that powered on, internal relay LCD and LEDs are batteries are not *With EG4 batteries we is switching on and off flashing. recommend the terminals be connected. repeatedly. torqued to 6ft lbs. or 8 Nm **If problem persists, contact your retailer.
-
Page 62: Fault Codes
9.2 FAULT CODES Code Explanation Troubleshooting Steps Ensure the inverter has sufficient airflow and the vents/fans are not clogged or blocked by debris. Ensure that the fans spin freely. Fault Code 02 – Internal Temperature Indicates that the internal temperature Alarm is over 212°... - Page 63 Check loads to ensure that the inverter is not attempting to power a 240V load with only 120V output. If running multiple inverters, test continuity between the units using a multimeter. Do a complete system shutdown Once the system is off, turn on the breakers for AC output panel Fault Codes 06 –...
-
Page 64: Fault Reference Codes
9.3 FAULT REFERENCE CODES Fault Codes Fault Event Code Icon Over temperature of inverter module Over temperature of DCDC module Battery voltage is too high Over temperature of PV module Output short circuited. Output voltage is too high. Overload time out Bus voltage is too high Bus soft start failed PV over current... -
Page 65: Warning Indicators
9.4 WARNING INDICATORS Warning Code Warning Event Audible Alarm Icon flashing Beep three times every Temperature is too High second Low battery Beep once every second Overload Beep once every 0.5 second Output power derating Beep twice every 3 seconds PV energy is low Beep twice every 3 seconds CAN communication... -
Page 66: Specifications
10. SPECIFICATIONS LINE MODE SPECIFICATIONS Input Voltage Waveform Sinusoidal (utility or generator) Nominal Input Voltage 120VAC Low Loss Voltage 95VAC± 7V (UPS); 65VAC± 7V (Appliances) Low Loss Return Voltage 100VAC± 7V (UPS);70VAC± 7V (Appliances) High Loss Voltage 140VAC± 7V High Loss Return Voltage 135VAC±... -
Page 67: Parallel Communication Port
UTILITY CHARGING MODE 60Amp (@ V =120Vac) Charging Current (AC) Charging Current (PV+AC) 80Amp (@ V =120Vac) Bulk Charging Voltage - Flooded Battery 58.4 Vdc Bulk Charging Voltage - AGM / Gel Battery 56.4 Vdc Floating Charging Voltage 54Vdc Overcharge Protection 63Vdc Charging Algorithm 3-Step... - Page 68 11. WI-FI COMMUNICATIONS DONGLE The EG4-3000EHV inverter comes with a Wi-Fi communications dongle and interface cable. The dongle allows the user to remotely access the unit for monitoring and control purposes. The following instructions describe the installation and setup process.
-
Page 69: Account Creation
11.1.2 ACCOUNT CREATION STEP 1: Download the SmartESS® Wi-Fi APP to your mobile device using the QR Code to the right or search “SmartESS” in your mobile device APP store. STEP 2: Open the SmartESS® Wi-Fi App and press the “Sign up” button. - Page 70 STEP 3: Sign in to the SmartESS® account created in Section 11.1.3. The SmartESS homepage will appear in the “Monitor” mode by default. This is evidenced by the “Monitor” icon in the lower left- hand corner being highlighted in green. Press the “+”...
- Page 71 B. Use the “SCAN” button to have your phone’s camera automatically scan the QR code on the Wi-Fi Dongle. STEP 5: After the dongle PN is populated (manually or automatically), press the “Next step” button to advance to the next screen. SCAN Button STEP 6: Enter the information requested as shown to the right in the red box.
- Page 72 STEP 8: The SmartESS APP homepage appears in the “Monitor” mode. STEP 9: Press the “Me” icon in the lower right- hand corner of the screen to enter the screen below. STEP 10: The “Me” icon in the bottom right corner will be highlighted in green.
- Page 73 STEP 11: Once in the Wi-Fi Pairing screen, follow the three steps for Wi-Fi Pairing and press the “Next” button to complete the pairing process. STEP 12: Go to the Wi-Fi Settings screen on your mobile device and select the Wi-Fi network that matches your dongle’s Part Number (see STEP 2 above).
- Page 74 STEP 14: Once the internet is successfully configured, you will see the first screen.to the right. Press the “Back to the homepage” button to return to the SmartESS homepage in the “Monitor mode (second screen on the right). After a few moments, the inverter will begin reporting data.
- Page 76 Notes...
- Page 77 CONTACT US support@eg4electronics.com +1 (903) 609-1988 www.eg4electronics.com...
- Page 78 WARNING: .45 right DANGER: .45 right CAUTION: .45 right IMPORTANT: .45 right NOTE: .4 right of page REMINDER: .45 right...
Need help?
Do you have a question about the EG4-3000EHV-48 and is the answer not in the manual?
Questions and answers