Table of Contents
Advertisement
Quick Links
Advertisement
Table of Contents
Troubleshooting

Subscribe to Our Youtube Channel
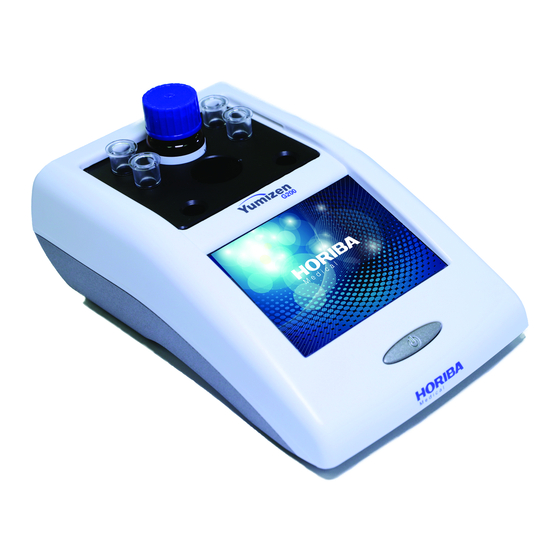
Related Manuals for horiba Yumizen G200


Summary of Contents for horiba Yumizen G200
- Page 1 Coagulation Analyzer: Yumizen G200 User Manual Ref: RAB320FEN...
-
Page 3: Table Of Contents
2. Menus Description ..........30 3. Software Buttons Description Quality Assurance..............32 ............... 32 1. Calibration ..............41 2. Quality Control Workflow................44 ..............44 1. Start of Day ..............45 2. Running Controls ............. 48 3. Running Analyses ............50 4. Results Management Yumizen G200... - Page 4 1. Instrument Description ............ 66 2. Measurement Principles Maintenance and Troubleshooting........81 ........... 81 1. Maintenance Procedures ..........82 2. Troubleshooting Procedures Instrument Installation and Checkup Procedures..85 ............ 85 1. To Install the Instrument ............86 2. To Check the Instrument Yumizen G200...
-
Page 5: Foreword
This document applies to the latest software version listed and higher versions. When a subsequent software version changes the information in this document, a new electronic edition is released and supplied by HORIBA Medical. To update a paper document, please contact your local HORIBA Medical representative. Yumizen G200 - Foreword... -
Page 6: Legal Information
While every precaution has been taken in the preparation of this manual, HORIBA Medical will not assume any liability to any persons or entities with respect to loss or damage, caused or alleged to be caused directly or indirectly by... -
Page 7: Document Symbols
Emphasizes information that must be followed to respect the good laboratory practice (not linked to risk) or prevent damage to the instrument. Emphasizes information that can be helpful to the operator before, during or after a specific operational function. Yumizen G200 - Foreword... -
Page 8: Typographical Conventions
Press Validate. check boxes, fields, etc.). Used for windows The Action window is displayed. titles, dialog boxes titles or tabs titles. External links can More information on be used to retrieve www.horiba-abx.com/documentation. information from a web site. Yumizen G200 - Foreword... - Page 9 Copyright © 2022 by HORIBA ABX SAS All rights reserved. No part of this publication may be reproduced or transmitted in any form or by any means, electronic, mechanical, photocopying, recording, or otherwise, without the prior written permission of HORIBA Medical. HORIBA ABX SAS Parc Euromédecine Rue du Caducée...
-
Page 10: Introduction
The user always operates with full knowledge and appreciation of instrument warnings and alarms. ■ Always refer to labelling and HORIBA Medical instructions in order to avoid compromising system integrity. This instrument must be operated as instructed in the user manual. Any other use might compromise system integrity and might be hazardous for the operator. -
Page 11: Limited Warranty
■ The system is operated under the instructions of this manual. ■ Only software or hardware specified by HORIBA Medical is installed on the instrument. This software must be the original copyright version. ■ Services must be done by recommendation from HORIBA Medical, provided by a HORIBA Medical technical representative using only approved spare parts and at least once per year or more, depending on the number of samples. -
Page 12: Graphics And Symbols
1.3. Graphics and Symbols Switch off position Switch on position Direct current Manufacturer This product conforms to the EC In Vitro Diagnostic medical Directives and device Regulation named in the Declaration of Conformity Yumizen G200 - Introduction... - Page 13 Electrostatic Keep dry Sensitive Device (ESD) Consult Instruction Fragile, handle with care for Use Temperature limitation Humidity limitation Batch code Reference Number Use by Single use only contain sufficient test Serial number Warning; Biological Content hazard Yumizen G200 - Introduction...
-
Page 14: Operational Conditions
(240): SAP reference Operational Conditions 2.1. Environment The operation of the Yumizen G200 should be restricted to indoor location use only. The instrument is designed for safety from voltage surges according to INSTALLATION CATEGORY II and POLLUTION DEGREE 2 (IEC 61010-1). -
Page 15: Humidity And Temperature Conditions
Instrument operating temperature: from +15°C (+59°F) to +30°C (+89°F). If the instrument is stored at a temperature lower than -10°C (14°F), it should stand for one hour at normal room temperature before use. Humidity conditions: relative humidity of 10-85% maximum, without condensation. Yumizen G200 - Introduction... -
Page 16: Electromagnetic Environment Check
Use only the main supply cable and the external power supply delivered with the instrument. If a new main supply cable or a new external power supply is needed, please contact your local HORIBA Medical representative to obtain it. Main power supply voltage fluctuations must not exceed +/- 10% of the nominal voltage. -
Page 17: Environmental Protection
Before instrument removal from use, transportation or disposal, perform a general cleaning and a draining of your instrument. 2.9. Installation A representative must install your instrument, printer and software. Yumizen G200 - Introduction... - Page 18 Only HORIBA Medical approved materials should be used with the Yumizen G200. 2.10. Package Factory package of the analyzer Yumizen G200 and its implements consists of: ■ corrugated cardboard Package protects analyzer and its implements from adverse factors of outside environment.
-
Page 19: Labels And Connections
Labels and Connections 3.1. Serial Number Label The serial label is located below the instrument. 3.2. Manufacturing Date The manufacturing date is included in the instrument serial number (format: MMYY). Yumizen G200 - Introduction... - Page 20 How to avoid the risk: wear protective gear, gloves and lab coats. Warning! Electrostatic Sensitive Device (ESD) On the working area Risk: electric shock. How to avoid the risk: do not touch electrical parts with your fingers. Yumizen G200 - Introduction...
-
Page 21: Power Supply Connection
Use only the main supply cable and the external power supply delivered with the instrument. If a new main supply cable or a new external power supply is needed, please contact your local HORIBA Medical representative to obtain it. 3.5. -
Page 22: Printer (Option)
All peripheral devices should comply with relevant standards. Printer (Option) Contact your local HORIBA Medical representative for more information about printer compatibility and consumable part numbers. Refer to the printer manual for installation. Yumizen G200 - Introduction... -
Page 23: Specifications
Specifications Technical Specifications 1.1. Intended Use The Yumizen G200 is a 2-channel semi-automated blood coagulation analyzer. The instrument can analyze decalcified plasma samples using coagulation, chromogenic and immunoassay methods. The analyzed data can be stored, displayed and reported. The instrument has several functions, including connectivity to use automatic reagent handling by barcode system. - Page 24 ■ 3.2% (109 mmol/L) sodium-citrate anticoagulated plasma in primary tube. ■ 3.2% (109 mmol/L) sodium-citrate, theophylline, adenosine and dipyramidole (CTAD) anticoagulated plasma in primary tube. Samples Management ■ Manual sample identification ■ Barcode sample identification (optional) Yumizen G200 - Specifications...
-
Page 25: Sample Collection And Mixing
Blood collection must be placed in vacuum or atmospheric collection tubes. Collection, Transport, And Processing Of Blood Specimens For Testing Plasma-Based Coagulation Assays And Molecular Hemostasis Assays; Approved Guideline-Fifth Edition. CLSI, document H21-A5 (2008) 28 (5). Yumizen G200 - Specifications... -
Page 26: Cybersecurity Description
Operating Environment 2.1.1. Hardware Configuration ■ Color LCD touch screen: 5.3 x 7.1 cm 2.1.2. Software Environment Operating System: Not applicable. 2.1.3. Network Condition USB ports 2.2. Security Software Not applicable. 2.3. Data and Equipment Interface ■ Yumizen G200 - Specifications... - Page 27 Calibration ■ System > Settings Access denied: Service Menu. 2.5. Relevant Requirements for Software Environment 2.5.1. System Software Not applicable. 2.5.2. Support Software Not applicable. 2.5.3. Application Software Not applicable. 2.6. Security Software Updates Not applicable. Yumizen G200 - Specifications...
-
Page 28: Physical Specifications
Use only the main supply cable and the external power supply delivered with the instrument. If a new main supply cable or a new external power supply is needed, please contact your local HORIBA Medical representative to obtain it. ■... -
Page 29: Reagents Specifications
These reagents are used for in vitro diagnostic. All these reagents are manufactured by HORIBA ABX SAS. Refer to the reagent notices and material safety data sheets for Yumizen G200 available online at www.horiba-abx.com/documentation. The reagents specified for this instrument have been approved in accordance with the applicable in vitro medical devices European legislation in force. -
Page 30: Performance Data
4.2. Performance Data For any information on reagent performance data such as Accuracy, Precision, Linearity, etc., please refer to the reagent notices for Yumizen G200 available online at www.horiba-abx.com/documentation. 4.3. Waste Handling Precautions The specimens, reagents, calibrators, controls, etc. and waste liquids that contain human specimen extracts are potentially infectious;... -
Page 31: Maintenance
In the Maintenance and Troubleshooting section, specific maintenance procedures are listed. The maintenance procedures identified are mandatory for proper use and operation of the Yumizen G200. Failure to execute any of these recommended procedures may result in poor reliability of the system. -
Page 32: Software
Software Software Overview The Yumizen G200 includes a software that allows you to navigate in the various screens. The touch screen allows easy and direct access to all functions via buttons. A = The information bar, which displays temperature, date, time and functionalities related to the screen currently displayed. -
Page 33: Menus Description
D-dimer Settings Chromogenic tests Protein C Result Nephelometric Turbidimetric User Defined Tests Chromogenic Language Date/time System Access Rights: Settings User Error messages Manager and Service* OnLine settings * Reserved to Horiba Medical Technical representative Storage state Yumizen G200 - Software... -
Page 34: Software Buttons Description
Export to USB: allows you to export results on a USB flash drive. Print: allows you to print results. Send to LIS: allows you to send results to the LIS. Edit: allows you to edit information. Validate: validates an action. Yumizen G200 - Software... - Page 35 Restore default: allows you to restore default parameters. Delete: deletes data. Back: goes back to the previous screen. Cancel: cancels an action. Yumizen G200 - Software...
-
Page 36: Quality Assurance
Refer to the Quality Assurance > Calibration > To Add Reagents and Calibration Automatically chapter. Related information: ■ To Add Reagents and Calibration Automatically, p.38 1.1.1. To Add Lot Information You need the targets sheet available in the reagent or calibrator kit. Yumizen G200 - Quality Assurance... - Page 37 For these tests you must add the mean normal values: PT, APTT, TT. Refer to the Quality Assurance > Calibration > Adding Reagents and Calibration Manually > Adding Mean Normal Values chapter. Related information: ■ Adding Mean Normal Values, p.34 Yumizen G200 - Quality Assurance...
- Page 38 1.1.2.2. To Add the MNAPTT Access: Main Menu > Calibration > Screening tests > APTT 1. Press Ratio. 2. Press Normal Value. 3. Type the MNAPTT indicated on the targets sheet. 4. Press the Validate button. Yumizen G200 - Quality Assurance...
- Page 39 Tests Units g/l or mg/dl D-Dimer ug FEU/ml, ug/l or ng/ml 3. If the required unit (dimension) is not displayed in the menu, select it referring to the Settings > To Configure Tests Parameters chapter. Yumizen G200 - Quality Assurance...
- Page 40 Access: Main Menu > Calibration You can specify extrapolation ranges for some tests. This allows or not the calculation for the measurements that are not within the strict range. 1. Enter the required test menu. Yumizen G200 - Quality Assurance...
- Page 41 Tests Units g/l or mg/dl ug FEU/ml, ug/l or ng/ml D-Dimer 3. Select the curve type as follows (Cal. password is required): Tests Curve types Lin-Inv Log-Log FIB and Factors AT and D-Dimer Lin-Lin p-p Yumizen G200 - Quality Assurance...
- Page 42 Calibration Manually chapter. A barcode reader must be connected to the instrument. You need the targets sheet available in the reagent or calibrator kit. 1. Press the required test category. 2. Press the test to calibrate. Yumizen G200 - Quality Assurance...
- Page 43 You must run at least 20 samples of healthy patients to obtain a reliable geometric mean. The Clinical & Laboratory Standards Institute (CLSI) highly recommends you to recalculate your local MNPT, MNAPTT and MNTT each time you use a new reagent lot. Yumizen G200 - Quality Assurance...
- Page 44 6. Readjust the calibration curve (Thivolle) points with the new MNPT. Keep the same difference between the values following the example below where the new calculated MNPT is 13.5. PT % Target sheet values (in seconds) New value 13.5 18.9 19.4 Yumizen G200 - Quality Assurance...
-
Page 45: Quality Control
QC already created are named with the QC reagent name. Free QC slots are named QC-# (# stands for a number between 1 and 8). 1. Press one of the available QC-#. 2. Press QC-#. Yumizen G200 - Quality Assurance... - Page 46 You need the control targets sheet available in the control kit. Eight QC slots are available. QC already created are named with the QC reagent name. Free QC slots are named QC-# (# stands for a number between 1 and 8). Yumizen G200 - Quality Assurance...
- Page 47 When a line is read, it skips to the next one automatically. 5. When the last line is read, press the Validate button. 6. Press Yes to confirm. Related information: ■ To Add Reagents and Calibration Automatically, p.38 ■ To Create a Control Lot Manually, p.41 Yumizen G200 - Quality Assurance...
-
Page 48: Workflow
Make sure that the printer has enough paper for daily operations. If not, add some paper following the instructions of the printer user guide. Check the alignment of the paper if the printer used is a tractor feed printer. Yumizen G200 - Workflow... -
Page 49: General Configuration
Reagents and controls must be added in the instrument before running controls. To create a master curve, refer to the Quality Assurance > Calibration chapter. If necessary, reconstitute the control referring to the control leaflet. 1. Press the required test category. Yumizen G200 - Workflow... - Page 50 Results are stored in Main Menu > QC > Results. You need to check control results. Refer to the Workflow > Running Controls > To Check Control Results chapter. Related information: ■ To Check Control Results, p.47 ■ Calibration, p.32 ■ Quality Control, p.41 Yumizen G200 - Workflow...
- Page 51 8. If necessary, press the Levey-Jennings button (A) to display the Levey-Jennings graph. If results are still out of range, please check your control or reagent stability and handling. Also check calibration setup according to the reagent type and lot used. Yumizen G200 - Workflow...
-
Page 52: Running Analyses
If the problem persists, please contact your local HORIBA Medical representative. Related information: ■ To Run a Control, p.45 Running Analyses In case of sample manual pre-dilution with a dilution factor different than HORIBA Medical recommendations (see Reagent Quick Step Guide), the pre-dilution ratio must be considered in the reported result. - Page 53 1. Press the required test category. 2. Press the required test. 3. Press the upper part of the measurement window (A). 4. Type the sample ID: a. If you are equipped with a barcode reader, scan the sample ID. Yumizen G200 - Workflow...
-
Page 54: Results Management
You can check the instrument memory in the Main Menu > System > Storage state menu. 4.1. To Sort Results Access: Main Menu > Result Access: Main Menu > QC > Results You can sort results according to the following criteria: test, sample ID and date. Yumizen G200 - Workflow... -
Page 55: Printing Results
You can choose to print the current result, one or several results, all of them or those which have not been printed yet. 1. For several results, press them first in the results list. 2. Press the Action button. Yumizen G200 - Workflow... - Page 56 Access: Main Menu > Result Access: Main Menu > QC > Results A printer must be connected to the instrument. The printer option must be activated. Refer to the Settings > To Configure the Instrument chapter. Yumizen G200 - Workflow...
- Page 57 You can choose to export the current result, several results, all of them or those which have not been printed yet. 1. For several results, press them first in the results list. 2. Press the Action button. The Action screen displays. Yumizen G200 - Workflow...
- Page 58 5. Press the Validate button. 4.4. To Export Results on a USB Flash Drive Access: Main Menu > Result Access: Main Menu > QC > Results You need a USB flash drive to perform this procedure. Yumizen G200 - Workflow...
- Page 59 3. Press the Action button. The Action screen displays. 4. Press one of the following options: ■ Current ■ Selected ■ ■ Not printed 5. Press the Export to USB button. 6. Press the Validate button. Yumizen G200 - Workflow...
-
Page 60: Deleting Results
You can choose to delete the current result, several results, all of them or those which have not been printed yet. 1. For several results, press them first in the results list. 2. Press the Action button. The Action screen displays. Yumizen G200 - Workflow... -
Page 61: End Of Day
2. If a printer (option) is connected to the instrument, switch it off. 3. Remove all the cuvettes. 4. Decontaminate the instrument. Refer to the Maintenance and Troubleshooting > Maintenance Procedures > To Decontaminate the Instrument Externally chapter. Yumizen G200 - Workflow... - Page 62 5. Put the protective cover on the instrument to avoid dust in the measuring channels. Related information: ■ To Decontaminate the Instrument Externally, p.81 Yumizen G200 - Workflow...
-
Page 63: Settings
1.2. To Manage Date/Time Logs Access: Main Menu > System > Settings > Date/time Logs are created each time the date or the time of the instrument is changed. You can see and print these logs. Yumizen G200 - Settings... - Page 64 1. Press the following button to access the logs. 2. If you want to print the logs, press the Print button. Yumizen G200 - Settings...
-
Page 65: To Configure Tests Parameters
Yumizen G PT Reco 5, you must also change the minimum time and lag time from this menu. HORIBA Medical recommends the activation of the parallel mode for result quality improvement. This mode allows you to perform duplicate measurement for a same sample and check the repeatability. - Page 66 Slope: to define the sample threshold. c. Dilution: to define the dilution ratio when sample dilution is required during measurement. 9. If you want to choose the dimensions: a. Press Dimension. b. Press the Edit button. Yumizen G200 - Settings...
-
Page 67: To Configure The Lis Connection
2. Depending on your configuration, select LIS system or LIS v2.0 system. 3. Press the Validate button. To Import and Export the Settings Access: Main Menu > System > Settings You need a USB flash drive to perform this procedure. Yumizen G200 - Settings... - Page 68 Make sure to use USB media free of any virus. 1. Insert the USB flash drive. 2. Press Import settings or Export settings. 3. Press the Validate button. The file containing the settings is named SETTINGS.dat. Yumizen G200 - Settings...
-
Page 69: Description And Technology
Description and Technology Instrument Description 1.1. Front Side A = Incubation positions B = Reagent incubation positions C = Measuring channels D = Touchscreen E = ON/OFF button Yumizen G200 - Description and Technology... -
Page 70: Measurement Principles
1.2. Rear Side A = Power supply connector B = USB Type-B C = USB Type-A Measurement Principles 2.1. General Description The Yumizen G200 instrument is a 2 channels optical coagulometer. Yumizen G200 - Description and Technology... - Page 71 Measurement type Scattered light Absorbance Absorbance Calculation mode Clotting Difference Kinetic Wavelength 640 nm 570 nm 405 nm Channel Test D-Dimer APTT FIB Cl APC-R Factor tests (II, V, VII, VIII, IX, X, XI, XII) Yumizen G200 - Description and Technology...
- Page 72 2.2. Nephelometry 2.2.1. Nephelometry Measurement Principle The nephelometry is based on the measurement of the light scattered by the clot. Measuring block Cuvette Clot 640 nm 90°C Detector Yumizen G200 - Description and Technology...
- Page 73 Coagulation time (D) is determined when equivalent areas A1 and A2 are found. The last plateau is found when the sum of the 15 last ranges (HistWidth) is superior or equal to 150 (HistLimit). Yumizen G200 - Description and Technology...
- Page 74 Y = Number of analyses X = Intensity Correlation between the histogram and the reaction curve Yumizen G200 - Description and Technology...
- Page 75 2.3. Turbidimetry 2.3.1. Turbidimetry Measurement Principle The turbidimetry is based on the measurement of the lost intensity due to the light absorption. 570 nm Measuring block Cuvette Sample Reagent Detector Yumizen G200 - Description and Technology...
- Page 76 Measurement curve The instrument measures the optical density at 570 nm. A = End of reagent dispensing B = First time C = End time ΔOD = OD - OD End time First time Yumizen G200 - Description and Technology...
- Page 77 Calibration curve The D-Dimer calibration is obtained by a successive calibrator points with different concentrations. Yumizen G200 - Description and Technology...
- Page 78 2.4. Colorimetry 2.4.1. Colorimetry Measurement Principle The colorimetry is based on the measurement of the light intensity passing through the colored reaction. 405 nm Measuring block Cuvette Sample Reagent Detector Yumizen G200 - Description and Technology...
- Page 79 A = End of reagent dispensing B = First time C = End time D = Measuring time ΔOD / min = linear regression between OD , OD and T End time First time Measuring time Yumizen G200 - Description and Technology...
- Page 80 Example of calibration curve The AT calibration is obtained by successive dilutions of the calibrator. 2.5. Post Check Parameters Description Post check parameters are only available from the Service menu. Yumizen G200 - Description and Technology...
- Page 81 DMin There is too much variation during the first plateau. Min Step There is no coagulation. Yumizen G200 - Description and Technology...
- Page 82 Weak Coag The coagulation is too weak. Max Value Measured curve data is superior to maximum value. The maximum value depends on the test. Yumizen G200 - Description and Technology...
- Page 83 The instrument measures the last plateau (end of reaction) for at least a minimum time. If a plateau is detected before the defined minimum recording time, the instrument does not take it into account. Yumizen G200 - Description and Technology...
- Page 84 The Min Rec Time is defined for each test (30 s in the example). Yumizen G200 - Description and Technology...
-
Page 85: Maintenance And Troubleshooting
■ Active on Mycobacterium tuberculosis (BK) ■ Antiviral (HIV, HBV and rotavirus) Product example recommended by HORIBA Medical: ANIOS detergent disinfectant; Wip’Anios. See also the WHO (World Health Organization) guidelines: "Laboratory Biosafety Manual, 3rd edition" for more information. Yumizen G200 - Maintenance and Troubleshooting... -
Page 86: Troubleshooting Procedures
Troubleshooting Procedures For technical assistance, you can call +33 (0)4 67 14 15 16. If a mechanical or electrical problem is suspected, do not perform inspection of the analyzer by yourself. Contact your HORIBA Medical representative. 2.1. Instrument Error Messages Access: Main Menu >... - Page 87 Accept the dilution the instrument. requested by the instrument. Diluted sample: Sample was diluted and the instrument calculated automatically the results. Weak coag: Coagulation is too Check preanalytical issues. weak. Yumizen G200 - Maintenance and Troubleshooting...
- Page 88 You can press Defragment which appears in the menu only when the message displays at startup. The instrument erases the deleted records still saved in the instrument memory and reorganizes the stored records to make free space. Yumizen G200 - Maintenance and Troubleshooting...
-
Page 89: Instrument Installation And Checkup Procedures
3. Connect the power cable at the back of the instrument. You must check the instrument. Refer to the Instrument Installation and Checkup Procedures > To Check the Instrument chapter. Related information: ■ To Check the Instrument, p.86 Yumizen G200 - Instrument Installation and Checkup Procedures... -
Page 90: To Check The Instrument
5. If an external printer is connected to the instrument, check that the results are correctly printed when the printer option is activated. To activate the printer option go to System > Printer. Yumizen G200 - Instrument Installation and Checkup Procedures...
Need help?
Do you have a question about the Yumizen G200 and is the answer not in the manual?
Questions and answers