
Subscribe to Our Youtube Channel
Related Manuals for horiba d-51


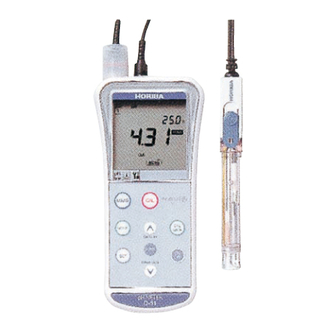
Summary of Contents for horiba d-51
- Page 1 For more information, please contact us: ExpotechUSA 10700 Rockley Road Houston, Texas 77099 281-496-0900 [voice] 281-496-0400 [fax] E-mail: sales@expotechusa.com Website: www.ExpotechUSA.com...
- Page 3 5 ℃ or less. HORIBA's Warranty and Responsibility Your meter is covered by HORIBA's warranty for a period of one (1) year, under normal use. Although unlikely, if any trouble attributable to HORIBA should occur during this period, necessary exchange or repairs shall be conducted by HORIBA, free of charge.
- Page 4 Precautions for use ■ CE Marking This product is in conformity with the following directives and standards: Directives:The EMC Directives 89/336/EEC The Electrical Product Safety Directive 73/23/EEC Standards: EN61326: 1997+A1:1998 (EMISSION: Class B, IMMUNITY Category: Minimum Require- ment) EN61010-1: 2001 Installation Environment This product is designed for the following environment.
-
Page 5: Safety Precautions
Precautions for use ■ Type and Definition of Signal Words For the safety use, the meter is equipped with the Warning Labels to alert every operator and user to the possible risk and danger. Before using understanding each message. The meaning of signal words are as follows: This indicates an potentially hazardous situation which, (WARNING) if not avoided, will result in death or serious injury. - Page 6 Precautions for use ● Indication WARNING This indicates an potentially hazardous situation which, if not avoided, will result in death or serious injury. CAUTION This indicates a potentially hazardous situation which, if not avoided, may result in minor or moderate injury. It may also be used to alert unsafe practices.
- Page 7 Precautions for use ■ Cautionary Items ● Precautions Do not give physical shock to the meter like dropping or hitting. ● Do not immerse the meter into alcohol, organic solvent, strong ● acid, strong alkaline, and other similar solutions. The meter contains ABS resin, acrylic resin, and various rubber products in its body use a hair-dryer for drying the meter.
-
Page 8: Table Of Contents
CONTENTS 1 Overview of the Meter ....1.1 Package contents ................1.2 Functions..................1.3 Part names ..................1.4 Explanation of display..............1.5 Operation keys................ - Page 9 5 Reference ......5.1 pH measurement................5.2 Specifications ................. 5.3 Default settings................5.4 Operation flowcharts..............Spare and optional parts.............. 5.5.1 Spare parts list ................5.5.2 Options ..................HORIBA...
-
Page 10: Overview Of The Meter
This chapter explains the part names, how to connect the electrodes, how to replace the batteries, and precautions when using the meter. Package contents The following items are shipped with each HORIBA pH meter package. Meter (main unit) 1 unit Dry-cell batteries 2 pcs. - Page 11 1 Overview of the Meter 1.1 Package contents Soft case 1 pc Operation manual 1 book To take measurements, you will need electrode(s). Refer to “5.5 Spare and optional parts” page 79 when purchasing the electrode(s). HORIBA...
-
Page 12: Functions
Required electrode/ Items standard solution pH electrode, pH standard solution Temperature − ● Functions An overview of the functions found on HORIBA the D-51 is shown below. Page Function Explanation Data memory Stores the data of measured values and page temperature to the memory (max. - Page 13 Auto Power OFF Sets the function that automatically turns the page power OFF if no keys are touched 30 minutes. Remaining data Displays the remaining memory. page memory Data memory Deletes data in memory. page clear Initializing Initializes all settings to the default values. page settings HORIBA...
-
Page 14: Part Names
1 Overview of the Meter 1.3 Part names Part names The D-51, pH meter has the following parts: Display Keys Portion for attaching strap AC connector Dry-cell battery holder Temperature connector Electrode connector D-51... -
Page 15: Explanation Of Display
Displayed when an error is generated Data No. Displayed when the data number has been set. Status display Shows error number and data − number. − − Displayed when temperature compensation function or automatic temperature compensation has been set. HORIBA... - Page 16 Displayed after calibration for pH and ION electrodes as calibration history. When no calibration data is available: Displayed when no calibration has been performed for pH and ION electrodes. Meter mode Displayed when in Measurement mode. Displayed when in Calibration mode. D-51...
-
Page 17: Operation Keys
This key takes effect only after pressed for one second to prevent accidental operation. The automatic power-off function is a default setting for this meter. The power is automatically turned OFF if no operation is performed after a period of approximately 30 minutes. HORIBA... -
Page 18: Connecting The Electrodes
Insert the electrode connector, making sure to align the connector grooves with the pins in the connector port on the main unit (see photo, ① ). Do not push the electrode with undue force when the pins are not properly aligned. D-51... - Page 19 (see photo, ④ ). The meter will not be waterproof if the electrode is not inserted properly. When the temperature electrode is not connected (or is connected improperly), the automatic temperature compensation (ATC) will be 25°C. HORIBA...
-
Page 20: Inserting/Replacing The Dry-Cell Batteries
Loosen the screw of the battery cover by using a coin screwdriver, etc. cover constructed so that the stop screw cannot be completely removed and lost. Pull up the screw, and remove the battery cover by sliding it out. D-51... - Page 21 Otherwise the meter may no longer be waterproof. Battery life The table below shows the battery life of alkaline batteries during continuous use. The life of manganese batteries is about a half of the alkaline batteries. Battery life approx. 200 hours HORIBA...
-
Page 22: Connecting The Ac Adapter
Indoor use only Supply voltage fluc- tuations allowed up to ± 10% AC adapter connector When the AC adapter is connected, the meter is no longer waterproof. Be careful not to let water get into the meter. D-51... - Page 23 1 Overview of the Meter 1.8 Connecting the AC adapter HORIBA...
-
Page 24: Taking Measurements
Settings required before measurement The built-in clock allows you to record the date of calibration and data memory storage. When using the meter for the first time, be sure to set this clock. “3.3 Displaying and setting the clock” page 34 D-51... -
Page 25: Measurement Modes
2 Taking Measurements 2.3 Measurement modes Measurement modes The D-51, pH meter has an Instantaneous Value Measurement mode and an Auto Hold Measurement mode for all components of the solution being measured. ● Instantaneous Value Measurement mode The D-51, pH meter performs instantaneous value... - Page 26 To clear the hold status or “stabilized” value (when “HOLD” is blinking), press the MEAS key. Blinks Displayed Criteria for judging stability pH, ORP, ION : Within ±1 mV variance in potential measurement after 10 seconds Temperature : Within ±2ºC variance after 10 measurement seconds D-51...
-
Page 27: Selecting The Measurement Modes
Pressing the MODE key changes the measurement mode. The last measurement mode item is the clock display. Pressing the MODE key once more returns the display to the first measurement mode. Power ON pH Measurement mode (instantaneous value) Clock display HORIBA... -
Page 28: Measuring Ph
“ ● pH repeatability check” page 26 “ ● pH calibration history” page 32 5. pH Measurement mode screen (instantaneous value) “3.4.4 Temperature compensation setting” page 41 Clear HOLD 6. Auto Hold Measurement “3.1 Data memory function” page 29 D-51... -
Page 29: Electrode Preparation
Glass fragments can cause injury. The outer tube of the electrode and the Caution tip of the electrode are made of glass. Use care not to break them. ● Entering the pH Measurement mode Press the ON/OFF key. The initial screen will appear. HORIBA... - Page 30 Press the CAL key while in the pH Measurement mode. The meter enters the Calibration mode and >CAL< is displayed. Displayed item differs depending on the standard solution setting. The mode cannot be changed during Auto Hold calibration (while “HOLD” is blinking or continually displayed. D-51...
- Page 31 Leave the port open while calibration is taking place. Open Close Calibration at first point Immerse the tip of the electrode in a beaker containing pH 7 standard solution. Immerse the pH electrode in the sample at least three centimeters. 3 cm or more HORIBA...
- Page 32 To stop the calibration: Press the CAL key while the HOLD mark is blinking. To establish the calibration: Press the ENTER key while the HOLD mark is blinking. To redo the calibration: Press the CAL key after the HOLD mark is displayed. D-51...
- Page 33 If a calibration is redone after the meter is returned to the Measurement mode, however, the calibration is conducted on the initial status of the meter; i.e., all the previous calibration data is cleared. HORIBA...
- Page 34 85% to 90%. “● ERR No.05 Electrode sensitivity error (pH)” page 59 ERR No.04 Asymmetrical potential error “ ● ERR No.04 Asymmetric potential error” page 58 ERR No.05 Sensitivity error “● ERR No.05 Electrode sensitivity error (pH)” page 59 D-51...
- Page 35 There is no problem in measurement accuracy if the difference is within ± 0.05 pH. ● Clearing calibrated values To clear all the calibrated values: Set the pH meter to the Calibration mode. Press the CAL key while holding the SET key down. HORIBA...
- Page 36 Open the internal solution filler port. Leave the port open while measurement is taking place. Open Close Immerse the electrode all the way in the sample. Immerse the pH electrode in the sample at least three centimeters. 3 cm or more D-51...
- Page 37 When measurement data is held using Instantaneous Value Measurement or Auto Hold Measurement, you can store that data in the memory by pressing the ▲ key. See “3.1 Data memory function” page 29. HORIBA...
-
Page 38: Functions
Up to 300 items of data can be stored in the memory. If the number of data items exceeds the maximum limit, ERR 10 is displayed and no more data can be stored. Data cannot be stored unless the value has stabilized or in the CAL mode. D-51... - Page 39 Press the MODE key to display the data and time. Select the desired data item using the ▲ and ▼ keys. Press the MODE key to display the ID. Select the desired data item using the ▲ and ▼ keys. HORIBA...
- Page 40 3.1 Data memory function If an error occurs while a data number is being displayed, the error number will NOT be displayed. When using a printer (sold separately), press the ENTER key while in the DATA OUT mode to print the data. D-51...
-
Page 41: Ph Calibration History Display
Date and time of calibration Latest check date Latest calibration date Pressing the CAL DATA key toggles between the latest calibration date and the latest check date. The latest check date is not displayed if no repeatability check has been performed. HORIBA... - Page 42 When the electrode needs washing When the electrode is old and is going bad Refer to“Asymmetrical potential display” on page 71. pH latest check data Press the ▼ key with latest check date displayed. The repeatability display will appear. Repeatability display D-51...
-
Page 43: Displaying And Setting The Clock
Displaying and setting the clock The clock needs to be when the meter is used for the first time or after replacing the batteries. ● Displaying the clock Press the MODE key in the Measurement mode to dis- play the clock. HORIBA... - Page 44 After setting the clock, press the ENTER key to update the setting. Pressing the CAL key at this time returns you to the Clock Display screen without changing the current setting. Press the MODE key to return to the Measurement mode. D-51...
-
Page 45: Setting Modes
Setting mode items Pressing the SET key moves the Setting Mode Selection cursor one by one to allow you to select the Setting mode of your choice. Setting Mode Selection cursor Press MEAS return Measurement mode from the Setting mode. HORIBA... -
Page 46: Display And Description
US standard When using the standard solution (USA) required by US standards Bottle mark Custom When using a user-defined standard (CUST) solution Bottle mark Refer to “Types of pH standard solution” on “● Types of pH standard solutions” page 72. D-51... - Page 47 3 Functions 3.4 Setting modes The calibrated value for pH 7 standard solution is different between the NIST standards and US standards. NIST standard: pH 6.86 (at 25°C) US standard: pH 7.00 (at 25°C) HORIBA...
- Page 48 Changing the standard solution setting Press the SET key in the Measurement mode and select the pH Buffer Setting mode. Press the ENTER key to toggle between NIST standard, US standard (USA) and a user- defined standard (CUST). Press MEAS return Measurement mode. D-51...
- Page 49 The measured value will be displayed, and “HOLD” will blink until the reading stabilizes. When the measured value stabilizes, “HOLD” will stop blinking and the calibrated value will be displayed. Perform the calibration for the second and third point following the same procedure. HORIBA...
-
Page 50: Temperature Compensation Setting
Manual temperature compensation (when an electrode temperature sensor is not being used and the temperature of the solution is known before hand) MTC is displayed. Set the temperature using the ▲ and ▼ keys. Setting range: 0.0 to 100.0 ° D-51... -
Page 51: Maintenance Mode
3 Functions 3.4 Setting modes 3.4.5 Maintenance mode Press the SET key in the Measurement mode and select the Maintenance mode. The LCD CHECK screen (Item No. 00) will appear. Item No. Maintenance mode HORIBA... - Page 52 Remaining Displays number of data items page data memoriy that can still be stored. Data memory Clears all data in the data page clear memory. Initialization of Initializes all settings to default page setting values. D-51...
- Page 53 Compare the LCD screen with this diagram to confirm that all segments of the LCD are displayed. Item No.00 Use the MODE key to proceed to the Battery voltage check (item No. 01). HINT! Entering the Maintenance mode Measure- Item No. Maintenance mode ment mode selection HORIBA...
- Page 54 The voltage shown in this mode will be a little lower than the actual voltage. Use the MODE key to proceed to temperature zero adjustment (item No. 02). HINT! Entering the Maintenance mode Measure- Item No. Maintenance mode ment mode selection D-51...
- Page 55 The above mode should be used when a greater precision than ±1°C is required. Use the MODE key to proceed to Automatic power-off setting (item No. 03). HINT! Entering the Maintenance mode Measure- Item No. Maintenance mode ment mode selection HORIBA...
- Page 56 OFF using the ▲ and ▼ keys. Setting range: 1 to 30 minutes Item No. 03 Press the MODE key to proceed to [Item No. 05] Remaining data memory. HINT! Entering the Maintenance mode Measure- Item No. Maintenance mode ment mode selection D-51...
- Page 57 Pressing the ENTER key clears all the data stored in the memory. Item No. 06 Press the MODE key to proceed to Initialization of setting (item No. 07). HINT! Entering the Maintenance mode Measure- Item No. Maintenance mode ment mode selection HORIBA...
- Page 58 Item No. Maintenance mode ment mode selection Press the MODE key to return to the first item in the maintenance modes, LCD check. Test print format HINT! Entering the Maintenance mode Measure- Item No. Maintenance mode ment mode selection D-51...
- Page 59 3 Functions 3.4 Setting modes HORIBA...
-
Page 60: Maintenance And Troubleshooting
Use care not to break them. ● Maintenance after daily use After taking measurements, wash the electrode using pure water (de-ionized water), wipe off the water from the electrode with filter paper or tissue paper, and store it with its cap on. D-51... - Page 61 If the internal solution comes in contact with your eyes, flush immediately with large amounts of water and seek treatment by a physician. Open the internal solution filler port and use a syringe to remove the internal solution. HORIBA...
- Page 62 If the solution inside the protective cap for the electrode has dried up and the electrode has not been used for an extended period of time, the response speed of the electrode may be slower (and its sensitivity lower) than before. D-51...
- Page 63 Wipe the dirt/grime off using cotton gauze that contains a neutral detergent. Inorganic grime Rinse using a hydrochloric acid solution or cleaning liq- uid (#220) of approximately 1 mol/L. Be sure not to soak the electrode in strong acid for a long period of time. HORIBA...
-
Page 64: Troubleshooting
No more than three points can be points exceeded calibrated. Cannot identify pH: The pH meter cannot identify the standard solution standard buffer. Data memory The number of data items has over exceeded the limit of the memory. D-51... - Page 65 10 seconds. the power is turned ON. The internal IC Seek repairs at your nearest retail is defective. outlet or HORIBA service station. ● ERR No. 02 Battery voltage low Explanation The battery has insufficient voltage. Cause How to solve problem The battery Replace the dry-cell battery.
- Page 66 Soak the membrane (on the glass membrane electrode) in pure (de-ionized) of the electrode water for 24 hours. has been dry for a long time. The temperature Measure after the sample solution of the sample temperature stabilizes. solution is fluctuating. D-51...
- Page 67 Connect the electrode correctly. not connected correctly. The electrode is Immerse the electrode in the not submerged sample at least three centimeters deeply enough to deep. cover the liquid junction (tip). There is problem Prepare new standard solution. with the standard solution. HORIBA...
- Page 68 Use fresh standard solution. problem with the standard solution. The electrode is Connect the electrode correctly. not connected correctly. Electrode is not Immerse the electrode in the submerged sample at least three centimeters deeply enough to deep. cover reference junction. D-51...
- Page 69 This error message is cleared by point. setting the pH meter to Measurement mode. This error does not affect calibration data obtained from previous three calibration points. Refer to “ ● Standard solution calibration” page 21. HORIBA...
- Page 70 ● ERR No.10 Data memory over Explanation The number of data items has exceeded the limit of the memory. Cause How to solve problem Memory over Delete data stored in the memory after confirming their contents. D-51...
-
Page 71: More Troubleshooting
The batteries Re-insert the batteries with the are loaded with poles correctly oriented. the poles reversed. The battery Remove the old batteries and voltage is low. correctly insert new dry-cell batteries. Or connect the unit to the optional AC adapter. HORIBA... - Page 72 Move the meter to a place where it or other device is not subject to dielectric effects. causing Be sure to ground devices that are electrical using commercial electricity. interference. The electrode is Connect the electrode correctly. not connected correctly. D-51...
- Page 73 Immerse the electrode in the junction is not sample solution up until the liquid immersed in the junction or deeper. sample solution. Some effects of Determine if this is the cause by the sample measuring with a stable standard solution. HORIBA...
- Page 74 How to solve problem The system is Turn the power OFF, and then turn it locked. back ON again. The electrode Attach the electrode connector connector is not correctly. attached correctly. pH meter is Contact your local HORIBA defective. distributor. D-51...
- Page 75 As shown in the diagram, use a jumper wire or bent paper clip to short the meter by touching both the center pin and some metal part in the electrode connector. If the flaching measured value disappears when this done, the meter is nomal. HORIBA...
- Page 76 “Minus” display appears, regardless of whether or not there is a tempera- ture connector. There is a Initialize the settings (see page 49). problem with the setting for the temperature display calibration mode (see page 46). D-51...
- Page 77 The responsive Wash the responsive membrane. membrane is dry or dirty. There is not Replace the reference solution with enough new solution. reference solution or it is dirty. The responsive Replace the electrode. membrane is cracked or worn out. HORIBA...
-
Page 78: Reference
It also serves as a reference for spare and optional parts. D-51... -
Page 79: Ph Measurement
In this state of equilibrium, the potential at the contact surface between the two solutions is called the “liquid junction potential.” A large liquid junction potential means measurements will be very inaccurate. HORIBA... - Page 80 Asymmetric potential also changes depending on the degree of contamination of the reference solution and the state of the glass membrane. Also, if the electrode membrane dries out, a large asymmetric potential will occur, giving rise to measurement errors. D-51...
-
Page 81: Temperature Compensation
・ pH 6.86 standard solution: Neutral phosphate 0.025 mol/L potassium dihydrogen phosphate, 0.025 mol/L sodium dihydrogenphosphate aqueous solution ・ pH 9.18 standard solution: Borate 0.01 mol/L tetra-sodium boric acid (boric sand) aqueous solution ・ pH 12.45 standard solution: Saturated calcium hydroxide solution HORIBA... - Page 82 9.081 12.043 1.694 4.035 6.838 9.068 11.984 1.700 4.047 6.834 9.038 11.841 When the standard solutions use US settings, the pH 7 values shown in the following table are different and pH 9 becomes pH 10 (see next page). D-51...
- Page 83 Temp. solution solution (°C) Neutral Carbonate phosphate 7.119 10.318 7.086 10.245 7.058 10.178 7.035 10.117 7.015 10.061 7.000 10.011 6.988 9.965 6.979 9.925 6.973 9.888 6.969 9.856 Calibration is performed using Nernst's equation with the above values. HORIBA...
- Page 84 Use the pH 4, 7, and 9 standard solutions. Other When finding the pH of other solutions, perform 2-point or 3-point calibration using pH 2, 4, 7, 9, or 12 standard solutions randomly, then measure the test solution. D-51...
-
Page 85: Specifications
Data memory Max. 300 pieces of data capacity Power Dry cell batteries type:AA alkaline with automatic power OFF function Ambient 0 – 45 ºC temperature 170(H) × 80(W) × 40(D) mm Dimensions Mass of main unit 300 g (including batteries) HORIBA... -
Page 86: Default Settings
5.3 Default settings Default settings Category Item Default values Common Temperature Automatic setting compensation temperature compensation Manual temperature 25 ºC compensation Automatic power OFF Approx. 30 min (ON) Standard calibration NIST solution Calibration setting Asymmetric potential: 0mV Sensitivity: 100% D-51... -
Page 87: Operation Flowcharts
(instantaneous value) (instantaneous value) Auto HOLD calibration *2) Auto Hold Measurement Automatic release of Hold Clear Hold Clock setting Clock display Clock setting To pH Measurement mode Calibration history display *1),*2) Data storage Memory call-up Setting mode Repeatability check HORIBA... -
Page 88: Spare And Optional Parts
5.5 Spare and optional parts Spare and optional parts This section lists spare and optional parts for the pH meter. These parts are available through HORIBA distributors. Place an order specifying their name, model, and part number. 5.5.1 Spare parts list ●... - Page 89 ● Internal reference solution Part name Model Part number Remarks Internal #300 9003003200 250 mL reference solution ● Cleaning liquid Part name Model Part number Remarks Cleaning liquid #220 9096002500 For pH, ORP, and ION for electrodes electrodes HORIBA...
-
Page 90: Options
AC adapter For Japan 9096003200 cable when for the pH Cable For US 9096003300 purchasing the meter AC adapter. For Europe 9096003400 Soft case 9096005100 Strap 9096005200 For the meter Stand for electrode 9096002700 Stand arm 9096002800 D-51... - Page 91 For more information, please contact us: ExpotechUSA 10700 Rockley Road Houston, Texas 77099 281-496-0900 [voice] 281-496-0400 [fax] E-mail: sales@expotechusa.com Website: www.ExpotechUSA.com...
Need help?
Do you have a question about the d-51 and is the answer not in the manual?
Questions and answers