Table of Contents
Advertisement
Quick Links
Advertisement
Table of Contents

Related Manuals for Rice Lake BenchMark SL Series


Summary of Contents for Rice Lake BenchMark SL Series
- Page 1 BenchMark Series Single Point Bench Scales Installation/Service Manual 22125...
-
Page 2: Table Of Contents
Replacement Parts—12" x 18" SST Model ................. 11 11.0 Replacement Parts—18" and 24" Models .................. 12 12.0 BenchMark Series Limited Warranty ................... 13 Copyright © 1999 Rice Lake Weighing Systems. All rights reserved. Printed in the United States of America. -
Page 3: Introduction
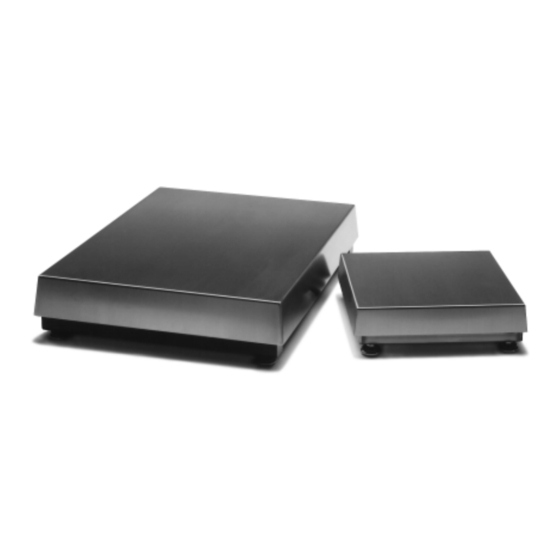
One exciting feature of the BenchMark series is its ability to be converted into a checkweigher. By adding the neck and head from a CW-80 CheckWeigher to your BenchMark scale, the features of a checkweigher are avail- able to you. Contact your Rice Lake Weighing Systems distributor for more information. 10"x10" and 12"x12" SL Models All seven models of the 10"... -
Page 4: 12", 18", And 24" Models
12", 18", and 24" Models All models in the larger scale series utilize mild steel frames and stainless steel deck covers for light washdown with a damp sponge. All models are available with mild steel or optional stainless steel under- Overload Stops Top Frame body frame construction. -
Page 5: 12", 18", And 24" Models
Specifications 1.4.1 10"x10" and 12"x12" SL Models 1.4.3 12"x18" Stainless Steel Model Load Cell: RL1040-N5 potted single point Load Cell: RL1040-N5 potted single point (5 lb is not potted) RL1140 potted single point, RL1140 potted single point, stainless steel load cell optional on stainless steel load cell optional on 50 lb and 100 lb models 30, 50, and 100 lb models... -
Page 6: Installation
2.0 Installation Leveling Scale Remove the scale from the shipping container and place it in the desired location. Lift off the deck cover and locate the bubble level. Adjust the four corner feet until the scale is level and all feet contact the support surface so the scale does not rock. -
Page 7: Calibration
3.0 Calibration It is recommended that the scale be “exercised” by loading it to near capacity 2 or 3 times before calibration to be certain that everything is seated. To calibrate your BenchMark: 1. With no load on scale, place indicator in its calibration mode and perform a zero calibration. 2. -
Page 8: Load Cell Replacement
5.0 Load Cell Replacement 10"x10" and 12"x12" SL Models 1. Unplug AC power from indicator and disconnect load cell cable from indicator’s terminal connection strip. 2. Lift off scale top cover. Locate two upper load cell screws. Use 7/16" wrench to unscrew and remove those two load cell screws. -
Page 9: 12", 18", And 24" Models
12", 18", and 24" Models 1. Unplug AC power from indicator and disconnect load cell cable from indicator’s terminal strip. 2. Lift off scale top cover. Locate upper load cell screws. Depending on model of scale, there will be either two or four upper load cell screws. -
Page 10: Load Cell Replacement Table
6.0 Load Cell Replacement Table y t i l l e 7.0 Installing Protective Clamshells Stainless steel enclosures called clamshells are available to provide extra protection for the load cell of every BenchMark scale. All clamshells are pre-drilled for load cell screws, overload screws, and cables. Any existing load cell shims or spacers are installed inside the clamshells. -
Page 11: Replacement Parts-10" X 10" And 12" X 12" Sl Models
8.0 Replacement Parts—10" x 10" and 12" x 12" SL Models Section BB (Enlarged) TOP VIEW OF SCALE WITH COVER REMOVED Section AA (Enlarged) t f i l l e , e i " 8 , t l n i l , l e l l e l l e... -
Page 12: Replacement Parts-12" Models (Mild Steel Only)
9.0 Replacement Parts—12" Models (Mild Steel Only) TOP VIEW OF 12" SCALE SERIES WITH COVER REMOVED TO SHOW LOCATION OF RUBBER PADS Section AA (Enlarged) e t I o i t e t I o i t , l e c i t l l e l l e... -
Page 13: Replacement Parts-12" X 18" Sst Model
10.0 Replacement Parts—12" x 18" SST Model TOP VIEW OF 12"x18" SST SCALE WITH COVER REMOVED Overload Protection Screw. Located under load cell (behind this view.) e t I o i t e t I o i t , e i "... -
Page 14: Replacement Parts-18" And 24" Models
11.0 Replacement Parts—18" and 24" Models TOP VIEW OF 18" AND 24" SCALE SERIES WITH COVER REMOVED TO SHOW LOCATION OF RUBBER PADS Section AA (Enlarged) e t I o i t e t I o i t , l e c i t l l e l l e... -
Page 15: Benchmark Series Limited Warranty
12.0 BenchMark Series Limited Warranty Rice Lake Weighing Systems (RLWS) warrants that all RLWS equipment and systems properly installed by a Distributor or Original Equipment Manufacturer (OEM) will operate per written specifications as confirmed by the Distributor/OEM and accepted by RLWS. All systems and components are warranted against defects in materials and workmanship for one year.
Need help?
Do you have a question about the BenchMark SL Series and is the answer not in the manual?
Questions and answers