BullFrog X Series Owner's Manual
Hide thumbs
Also See for X Series:
- Owner's manual (42 pages) ,
- Installation manual (19 pages) ,
- Owner's manual (61 pages)
Table of Contents
Advertisement
Quick Links
Advertisement
Table of Contents
Troubleshooting

Related Manuals for BullFrog X Series


Summary of Contents for BullFrog X Series
- Page 1 X SERIES OWNERS MANUAL...
-
Page 2: Quick Reference
QUICK REFERENCE Electrician To assist you with the installation and maintenance service of your new spa, please ll out the following information 1. Name: and keep it on hand for future reference. Telephone: My Spa Information 2. Name: Model: Telephone: Serial Number: Concrete, Decking, and Masonry Dealership:... -
Page 3: Table Of Contents
TABLE OF CONTENTS Quick Reference Overview Important Safety Instructions Getting to Know Your Spa Filling Your Spa X Series Control Panels Water Care & Chemistry Spa Maintenance Installation & Delivery Electrical Chaseway Diagrams Setup & Wiring Diagrams GFCI Wiring Diagram... -
Page 4: Overview
X Series spas include the following models: its surroundings, please make sure your spa and any X SERIES: X8, X8L, X7, X7L, X6L, X5L, & X6R adjoining installations, including the electrical hook- up, are completed according to codes of and only a er... -
Page 5: Important Safety Instructions
IMPORTANT SAFETY INSTRUCTIONS Safety Instructions installation of an integral ground fault circuit interrupter MUST be completed by a quali ed Electrician and must When installing and using this electrical equipment, meet all applicable electrical codes. basic safety precautions should always be taken, including the following: For Cord-Connected units: Replace the damaged cord immediately. - Page 6 Hypothermia include: CAUTION: Non-Approved Accessories. Using Unawareness of impending hazard accessories not approved by Bullfrog International, LC Failure to perceive heat could void your warranty or cause other problems. Please Failure to recognize the need to exit the spa consult your authorized Bullfrog Spa dealer.
- Page 7 It should be placed in a noticeable place adjacent to the spa. For free additional copies, contact your authorized Bullfrog Spa Dealer. * Final warning sticker is included with spa for installation by owner.
-
Page 8: Spa Overview
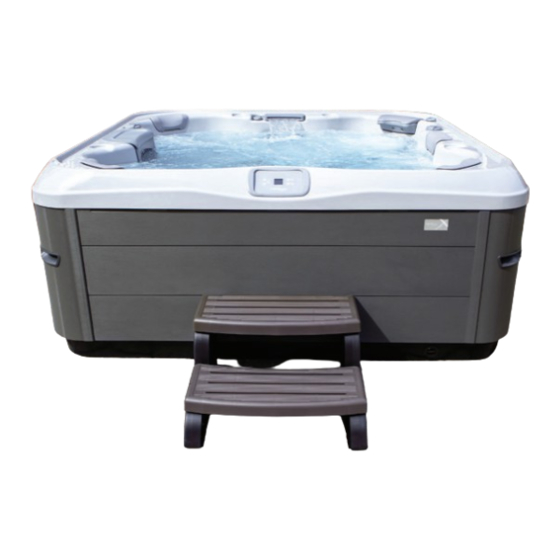
GETTING TO KNOW YOUR SPA Spa Overview (X7 Spa Model Pictured) 1. Main control (touch-screen upgrade optional) 2. Filter access 3. Headrest 4. Water feature 5. Foot therapy jet 6. Leg therapy jets 7. Main LED light 8. Entry step and cool-down seat 9. - Page 9 Equipment Compartment Overview Spa Equipment Compartment “X7” Series 1. Jet pump 1 2. Jet pump 2 3. Control center box 4. Safety certi cate and serial number 5. Serial number sticker (visible with door installed) 6. Drain outlet 7. Water heater 8.
-
Page 10: Filling Your Spa
IMPORTANT: Never ll the spa with so water unless blowing it open inadvertently. an appropriate mineral supplement is immediately added (see your authorized Bullfrog Spas Dealer). If your water is... -
Page 11: Series Control Panels
Home/Status Screen the pumps, press the “Jets 1” button once to prime in e Home/Status screen on your X Series (X500) control low-speed. A er the pump turns on and water is visibly shows basic statuses including: time, jet status, light... - Page 12 Heats during ltration cycles. Spa Settings Filter cycle start time: 8:00 AM, duration 1.5 hours, and e settings on the X Series (X500) control pad are 8:00 PM, duration 1.5 hours. navigated by the use of the (Settings) button. One press...
-
Page 13: Modifying Water Care Schedules
Filter cycle start times: 7:00 AM, duration 3 hours, and 6:00 PM, duration 3 hours. Maintenance Reminders e X Series (X500) keypad can be set up to remind you Weekender of several types of maintenance required on your spa, In Weekender mode, the spa temperature set point will including rinsing the lter, cleaning the lter, changing spa be reduced by 20°F (11°C) (see description of “Economy... -
Page 14: Screen Lock Settings
Partial level is screen displays technical information about the locks the set point adjustment and many options in the control system (X500) so ware on your X Series spa settings menu. e Full level locks all keypad functions. and applicable revisions of the di erent components Once you have selected your desired lock function press of your system. - Page 15 If the pump(s) Adjusting the Set Temperature IMPORTANT: Your Bullfrog Spa is equipped with one Within one to two minutes a er spa start up and of three types of main control systems that correspond to initialization, the water temperature will be displayed in the spa series.
- Page 16 When the set value is lower than the current temperature Standard “Cooling to xx.x” will appear at the bottom of the screen. In Standard mode, the spa will heat to the set point and lter according to the spa’s standard con guration. e spa When the set value is higher than the current temperature, will heat to set point at all times and all days of the week.
-
Page 17: Keypad Settings
NOTE: Spas NOT equipped with a dedicated ltration Set Date and Time of Day pump will turn on automatically, using jet pump 1 on low Setting the correct date and time is important for settings speed, to lter and/or heat. is is normal spa operation. -
Page 18: Diverter Valve
Diverter Valve e diverter valve is used to direct water ow from the pump to a speci c seat that the user will be sitting in. Water ow can be dispersed to all jets that are powered by that pump or it can be diverted to a speci c seat. diverter valve regulates the ow of the water so that the user can dial in the correct therapy the desire To use the diverter valve:... -
Page 19: Water Care & Chemistry
Bullfrog Spas that takes the guess work out of water care so Authorized Bullfrog Spas Dealer. Your Authorized you always feel at ease while enjoying your hot tub. - Page 20 Balance water by following STEPS a - d in order. Set the FROG @ease Mineral Cartridge to the highest setting using the dial on the bottom of the cartridge. No IMPORTANT: Always follow printed instructions on the balancing further adjustments are necessary for the life of the cartridge. chemical packages.
-
Page 21: Troubleshooting
Follow the same procedure for the FROG @ease SmartChlor Step 4: Routine Hot Tub Care Cartridge into the other opening. With the silver FROG Drain and refill hot tub as direct- FROG @ease SmartChlor Cartridge @ease ed by your hot tub manufacturer. facing the inside of the hot Mineral Whenever you drain and refill,... - Page 22 FROG @ease SmartChlor Cartridge will maintain 0.5-1.0 ppm free chlorine level as long as the water is balanced. NOTE: Free Chlorine levels are reduced up to 75%* when using FROG @ease Minerals. NOTE: Why FROG @ease Test Strips? The FROG @ease Smart- Chlor Cartridge forms a chlorine reserve that will be inaccurately measured as total chlorine on other test strips.
- Page 23 Bromine and Dichlor tablets are also not recommended Shell Care. Clean the other areas of the spa, including as an acceptable sanitizer in Bullfrog Spas unless an JetPaks, with a spa surface cleaner as necessary. appropriate feeding or metering device is used and the...
-
Page 24: Spa Maintenance
Total Alkalinity (TA): Total alkalinity (TA) is the Your Bullfrog Spas spa may be equipped with the quantitative measurement of alkaline components EOS enhanced ozone puri cation system. Long term (carbonates and bicarbonates) present in water to act as a maintenance of this system requires the replacement of bu er against rapid pH changes. - Page 25 It is recommended that pleated cylindrical lter WARNING: Avoid drainage that can lead into basement cartridge(s) used in X Series spas be cleaned every 3-6 window wells or any other area where damage could occur. weeks or as needed. Spas equipped with the optional...
-
Page 26: Spa Surface Care
Bullfrog Spas Dealer. For stubborn stains, use a mild acrylic cleaner or a mild detergent. To apply these cleaners, use a so , damp cloth or sponge. Rinse well and dry with a clean cloth. -
Page 27: Low-Use Or No-Use Periods
(never petroleum may be subject to damaged plumbing or equipment as a based) to condition the area per your Bullfrog Spas result of ice buildup within the spa. If the spa cannot be Dealer’s instructions. - Page 28 Water Chemistry section. until the door is secured. LED Light Replacement Step 3: Replace trim strips by snapping each carefully into Contact your authorized Bullfrog Spas Dealer for repair. the trim channel. X Series Door Removal X6R Door Removal...
-
Page 29: Installation & Delivery
GFCI test procedure. Each paint. An architect can help to determine if special Bullfrog Spa is manufactured and tested to a standard that ventilation equipment is required, such as a humidistat provides maximum protection against electrical shock. - Page 30 Use of a Cover-Li ing Mechanism: If using a cover-li ing mechanism, allow up to 18 inches (.61m) of clearance behind the spa. Check with your authorized Bullfrog Spas Pea Gravel or Crushed Rock Dealer for the exact clearance requirements for the cover- NOTE: Concrete foundations should be a minimum li ing mechanism.
-
Page 31: Design Considerations
CAUTION: Consult a quali ed structural engineer or is important that the spa foundation be supported by contractor before the spa is placed on an elevated structure a at, stable, and consistent subsurface. Bullfrog Spas or deck. International highly recommends consulting a quali ed,... -
Page 32: Delivery Basics
Installation must be in accordance with all national and local wiring rules. Delivery Basics WARNING: Never use an extension cord. Bullfrog International, LC does not allow the use of an extension To prepare for the delivery of your spa, make sure the cord under any possible situation. - Page 33 Note: To conform with electrical codes, and to create a barrier against pests, any holes created in the IMPORTANT: Installation must be in accordance with base of your Bullfrog Spa should be tted with an all national and local wiring rules and performed by a appropriate connector.
-
Page 34: Electrical Chaseway Diagrams
ELECTRICAL CHASEWAY DIAGRAMS 89.7” [228 cm] 83.3” [212cm] From bottom of base From bottom of base 28.5” 33” [72cm] [84cm] Model A8, A8-E, A8L, A8L-E, A8D, A8D-E, R8, R8-E, X8, X8-E 89.7” Model A7, A7-E, R7, R7-E, [228cm] 83.7” From bottom of base 7’10”... -
Page 35: Setup & Wiring Diagrams
SETUP AND WIRING DIAGRAMS Hardware Setup/Wiring Diagram X Series, 60Hz Equipment YE 6 Box WARNING / AVERTISSEMENT - USE ONLY #4 AWG TO #12 AWG COPPER CONDUCTORS. 240V - NOT FOR USE WITH COMPACT STRAND WIRE. P24 P25 P26 - UTILISER SEULEMENT DES CONDUCTEURS EN CUIVRE #4 AWG À... -
Page 36: Gfci Wiring Diagram
GFCI WIRING DIAGRAMS Electrical wiring: North American model in.ye and in.yt Refer to wiring diagram in the enclosure box lid for more information. 240 V (4 wires) 120 V (*3 wires) *If connected to a 3 wires system, the heat.wave and accessories will not operate at 240 V Refer to the section «... -
Page 37: Rcd Wiring Diagram
RCD WIRING DIAGRAMS Electrical wiring: European model in.ye Refer to wiring diagram in the enclosure box lid for more information. Warning in.ye.ce models must always be connected to a circuit protected by a Residual-Current Device (RCD) having a rated operating residual-current not exceeding 30 mA. Correct wiring of the electrical service box, RCD, and pack terminal block is essential! Check your electrical code for local regulations. -
Page 38: Troubleshooting Guide
If the problem cannot be solved using these Cause #1: Light has failed. procedures, contact your authorized Bullfrog Spas Dealer. Solution: Replace light. Control panel displays an error message: Cause #2: Lighting system is defective. -
Page 39: Warranty Info
Warranty solely to the original end-user purchaser (“Owner” or “you”) of any 2023 model year and later X Series Bullfrog Spas hot tub manufactured on or after February 1, 2023 and installed for residential use in the United States or Canada. - Page 40 In the event of a structure or frame failure after seven years from the original spa purchase date, the defective spa must be sent to Bullfrog for repair at Owner’s expense. In some situations, the servicing dealer or Bullfrog may charge Owner a reasonable service fee.
- Page 41 Bullfrog and must be freight prepaid. Return freight will be paid by Bullfrog on all warranted components and spas, except that Owner is responsible for all shipping charges for any spa returned for repairs more than seven years after its purchase date.
- Page 42 DISCLAIMERS EXCEPT AS SET FORTH IN THIS LIMITED WARRANTY OR OTHERWISE REQUIRED BY APPLICABLE LAW, BULLFROG AND ITS AUTHORIZED AGENTS SHALL NOT BE LIABLE FOR ANY PERSONAL INJURY, DEATH, DAMAGES TO PROPERTY, LOSS, COST OR OTHER DAMAGE, WHETHER DIRECT, INCIDENTAL, CONSEQUENTIAL, SPECIAL OR PUNITIVE, ARISING OUT OF THE SPAS, BULLFROG’S OR ITS AGENTS’...
- Page 43 Bullfrog International, LC 7017 W 11800 S Herriman, UT 84096 801.565.8111 801.565.8333 : info@bullfrogspas.com v 1.4 Register your spa online by visiting: bullfrogspas.com/warranty-registration North America 2024 Bullfrog International LC...
Need help?
Do you have a question about the X Series and is the answer not in the manual?
Questions and answers