BullFrog X Series Owner's Manual
Hide thumbs
Also See for X Series:
- Owner's manual (43 pages) ,
- Installation manual (19 pages) ,
- Owner's manual (72 pages)
Advertisement
Table of Contents
- 1 Quick Reference
- 2 Table of Contents
- 3 Important Safety Instructions
- 4 Getting to Know Your Spa
- 5 Filling Your Spa
- 6 Series Control Panels
- 7 Water Care & Chemistry
- 8 Spa Maintenance
- 9 Installation & Delivery
- 10 Setup & Wiring Diagrams
- 11 GFCI Wiring Diagram
- 12 RCD Wiring Diagram
- 13 Troubleshooting Guide
- 14 Warranty Info
- Download this manual
Advertisement
Table of Contents

Related Manuals for BullFrog X Series


Summary of Contents for BullFrog X Series
- Page 1 X SERIES OWNERS MANUAL...
-
Page 2: Quick Reference
QUICK REFERENCE Electrician To assist you with the installation and maintenance service of your new spa, please fill out the following information 1. Name: and keep it on hand for future reference. Telephone: My Spa Information 2. Name: Model: Telephone: Serial Number: Concrete, Decking, and Masonry Dealership:... -
Page 3: Table Of Contents
TABLE OF CONTENTS Quick Reference Overview Important Safety Instructions Getting to Know Your Spa Filling Your Spa X Series Control Panels Water Care & Chemistry Spa Maintenance Installation & Delivery Setup & Wiring Diagrams GFCI Wiring Diagram RCD Wiring Diagram... - Page 4 Carefully read this Owner’s Manual before you install your spa. Your Bullfrog Spas Limited Warranty may be voided if damage is caused by failure to install, maintain, and U.S. Patents: 7,908,684, 8,661,576, 8,881,321, 8,689,370,...
-
Page 5: Important Safety Instructions
IMPORTANT SAFETY INSTRUCTIONS Safety Instructions Connect to grounded, grounding-type receptacle only. When installing and using this electrical equipment, WARNING: To Reduce the Risk of Injury: basic safety precautions should always be taken, including the following: Water temperature in a spa should never exceed 104°F (40°C). - Page 6 (3m) of the spa or hot tub must be bonded to the equipment grounding bus with copper conductors no CAUTION: Non-Approved Accessories. Using smaller than No. 6 AWG. accessories not approved by Bullfrog International, LC could void your warranty or cause other problems. Please...
- Page 7 It should be placed in a noticeable place adjacent to the spa. For free additional copies, contact your authorized Bullfrog Spa Dealer. * Final warning sticker is included with spa for installation by owner.
-
Page 8: Getting To Know Your Spa
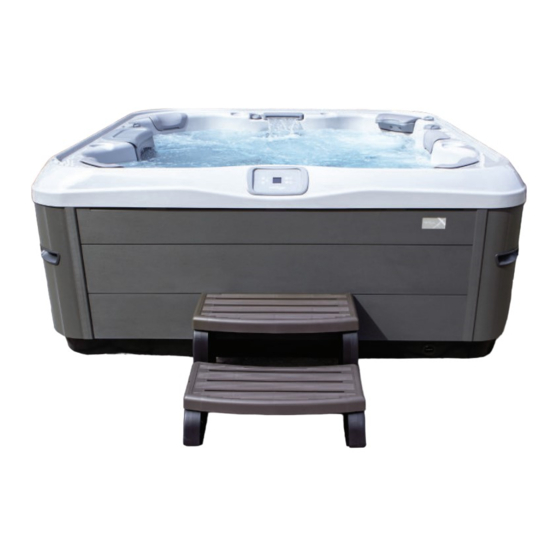
GETTING TO KNOW YOUR SPA Spa Overview (X7 Spa Model Pictured) 1. Main control (touch-screen upgrade optional) 2. Filter access 3. Headrest 4. Water feature 5. Foot therapy jet 6. Leg therapy jets 7. Main LED light 8. Entry step and cool-down seat 9. - Page 9 Equipment Compartment Overview Spa Equipment Compartment “A8L” Series 1. Jet pump 1 2. Jet pump 2 3. Control center box 4. EOS ozone generator box 5. EOS mixing module 6. Safety certificate and serial number 7. Serial number sticker (visible with door installed) 8.
-
Page 10: Filling Your Spa
IMPORTANT: Never fill the spa with soft water unless blowing it open inadvertently. an appropriate mineral supplement is immediately added (see your authorized Bullfrog Spas Dealer). If your water is... -
Page 11: Series Control Panels
Home/Status Screen the pumps, press the “Jets 1” button once to prime in The Home/Status screen on your X Series (X500) control low-speed. After the pump turns on and water is visibly shows basic statuses including: time, jet status, light... - Page 12 Filter cycle start time: 8:00 PM, duration 3 hours. Spa Settings 2. Standard – Beginner The settings on the X Series (X500) control pad are In Standard mode the spa will heat to the set point and navigated by the use of the (Settings) button.
- Page 13 (Settings) button will take you Maintenance Reminders back to the main Settings menu. The X Series (X500) keypad can be set up to remind you of several types of maintenance required on your spa, When you change the display orientation, the contextual including rinsing the filter, cleaning the filter, changing spa options and arrow keys adjust to the chosen orientation.
- Page 14 This screen displays technical information about the locks the set point adjustment and many options in the control system (X500) software on your X Series spa settings menu. The Full level locks all keypad functions. and applicable revisions of the different components Once you have selected your desired lock function press of your system.
- Page 15 From the home status screen you may press the button to rotate the screen 180 degrees for easier viewing from IMPORTANT: Your Bullfrog Spa is equipped with one inside the spa. of three types of main control systems that correspond to the spa series.
- Page 16 When the set value is lower than the current temperature Suggested use: Use to maintain readiness for use every day “Cooling to xx.x” will appear at the bottom of the screen. at all times of day. When the set value is higher than the current temperature, Economy time: Will not use Economy mode.
- Page 17 Air Valve Controls Reminders icon in the Settings menu. X Series premium seats have an air valve control. The air Maintenance reminders allow you to verify the time left for these seats can be turned off or on by turning the air...
-
Page 18: Water Care & Chemistry
(USA Only) up to 600 gallons. Use with the FROG @ease SmartChlor Cartridge in the FROG @ease Sanitizing System for Bullfrog Spas. Ensure all hot tub equipment is working Beginning in 2019 all 2-filter Bullfrog Spas come properly. Operate the pump and filter as recommended by your hot tub manufac- equipped with an @ease-ready holder system installed in turer. - Page 19 Balance water by following STEPS a - d in order. IMPORTANT: Always follow printed instructions on the balancing chemical packages. Add balancing chemicals in small increments one at a time with the jets on and wait 6 hours before testing again and adding any additional balancing chemicals.
- Page 20 Step 2: Set the Cartridges Blue = FROG @ease Mineral Cartridge Silver = FROG @ease SmartChlor Cartridge The combination provides the Fresh Mineral Water benefits of cleaner, Bullfrog Spa Models Setting # clearer and softer water that’s easier to take care of.
- Page 21 Step 4: Routine Hot Tub Care FROG @ease SmartChlor Cartridge will maintain 0.5-1.0 Drain and refill hot tub as direct- ppm free chlorine level as long as the water is balanced. ed by your hot tub manufacturer or every four months when FROG NOTE: Free Chlorine levels are reduced up to 75%* minerals need to be replaced.
- Page 22 JetPaks, with a spa surface cleaner as necessary. Bromine and Dichlor tablets are also not recommended as an acceptable sanitizer in Bullfrog Spas unless an IMPORTANT: Drain your spa to an area that can handle appropriate feeding or metering device is used and the a large quantity of water.
-
Page 23: Spa Maintenance
Total Alkalinity (TA): Total alkalinity (TA) is the Your Bullfrog Spas spa may be equipped with the quantitative measurement of alkaline components EOS enhanced ozone purification system. Long term (carbonates and bicarbonates) present in water to act as a maintenance of this system requires the replacement of buffer against rapid pH changes. - Page 24 It is recommended that pleated cylindrical filter shell and jet pod areas with a spa surface cleaner. See Spa cartridge(s) used in A Series, R Series, X Series, and Shell Care. Clean the other areas of the spa, including STIL spas be cleaned every 3-6 weeks or as needed. Spas JetPaks, with a spa surface cleaner as necessary.
- Page 25 Bullfrog Spas Dealer. For stubborn stains, use a mild acrylic cleaner or a mild detergent. To apply these cleaners, use a soft, damp cloth or sponge. Rinse well and dry with a clean cloth.
- Page 26 (never petroleum may be subject to damaged plumbing or equipment as a based) to condition the area per your Bullfrog Spas result of ice buildup within the spa. If the spa cannot be Dealer’s instructions.
- Page 27 LED Light Replacement until the door is secured. Contact your authorized Bullfrog Spas Dealer for repair. Step 3: Replace trim strips by snapping each carefully into the trim channel.
-
Page 28: Installation & Delivery
GFCI test procedure. Each paint. An architect can help to determine if special Bullfrog Spa is manufactured and tested to a standard that ventilation equipment is required, such as a humidistat provides maximum protection against electrical shock. - Page 29 Use of a Cover-Lifting Mechanism: If using a cover-lifting mechanism, allow up to 18 inches (.61m) of clearance behind the spa. Check with your authorized Bullfrog Spas Pea Gravel or Crushed Rock Dealer for the exact clearance requirements for the cover- NOTE: Concrete foundations should be a minimum lifting mechanism.
- Page 30 CAUTION: Consult a qualified structural engineer or is important that the spa foundation be supported by contractor before the spa is placed on an elevated structure a flat, stable, and consistent subsurface. Bullfrog Spas or deck. International highly recommends consulting a qualified,...
- Page 31 Installation must be in accordance with all national and local wiring rules. WARNING: Never use an extension cord. Bullfrog International, LC does not allow the use of an extension cord under any possible situation. The use of an extension...
- Page 32 Permanently-Connected 240V~/60Hz spas require a create a barrier against pests, any holes created in the GFCI protected, 4-wire (Line 1, Line 2, Neutral, and base of your Bullfrog Spa should be fitted with an Ground), 240V~/60Hz, 50A or 60A, Single-Phase, appropriate connector.
- Page 33 83.3” [212cm] 75.3” [191cm] From bottom of base From bottom of base 32.8” [83cm] 30.2” [77cm] 83.7” [213cm] Model A7L, A7L-E, From bottom of base R7L, R7L-E X7L, X7L-E 83.3” Model A6L, A6L-E, R6L, [212cm] 7’ 4” (2.24m) x 7’ 4” (2.24m) x R6L-E, X6L, X6L-E From bottom 36”...
-
Page 34: Setup & Wiring Diagrams
SETUP AND WIRING DIAGRAMS Hardware Setup/Wiring Diagram X Series (yt 6) Connecting high voltage accessories: North American model in.yt For the connection to the 0.250 inch terminals, the high voltage accessories must be provided with female quick connect terminals, straight and non-insulated for all types of connections, including the ground. Accessories of 120 V or 240 V may be connected to the corresponding terminals of the printed circuit of the in.yt. - Page 35 Hardware Setup/Wiring Diagram X Series, 50Hz Equipment (yt6) v3 Connecting high voltage accessories: European model in.yt For the connection to the 0.250 inch (6mm) terminals, the high voltage accessories must be provided with female quick connect terminals, straight and non-insulated for all types of connections, including the ground. Only 230 V accessories may be connected to the corresponding terminals of the printed circuit of the in.yt.
- Page 36 Hardware Setup/Wiring Diagram X Series, 60Hz Equipment YE 6 Box WARNING / AVERTISSEMENT - USE ONLY #4 AWG TO #12 AWG COPPER CONDUCTORS. 240V - NOT FOR USE WITH COMPACT STRAND WIRE. P24 P25 P26 - UTILISER SEULEMENT DES CONDUCTEURS EN CUIVRE #4 AWG À...
-
Page 37: Gfci Wiring Diagram
GFCI WIRING DIAGRAMS Electrical wiring: North Amercian model in.ye and in.yt Refer to wiring diagram in the enclosure box lid for more information. 240 V (4 wires) 120 V (*3 wires) * If connected to a 3 wires Note: To convert model to a 120 V system, the white (common) accessory wire must be moved. -
Page 38: Rcd Wiring Diagram
RCD WIRING DIAGRAMS Electrical wiring: European model in.yt Refer to wiring diagram in the enclosure box lid for more information. Warning in.yt.ce models must always be connected to a circuit protected by a Residual-Current Device (RCD) having a rated operating residual-current not exceeding 30 mA. Correct wiring of the electrical service box, RCD, and pack terminal block is essential! Check your electrical code for local regulations. -
Page 39: Troubleshooting Guide
Spa pump turns off during operation: all, but the pump is running: Cause #1: Automatic timer has completed its 30 or 60 Cause #1: Jet handle(s) X Series are partially or fully minute cycle. closed. Valves are closed Series A & R JetPak II, Solution: Solution: Turn on the pump. -
Page 40: Warranty Info
LIMITED WARRANTY X Series Bullfrog International, LC (“Bullfrog”) extends warranty coverage solely to the original end-user purchaser (“Owner”) of any X Series Bullfrog Spa installed for residential use in the United States or Canada. 3 year Warranty 3 year Warranty... - Page 41 FITNESS FOR A PARTICULAR PURPOSE. ALL WARRANTY SER- VICE MUST BE PERFORMED BY BULLFROG OR ITS AUTHORIZED In doing so, Bullfrog reserves the right, at its option, to either AGENT. NO AGENT, DEALER, DISTRIBUTOR, SERVICE COMPANY repair or replace the defective spa or component.
- Page 42 Bullfrog International, LC 7017 W 11800 S Herriman, UT 84096 801.565.8111 801.565.8333 : info@bullfrogspas.com Register your spa online by visiting: bullfrogspas.com/warranty-registration North America 2023 Bullfrog International LC...
Need help?
Do you have a question about the X Series and is the answer not in the manual?
Questions and answers