
Related Manuals for Holland Grill Epic BH421-464


Summary of Contents for Holland Grill Epic BH421-464
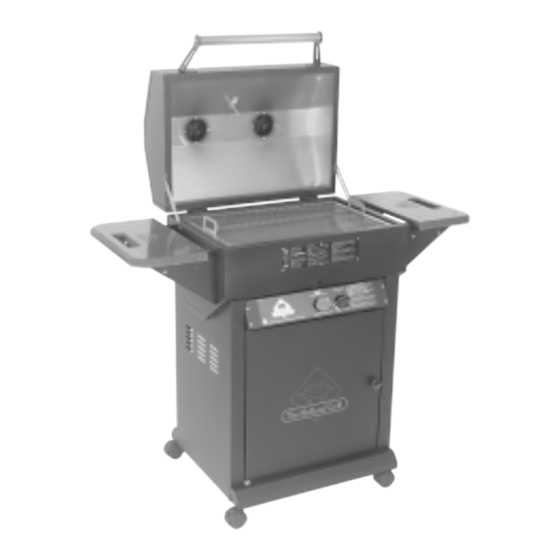
- Page 1 This Owner's Manual is provided and hosted by Appliance Factory Parts. Holland BH421-464 Owner's Manual Shop genuine replacement parts for Holland BH421-464 Find Your Holland Grill Parts - Select From 32 Models -------- Manual continues below --------...
- Page 2 20 lb. L.P. cylinder that is equipped with a Sherwood Valve #PV3349 AND an overfill protection device (OPD). The only Grill not to flare up! BARBECUE INDUSTRY ASSOCIATION MEMBER ©The Holland Grill Co., Inc. V2007 PN SG5-002 ANSI Z21.58b-2006/CSA 1.6b-2006...
-
Page 3: If You Smell Gas
DANGER IF YOU SMELL GAS: 1. SHUT OFF GAS TO APPLIANCE. 2. EXTINGUISH ANY OPEN FLAME. 3. OPEN LID. 4. IF ODOR CONTINUES, KEEP AWAY FROM THE APPLIANCE AND IMMEDIATELY CALL YOUR GAS SUPPLIER OR YOUR FIRE DEPARTMENT. WARNING 1. DO NOT STORE OR USE GASOLINE OR OTHER FLAMMABLE LIQUIDS OR VAPORS IN THE VICINITY OF THIS OR ANY OTHER APPLIANCE. - Page 4 Simply close the lid and cook by time. It’s guaranteed not to flare-up. Thank you for purchasing a Holland Grill. This is truly a grill that you, your family and friends will use and enjoy for many years to come.
- Page 5 PERFORMANCE. visual inspection should include leak testing the entire length of hose • CHOOSE ONLY A LEVEL LOCATION FOR GRILL OPERATION. THE HOLLAND GRILL and fittings. (See final assembly instructions for more information.) MUST BE SITTING SECURELY ON A LEVEL SURFACE FOR PROPER OPERATION AND EVEN HEAT DISTRIBUTION.
- Page 6 The LP gas cylinder shall be used only outdoors in a well ventilated to set it up properly. The N.G. Holland Grill is set to operate at 7 space and not in a building, garage, or any other enclosed area. The LP inches water column pressure, using an orifice with a #48 drill size.
- Page 7 FIGURE 2b Cabinet side, RIGHT FIGURE 3 Cabinet side, LEFT FIGURE 2a Cabinet side, RIGHT 8-32 x 3/8 Screw Insert and fasten Bucket Bracket into slot as shown Magnetic Catch 8-32 x 3/8 Hex Nut and Lock Washer 10-24 Phillips head screw and lock washer Loosen these 2 bolts.
- Page 8 FIGURE 4a Bottom Assembly 1/4 - 20 Hex Bolt 1/4 Lock Washer (both sides) FIGURE 4b Door Pivot Bracket Route electrode wire through obround hole 10 - 24 x 3/8 1/4 - 20 x 1/2 Phillips Screw Hex Bolt and and Lock Washer 1/4 - 20 Hex Nut Lock Washer...
- Page 9 FIGURE 5a Shelf 10 - 24 Carriage Bolt bolt must be inserted in slot of Lid Stop Lid Stop 1/4 - 20 x 5/8 Hex Bolt and Lock Washer 1/4 - 20 Hex Bolt and Lock Washer Hinge Flat Washer and “Top Lock” Nut 1/4 - 20 x 1 Round head Phillips Screw and Lock Washer FIGURE 5b...
- Page 10 FIGURE 6 10 -24 x 1” Carriage bolt Cooking g Grid Drip Pan FIGURE 8 Drain Pipe 10 -24 Hex Nut and Lock Washer Shelf Bracket Drain Valve Screws onto drain pipe Hand tighten only Utensil Hook Drip Bucket Hangs on Bucket Bracket Cutaway to Condiment Tray...
-
Page 11: Lighting Instructions
There should be no need for re-adjustment for the life of your Holland Grill, but it is wise to check the flame color each Air shutter time you light your grill. When proper setting is obtained be sure to &... -
Page 12: Turning Grill Off
Following these instructions will improve the longevity and quality of cooking. To assure safe operation of your Holland Grill, the area for cooking should always be kept free of combustible materials of any type, such as gasoline or other flammable vapors or liquids. -
Page 13: Cooking Instructions
Place it • It is important to realize cooking on a Holland Grill uses a different in one of the rear corners in the process in order for the grill to perform correctly. It is essential that space between the top edge of the lid remain closed while grilling. -
Page 14: Replacements Parts List
AG4-555C TANK SUPPORT SS5-914C LID STOP If you have a question about the warranty or want to order parts or accessories, please contact your local Holland Grill dealer or call 800-880-9766 or visit us on the web at hollandgrill.com E-10... -
Page 15: Grilling Instructions
Approximately 20 minutes crab legs, etc. NOTE: Remember, the Holland Grill needs to warm up completely. Temperature will remain about 400 degrees F. All grilling times are approximate depending on size, weight and individual taste preference. Grill needs to remain closed at all times during grilling to be accurate with this time chart. - Page 16 STEP 8 Replace the No. 48 Natural gas orifice with the No. 55 LP (propane) gas orifice. Installation is the reverse. STEP 9 Use only a Holland Grill factory authorized LP (propane) hose and regulator assembly. STEP 10 Attach the regulator hose to the gas valve inlet and then attach big black plastic nut to LP tank.
- Page 17 The Holland Grill Company, Inc. 121 Thomas Mill Road Holly Springs, NC 27540 Call 1-800-880-9766 or visit www.hollandgrill.com for a dealer near you. ©The Holland Grill Co., Inc. V2007...
Need help?
Do you have a question about the Epic BH421-464 and is the answer not in the manual?
Questions and answers