Table of Contents
Advertisement
Quick Links
Installation and Owner's Manual
Failure to follow these instructions may affect the Warranty
Pro-Series
™
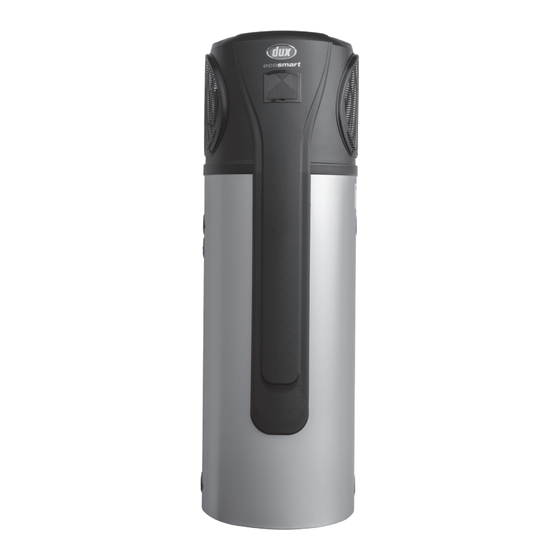
Model: 270DHB36, 270DHB36P
Installation Details
Owner's Information
Warranty
For advice, repairs and service, call:
1300 365 115 (Australia)
0800 729 389 (New Zealand)
Carefully remove all packaging and
transit protection from the heater before
installation. Dispose of the packaging
responsibly using re-cycling facilities
where they exist.
Specifications and materials may change without notice.
Effective for Ecosmart
H4950
Rev. B
IMPORTANT INFORMATION
Heat Pump Water Heater
water heaters manufactured and sold after 1st June 2024.
®
Advertisement
Table of Contents

Related Manuals for Dux ecosmart Pro 270DHB36


Summary of Contents for Dux ecosmart Pro 270DHB36
- Page 1 Installation and Owner’s Manual IMPORTANT INFORMATION Failure to follow these instructions may affect the Warranty Pro-Series ™ Heat Pump Water Heater Model: 270DHB36, 270DHB36P Installation Details Owner’s Information Warranty For advice, repairs and service, call: 1300 365 115 (Australia) 0800 729 389 (New Zealand) Carefully remove all packaging and transit protection from the heater before installation.
-
Page 2: Important Safety Information
Installation and Owner’s Manual – Ecosmart Pro-Series Important Safety Information WARNING – THIS APPLIANCE DO NOT STORE CHEMICALS OR MAY DELIVER WATER AT HIGH FLAMMABLE MATERIALS, OR SPRAY TEMPERATURE. REFER TO THE AEROSOLS NEAR THIS WATER HEATER. PLUMBING CODE OF AUSTRALIA DO NOT STORE ANY COMBUSTIBLE (PCA), LOCAL REQUIREMENTS MATERIAL NEAR THIS WATER HEATER. - Page 3 HYDROGEN IS DISCHARGED THROUGH faulty thermostat. THE TAP IT WILL PROBABLY MAKE A SOUND SIMILAR TO AIR ESCAPING. Turn off the water heater and contact Dux After Sales and Service. RELIEF VALVE: The Pressure & Temperature Relief (PTR) OVER-TEMPERATURE ENERGY...
- Page 4 Installation and Owner’s Manual – Ecosmart Pro-Series Important Safety Information tradesperson or the manufacturer. The water heater must not be operated unless these devices are fitted and in working order. COLD WATER CONNECTION: The water heater is intended to be permanently connected to the water supply main, and not connected by a hose-set.
- Page 5 Note for Victoria: the recirculation line. This water heater must be installed by a licensed person as required by the Victorian Please consult Dux After Sales and Service Building Act (1993). for advice if required. Only a licensed person will provide a...
-
Page 6: Transport And Handling
Installation and Owner’s Manual – Ecosmart Pro-Series Important Safety Information Where the water heater is subjected to wet Transport and Handling: conditions, a plinth should be installed under When moving the water heater, it must be the water heater. kept in a vertical orientation at all times. A properly drained safe tray must be installed Never tilt the water heater more than where property damage could occur from... -
Page 7: Table Of Contents
Installation Requirements Plumbing Connections Specifications Filling and Draining Electrical Connection Wiring Diagram Installation Commissioning Principle of Operation Display Operation Guide Mode Settings System Maintenance Troubleshooting Considering a Service Call? Warranty © Dux Manufacturing Limited 2024. All rights reserved. H4950 Rev. B... -
Page 8: Water Supply
If you are unsure about the water temperature of 80°C. Please consult Dux After supply, you can obtain information from the local Sales and Service for advice if required. - Page 9 Installation and Owner’s Manual – Ecosmart Pro-Series Plumbing Connections Water Supply Pressure: The PTR Valve rating is 1,000 kPa. This water heater is designed for direct The PTR Valve rating is also shown on connection to water supply pressures of up the compliance plate.
-
Page 10: Specifications
Installation and Owner’s Manual – Ecosmart Pro-Series Specifications Nominal Dimensions (mm) Model 270DHB36 / P Inlet/Drainage Height (A) Outlet Height (B) 1211 Total Height (C) 2010 Nominal Diameter (D) Total Depth including Cover (E) Specifications Model 270DHB36 270DHB36P Storage Capacity (L) Rated Heating Capacity (kW) Max Current (A) 15.6... - Page 11 Installation and Owner’s Manual – Ecosmart Pro-Series Specifications Model 270DHB36 270DHB36P Measurement conditions: Instant heating: Ambient temperature 20°C /15°C , Power Supply (/) 230 - 240V ~/50Hz Water inlet 15°C Water outlet 55°C . Moisture Resistance IPX4 (IPX) Working range: Rated Heating (1) Ambient temperature is -5°C ~43°C Capacity - Heat pump...
-
Page 12: Filling And Draining
Installation and Owner’s Manual – Ecosmart Pro-Series Filling and Draining Filling the Water Heater: Draining the Water Heater: The water heater must be filled with water Turn off the electricity supply to the before turning on the electrical supply. water heater. Open all hot water taps. -
Page 13: Electrical Connection
Contact Dux After Sales and Service if required. For hardwired models, the heater is supplied with a 2.5m long power cord which can be connected to a fixed wiring terminal. -
Page 14: Wiring Diagram
Installation and Owner’s Manual – Ecosmart Pro-Series Wiring Diagram AT : Ambient temperature AN01 BTT : Bottom of tank temperature COMP : Compressor AN02 CT : Coil temperature AN03 EEV: Electronic expand valve AN04 ET : Exhaust temperature FM : Fan motor AN05 HP :... -
Page 15: Installation
Installation and Owner’s Manual – Ecosmart Pro-Series Installation For continued safety of this appliance it Manual transport must be installed, operated and maintained For manual transport, the wooden pallet can in accordance with the manufacturer's be used for bottom part. instructions. -
Page 16: Initial Operation
Installation and Owner’s Manual – Ecosmart Pro-Series Commissioning Initial Operation: Completely fill the water heater with water before turning on the electrical supply. This can be done by opening all hot water outlets in the house and opening the inlet valves to the water heater. -
Page 17: Principle Of Operation
Installation and Owner’s Manual – Ecosmart Pro-Series Principle of Operation Principle of Operation: Freeze Protection A heat pump water heater works in a similar The water heater is equipped with an active- way to a reverse cycle air conditioner. defrost function which automatically melts Heat is extracted from the outside air and ice formed on the evaporator coil during cold transferred to the water in the tank. -
Page 18: Display Operation Guide
Installation and Owner’s Manual – Ecosmart Pro-Series Display Operation Guide 7. Display Operation Guide 7.1 Function of wire controller Function of key 7.1.1 Function of key Button Name Function Button Name Function ON/OFF Turn on/off the unit Turn on/off the unit. ON/OFF Mode Switch unit running modes or save setting parameters... - Page 19 Installation and Owner’s Manual – Ecosmart Pro-Series Display Operation Guide Status Icons Icon Name Function High temperature Indicates that the unit is in the high temperature disinfection disinfection mode Shows that the fan is on Wi-Fi Indicates Wi-Fi connection Shows that the water temperature has reached Set temperature the target point and the unit will shut off achieved...
- Page 20 Installation and Owner’s Manual – Ecosmart Pro-Series Display Operation Guide Status Icons Icon Name Function Shows that the main display area displays the Second second Indicating that the time period is set at 0~12h. Indicating that the time period is set at 12~24h. H4950 Rev.
-
Page 21: Mode Settings
Installation and Owner’s Manual – Ecosmart Pro-Series Mode Settings 7.2 Usage of wire controller Turn ON/OFF the unit 7.2.1 Turn ON/OFF the unit To unlock the keyboard, see page 28, "Mode setting - Unlock / lock the keyboard". Press " "... - Page 22 Installation and Owner’s Manual – Ecosmart Pro-Series Mode Settings Mode selection 7.2.2 Mode selection Press " " to select, Heating mode or Vacation mode, in power-on state and power-off Press " " to select , Eco heating mode,Vacation heating mode, in power-on state.
- Page 23 Installation and Owner’s Manual – Ecosmart Pro-Series Mode Settings Boost mode 7.2.4 Electric heater setting 7.2.4 Electric heater setting The Boost mode turns the heating element on for only one heating cycle when the unit is The electric heater can be turned on when the unit is heating or standby. heating or on standby.
- Page 24 Installation and Owner’s Manual – Ecosmart Pro-Series Mode Settings 7.2.5 Time setting In the standby or running interface, do as follows to set the time when in heating mode. When press “ ” once, the hour parameter will flash then Set time &...
- Page 25 Installation and Owner’s Manual – Ecosmart Pro-Series Mode Settings Press “ ” or “ ” to change the minute parameter. The date is flashing Press “ ” to confirm. press “ ” or “ ” to change the day parameter and press “...
- Page 26 Installation and Owner’s Manual – Ecosmart Pro-Series Mode Settings Press “ ” or “ ” to change the month parameter. The new set time Press “ ” to confirm. 7.2.6 Timer setting 1)Under the , economic mode, you can enter the timer setting. Press “...
-
Page 27: Timer Setting
Installation and Owner’s Manual – Ecosmart Pro-Series Mode Settings Timer setting You can set up to two timers when the heat pump is in the Heating mode. Press " " and hold for 2 seconds, the "1 and ON" will flash, and then you can set the turn on time of timer1 as the "Set time &... - Page 28 Installation and Owner’s Manual – Ecosmart Pro-Series Mode Settings Period 1 ON time Press “ ” and hold for 2S Press " " and hold for 2 seconds to enter into the next setting without confirm the previous one. Period 1 OFF time Press “...
- Page 29 Installation and Owner’s Manual – Ecosmart Pro-Series Mode Settings Set the hour Period 2 OFF time Set the minute H4950 Rev. B...
- Page 30 Installation and Owner’s Manual – Ecosmart Pro-Series Mode Settings Press “ ” to confirm the time Example: Running period 1: 8:00~10:00; Running period 2: 16:30~20:00. Out water temperature Current time Press “ ” and hold for 2S H4950 Rev. B...
- Page 31 Installation and Owner’s Manual – Ecosmart Pro-Series Mode Settings Confirm the time after setting Confirm the time after setting Period 1 OFF time Period 1 OFF time Confirm the time after setting Confirm the time after setting Period 2 ON time Period 2 ON time Confirm the time after setting Confirm the time after setting...
- Page 32 Installation and Owner’s Manual – Ecosmart Pro-Series Mode Settings 3)If you want to cancel the timer setting, follow this below To cancel the timer setting: Out water temperature Timer state The "1 ON" icon and Press “ ” and lasting for 2s time are flashing Press “...
- Page 33 Installation and Owner’s Manual – Ecosmart Pro-Series Mode Settings Vacation mode On departure day, activate the Vacation mode by turning off the water heater at the 2)In the vocation mode 2)In the vocation mode controller and follow the instructions below to set the "Turn back ON" date. Press “...
- Page 34 Installation and Owner’s Manual – Ecosmart Pro-Series Mode Settings Unlock / lock the keyboard 7.2.7 Keyboard locking Press " " and hold for 5 seconds to unlock the keyboard. Press " " and hold for Press “ ” and hold for 5s once to lock the keyboard. Press “ ”...
- Page 35 Installation and Owner’s Manual – Ecosmart Pro-Series Mode Settings Forced Defrost Turn off the water heater manually, press and hold the " " for 10 seconds to turn on the forced defrost function. After pressing the " " button, the " "...
-
Page 36: System Maintenance
Installation and Owner’s Manual – Ecosmart Pro-Series System Maintenance Anode Replacement: Follow these steps to replace the Short Horizontal anode; The water heater is equipped with two anodes. a) Follow the same step as the Long Vertical instructions for steps 1 and 2. Follow these steps to replace the Long Vertical anode;... - Page 37 Installation and Owner’s Manual – Ecosmart Pro-Series System Maintenance H4950 Rev. B...
- Page 38 This service should only be carried out by a safely and efficiently. licensed tradesperson. We recommend your local Dux Service Agent. The conditions applying to your water heater warranty are set out on page 37 of this In locations where the water has manual.
-
Page 39: Troubleshooting
Installation and Owner’s Manual – Ecosmart Pro-Series Troubleshooting 1. Why is the compressor not running when I 6. Why is hot water still available when the start up the heat pump? water out temperature on the display decreases substantially? When the heat pump is powered on after the last shut-down, it will take 3 minutes Because the upper sensor is positioned for the compressor to run. - Page 40 Installation and Owner’s Manual – Ecosmart Pro-Series Troubleshooting Common error codes and corrective actions are described below. Call the Dux After Sales team to book a service call on 1300 365 115. Display Error Description Corrective action Bottom water temperature sensor...
-
Page 41: Considering A Service Call
Installation and Owner’s Manual – Ecosmart Pro-Series Considering a Service Call? Please review this section. Although there an inexpensive flow control valve can are no user serviceable components in the easily be fitted to the shower outlet. water heater, the information contained in •... - Page 42 If after reviewing the information contained in this section, the problem has not been identified, please contact Dux After Sales and Service. H4950 Rev. B...
-
Page 43: Warranty
Installation and Owner’s Manual – Ecosmart Pro-Series Warranty Dux Ecosmart Pro-Series Heat Pump Water Heater - Warranty Summary: Your water heater is specified with a warranty as set out in the table below. The fault must appear within the defined time period, which commences from the date of installation (or manufacturing date of the unit if proof of the date of installation is not available) in order to be covered. -
Page 44: Warranty Conditions
100km from a temperature of 80°C. Dux office or Dux agent, the Owner will These warranties do not apply to defects be responsible under the warranty for that are a result of, without limitation, the... - Page 45 To the extent permitted by law the liability of Dux shall be limited to the cost of the repair or replacement of the water heater. H4950 Rev. B...
- Page 46 Dux, If Dux fails to meet a guarantee under the then you are entitled to a replacement or ACL, your remedy for such failure may be...
-
Page 47: Contact Details
Warranty claims can be placed by Lackey Road, Moss Vale, NSW, 2577 completing the following steps: Australia • Contact Dux on one of the numbers 1300 365 115 (Australia) listed below. 0800 729 389 (New Zealand) • Select the "Service" option followed by Email: duxaftersales@dux.com.au... - Page 48 Please Register Your Water Heater Please take a moment to fill out your details for warranty registration at: www.dux.com.au/warranty or use your smartphone to scan this code: Heat Pump Water Heater For advice, repairs and service, call: 1300 365 115 (Australia)
Need help?
Do you have a question about the ecosmart Pro 270DHB36 and is the answer not in the manual?
Questions and answers