
Subscribe to Our Youtube Channel
Related Manuals for Giersch M10


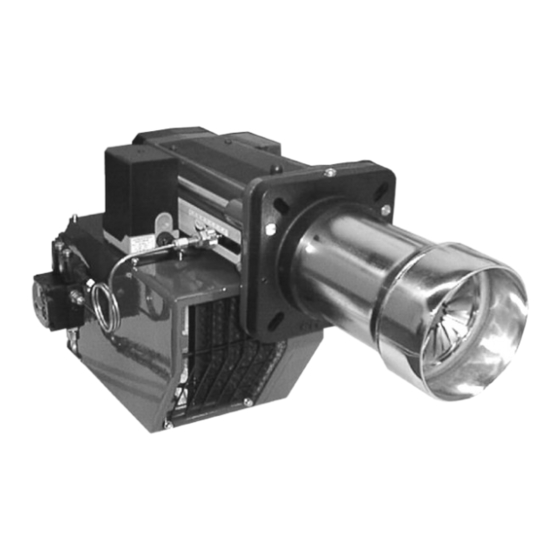
Summary of Contents for Giersch M10
- Page 1 Technical Information • Installation Instructions Issued April 2024 Technical changes in the sense of product improvement reserved!
-
Page 2: Table Of Contents
Contents 1 General information .......................... 3 2 Standard Specifications ........................3 3 Maintenance and Customer Service....................3 4 Operating Instructions........................3 5 Instruction of Operative Personnel....................3 6 Key for code designation ......................... 3 8 Boiler connection measures......................4 9 Installation of flange ......................... 4 10 Inserting the Nozzle .......................... -
Page 3: Standard Specifications
Standard Specifications Before installing the Giersch Series M10 oil burner, please check that al items included in the standard specifications are present. Standard specifications: Burner, fixing unit, separate operating instructions, technical information leaflet, flange gasket, one 7-pin and one 4-pin connector (Wieland connector). -
Page 4: Technical Data
Technical data Burner type Technical specifications M10-AE-WLE M10-Z-L-WLE M10.2-Z-L-WLE Burner output in kW 120 - 355 125 - 490 255 - 566 Fuel oil EL, DIN 51603 Method of operation With start-up load reduction 2 Stage Voltage 1 / N / PE ~ 50 Hz / 230 V current consumption 4 A max. -
Page 5: Inserting The Nozzle
10 Inserting the Nozzle After removing the two M8 nuts (size 13) the burner can be drawn back on the guide pins. It is now in the servicing position. Undo the screw and withdraw the flame ring forwards. Unscrew the plastic dust screw from the nozzle holder. When doing so, it is essential to ensure that the sea- ling face is not damaged. -
Page 6: Air Adjustment
13 Air adjustment Design -AE After releasing the locking screw (1), the air volume is set to the required boiler output using the control knob (2). The air damper position is given on the Adjustment Table. When adjustment is complete, the securing screw (1) must be re-tightened. Design -Z-L The air damper positioning motor adjusts the air dam- per position or trips the solenoid valve on two-stage... - Page 7 The air valve positioning motor SQN The air valve positioning motor adjusts the air valve po- sition or trips the solenoid valve on two-stage burners with air shut-off. Adjustment is via limit switch cams on the positioning drive roller. You can refer to the presetting table for the cam positi- ons for adaptation of the burner to the requisite boiler output.
-
Page 8: Electrical Connection
The supply cable must be protected by a fuse with a maximum rating of 10 AF or 6.3 AT (recommended) and must be a flexible cable. If the terminal box is already wired up, check that the connections match the circuit diagram shown here. Electrical connection M10-AE Electrical connection M10-Z-L Electrical connection M10.2-Z-L... -
Page 9: Oil Connection
15 Oil connection The oil line must end close enough to the burner to ensure that the flexible oil hose is not under tension when connected. Care should be taken to ensure that the burner can easily be moved into the servicing position. - Page 10 Single pipe system Danfoss BFP 52 Suntec AT2 55 Nozzle 10 kg/h 20 kg/h 12 kg/h 19 kg/h 30 kg/h ∅5mm ∅6mm ∅6mm ∅8mm ∅10mm ∅4mm ∅6mm ∅6mm ∅8mm ∅6mm ∅8mm ∅10mm Pipe∅ H (m) L (m) L (m) L (m) L (m) L (m) L (m)
-
Page 11: Oil Pump
16 Oil pump The pumps are intended for installation in a dual-pipe system (factory setting). The M10 oil burner starts up at low pump pressure and then switches over to the higher pump pressure and thereby to maximum output. The pump pressure must be set for the output required (see Adjustment Table. The specified pump pres- sures are only guide values and may deviate depending on plant conditions. -
Page 12: Start-Up
For conversion to single pipe system, we recommend to use a fuel oil filter with return feed. For this, the pump remains in two-pipe operation. Install flow and return burner pipes at the filter. Open the oil tap at the filter. -
Page 13: Control Unit Lmo
18 Control unit LMO Testing the control unit for proper functioning Danger of fatal injury from electric shocks! Disconnect electrical cable from power supply before carrying out any work on live parts! Troubleshooting may only be carried out by authorised and trained per- sonnel! Unlocking may only be carried out by an autho- rised specialist. - Page 14 Error code table Red blink code of „AL“ at Possible cause signal term. 10 lamp (LED) 2 x blinks No establishment of flame at the end of «TSA» - Faulty or soiled fuel valves - Faulty or soiled flame detector - Poor adjustment of burner, no fuel - Faulty ignition equipment 3 x blinks...
-
Page 15: Troubleshooting
19 Troubleshooting Establishment Cause Elimination Fuse defective Replace Safety thermostat locked Reset Temperature of the controller adjustment excee- Attempt restart after temperature has drop- Burner motor does not run Control box defective Replace Motor defective Replace Air damper positioning motor not opening valve Replace or not enabling Motor-pump coupling defective... -
Page 16: Adjustment Table
20 Adjustment table M10 The values given in the tables are only setting values for start-up. The system settings required in each case must be redefined if values such as boiler output, calorific value and altitude deviate. A correction is required in any case. -
Page 17: Explosion Drawing
E. .02.1999 • G. 04.04.24 ZBZ_2-577... - Page 18 ZBZ_2-578 E. .02.1999 • G. 04.04.24...
-
Page 19: Parts List
Fan∅180 x 74 47-90-24190 Fan∅180 x 75 (M10.2) 46-90-12997 Motor 230 V/ 50 Hz - 370 W 47-90-12998 Motor 230 V/ 50 Hz - 750 W with relay for M10.2 47-90-27431 Ignition transformer 47-90-26930 Control unit LMO 47-90-28928 Lower part of control box... -
Page 20: Declaration Of Conformity
23 Declaration of Conformity Declaration of Conformity for Oil Burners We, Enertech GmbH, Adjutantenkamp 18 in D-58675 Hemer declare under our responsibility that oil burner type M10 … are conform with the regulations of these directives MD2006/42/EC EMC2004/108/EC BED92/42/EEC LVD2006/95/EC und are marked with: EN 267 report OB 2822016T1 TÜV Rheinland Energy GmbH... - Page 21 Declaration of Conformity for Oil Burners We, Enertech GmbH, Adjutantenkamp 18 in D-58675 Hemer declare under our responsibility that oil burner type M10.2-Z-L are conform with the regulations of these directives MD2006/42/EC EMC2004/108/EC BED92/42/EEC LVD2006/95/EC und are marked with: EN 267 report OB 2832016T1 TÜV Rheinland Energy GmbH Hemer, 12.01.2024...
-
Page 22: Burner Construction Measures
Subject to alterations. Giersch GmbH • Brenner und Heizsysteme Adjutantenkamp 18 • D-58675 Hemer • Telephone 02372/965-0 • Fax 02372/61240 E-mail: info@giersch.de • Internet: http://www.giersch.de...
Need help?
Do you have a question about the M10 and is the answer not in the manual?
Questions and answers