
Subscribe to Our Youtube Channel
Related Manuals for Giersch GG20-LN


Summary of Contents for Giersch GG20-LN
- Page 1 Technical Information • Installation Instructions GG20-LN May 2012 edition In the interests of continuous product improvement, technical specifications are subject to change without prior notice!
-
Page 2: Table Of Contents
22. Flame control using ionization electrode..................21 23. Measuring the ionization flow....................... 21 24. Servicing the air pressure monitor ....................21 25. Circuit diagram GG20-LN ......................22 26. Possible errors ..........................25 27. Exploded drawings........................26 28. Spare parts list ..........................27 29. -
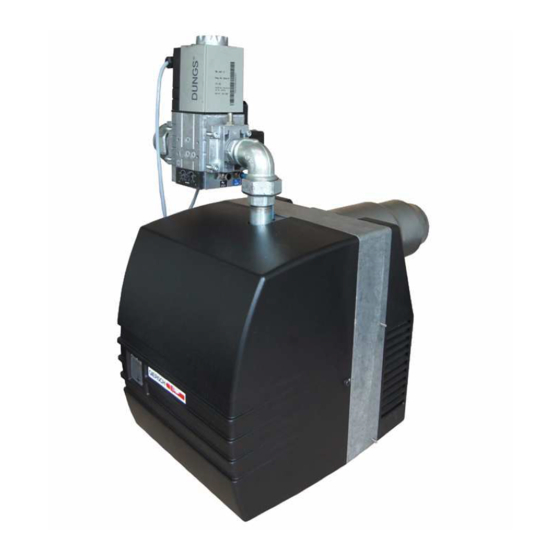
Page 3: Overview
DIN EN 437 and comply with the European Standard DIN EN 676:2008-11. 2. Scope of delivery and connection data Before installing the Giersch gas burner, please check that all items included in the scope of delivery are present. -
Page 4: Key For Code Designation
Overview 6. Key for code designation GG20/1-Z-(-M)-L-N(-F)-LN LowNox LowNox Natural gas LL + E = "-N", liquefied gas 3B/P = "-F" Erdgas LL+E ="-N" oder Flüssiggas ="-F" Luftabschlussklappe Air damper Zweistufig oder Modulierend 2-stage/modulating Baugröße Burner type Baureihe Burner series 7. -
Page 5: Installation
Installation 8. Install flange and burner Important: Secure the sliding flange so that the clamping screw 3 is positioned at the top! When installing the sliding flange, only tighten screws 1 and 2 otherwise it will not be possible to secure the burner tube with screw 3. -
Page 6: Service Position
Installation 11. Service position Risk of injury by fan impeller on activation in service position. • Release quick-release locks (5 x) and detach base plate, • Place the keyhole openings in the base plate onto the socket head cap screws of the housing and lock them into place. -
Page 7: Connecting To Power Supply
Installation 12. Connect to power supply • De-energise the system. Move the master switch into the "OFF" position. • Check the polarity of all connecting plugs. • Wire the plug as shown in the terminal diagram. Lay the flexible control line so that the boiler door remains swivellable. -
Page 8: Function
Function 13.Control unit DMG 972 Function testing the control unit Danger of fatal injury from electric shocks! Disconnect electrical cable from power supply before car- rying out any work on live parts! Troubleshooting may only be carried out by authorised and trained personnel! Unlocking may only be carried out by an authorised spe- cialist. - Page 9 Function Fault message Flash code Cause of fault Fault shut-down safety time No flame detection within the safety interval Extraneous light fault External light during monitored phase, possible sensor fault Air controller in working posi- Air controller contact fused tion Air controller time-out Air controller does not close within a defined time span Air controller opens...
-
Page 10: Start-Up
Start-up 14. Air flap positioning motor The positioning drive STA 13 B0 is used to adjust the air flap on burners with a 2-stage or modulating operat- ing modes. Make the adjustment using the limit switch cams on the positioning drive roller. After each normal shut-down, the positioning drive moves to fully closed (ST0). -
Page 11: Adjusting The Mixing Head
Start-up 15.Adjustment of the mixing head Set the position of the mixing head according to burner output in accordance with the table on page 14 ff. 16. Adjusting the ignition/ionisation electrode The electrodes are preset at the factory. The dimensions are specified for checking purposes. 11 ±... -
Page 12: Gas Burner With Gas Train
Start-up 18. Gas burner with gas train ..Version MB: Exact pneumatic mixture control for optimum energy utilisation and combustion. Technical data of gas train MB... Gas types: Gas type families 1, 2 and 3, acc. to DIN EN 437/EN 2003-09 Inlet pressure: 15 to <... - Page 13 Start-up Technical data of gas train CG... Gas types: :Gas type families 1, 2 and 3, acc. to DIN EN 437/EN 2003-09 Inlet pressure: max. 100 mbar ≥ Permissible outlet pressure:pG 0.4 to < 50 mbar Max. pressure drop: 50 mbar (P Ambient temperature: -10°C to +60°C Connecting flanges:...
-
Page 14: Adjustment Tables
Start-up 19. Adjustment tables The values specified in the tables are only reference inputs for commissioning. The system set- tings required in each case must be redefined if values such as boiler output, calorific value and altitude deviate. A correction is required in any case. The maximal burner output can only be achieved in mixing head position 17 mm. - Page 15 Start-up GG20/2-N-LN = 9.3 [kWh/m Natural gas LL: H Burner output Boiler output Air flap Mixing head Position Gas nozzle pressure Gas flow rate position position inlet nozzle η= 92% [kW] [kW] [ ° ] [mm] [ ° ] [mbar] Stage 2 Stage 1 Stage 2 Stage 1 2nd stage 1st stage Stage 2...
- Page 16 Start-up The burner can be put into operation once the gas and electrical installation and assembly work has been completed. • Measure inlet pressure with U-pipe pressure gauge at measuring point "p ". max. 100 mbar (static pressure) for KEV 220, KEV 225 max.
-
Page 17: Modulating Or 2-Stage Sliding Gas Burner With Gas Train
Start-up 20. Modulating or 2-stage sliding gas burner with gas train... Gas supply measuring point A (p nozzle pressure measuring points B (p N = Zero point (gas nozzle pressure adjustment for min. output) V = Ratio of nozzle pressure to air pressure in the burner tube (gas nozzle pressure adjustment at max. - Page 18 Start-up Set min. output 1st stage: Adapt nozzle Min. output • Set burner to low load 1st stage and correct pressure min. output exhaust gas values at "N". Increase ST1/min. Output/nozzle pressure for GG20-M-L-LN: output if: too low To do so, set the output controller to min. output Increase ST1/min.
-
Page 19: Calculation Principle For Gas Burner Adjustment
Start-up 21. Calculation principle for gas burner adjustment The values given in the tables are setting values for start-up. The necessary system adjustment must be newly determined in each case. General: the calorific value (H ) of fuel gases is generally specified for the normal state (0°C, 1013 mbar). - Page 20 Start-up Flow measurement Determining flow duration at gas meter.. Calculated flow duration in seconds t for a flow volume of 200 litres (corresponding to 0.2 m spec for the example given above is: = 3.3 m × -- - -- - -- - 0 2m 3600...
-
Page 21: Service Instructions/Dimensions
Service instructions/dimensions 22. Flame control using ionization electrode If an AC current is applied between the burner and the ionisation rod, a DC current flows due to the recti- fying effect of the flame. This ionisation current forms the flame signal and is amplified and passed to con- trol box. -
Page 22: Circuit Diagram Gg20-Ln
Service instructions/dimensions 25. Circuit diagram GG20-Z-L-LN till 180 W Boilter controller Burner Gas train GG20-Z-L-LN off 180 W Boilter controller Burner Gas train... - Page 23 Service instructions/dimensions GG20-M-L-LN till 180 W Boilter controller Burner Gas train GG20-M-L-LN off 180 W Boilter controller Burner Gas train...
- Page 24 Service instructions/dimensions High terminal A Plug unit for boiler control, 7-pin. blk/br High terminal B Socket unit for burner, 7-pin. blk/br High terminal C Plug unit for boiler control, 4-pin blk/green Ionisation electrode Socket unit for burner, 4-pin blk/green External fuse for boiler regulation 6.3 A (slow) / Plug unit for gas pressure monitor max.
-
Page 25: Possible Errors
Service instructions/dimensions 26. Troubleshooting Flash code DMG Defect determined: Cause: Remedy: Burner motor does not Electric supply lead faulty Rectify faults in electrical installation start up Fuse faulty Replace Safety thermostat locked out Unlock Temperature of controller set- Renewed start attempt after tempera- ting is exceeded ture drop Control box faulty... -
Page 26: Exploded Drawings
Service instructions/dimensions 27. Exploded drawings GG20/1-LN GG20/2-LN... -
Page 27: Spare Parts List
28. Spare parts list GG20/1-LN, GG20/2-LN Seq. No. Designation Order no. Replacement ignition and ionisation electrode set (comprising Nos. 1 and 9) 47-90-27757 Silicone hose Ø 10 x 1 x 80 lg. 47-90-22466 Set of spare ignition and ionisation cables, complete (comprising Nos. 1b and 47-90-27758 Set of spare ignition and ionisation cables, complete, ext. -
Page 28: Declaration Of Conformity For The Forced-Air Gas Burner
29. Declaration of conformity We, Enertech GmbH, D-58675 Hemer, hereby declare on its own responsibility that the products GG20/1-…-LN GG20/2-…-LN are in conformity with the following standards: EN 60335 EN 50081 EN 50082 EN 676 These products are CE labelled in compliance with the provisions of the following directives: 89 / 336 / EEC EMC Directive 2004 / 109 / EEC Low Voltage Directive 92 / 42 / EEC Energy Efficiency Directive... -
Page 30: Burner Dimensions / Boiler Connecting Dimensions
Subject to change. Enertech GmbH • Brenner und Heizsysteme Adjutantenkamp 18 • D-58675 Hemer • Telephone +49 (0)2372/965-0 • Telefax +49 (0)2372/61240 E-mail: kontakt@giersch.de • Website: http://www.giersch.de...
Need help?
Do you have a question about the GG20-LN and is the answer not in the manual?
Questions and answers