Table of Contents

Related Manuals for Shure MXA710


Summary of Contents for Shure MXA710
- Page 1 MXA710 2-Foot and 4-Foot Linear Array Microphone Shure MXA710 linear array microphone user guide. Learn how to install the mic in a variety of rooms and how to use Shure's trusted IntelliM ix DSP platform. Version: 5.4 (2024-H)
-
Page 2: Table Of Contents
Shure Incorporated Table of Contents DSP Best Practices MXA710 2-Foot and 4-Foot Linear Array Microphone Acoustic Echo Cancellation Noise Reduction New in Firmware 6.2 Automatic Gain Control (AGC) General Description Delay Features Compressor Parametric Equalizer MXA710 Designer Setup Example Step 1: Install and Connect... - Page 3 Shure Incorporated Sending Audio from a Shure Device Specifications Receiving Audio from a Device Using a Different Audio MXA710 Frequency Response Network Protocol Lobe Sensitivity Use Command Strings IMPORTANT SAFETY INSTRUCTIONS Optional Accessories Important Product Information Information to the user...
-
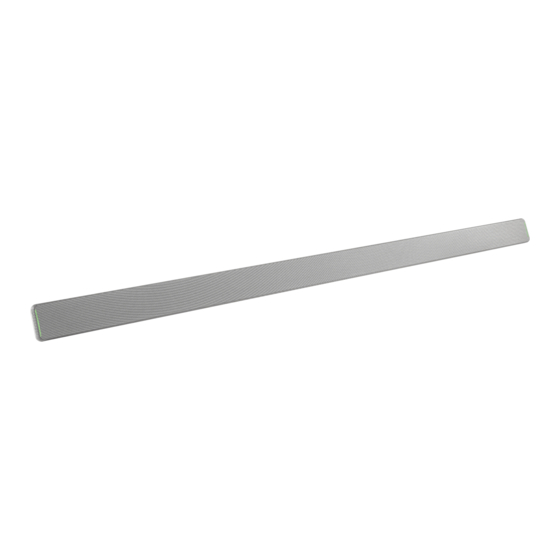
Page 4: Mxa710 2-Foot And 4-Foot Linear Array Microphone
AV conferencing environments. The linear form factor of the MXA710 allows for placement virtually anywhere in a meeting space, including on a wall, around a display, on a ceiling, or in a ®... -
Page 5: Step 1: Install And Connect
Open a new design and drag both devices into the design. Designer prompts you to choose an installation method for the MXA710. You can change this setting later in [Your room] > Coverage > MXA710 > Properties > Device control > Change installation. -
Page 6: Step 3: Adjust Microphone Coverage
Select Deploy and connect to send device settings to your installed online devices. Designer walks you through associ ating the design devices with the online devices. Step 3: Adjust Microphone Coverage Go to [Your room] > Coverage to adjust the MXA710's coverage. Set up a way to listen to the microphone directly (with a Dante headphone amp, for example). -
Page 7: Mxa710 Parts
Shure Incorporated MXA710 Parts Mute status LED Customize LED color and behavior in Designer by going to: Device configuration > Settings > Lights. Mute Status LED Default Settings Microphone Status LED Color/Behavior Active Green (solid) Muted Red (solid) Hardware identification Green (flashing) -
Page 8: Model Variations
Sits behind the microphone grille. To access, find a grille hole that aligns with the left edge of the mute status LED and the "S" of the Shure logo. Use a small paperclip or other tool to press and hold the button. You may need to try a few different holes to press the reset button. -
Page 9: Cable Requirements
Find the left edge of the microphone light, which sits behind the grille. Insert the paperclip into the grille hole that aligns with the left edge of the microphone light and the "S" of the Shure lo go. Press and hold to reset the microphone. If you don't feel a button, try the grille holes below and around the first one. -
Page 10: Reset Modes
Shure Incorporated Reset Modes • Network reset (press for 4-8 seconds): Resets all Shure control and audio network IP settings to factory defaults. Red LED along bar. • Full factory reset (press for more than 8 seconds): Resets all network and configuration settings to the factory defaults. -
Page 11: How To Adjust Microphone Coverage
To control microphone coverage, use Designer. Microphone coverage is at the room level, meaning that there is one coverage map for all Shure devices in a room. Add the MXA710 to a design or an online room. Designer prompts you to choose an installation orientation. There are 4 options: ◦... -
Page 12: Mxa710 Coverage Examples
Tips for Great Coverage • To change the installation type, go to [Your room] > Coverage > MXA710 > Properties > Device control > Change installation. •... - Page 13 Shure Incorporated Wall Horizontal (4-foot microphone) 3 lobes 13/43...
- Page 14 Shure Incorporated Ceiling (2-foot microphone installed flush with ceiling) 3 lobes. Some are bidirectional in certain positions. 14/43...
- Page 15 Shure Incorporated Table (2-foot microphone) 3 lobes. Some are bidirectional in certain positions. 15/43...
-
Page 16: Using Autofocus To Improve Coverage
This microphone uses built-in Autofocus technology to fine-tune microphone coverage in real time, even if meeting participants lean back or stand up. On microphones that show steerable lobes for coverage (such as the MXA710 or MXA920), you'll see the lobes moving in the coverage map as participants change positions. Autofocus only responds to in-room sound sources. -
Page 17: How To Install The Mxa710
Only use these faders to adjust the gain of a lobe after you are satisfied with the automixer's gating behavior. How to Install the MXA710 The MXA710 is an extremely versatile microphone. You can install it in many places in a conference room and easily get good coverage for all talkers. -
Page 18: Installing The Wall-Mounting Bracket
Don't place the microphone behind obstructions. Keep the microphone's grille at least 36 inches away from any occupan cy sensors. • Plan for any future coverage needs. Ways to Install the MXA710 Accessory Install location Other hardware required? Wall-mounting bracket... - Page 19 Shure Incorporated If you're mounting over a junction box, remove the existing cover plate. Position the wall-mounting bracket. You can mount it vertically or horizontally on the wall. Using a pencil, mark the wall for the position of the drywall anchors and screws. If you're installing over a junction box, balance the bracket with 2 screws above the box and 2 screws below it.
-
Page 20: Suspending The Microphone From The Ceiling
Any Guilford of Maine fabric with ≥0.95 NRC (noise reduction coefficient) rating These are examples of fabrics that met our specifications at the time when Shure evaluated fabrics: Guilford of Maine's Bee Have, and Kvadrat's Ginger, Mi Casa, Casita, and Time. -
Page 21: Intellimix Dsp
• Use only 1 layer of fabric over the microphone or mounting hardware. • Always confirm the fabric's acoustic specifications and testing process with the fabric manufacturer. Shure doesn't keep track of any changes in fabric specifications. IntelliMix DSP This device contains IntelliMix digital signal processing blocks that can be applied to the automix channel output. The DSP blocks include: •... -
Page 22: Noise Reduction
Auto (default)*: For best results, use this setting. The nonlinear processing level automati cally adapts to changes in the acoustic environment. * Auto setting available in firmware 6.2 and newer for MXA920, MXA902, MXA901, and MXA710 Noise Reduction Noise reduction significantly reduces the amount of background noise in your signal caused by projectors, HVAC systems, or other environmental sources. -
Page 23: Delay
Shure Incorporated Target Level (dBFS) Use −37 dBFS as a starting point to ensure adequate headroom and adjust if necessary. This represents the RMS (aver age) level, which is different from setting the input fader according to peak levels to avoid clipping. - Page 24 Shure Incorporated PEQ Filter Settings Setting Function Only the first and last band have selectable filter types. Parametric: Attenuates or boosts the signal within a cus tomizable frequency range Low Cut: Rolls off the audio signal below the selected fre...
- Page 25 Shure Incorporated Copy and Paste Equalizer Channel Settings Use to quickly apply the same PEQ setting across multiple channels. Select the PEQ of the desired channel. Click copy. Select the channel to apply the PEQ setting to and click paste.
-
Page 26: Best Practices
To use, open the microphone in Designer and click EQ contour to turn it on or off. • MXA710 EQ contour: Low shelf at 300 Hz, -6 dB Click Bypass all EQ to quickly bypass any EQ contours or channel EQ settings. - Page 27 Shure Incorporated Automix Settings Setting Function Keeps the most recently used microphone channel active. The purpose of this feature is to keep natural room sound in Leave last mic on the signal so that meeting participants on the far end know the audio signal has not been interrupted.
-
Page 28: Speech Gating Threshold And Enhanced Noise Filtering
Removes noise sources that: Firmware 6.2 and newer for: Are in the microphone's coverage area Are not immediately next to a person MXA710, MXA901, MXA902: On or off Enhanced noise filtering talking. Example: If a person talking settings opens a bag of chips, you will still hear MXA920: Low, medium, or high settings the bag. -
Page 29: Automix Modes
Automix Modes To select an automix mode, go to: • MXA710, MXA910, MXA920:[Your device] > IntelliMix > Properties • P300 and IntelliMix Room:[Your device] > Automixer > Properties Gating Gating mode delivers fast-acting, seamless channel gating and consistent perceived ambient sound levels. The off attenuation setting is applied to all inactive channels, regardless of the number of active channels. -
Page 30: Mute Sync
Shure devices use logic and mute sync to make this happen. • Logic: Aligns mute status across Shure devices in the room. The processor (such as a P300, IntelliMix Room software, or an ANIUSB-MATRIX) is the controller. -
Page 31: Encryption
Select Shure devices support the IEEE 802.1X port access protocol for network authentication. Important: To use the 802.1X security protocol with Shure devices, set the network switch to multiple host authentication. You must also make accommodations to allow the audio network interface to connect to the network. The audio network interface doesn't support the 802.1X protocol. -
Page 32: Turn Off Or Clear 802.1X Settings
Shure Incorporated Initialize the device if necessary. Open the device and go to Settings > Network > 802.1X. Choose your EAP method from the menu. Enter any required credentials and load any necessary certificates. Press Save to save the 802.1X settings to the device. -
Page 33: Networking Best Practices
Always use a "star" network topology by connecting each device directly to the switch or router. • Connect all Shure networked devices to the same network and set to the same subnet. • Allow all Shure software through the firewall on your computer. -
Page 34: Device Ip Configuration
Shure Incorporated Device IP Configuration This Shure device uses 2 IP addresses: one for Shure control, and one for Dante audio and control. For most installations, the Shure control and Dante audio IP addresses should be in the same subnet range. -
Page 35: Digital Audio Networking
Required for inter-device communication Open 64000 Telnet Required for Shure firmware update Open *These ports must be open on the PC or control system to access the device through a firewall. **Some firmware supports HTTPS. HTTPS isn't available for all devices. -
Page 36: Dante Flows For Shure Devices
Considerations for Shure devices controlled by DDM: • When you add Shure devices to a Dante domain, set the local controller access to Read Write. Otherwise, you won't be able to access Dante settings, perform a factory reset, or update device firmware. -
Page 37: Sending Audio From A Shure Device
AES67 flow, the AES67 session ID and IP address are required. Shure devices: The transmitting device must support SAP. In Dante Controller, a transmit device (appears as an IP address) can be routed like any other Dante device. -
Page 38: Additional Resources
Shure Knowledge Base FAQs • Command strings for Shure devices • Shure API documentation • Shure Enterprise Networking Troubleshooting Checklist • Training from the Shure Audio Institute • Shure Systems YouTube channel Download Shure Software • Shure Designer • Shure Update Utility •... - Page 39 Shure Incorporated Weight MXA710-2FT 2 lbs (0.91 kg) MXA710-4FT 3.7 lbs (1.67 kg) Product Dimensions MXA710-2FT 0.87 x 2.36 x 25.04 in. (22.09 x 60 x 636 mm) H x W x L MXA710-4FT 0.87 x 2.36 x 49.12 in. (22.09 x 60 x 1247.76 mm) H x W x L...
-
Page 40: Mxa710 Frequency Response
Delay, Equalizer (4band Parametric) , Mute, Gain ( 140 dB range) Acoustic Echo Cancellation Tail Length Up to 250 ms Networking Cable Requirements Cat 5e or higher (shielded cable recommended) MXA710 Frequency Response Frequency response measured directly on-axis from a distance of 6 feet (1.83 m). 40/43... -
Page 41: Lobe Sensitivity
Shure Incorporated Lobe Sensitivity The edge of the blue coverage area for each channel represents where the sensitivity reaches -6 dB. Understanding how lobe sensitivity is displayed helps to: • Provide complete coverage in a space, either by adding lobes or changing the lobe width. This ensures the sensitivity is within 6 dB in all areas. -
Page 42: Important Safety Instructions
Shure Incorporated IMPORTANT SAFETY INSTRUCTIONS READ these instructions. KEEP these instructions. HEED all warnings. FOLLOW all instructions. DO NOT use this apparatus near water. CLEAN ONLY with dry cloth. DO NOT block any ventilation openings. Allow sufficient distances for adequate ventilation and install in accordance with the manufacturer’s instructions. -
Page 43: Important Product Information
This product meets the Essential Requirements of all relevant European directives and is eligible for CE marking. The CE Declaration of Conformity can be obtained from Shure Incorporated or any of its European representatives. For contact information please visit www.shure.com...
Need help?
Do you have a question about the MXA710 and is the answer not in the manual?
Questions and answers