Table of Contents
Advertisement
Quick Links
Advertisement
Table of Contents

Subscribe to Our Youtube Channel
Related Manuals for Shure MXA910-60CM


Summary of Contents for Shure MXA910-60CM
- Page 1 MXA910, MXA910-60CM, MXA910W-A Ceiling Array Microphone Shure MXA910 ceiling array microphone user guide. Includes mounting instructions, specifications, command strings, best practices, and mi crophone configuration details. Version: 9 (2019-K)
-
Page 2: Table Of Contents
Shure Incorporated Table of Contents Model Variations MXA910, MXA910-60CM, MXA910W-ACeiling Array Mi- Rubber Scratch Protectors crophone Ceiling Installation NOTICE Rubber Scratch Protectors (MXA910W-A) Ceiling Installation (MXA910W-A) Overview Suspension Mounting General Description Cable Management Features Installing the Junction Box Accessory System Overview Software Installation, Management, and Security Differences Between 3.x and 4.x Firmware... - Page 3 Shure Incorporated Automatic Gain Control (AGC) Using a Third-Party Control System Delay Troubleshooting Compressor Important Product Information Networking and Dante Information to the user Digital Audio Networking Specifications Switch Recommendations for Dante Networking Polar Response Cable Requirements Frequency Response QoS (Quality of Service) Settings...
-
Page 4: Mxa910, Mxa910-60Cm, Mxa910W-A Ceiling Array Microphone
NOTICE Due to a preliminary finding by a federal court in the United States, Shure is authorized to ship the MXA910-60CM. This model is fully certified and lawful to use anywhere in the world but is not lawful to be used in the United States in a drop ceiling mount... -
Page 5: Features
Shure Designer system configuration software provides comprehensive microphone and pattern control • With Designer, you can also design coverage with online and offline devices, and route audio between Shure devices • If Designer isn't available, use the browser-based web application to control the microphone •... -
Page 6: System Overview
Danteenabled loudspeakers and amplifiers connect directly to a network switch. Analog loudspeakers and amplifiers con nect through a Shure Network Interface (model ANI4OUT), which converts Dante audio channels into analog signals, deliv ered through 4 discrete XLR or block connector outputs. -
Page 7: Differences Between 3.X And 4.X Firmware
Shure Incorporated ™ Audio: Route audio with Dante Controller or Shure Designer software. Dante Virtual Soundcard enables audio monitoring and recording directly on the computer. Differences Between 3.x and 4.x Firmware When you update an MXA910 from 3.x to 4.x firmware, you'll be able to use IntelliMix DSP features optimized for MXA. -
Page 8: Getting Started
Shure Designer software installed on a computer. Download at www.shure.com. Note: If Designer isn’t available, you can use a web application to control the MXA910 and Dante Controller to route audio. Download the Shure Web Device Discovery application to access your device’s web application. -
Page 9: Step 3: Adjust Microphone Coverage
Shure Incorporated Step 3: Adjust Microphone Coverage To design microphone coverage, you'll need to create a Project and a Location. You can learn more about both in Designer’s Help section. From My projects, select New to create a new project. -
Page 10: Step 4: Apply Dsp
To use AEC, route a far-end reference signal to the microphone's AEC Reference In channel. ◦ Use Designer to route a reference signal coming from a Shure device, like the ANIUSB-MATRIX or P300. ◦ Use Dante Controller to route a reference signal from other third-party Dante devices. -
Page 11: Step 5: Route Audio
Shure Incorporated Step 5: Route Audio To route audio from the MXA910 to other Shure devices, use Designer. For non-Shure devices, use Dante Controller software. We'll route audio from the MXA910 to an ANIUSB-MATRIX. Add the ANIUSB-MATRIX to your location. -
Page 12: System Planning And Gear Requirements
Shure Incorporated System Planning and Gear Requirements MXA910 Equipment Combinations MXA910 and ANI22 MXA910 and ANIUSB MXA910 and P300 Room size Small or medium Small or medium Medium or large Mobile I/O Analog I/O USB I/O Power PoE+ Logic control Yes with P300 firmware 3.1.5... -
Page 13: Use Case: Soft Codec With Aniusb Or P300
ANIUSB-MATRIX or P300 • Computer with conferencing software • Network switch supplying Power over Ethernet (PoE) • Computer on network with: ◦ Shure Designer software or ◦ Device web applications • Cat5e (or better) Ethernet cables • USB cable •... -
Page 14: Use Case: Ani22 And Hard Codec
ANI22 (block or XLR connector versions available) • Hard codec • Display • Network switch supplying Power over Ethernet (PoE) • Computer on network with: ◦ Shure Designer software or ◦ Device web applications • Cat5e (or better) Ethernet cables 14/59... -
Page 15: Use Case: Medium Or Large Room With 2 Mxa910S And A P300
• P300 • Network switch supplying Power over Ethernet Plus (PoE+) • Computer on network with: ◦ Shure Designer software or ◦ Device web applications • Cat5e (or better) Ethernet cables • Any other speakers, mobile devices, codecs, or displays... -
Page 16: Led Light Bar
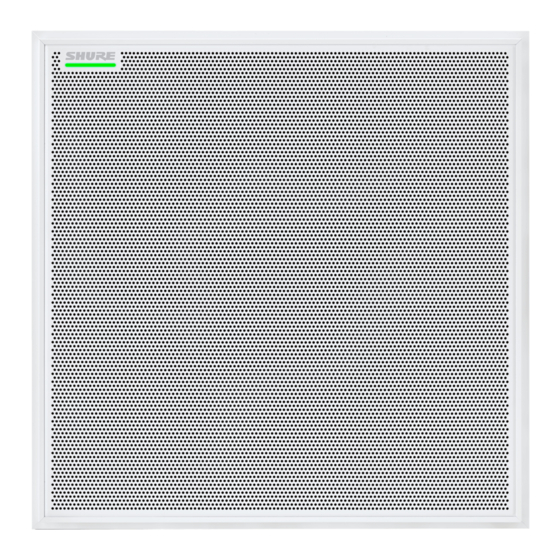
Shure Incorporated ① Network Port RJ-45 jack for network connection. ② Network Status LED (Green) Off = no network link On = network link established Flashing = network link active ③ Network Speed LED (Amber) Off = 10/100 Mbps On = 1 Gbps LED Light Bar The LED on the microphone indicates whether the microphone is active or muted, identifies the hardware, and provides confir... - Page 17 Shure Incorporated Default Settings Microphone Status LED Behavior / Color Active Green (solid) Mute Red (solid) Hardware identification Green (flashing) Firmware update in progress Green (progresses along bar) Network reset: Red (progresses along bar) Reset Factory reset: Triggers device power-up...
-
Page 18: Reset Button
The hardware reset button is located inside a grille hole and can be pushed with a paperclip or other small tool. The hole is identified with a gray circle. When looking at the Shure logo, it is the second hole in the fourth row from the top. -
Page 19: Installation
• In rooms with flexible furniture arrangements or multiple array microphones, use the microphone configuration tool in the web application or Shure Designer software to ensure that the coverage is adequate for all seating scenarios. • The lobes should be pointed towards the front of each talker. Carefully consider placement in rooms where talkers may face a screen during a video conference. - Page 20 Shure Incorporated Distances With Equivalent Speech Transmission Index Values Ceiling Array Microphone (Distance to Talker) Cardioid Gooseneck Microphone (Distance to Talker) 6 ft (1.83 m) 3.75 feet (1.14 m) 8 ft (2.44 m) 5 feet (1.52 m) 10 ft (3.05 m) 6.25 feet (1.91 m)
-
Page 21: Fyrewrap Fire Protective Wrap System Installation
Shure Incorporated ® FyreWrap Fire Protective Wrap System Installation The FyreWrap fire protective wrap system included with the MicroflexAdvance MXA910 ceiling array microphone must be in stalled to meet the UL 2043 plenum rating (suitable for air handling spaces). Installation... -
Page 22: Installing The Array Microphone
Shure Incorporated Installing the Array Microphone The array microphone mounts directly in a ceiling grid, or can be attached using other methods. Before you begin: • Remove the protective plastic cover from the microphone. • Verify the ceiling grid size matches the appropriate model variation. -
Page 23: Ceiling Installation
Shure Incorporated Ceiling Installation Make space in the ceiling grid for the array microphone to be installed. Run the Ethernet cable above the ceiling grid and through the opening in the ceiling. Note: An optional junction box accessory (model A910-JB) mounts on the microphone to directly connect conduit. -
Page 24: Rubber Scratch Protectors (Mxa910W-A)
Shure Incorporated Rubber Scratch Protectors (MXA910W-A) Optional: Before installing the microphone in the ceiling, attach the included rubber pads to the corners of the microphone flange to prevent scratching. 24/59... -
Page 25: Ceiling Installation (Mxa910W-A)
Shure Incorporated Ceiling Installation (MXA910W-A) Make space in the ceiling grid for the array microphone to be installed. Run the Ethernet cable above the ceiling grid and through the opening in the ceiling. Note: An optional junction box accessory (model A910-JB) mounts on the microphone to directly connect conduit. - Page 26 Shure Incorporated Note: Depending on the width of the ceiling grid T-bars, you may need to remove or adjust one side's T-bar to install the MXA910W-A. 26/59...
-
Page 27: Suspension Mounting
Hard Ceiling Mounting You can mount the microphone in hard ceilings without a tile grid using the A910-HCM accessory. Learn more at www.shure.com. Painting Components The grille and frame of the array microphone can be painted to blend in with room design. Some basic disassembly is required for painting. - Page 28 Shure Incorporated Important: Do not remove the screws that are farthest in the corner and recessed into the panel (see graphic). Carefully lift the assembly out of the frame. Remove the gray plastic LED lightpipe. Leave the black plastic guide in place.
-
Page 29: Cable Management
Shure Incorporated Paint the frame and grille section and allow it to completely dry before reassembling. Do not paint any part of the main assembly. (2.1) Masking off the extrusion (highlighted in black) Step 3: Reassembly Secure the foam piece with the hook-and-loop fastener strips around the edges. -
Page 30: Installing The Junction Box Accessory
Shure Incorporated Installing the Junction Box Accessory The A910-JB junction box mounts on the microphone, enabling conduit connections for cable runs. Refer to local building codes and regulations to determine if the junction box is necessary. There are three punch-out sections on the junction box for attaching conduit. - Page 31 Shure Incorporated 3. Install the 4 screws to secure the junction box on the microphone. 31/59...
-
Page 32: Software Installation, Management, And Security
Software Installation, Management, and Security Controlling Devices with Shure Designer Software You can control this device using Shure Designer software. Designer enables integrators and system planners to design audio coverage for installations using MXA microphones and other Shure networked components. -
Page 33: Accessing The Web Application
Learn more and download at www.shure.com/designer. Accessing the Web Application The Shure Web Server Discovery application finds all Shure devices on the network that feature a web-based GUI. Follow these steps to install the software and access the web application: ①... -
Page 34: Microphone Configuration
Settings > About. The format for Shure device’s firmware is MAJOR.MINOR.PATCH. (Ex. 1.6.2 where 1 is the Major firmware level, 6 is the Mi nor firmware level, and 2 is the Patch firmware level.) At minimum, devices that operate on the same subnet should have iden... -
Page 35: Configuring Microphone Coverage For Mxa910
Shure Incorporated Each lobe is represented graphically and can be dragged into place. A corresponding mixer channel provides control over audio settings for each lobe. Configuring Microphone Coverage for MXA910 To configure the MXA910, follow these steps: Set Device Properties Select the device and set the properties: Enter a value for the device height (the distance between the floor and the microphone). - Page 36 Shure Incorporated Position Microphone Coverage Add channels by clicking Add channel above the workspace. Enter the talker height by selecting a channel and providing the value in the Properties. This ensures accurate aiming. Move channels to cover the appropriate areas: ◦...
-
Page 37: Adjusting Levels
Reduce room irregularities • Adjust frequency response for reinforcement systems To turn off all EQ filters, select Bypass all EQ. If you’re using Shure Designer software to configure your system, please check the Designer help section for more about this topic. 37/59... - Page 38 Shure Incorporated Setting Filter Parameters Adjust filter settings by manipulating the icons in the frequency response graph, or by entering numeric values. Disable a filter using the check-box next to the filter. Filter Type Only the first and last band have selectable filter types.
- Page 39 Shure Incorporated Copy, Paste, Import, and Export Equalizer Channel Settings These features make it simple to use effective equalizer settings from a previous installation, or simply accelerate configuration time. Copy and Paste Use to quickly apply the same PEQ setting across multiple channels.
-
Page 40: Eq Contours
Shure Incorporated When to Use the Channel and Automix Equalizers Apply Automix EQ to make system-wide changes, such as a treble boost to improve speech clarity. Use Channel EQ to make adjustments to a specific channel. For example, to reduce unwanted noise picked up by only one channel. -
Page 41: Custom Presets
Mute group, muting any of those individual channels will mute all of the grouped channels. If you’re using Shure Designer software to configure your system, please check the Designer help section for more about this topic. -
Page 42: Encryption
• Disable AES67 in Dante Controller. AES67 and AES-256 cannot be used at the same time. If you’re using Shure Designer software to configure your system, please check the Designer help section for more about this topic. Automix Automix Channel This channel automatically mixes the audio from all selected channels to deliver a convenient, single output. -
Page 43: Automix Modes
Shure Incorporated Automix Modes Gating Gating mode delivers fast-acting, seamless channel gating and consistent perceived ambient sound levels. Off-attenuation in this mode is fixed at -20 dB per channel, regardless of the number of open channels. Gain Sharing Gain sharing mode dynamically balances system gain between open and closed channels. The system gain remains consis... -
Page 44: Automix Modes (Firmware <4.X Only)
Automix Modes (Firmware <4.x only) Classic Classic mode emulates the Shure SCM820 automixer (in its default settings). It is renowned for fast-acting, seamless channel gating and consistent perceived ambient sound levels. Off-attenuation in this mode is fixed at -20 dB per channel, regardless of the number of open channels. -
Page 45: Dsp Best Practices
Shure Incorporated • Noise reduction • Compressor • Delay To access the DSP blocks, select the IntelliMix tab. When enabled, each DSP block will be colored. Selecting Bypass IntelliMix will bypass the following DSP blocks: AEC, AGC, noise reduction, compressor, and delay. -
Page 46: Noise Reduction
Shure Incorporated Low: Use in rooms with controlled acoustics and minimal echoes. This setting provides the most natural sound for full du plex. Medium: Use in typical rooms as a starting point. If you hear echo artifacts, try using the high setting. -
Page 47: Networking And Dante
Shure Incorporated When the audio signal exceeds the threshold value, the level is attenuated to prevent unwanted spikes in the output sig nal. The amount of attenuation is determined by the ratio value. Perform a soundcheck and set the threshold 3-6 dB above average talker levels, so the compressor only attenuates unexpected loud sounds. -
Page 48: Networking
Always use a "star" network topology by connecting each component directly to the switch or router. • Connect all Shure networked devices to the same network and set to the same subnet. It is also required in order to open the web application for a device. - Page 49 Configuring IP Settings IP configurations are managed in Shure Designer software. By default, they are set to Automatic (DHCP) mode. DHCP mode enables the devices to accept IP settings from a DHCP server, or automatically fall back to Link-Local settings when no DHCP is available.
- Page 50 MAC address, as array of 6 bytes Note: The Shure device should respond in less than one second on a typical network. If there is no response, try sending the query again after verify ing the destination IP address and port number.
- Page 51 8180* HTML Required for web application Open † 8427 Multcast SLP Required for inter-device communication Open 64000 Telnet Required for Shure firmware update Open Dante Audio & Controller Port TCP/UDP Protocol Description SNMP Used by Dante † [319-320]* Dante clocking...
-
Page 52: Echo Reduction (Firmware <4.X Only)
Shure Incorporated Echo Reduction (Firmware <4.x only) In audio conferencing, a talker may hear their voice echo as a result of the microphone capturing farend audio from loud speakers. The echo reduction feature prevents the farend signal from activating the microphone. Ideal for installations in which perchan... -
Page 53: Troubleshooting
Shure Incorporated • LED color and behavior • Loading presets • Adjusting levels A complete list of command strings is available at: pubs.shure.com/command-strings/MXA910. Troubleshooting Problem Solution Problem is browser-related. Turn off hardware acceleration Software lags in Google Chrome browser option in Chrome. -
Page 54: Important Product Information
This product meets the Essential Requirements of all relevant European directives and is eligible for CE marking. The CE Declaration of Conformity can be obtained from Shure Incorporated or any of its European representatives. For contact information please visit www.shure.com... -
Page 55: Specifications
593.8 x 593.8 x 54.69 mm (23.38 x 23.38 x 2.15 in.) H x W x D MXA910W-A 603.8 x 603.8 x 54.69 mm (23.77 x 23.77 x 2.15 in.) H x W x D control application HTML5 Browser-based or Shure Designer Plenum Rating ® Requires Fyrewrap fire protective wrap system... - Page 56 Shure Incorporated AES67 or Dante Digital Output Channel 10 total channels (8 independent transmit channels, 1 Automatic mixing transmit channel, 1 AEC reference Count in channel) Sampling 48 kHz Rate Bit Depth Sensitivity at 1 kHz 0.75 dBFS/Pa Maximum SPL Relative to 0 dBFS overload 93.25 dB SPL...
-
Page 57: Polar Response
Shure Incorporated Polar Response Polar response measured directly on-axis from a distance of 6 feet (1.83 m). Frequency Response Frequency response measured directly on-axis from a distance of 6 feet (1.83 m). Lobe Sensitivity The edge of the blue coverage area for each channel in the web application represents where the sensitivity reaches -6 dB. -
Page 58: Accessories
Shure Incorporated Accessories Optional Accessories and Replacement Parts Junction Box Accessory A910-JB MXA910W frame and grille assembly RPM901 MXA910AL frame and grille assembly RPM902 58/59... -
Page 59: Furnished Accessories
Shure Incorporated MXA910B frame and grille assembly RPM903 MXA910W-60CM frame and grille assembly RPM904 MXA910AL-60CM frame and grille assembly RPM905 MXA910B-60CM frame and grille assembly RPM906 Furnished Accessories Rubber pad set 95A28365 Cable management clip 95A29877 59/59...
Need help?
Do you have a question about the MXA910-60CM and is the answer not in the manual?
Questions and answers