
Related Manuals for Apera Instruments SX723


Summary of Contents for Apera Instruments SX723
- Page 1 SX723 Portable pH/Conductivity Meter User Manual APERA INSTRUMENTS, LLC aperainst.com v2.0 - 1 -...
-
Page 2: Table Of Contents
Table of Contents Brief Instruction ....................... - 3 - Technical Specifications ....................- 3 - pH ............................- 3 - mV ............................- 4 - Conductivity ........................... - 4 - Other Technical Parameters ....................- 4 - Working Condition ........................- 4 - About the Meter ...................... -
Page 3: Brief Instruction
Brief Instruction Thank you for choosing Apera Instruments SX723 Portable pH/conductivity Meter (will be called “the meter” in short in the following content). Before using the meter, please read this instruction manual carefully to help you properly use and maintain it. -
Page 4: Conductivity
2.2 mV Measurement range (mV/ORP/EH) -1999 mV to 0 to 1999mV Resolution Accuracy Meter: ±0.1% FS, Overall: ±15mV 2.3 Conductivity Conductivity: (0.00 to 19.99)μS/cm (20.0 to 199.9)μS/cm (200 to 1999)μS/cm (2.00 to 19.99) mS/cm Measurement range (20.0 to 199.9) mS/cm TDS: (0 to 100) g/L;... -
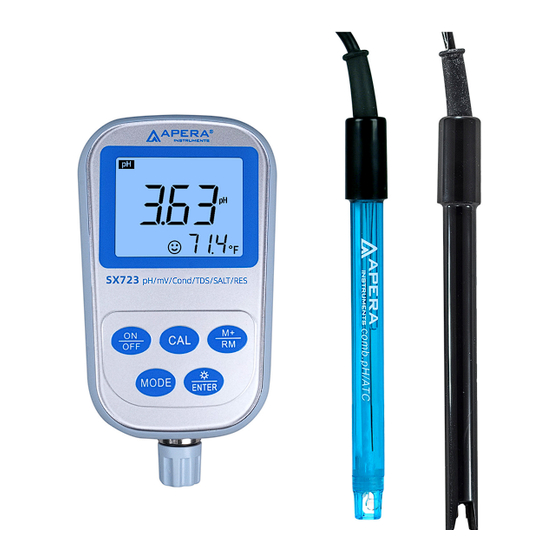
Page 5: About The Meter
About the Meter Screen Display ① —— Parameter icon ② —— Measurement value ③ —— Serial number and icon as measurement to be saved and recalled and indication icon for special states. M+ — measurement value to be saved; RM — Saved data to be recalled; ④... - Page 6 3.2.4. — Backlight and confirmation key (a) In measurement mode, short press to turn on or off the backlight. (b) In calibration mode or the parameter setting, press this key to make confirmation, and return to measurement mode. (c) When in mode, hold this key to change pH resolution: 0.01→0.1 pH in turn.
-
Page 7: What's In The Kit
What’s in the Kit SX723 pH/Conductivity meter *1 201T-S pH/temp. electrode *1 2301T-S conductivity/temp. electrode *1 Spare AA batteries *2 1413μS/cm conductivity calibration solutions Silicone boot *1 (50mL) *1 bottle pH buffer solutions (pH4.00, pH7.00, Screw driver *1 pH10.01, 50ml bottle/each) -
Page 8: Ph Measurement
pH Measurement Short press to turn on the meter. Connect 201T-S pH electrode to the meter (See Section 5 for connection tutorial). The meter will automatically enter pH measurement mode. 6.1 pH Electrode The meter comes with the 201T-S 3-in-1 combination electrode with a built-in temperature sensor, which enables automatic temperature compensation. -
Page 9: Notes About Ph Calibration
6.2.3. Rinse off the pH electrode in pure water and remove excess water, then insert it into the pH4.00 buffer solution, make a quick stir and then hold it still. When the reading is stabilized and stays on screen, short press again to finish the 2 point calibration. -
Page 10: Sample Test
must be re-calibrated: • The electrode hasn’t been used for a long time or a new electrode is connected. • After measuring strong acid (pH<2) or strong base (pH>12) solutions. • After measuring fluoride-containing solution and strong organic solution. • There is a significant temperature difference between the test sample and the buffer solution. -
Page 11: Parameter Setting
Raw meat LabSen 761, LabSen 763 Micro sample testing LabSen 241-6, LabSen 241-3 Cosmetics, skincare products LabSen 851-1, LabSen 851-S Soil LabSen 551, LabSen 553 Solid or semi-solid samples (cheese, dough, fruits, meat LabSen 251, LabSen 751, LabSen products, etc.) Strong acid solutions, HF containing solutions (HF LabSen 831 concentration<1%) - Page 12 6.6.1 pH buffer solution series selection (P1) (a) Long press , meter enters P1 mode: see picture (4-2). (b) Press to choose buffer solution series: (U.S.A series) — 1.68, 4.00, 7.00, 10.01and 12.45 pH (NIST series) — 1.68, 4.01, 6.86, 9.18 and 12.45 pH (China series) —...
- Page 13 6.6.4 Temperature unit ˚C/˚F setting (P4) (a) Short press in P3 to enter P4, see picture (4-5). (b) Press to choose temperature unit: ˚C or ˚F. (c) Press to enter next parameter setting or press to confirm and return to measurement mode. 6.6.5 Backlight display time setting (P5) (a) Short press...
-
Page 14: Cleaning Ph Electrode
6.7 Cleaning pH Electrode 1) The measurement is only as accurate as the electrode is clean. Always thoroughly rinse off the electrode before and after each test with pure water. 2) For tough contaminants, soak the electrode in Apera electrode cleaning solution (AI1166) for at least minutes. -
Page 15: Notes About Ph
6.9 Notes about pH 1) Never store pH electrode in pure water as it will damage the electrode. Always store the electrode in 3M KCL soaking solution (AI1107). 2) If you find any air bubble in the glass bulb of the pH sensor, simply shake the probe with force for a few times to remove it. -
Page 16: Sample Test
7.3 Sample Test Screw off the storage bottle. Rinse the electrode with pure water. Shake off excess water or blot-dry with clean tissue or kimwipe. Stir the electrode for a few seconds after it’s dipped into the sample solution and then hold it still. -
Page 17: Parameter Setting
Table (6-1) Measurement range 0.05 to 20μS/cm 0.5μS/cm to 200mS/cm Electrode constant K=0.1 (flow test) K=1.0 12.88 mS/cm Calibration solution 84μS/cm 84μS/cm 1413μS/cm 111.9 mS/cm Calibration icon Note: When you choose to use DJS-0.1-S pure water conductivity electrode (sold separately, K=0.1, no temperature sensor built in), you can use Manual Temperature Compensation mode: long press , temperature value starts flickering, press... - Page 18 7.6.2 Electrode constant selection (P2) (a) In P1, short press to enter P2 mode, see picture (6-4); (b) Press to change the constant setting: 0.1→1.0→10.0. (c) Press to enter the next parameter setting or press return to measurement mode. (d) The factory default setting of P2 is K=1.0. 7.6.3 Reference temperature selection (P3) (a) In P2, short press...
-
Page 19: Temperature Compensation Coefficient
7.6.7 Backlight display time setting (P7) In P6, short press and enter P7, for details please refer to Section 6.6.5 7.6.8 Auto power off time setting (P8) In P7, short press and enter P8, for details please refer to Section 6.6.6 7.6.9 Restore to producer setting (P9) In P8, short press... -
Page 20: Limited Warranty
We warrant this instrument to be free from defects in material and workmanship and agree to repair or replace free of charge, at option of APERA INSTRUMENTS, LLC, any malfunctioned or damaged product attributable to responsibility of APERA INSTRUMENTS, LLC for a period of THREE YEARS (SIX MONTHS for the electrodes) from the delivery.
Need help?
Do you have a question about the SX723 and is the answer not in the manual?
Questions and answers