
Subscribe to Our Youtube Channel
Related Manuals for Supreme Heating Nova V2-09


Summary of Contents for Supreme Heating Nova V2-09
- Page 1 SWIMMING POOL HEAT PUMP Installation & Instruction Manual IMPORTANT NOTE: Thank you very much for purchasing our product. Before using your unit, please read this manual carefully and keep it for future reference.
-
Page 3: Table Of Contents
CONTENTS 1. FOREWORD ........................1 1.1. Read the Manual Before Operation ................. 1 1.2. The Symbol Description of The Device ..............6 1.3. Statement .........................6 1.4. Safety Factors ......................7 2. OVER VIEW OF THE UNIT ....................8 2.1. Accessories Supplied With The Unit ................ 8 2.2. -
Page 4: Foreword
1. FOREWORD 1.1. Read the Manual Before Operation WARNING Do not use means to accelerate the defrosting process or to clean, other than those recommended by the manufacturer.The appliance shall be stored in a room without continuously operating ignition sources (for example: open flames, an operating gas appliance or an operating electric heater). - Page 5 No ignition sources No person carrying out work in relation to a refrigeration system which involves exposing any pipe work that contains or has contained flammable refrigerant shall use any sources of ignition in such a manner that it may lead to the risk of fire or explosion. All possible ignition sources, including cigarette smoking, should be kept sufficiently far away from the site of installation, repairing, removing and disposal, during which flammable refrigerant can possibly be released to the surrounding space.
- Page 6 Ensure that the apparatus is mounted securely. Ensure that seals or sealing materials have not degraded to the point that they no longer serve the purpose of preventing the ingress of flammable atmospheres. Replacement parts shall be in accordance with the manufacturer’s specifications. Repair to intrinsically safe components Do not apply any permanent inductive or capacitance loads to the circuit without ensuring that ...
- Page 7 Removal and evacuation When breaking into the refrigerant circuit to make repairs – or for any other purpose – conventional procedures shall be used. However, it is important that best practice is followed since flammability is a consideration. The following procedure shall be adhered to: Remove refrigerant;...
- Page 8 The recovery process is supervised at all times by a competent person; Recovery equipment and cylinders conform to the appropriate standards. Pump down refrigerant system, if possible. If a vacuum is not possible, make a manifold so that refrigerant can be removed from various parts of the system.
-
Page 9: The Symbol Description Of The Device
1.2. The Symbol Description of The Device The precautions listed here are divided into the following types. They are quite important, so be sure to follow them carefully.Meanings of DANGER, WARNING, CAUTION and NOTE symbols. Symbols Meaning Description The symbol shows that this appliance uses a flammable refrigerant. -
Page 10: Safety Factors
1.4. Safety Factors The following safety factors need to be considered: Please read the following warnings before installation; Be sure to check the details that need attention, including safety factors; After reading the installation instructions, be sure to save them for future reference. WARNING Make sure that the unit is installed safely and reliably. -
Page 11: Over View Of The Unit
Stop operating the unit once there is a problem or an fault code. Please turn off power and stop running the unit. Otherwise it may cause electric shock or fire. Be careful when the unit is not packed or not installed. Pay attention to sharp edges and fins of heat exchanger. -
Page 12: Dimensions Of The Unit
2.2. Dimensions of The Unit Dimension Unit:(mm) Model Nova V2 - 09 Nova V2 - 15 1002 Nova V2 - 18 Nova V2 - 21 Nova V2 - 25 1192 Nova V2 - 28... -
Page 13: Main Parts Of The Unit
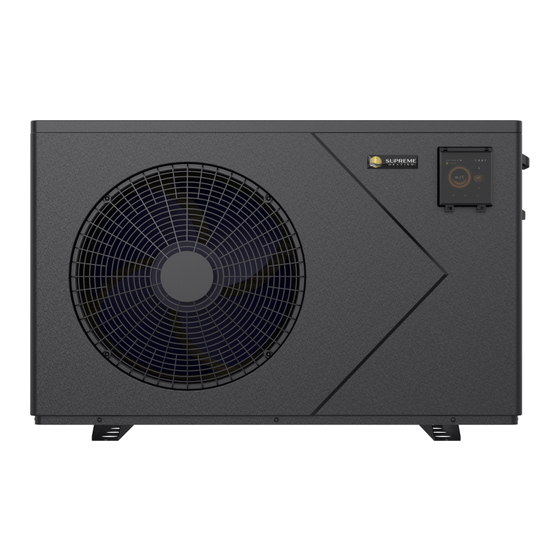
2.3. Main Parts of The Unit Nova V2 - 09 Left Handle Needle Valve Electrical Box Fan Motor Refrigerant Filter Fan Motor Support Side Panel Fixed Strip Top Panel Fan Blade Water Flow Switch Top Cover Fixed Strip Front Panel Fixed Strip Compressor Left Panel Front Panel... - Page 14 Nova V2 - 15/ Nova V2 - 18 Left Handle Low Pressure Switch Electrical Box Cover Left Panel Needle Valve Electrical Box Side Panel Fixed Strip Refrigerant Filter Top Panel Front Panel Fixed Strip Water Flow Switch Fan Motor Support Front Panel Top Cover Fixed Strip Fan Guard...
- Page 15 Nova V2 - 21 Left Panel Needle Valve Electrical Box Cover Refrigerant Filter Left Handle Electrical Box Side Panel Fixed Strip Low Pressure Switch Fan Motor Support Fan Motor Reactor Box Cover Middle Support Plate Chassis Assembly Reactor Fan Blade Right Handle-1 Reactor Box Fan Guard...
- Page 16 Nova V2 - 25/ Nova V2 - 28 Top Cover Fixed Strip Left Panel High Pressure Switch Left Handle Needle Valve Top Panel Side Panel Fixed Strip Refrigerant Filter Electrical Box Fan Motor Low Pressure Switch Electrical Box Cover Middle Support Plate Fan Motor Support Fan Blade...
-
Page 17: Parameter Of The Unit
2.4. Parameter of the Unit Model: Nova V2 - 09 Nova V2 - 15 Nova V2 - 18 Ambient Temperature: (DB/WB) 27°C/24.3°C; Water Inlet/Outlet Temperature: 26°C/28°C. Heating Capacity (kW) 1.89~9.22 3.22~15.25 4.15~18.15 Power Input (kW) 0.11~1.29 0.20~2.12 0.26~2.5 16.61~7.15 16.15~7.21 16.21~7.1 Ambient Temperature: (DB/WB) 15°C/12°C;... - Page 18 Model: Nova V2 - 21 Nova V2 - 25 Nova V2 - 28 Ambient Temperature: (DB/WB) 27°C/24.3°C; Water Inlet/Outlet Temperature: 26°C/28°C. Heating Capacity (kW) 4.34~21.08 4.87~25.37 5.13~28.01 Power Input (kW) 0.27~2.94 0.30~3.60 0.33~4.01 16.34~7.18 16.11~7.05 15.78~6.98 Ambient Temperature: (DB/WB) 15°C/12°C; Water Inlet/Outlet Temperature: 26°C/28°C. Heating Capacity (kW) 3.04~14.95 3.41~17.88...
-
Page 19: Installation And Connection
3. INSTALLATION AND CONNECTION WARNING: The heat pump must be installed by a professional team. The users are not qualified to install by themselves, otherwise the heat pump might be damaged and risky for users’ safety. This section is provided for information purposes only and must be checked and adapted if necessary according to the actual installation conditions. -
Page 20: Installation Instruction
3.3. Installation Instruction 3.3.1 Pre-requirements Equipment necessary for the installation of your heat pump: Power supply cable suitable for the unit’s power requirements. A By-Pass kit and an assembly of PVC tubing suitable for your installation as well as stripper, PVC adhesive and sandpaper. -
Page 21: Installation Layout
The unit must not be installed in an area exposed to oil, flammable gases, corrosive products, sulphur compounds or close to high frequency equipment. To prevent mud splashes, do not install the unit near a road or track. Please ensure the unit is installed in an appropriate location to avoid causing a nuisance to neighbors. -
Page 22: Electrical Installation
Item Quantity Item Quantity Swimming Pool PH Regulator ① ⑦ Heat Pump Y-Type Filter Sand Tank Filter ② ⑧ One-Way Valve Flocculator ③ ⑨ Circulating Water Pump Disinfector ④ ⑩ Hair Collector Metering Pump ⑤ ⑪ Stop Valve ⑥ 3.3.5 Electrical Installation To function safely and maintain the integrity of your electrical system, the unit must be connected to a general electricity supply in accordance with the following regulations: Upstream, the general electricity supply must be protected by a 30mA differential switch. -
Page 23: Trial Running After Installation
Nova V2 - 09/ Nova V2 - 15/ Nova V2 - 18/ Nova V2 - 21/ Nova V2 - 25/ Nova V2 - 28 3.4. Trial Running After Installation WARNING:Please check all the wiring carefully before turning on the heat pump. 3.4.1. -
Page 24: Wire Controller Operation Guidance
4. WIRE CONTROLLER OPERATION GUIDANCE 4.1. Wire Control Panel Diagram Main Interface(Heating Mode) Current Target Water Temp. Water Temp. Menu ... - Page 25 Icon Icon Icon Name Name Lock Status Compressor Unlock Status Wi-Fi ON/ OFF Heating Mode Cooling Mode Mode Auto. Mode Menu Silent Mode Down Smart Mode Return Powerful Mode Defrosting Next Page Water Pump Previous Page Fan Motor Function OFF Anti-freeze Function ON...
-
Page 26: Key Operating Instruction
4.2. Key Operating Instruction Item Operation Guide 1) If the main interface shows icon“ ” , press this key to unlock; If the main interface shows icon“ ” , press this key to lock; Lock/unlock In any interface, if there is no key operation for 60 seconds, the system will automatically go back to the main interface and enter lock status;... - Page 27 Item Operation Guide In unlocked status, press icon “ ” to enter the menu, then press “ ” to Parameter enter the interface of parameter query, and then press“ ”and“ ”to query check the parameters; In unlocked status, press icon “ ”...
-
Page 28: System Status Parameter Query
4.3. System Status Parameter Query Description Description Code Code Water Inlet Temp. Reserved Water Outlet Temp. Compressor Current Ambient Temp. Heatsink Temp. Exhaust Temp. DC Bus Voltage Suction Temp. Compressor Frequency Heating Coil Temp. DC Fan Speed Cooling Coil Temp. Main Control Board Version EEV Steps 4.3.1. -
Page 29: Wi-Fi Settings
Driver module error list Description Description Code Code AC phase loss or CT is Compressor Over-current disconnected AC over-current or Compressor out of step compressor overpower Compressor phase loss IPM over heat protection Compressor current DC voltage is too low protection PFC module over heat DC voltage is too high... -
Page 30: Software Startup
Method 2: Scan the QR code. For IOS and Android Users 4.5.2 Software Startup After installation,click “ ” on your desktop to start up Smart Life. 4.5.3 Software Registration and Configuration 1. Registration Users don’t have account can click “Register” to create an account: Register Enter your phone number Get Verification Code... - Page 31 After registration, you need to Create a Home:Create a Home Set Home Name Set Home Location Add Rooms.
- Page 32 2. Account ID+ Password Login Existing accounts can be logged in directly, in the following order. If you forget your password you can choose to login with your verification code and select "Forget Password": Enter your phone number Get verification code .
- Page 33 After creating a home or logged in,enter the main interface of APP. Note: Click the device to check the status, and you can set the operating mode, ON/OFF, timer. Click “+” to add devices.
- Page 34 3. Wi-Fi Module configuration steps: Step 1: In unlocked status, press icon “ ” to enter the menu, then press “ ” to enter Wi-Fi connection interface, and then press “ ” to activate the Wi-Fi configuration ; Step 2: Turn on the phone's Wi-Fi function and connect to the Wi-Fi hot-spot.
- Page 35 Step 3: Open the "smart life" APP, log in into the main interface, click on the top right corner "+" or "add equipment" of the interface, enter the equipment type selection, the "Large Home Appliances" , select "Smart Heat Pump" equipment and add equipment into the interface. Step 4: After selecting "Smart Heat Pump", enter the interface of "Add Equipment", .
- Page 36 Step 5: When “Scan devices”, “Register on Cloud”, “Initialize the device” are all completed, connect succeeds.
- Page 37 4.5.4 Software Function Operation After the device is bound successfully, enter the operation interface of “Smart heat pump” (Device name, modifiable) In the main interface of “Smart Life”, click “Smart heat pump” to enter the operation interface. Back Edit: You can change device name, select device installation location, check networking status, add shared users, create device cluster, view device information, and more.
- Page 38 Modify device name Click in the following order to enter device details, and click "Device Name" to rename the device. Device sharing To share a bound device, the user should do so in the following order. After successful sharing, the list will be added to show the person shared ...
- Page 39 Enter the account of the shared, click "Done", and the share success list shows the newly added account of the Shared.
- Page 40 The interface of the person to be shared is as follows. The received shared device is displayed. Click it to operate and control the device. Mode settings Click “ ” on the main interface to switch the modes.
- Page 41 Timer setting 1.Click “ ” on the main interface to enter the setting interface, then click “Timer” to add timer. 1.After entering timer setting, swipe up/down to set timer,set up repeat weeks and ON/OFF, then click “save” to save your settings as follows.
-
Page 42: Device Removal
Hours Minutes Set the repetition Set power ON/OFF Save your modification 4.5.5 Device Removal Click “ ” on the top right corner of the main interface to enter the device details interface, and click “device removal”. Indicator light under“ ” flashes rapidly for 3 minutes, The network can be reconfigured within 3 minutes, and the network can be quit if it is not connected within 3 minutes. -
Page 43: Maintenance And Winterzing
5. MAINTENANCE AND WINTERZING 5.1. Maintenance WARNING: Before undertaking maintenance work on the unit, ensure that you have disconnected the electrical power supply. Cleaning a. The heat pump’s casing must be cleaned with a damp cloth. The use of detergents or other household products could damage the surface of the casing and affect its properties. - Page 44 Step 2: Remove the top cover ① Remove the screws on the top cover; ② Take out the top cover in the direction of the arrow. Step 3: Remove the electrical box cover The below tutorial image is for Nova V2 - 09/ Nova V2 - 15/ Nova V2 - 18/ Nova V2 - 25/ Nova V2 - 28 ①...
- Page 45 The below tutorial image is for Nova V2 - 21 ① Remove the screws on the reactor box cover; ② Remove the screws on the electrical box cover; ③ Take out the electrical box cover in the direction of the arrow. Step 4: Remove the front panel ①...
- Page 46 Step 5: Remove the right panel ① Remove the screws on the fixing plate; ② Remove the screws of the pressure gauge, water inlet & outlet joint, and other screws on the right panel; ③ Take out the right panel in the direction of the arrow. Step 6: Remove the left panel ①...
-
Page 47: Winterizing
5.3. Winterizing “CUT OFF” power supply of the heater before cleaning, examination or repairing In winter season when you don’t swim: a. Cut off power supply to prevent any machine damage. b. Drain water clear of the machine. !! Important: Unscrew the water nozzle of inlet pipe to let the water flow out. - Page 48 Version:20240806...
Need help?
Do you have a question about the Nova V2-09 and is the answer not in the manual?
Questions and answers